How to repair a cracked Intake Manifold (2 Viewers)

This site may earn a commission from merchant affiliate
links, including eBay, Amazon, Skimlinks, and others.

Ok- I've rebuilt my intake and exhaust manifolds. Here's what I've done:

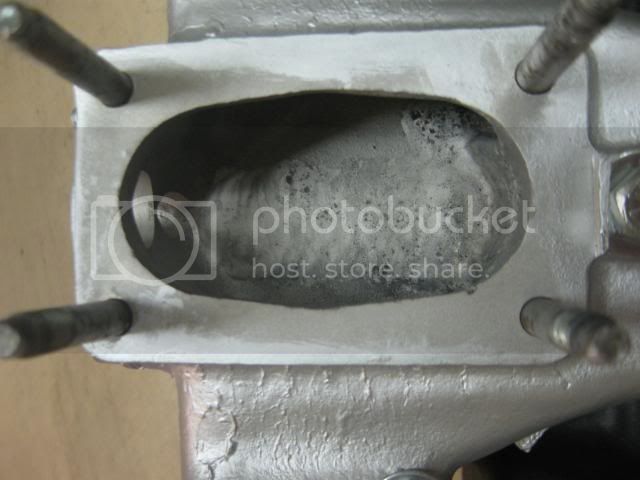
1. Had the cracked aluminum intake welded.
2. Replaced the wavy washers in the swivel ends of the exhaust manifold to try to prevent leaks.
3. Installed SOR Stainless block off plate and trimmed the flapper valve to fit and operate properly. I tested it with a torch to make sure it was working.
4. Painted the intake with POR 15 high temp aluminum paint.
5. Painted the exhaust manifold with POR15 high temp grey manifold paint.
6. Installed new bolts and torqued everything down.
7. Had the surfaces machined to ensure straight edge.

Here's my problem:

I don't know if I should go through the trouble of swapping this one in. I have new Remflex gaskets RTG.

The reason I wanted to do this is I suspect a cracked intake on mine. My vacuum at idle runs around 17-18 and the cruiser is running very good, but when I set the timing to factory 7 deg (on the BB), I get pinging easily. When I retard the timing (1/2 way between TDC (the line) and the BB, I get backfire.

I have rebuilt the carb and gone through the emissions stuff. The only other thing I know that is not right is the OC sensor is not functioning properly (no resistance on my Ohm meter).

I might be able to desmog my rig in 1-2 years, so I would probably go with a header then. I have to wait until it is 24 years old in Texas, though to pass inspection. I do not have to smog test in my county, but all the other smog equip is in place.

Any thoughts?
 
Here's some manifold pictures. The first one is the swivel end with the clip and wavy gasket showing. In the groove on the right, you might be able to see the wavy gasket in place.
IMG_1966.jpg
 
Here's pictures from different angles of the painted manifolds with aluminum crack repaired and SOR stainless block off plate installed:

IMG_2026.jpg


IMG_2025.jpg


IMG_2024.jpg


IMG_2023.jpg
 
Last edited:
mmm thats purdy.

Nice work.

Bet you can't wait to get that on there
 
Can we get a close-up of the repaired crack ?
 
Here's 2 pictures of the trimmed diverter valve. In the second one, you can see the underside of the repaired crack in the intake.

IMG_1923.jpg


IMG_1924.jpg


Here's 2 close ups of the carburetor side of the welded crack. A general machine shop repaired the crack and planed the mating surfaces of the intakes. An automotive shop bead blasted everything. It cost me about $125.00. I'm almost afraid to install it for fear it will leak or something else will be screwed up.

IMG_2065.jpg


IMG_2067.jpg


Like I said before- if I had to do it over again, I would have bought a new one.
 
So you trimmed the heat riser valve to clear the SOR plate ? Good Idea... Wish I'd done that. I just locked mine in the open position, but Hell, I'm in So Cal...

Looks good. Prolly saved yourself a few hundred over a new one, anyway. They've gone up in price. Lot less work and running around, though.

:cheers:
 
Yes- I trimmed the plate. The photos show it partially trimmed, then I put the parts together and looked at it to make sure it would clear. I was concerned it might restrict exhaust flow, so I trimmed it some more after that. I have no idea if it will work until I install it and see.

It does get cold enough here that I was hoping to retain some stock function.
 
Be aware (if you haven't installed the manifolds yet) you may have to clearance the stud or bolt holes a little to get it to go over the studs or for the mounting bolts to fit through...

Also, fj40jim mentioned once they should be "spot faced" too (so the thickness of the intake and exh sides are the same - so you get even torque on the gasket), but I didn't do mine, 'cuz I didn't know about it, then, and it seems fine.
 
Did you 'lock' it in the open position by closing the manifold up and resting the flapper against the SOR plate? I'm getting mine back from the welder tomorrow and going to put it back together with the SOR plate. Does it affect any performance to keep it open, doesn't get too cold here either.
 
Did you 'lock' it in the open position by closing the manifold up and resting the flapper against the SOR plate? I'm getting mine back from the welder tomorrow and going to put it back together with the SOR plate. Does it affect any performance to keep it open, doesn't get too cold here either.

Yes, that's what I did. The idea was to keep the exhaust away from the underside of the intake as much as possible.

But I like hank's idea better :D
 
Be aware (if you haven't installed the manifolds yet) you may have to clearance the stud or bolt holes a little to get it to go over the studs or for the mounting bolts to fit through...

Also, fj40jim mentioned once they should be "spot faced" too (so the thickness of the intake and exh sides are the same - so you get even torque on the gasket), but I didn't do mine, 'cuz I didn't know about it, then, and it seems fine.

Are the stud/bolt hole clearance issues because the manifolds were separated? I noticed the holes were not completely round since putting it back together.

What do you mean by spot faced? I assume that is talking about machining them while they are bolted together?
 
SPOT FACING

And you may have to take a small dremel like tool to just grind out the holes for the bolts.

I suppose it happens 'cuz metal has been removed and you've had it apart and moved things around...

Anyway, I had to do mine, but it's a very small amt of material that I had to removed. I think I even used a round file on some holes.
 
Used a hacksaw (lots of elbow grease) to trim down the flapper on the exhaust manifold. Bought the FELPRO gasket set for the heatriser; they are way to thick and the bolt holes which attach the intake/exhaust to the block wouldn't line up. I'm still going to use their other exhaust gaskets though. New exhaust horn gaskets too.

View attachment 372000

View attachment 372001

View attachment 372002
 
Last edited:
Which gaskets set did you buy ? Mine lined up fine. Used the FP, also. ..

Use a little of the Orange Permatex Hi-temp RTV when you put it back together. On the horns and at the mating surface betwn the intake/exhaust .

Nice to know those intakes can be saved... I've got a couple of cracked ones, I'm gonna have welded, now.

NICE PIX !
 
I fixed one once........not sure how long it lasted cause the truck was sold 6 months later. I used mapp gas and 56% silver solder made by Harris...........seemed to be ok. It was a bitch getting it stick. Brass you may have better luck with if it has the white flux already on the stick. It comes in 4 foot lenghts.
 
This shows the thickness off the FELPRO heatriser gaskets....I couldn't compress them enough to get the bolt holes on the two halves to line up. I didn't want to strip the threaded holes in the front of the aluminum intake (Someone already had and I had to tap and rethread.). I'll still use all the other gaskets though, they look great.

View attachment 372213

View attachment 372214

View attachment 372215
 
Last edited:
I dunno - Maybe that's what they're supplying now, but mine were the standard dimpled foil type. Maybe somebody messed with your box ?

:meh:
mangask0001.jpg
mangask0002.jpg
 
AWWW MAN! That's what I wanted, those would totally work. Oh well, I just ordered some stock ones from SOR on Friday.
 

Users who are viewing this thread

Back
Top Bottom