A 2H story

This site may earn a commission from merchant affiliate
links, including eBay, Amazon, Skimlinks, and others.

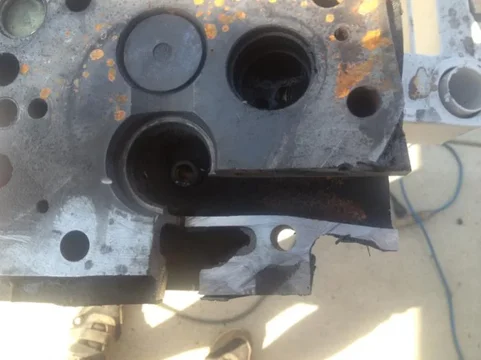
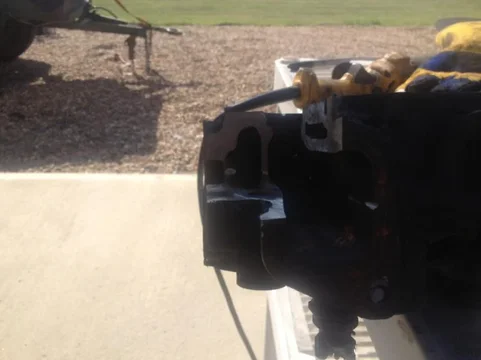
Some more cut aways.


image-3602252955.jpg


image-3713964217.jpg


Intake runner. Pretty straight shot. Won't do much here. Lots of thickness if you wanted to hog it out....


image-859651451.jpg


image-1477505033.jpg


Exhaust cut away. Not much thickness that the turns in he runner. I won't take much out to straighten them. To bad was hoping there was some bulk to remove to make the run cleaner.


Lastly some pics of inside of coolant area. Still had some casting sand and bad flash inside. Can see why some heads might be prone to crack if u had a bad cast...


image-4052651259.jpg

image-3602252955.jpg


image-2934794137.jpg


image-859651451.jpg


image-1477505033.jpg


image-4052651259.jpg


image-1208078670.jpg


image-3713964217.jpg
 
In the garage and maybe with a better camera
 
I'll be following this closely! I am in a similar boat and rebuilding a 2H. These head pictures really help. Great stuff!
 
Looks like you are off to a good start with the cut away views to see where the deficiencies are and how much metal you have to work with. Biggest (and safest) bang for the buck is going to come from cleaning up the castings and smoothing rough transitions without any real reshape of the runners/ports. The next time I do a 3FE head I think I'll just clean up the transition through the cast runner, the area machined for the insert and the insert itself and call it good. The area behind the valve seats in those photos looks horrible. I bet cleaning that up alone will improve things a lot. You may not need to push things as much boost-wise if flow is better.

I should dig out a couple books I have and send them out your way (or bring them out if I make if for the Tarsand trek).

Ratpuke's option 4 had crossed my mind..... but after looking at that Ford yesterday, I really can't stomach picking up a domestic for rig duty. So I still have plans to get that 62 together for a work truck.

Anyway, I should get back to work and take a better look at this later.
 
Last edited:
Was hoping you would chime in. I had many the same thought. More cleaning than truly porting. Ill put up some better pics done by a professional and then get you folks to comment on what to do. My main plan was transition to valve seat work... Maybe back cut valves as de shroud valves in combustion chamber.
 
To check for bore taper, you can slide in a ring, square it up with a piston and measure the end gap with a feeler gauge. Check a few points down the cylinder, and voila!
 
More pics for documentation and comparison reasons:


image-2507949629.jpg

Exhaust 1


image-235629307.jpg

Exhaust 2


image-2654990367.jpg

Exhaust 3


image-2133005788.jpg

Exhaust 5


image-2147321649.jpg

Exhaust 6

image-2507949629.jpg


image-235629307.jpg


image-2654990367.jpg


image-2133005788.jpg


image-2147321649.jpg
 
image-3456358508.jpg
Intake 1


image-2288895541.jpg

Intake 2


image-3139496731.jpg

Intake 3


image-3111537760.jpg

Intake 4


image-1260996169.jpg

Intake 5


image-4143198502.jpg

Intake 6

image-3456358508.jpg


image-2288895541.jpg


image-3139496731.jpg


image-3111537760.jpg


image-1260996169.jpg


image-4143198502.jpg
 
image-974692034.jpg

Intake 6


image-3087508958.jpg

Intake 5


image-1405080296.jpg

Intake 4


image-3975736385.jpg

Intake 3


image-2025003915.jpg

Intake 2


image-3704192651.jpg

Intake 1

image-974692034.jpg


image-3087508958.jpg


image-1405080296.jpg


image-3975736385.jpg


image-2025003915.jpg


image-3704192651.jpg
 
So as u can see looks like a lot of polishing work a maybe not as much porting.

I'd like input on the bowls through. They all have a pretty harsh step half way through the valve guide. My though was to smooth the step but maybe I should carve it out so only the guide hangs down...

Thought?
 
These look blurry but I'm not sure if it is my eyes or if something happened when they were resized. I can re-upload the originals if you prefer.
 
I'll throw in my 2 cents just like the others.

I vote for option 3 or option 4 (i will explain) if your going to be doing a break down. Reason being, the issues you are having.

I would highly recommend you decide how much your going to throw at a 2H to get it ported, polished and rebuilt. You have to assume that the block needs to be redone if your going to go through all of this trouble to re-piston and everything. If I was going to be done this I would highly recommend getting the block looked over before you just chuck pistons in. I am assuming you are smart enough to do that.

ARP studs all the way
Gturbo all the way, you have a few options depending on your goals and boost levels. I am assuming 20-24lbs so a grunter 1 or 2 would probably have you covered.

A full proper rebuild, port and polish and all that jazz I would estimate to be around 4-5k. That is my guess, don't flame me if I am right off. But I know a full turbo piston set for a 1hz along with a rebuild kit is upwards of 2k + in Australia. Its gotta be similar with the 2H

Option 4:
I see this option being fun but expensive enough in the end to have an inferior engine in terms of performance to a 1hd-t. You could chuck in a 12h-t but you are then facing a dated engine and harder to find parts down the road. I think your good about 20lbs of boost with a gturbo on one.
Throw in a 1hd-t and a gturbo, custom plenum and a big airbox and you will be off to the races. Youll need to track down a performance clutch and a 1hz bell housing and change your input shaft on your h55f. Since you have to do that break down throw in a macnamara gear into your transfer to prolong your output shaft of your h55f and your golden.

either way you have to decide what your goals are with the truck, how long you plan on keeping it and what your budget it.
 
I'd do something more like this on the near side. Smooth out the sharp edges where the valve pocket is machined, and where the two pieces of the mold met just behind that.

image-2107467585.jpg

Your goal is to get as smooth a radius as you can, not necessarily the straightest path between the valve and port, as the flow needs to transition from horizontally along the runner to vertically passing down to the back of the valve (or the reverse for exhaust ports).

image-2107467585.jpg
 

Users who are viewing this thread

Back
Top Bottom