"Therapy" my FJ60 build (1 Viewer)

This site may earn a commission from merchant affiliate
links, including eBay, Amazon, Skimlinks, and others.

Joined
Oct 6, 2004
Threads
82
Messages
1,569
Location
Longmont, CO
Ok well I guess I'll start by introducting myself. I'm Nick and I have had several Cruisers. A '78 FJ40 (which I still have), a '74 FJ55 (sold to RedLine Cruisers), and now a '84 FJ60.

I sold the pig to buy this as the I couldnt afford to fix up the pig and needed something a bit more "reliable". So I drove 1.5 hours south to Colorado Springs to look at a 60 I found on Craigslist. I test drove it and liked it so I payed $4,000 for it. I drove it for a year and a half and in that time I started to notice that the engine was loosing power.

Supposedly the engine was rebuilt at 120,000 miles. After my purchase and driving it it now had 180,000 on it. I have all the paper work for the rebuild but it wasnt done very well. The cylinder pressure was all over the board. 110, 120, 80, 160, 100, and 120, and there was literally oil pissing out of the engine and out the exhaust pipe. By the time I was able to get the funds and all the peices for the new engine, the truck couldnt get over 65mph on the hwy on flat terrain. Going up hill it was 45 mph max. lol.

So I opted to do a 5.3L Vortec with a Marks adapter so I could maintain the stock transmission/tranny location.

Now the build begins... :D

But before I start I need to thank my best friend Beth for letting me use her garage to do this build as it's damn near impossible to do in an apartment parking lot. lol

I picked up the 5.3L Vortec from Bryan with BD Turnkey Engines over on pirate. He got me a 2002 out of a Chevy Silverado 1500 with 90,000 miles on it. The compression was good across all cylinders and it had plenty of power to spare. He wiped and reprogramed the ECM to my specifications. Did a great job and shipped me a quality engine.

shippingpic.jpg
 
Last edited:
I ordered the Marks adapter from Advance Adapters. Not to get side tracked but I feel this is worth a small rant. I ordered the adapter from AA and was assured by the customer service agent that it was in stock and would ship ASAP. Well that didnt happen. A long long long story short I ended up getting the adapter after 3 months and many phone calls getting 3 different "solid" ship dates before it finally arived. I realize that it's not AA's fault that they didnt have the adapter. But dont lie to me about having it and when it will ship to me. Just tell me that you dont have it and you will let me know when I will get it. I was finally able to get that date from the shipping manager after they got the adapter from Australia. I did chew him a new ass and gave him the names of all the employees who lied to me and made sure he chewed their asses. That is the only reason this is the only rant about this situation.

I received my adapter and was finally able to get started on the swap.

Woot

So I pulled the old tired 2F out of the engine bay!!!

2fengineinstalled.jpg


2Fpulled.jpg


2fenginepulled.jpg


emptybay-1.jpg


She came out pretty easy and "clean". FYI clean is a relative term. lol. I spent a lot of time labeling everyting. That's the blue tape you see in the pictures. Taking bolts off putting them in ziplocs and labeling what they came off of. It took FOREVER but it made re assembly and wiring so much easier and well worth it!!!

I sold the engine to a fellow mudder on here via CraigsList. I for the life of me dont know his screen name but he's from Grand Junction. Super cool guy and tool all the crap I didnt need off my hands for me lol. Maybe he'll chime in on the tread but I doubt it. He was building a 45 I belive.


on a side note it's always interesting what you discover what PO's did to your truck. This is how the radiator was held on after the "rebuld of the engine". Its just a bit of insite to how well the rebuild was actually done.... :rolleyes:

radiatormountugh.jpg


Yup....that's a ZIP TIE!!! Whiskey Tango Foxtrot over?!!!
 
Last edited:
I was a bit lacking in taking pictures as I was doing work as I was motivated to get it done. lol But I did run into a few speed bumps with the Vortec adaptation to the Marks adapter. According to Advance Adapters I needed to put a pilot bearing spacer in before the bearing itself. Well that was a disaster as they were wrong.

pilotspacerugh.jpg


bearing spacer installed.

pilotbearingugh.jpg


the pilot bearing installed as far as it would go in with the spacer....ugh

as there wasnt any room to get a pilot bearing puller in there to remove the spacer I had to weld a nut to the spacer. Then use a slide hammer to get it out. I was pissed. I reinstalled the pilot bearing as it was intended with OUT the spacer and it worked great.

I then moved to installing the Marks adapter onto the stock 4 speed tranny.

weldinginmotormounts.jpg


I dont have any pics of the set up of the adapter but the instructions from Marks are very good and very strait forward....if you receive the instructions. That was another thing AA forgot. I had to call and have them emailed to me. :rolleyes:
 
I then did a dry fit of the Vortec to determine the location of the motor mounts.

enginehoisted.jpg


I then removed the engine after tacking in the motor mounts and permanitly burned them in.

vortecmotormounts.jpg


Now came for a few additions to the engine. I was unable to use the factory exhaust manifolds as they dumped out on the frame rails. So I ordered some Hooker Block Hugger Headers from Summit Racing. In the same order I got the fuel pump and some small adapters.

Engine.jpg


My son Liam helped me install the Hooker Headers.

I also installed the stock 2F oil pressure unit into the Vortec and drilled and tapped the water port behind the passenger side header on the head. Thank you Rover67 for the help with this. Unfortunetly I dont have any pics. As again I was a bit envolved with the install. I'm one of those guys who wont eat or drink when I'm focused. lol

Now that the motor mounts were in the engine could go in permanitly. It took some wiggling but I eventually got it in there and bolted up!!!

Vortecdryfit.jpg


This was a big step for me. The only probelm was that with the engine in there was only 1" between the oil pan and the front diff. yarg. So I then ordered a 4" OME lift kit from Man-it-aint-free.
 
Last edited:
I then spent many hours just connecting plumbing and wires to the new engine. I got a power steering pump hose manufactured at Tubes and Hoses up in Loveland CO. They did a great job. They took the stock connections from the FJ60 gear box and the connections from the GM Power steering pump and merged them into a single hose. They also did the same for my Air conditioning hoses. They do great work and if your in the front range area I suggest you take all your business there. Great guys with solid very very resonable prices!!!

The next thing to address was the fan as the Vortec didnt come with a mechanical fan and Bryan at BD Turnkey Engines had wired the ECM for a high/low electric fan. So I ran over to the local pull-n-save and grabbed a fan out of a Ford Taurus. and FYI the slim 2 speed fans are in high demand and only available in '91-'95 Taurus'. There was only 1 in the entire lot and there were about 35 different Taurus'. lol

After picking up the fan I wanted a way to cleanly mont it to my radiator with minimal fabrication. So I ended up using the stock fan shroud to mount my fan to the radiator.

fanshroud3-2.jpg


fanshroud2.jpg


fanshroud1.jpg


This worked out great and was allows for great flow through the radiator!!!
 
After getting the fan done it was time to button everything up.

engineinstalled3.jpg


Engineinstalled2.jpg


Engineinstalled.jpg


as you can see in the pics above I moved the battery over to the drivers side and moved the over flow container to the passenger side to make room for the K&N air filter, which is now placed just behind the passenger side head light. That sucker is huge!!! lol

Time for fluids...she's a thirsty girl

thirstyengine.jpg
 
Last edited:
Well not that the engine is in and its full of fluids lets start her up!!!


http://www.youtube.com/watch?v=74OS7N6JPd4&feature=youtu.be

the smoke in the video is radiator fluid burning off the belt.

After getting it started it was noticed that the fuel pump I had purchased from Summit Racing was extremley noisey. Infact it was so loud that you could hear the whining of it over the engine with OUT any exhaust on it. So I called Summit and they shipped me a new one...but more about that later.... sigh
 
Last edited:
Now it's time to do the lift, exhaust and eventually tires.

I had purchased an OME 4" lift from Man-a-fre.

Over all the install of the lift went well aside from a few hiccups. Removing the old springs was the biggest bitch of the entire install. The spring pins were frozen in to the old bushings at the fixed end of the spring pack on both the fronts and rears. I ended up having to cut 3 of the 4 spring pins out.

removingfactorysprings.jpg


Loganhelping.jpg


my son Logan helping me out and handing me tools.

Grindingforlift.jpg


Once I got the rear springs/shocks and driveshaft in I started on the front. I got it all done but with one hiccup. The kit was missing a set of FJ60 greasable spring pins. After some "colorful" converstaion with the owner of Man-it-aint-free I was able to get the spring pins installed a couple days later.

The lift is sexy as hell.
 
This how the truck sits now. Lifted, and with the new engine in. There are still things that need to be done. New tires 35x12.5x15 BFG mud terrains, window tint and evenutally a new paint job.

Liftedside.jpg


At the point of this picture the exhaust had not been done yet. I ended up taking it to Ken's Muffler here in town. They did a good after I had them re route the exhaust because the mechanic didn't speak very well english and didnt understand what I had said. They put in all the pipe from the headders to the tip. INitally he bent the pipe from the passenger side headder infront of the oil pan instad of behind. When I saw this I explained to him that wouldnt work as when I'm wheeling the differental would rise and crush the pipe against oil pan. So the next day he removed all his old work and rerouted the 2.5" pipe behind the oil pan and under the marks adapter. Then into a custome "Y" pipe that he built with a 3" out, to the Catalyic converter and then to a Magnaflow 3" in 3" out. Then having the exhaust exit just behind the rear drivers tire.

exhaust.jpg
 
So now back to the fuel pump issue. Last week on Tuesday I receive the new fuel pump from Summit to replace the extremly loud original that I had ordered. Well I got under the truck and swapped the 2 identical pumps out. I then started the truck up to see how loud the new pump was. Well after starting it, this pump was as loud as the original plus....this one was spraying fuel out of the negative terminal post. I ended up calling the manufacture of the pump (trick flow) and explained what was happening. The tech literally said to me that he has no idea and that I should have Summit send me a new one for the new one...lol. Turns out that Trick Flow doesnt even make this pump. It's 100% out sourced and explains why its a POS. Well I'm not about to do that. SO I called up Summit and it also turns out that they own Trick Flow and new that pump was a hunk of junk. So the sales assosciate took some serious time and and did some research with me and found another pump that would provide the PSI and GPM that was necessary for my engine. I paid the difference and he shipped me the new pump. Woot.

I got the new new pump on Friday afternoon from UPS. I immedietly got under my truck and swapped out the pumps. This new one was extremly quiet and ran like a dream. I then rolled my truck out of the garage and left it in the driveway. That's where this story takes a nasty turn. I left the truck in the drive way at 6p and went in for dinnner. Then I went back out at 9p to leave for work. Well it turns out I got a flat tire in that time. weird....

Well I ended up taking my friends car to work that night as I was running late and would deal with the flat Sat morning when I got home at 6a. Well when I got home I pulled the tire off the truck and looked for the hole in the tread, thinking I had rolled over a bolt or screw. Well I couldnt find one. So I went to put the tire in the back of the 60 and that's when I saw the scratches.......fxxxing scratches are you kidding me?!!!! Some ass hat had keyed my truck..

rearhatchscratch2.jpg


tailgatedriverscratch.jpg


tailgatepassengerscratch.jpg


So now that im pissed as hell I need to get to sleep as I have to be back at work at 6p sat that night for a 12 hour shift. I go to bed and end up leavinf for work early so I can try and put some air in the tire to try and figure out where the hole was. Well when I get to the gas station and start filling it up, I see it. a 2' gash in the side wall. Are you fxxxing kidding me?!!! the same douche bag has slashed my tire. Who does this kind of crap? really?!!

slashclose.jpg


tire.jpg


So I called the police to file a report. I fully realize that noting will come of it. I only have 1 suspect and obvsouly he's not going to just fall to his knees and convess his crimes. But non the less I filled the report jsut to get it on the books.

I'm going to try and bait the ass hat and catch him violating my "Therapy" again. I am setting up a motion activated hunting cam and leaving my tuck out side again. hopefully he'll take the bait and I can make him pay for everything.
 
So that's where I sit today. 1 tire short. I need 35's so its not a huge issue. But it still sucks none the less.

Next on the schedule is window tint, tires, and paint. I am currently working on building a new front bumper for the truck. It will hold my Warn 8274. I acutally adopting a simialr design to the 4+ front tow bumper.

I'm using a stock Heep mount that I'm modifying for this application.

winchplate.jpg


winchplate2.jpg


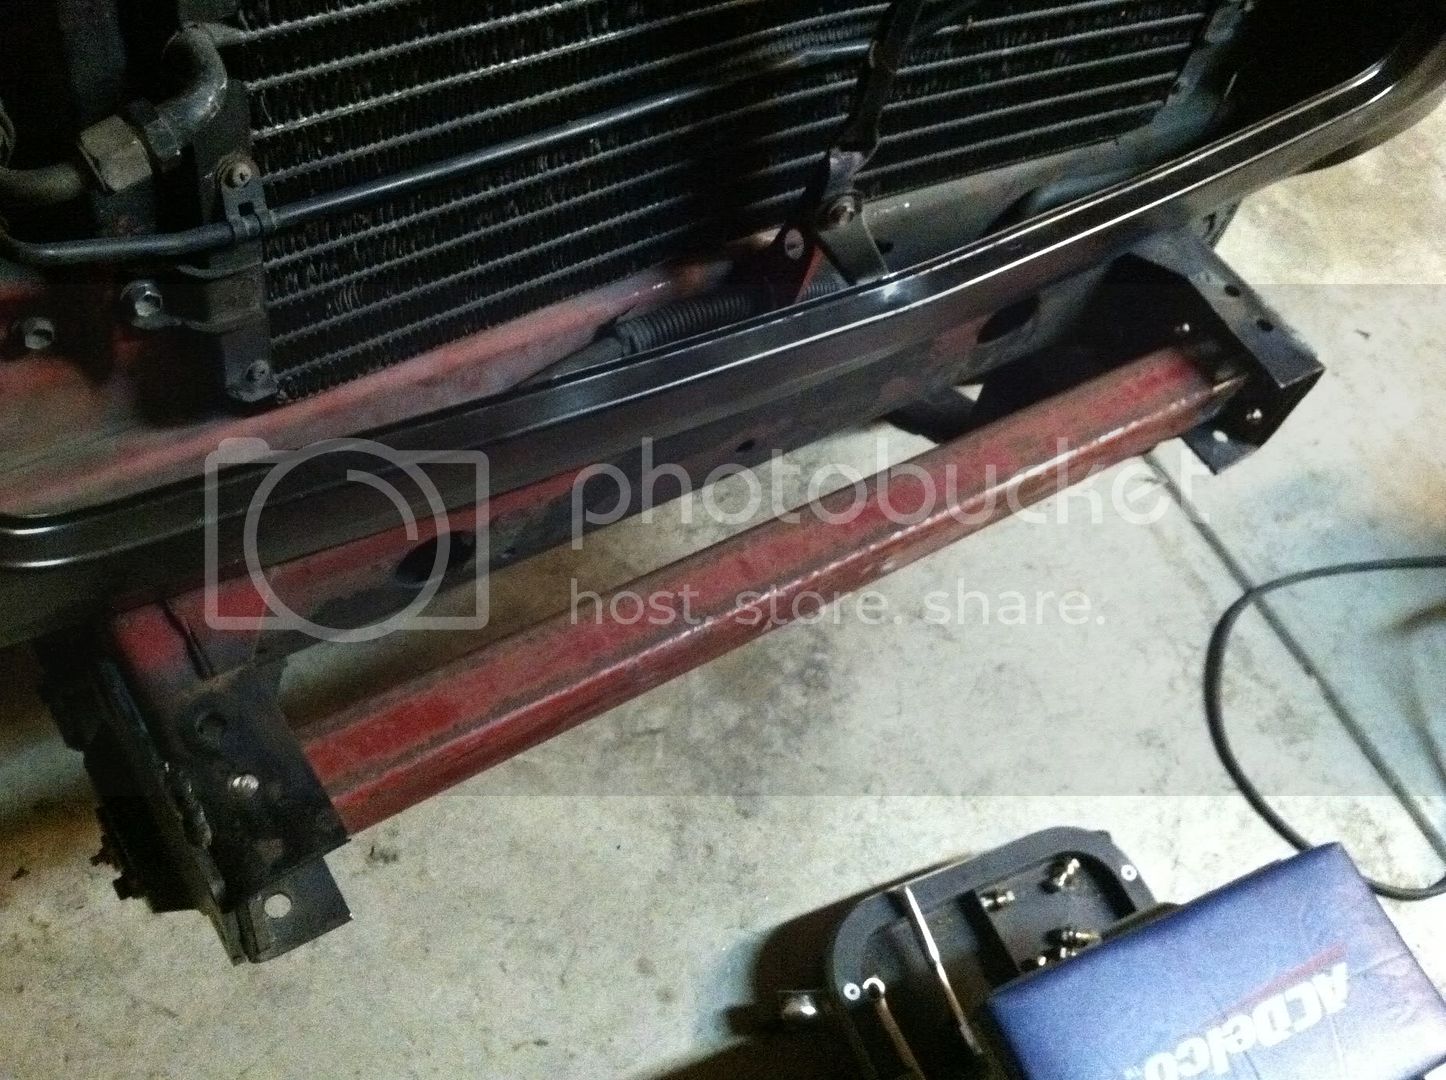
This is how I'm mounting the bumper to the factory rails. I cut and drilled mounting plates that have a bar welded between them and they bolt up to the factory holes that also hold the OME 4" shackel reveral on.

bumpermount-1.jpg


Here's the winch plate modifyed and mounted to the new cross bar.

winchplatemounted.jpg


I have now built the bumper extensions but have more plating to do on them and finish welding. More pics to come in the near future.
 
I hope you catch that bastard that knifed your tire and keyed your truck.
Thanks for sharing your buildup this was pretty cool that you waited till nearly finished to up the pictures.
 
I hope you catch that bastard that knifed your tire and keyed your truck.
Thanks for sharing your buildup this was pretty cool that you waited till nearly finished to up the pictures.

Yeah I wasn't even going to do a build thread. But I was bored at work tonight lol.

Yeah I have a very good idea who the guy was. Hard parts proving it. :mad:
 
Outrageous Behavior

Yeah I have a very good idea who the guy was. Hard parts proving it. :mad:

Nick - Thanks for the thread and sorry for your pain. Revenge is a dish best served cold and in ways the douchebag (one word or two?) isnt expecting. Kind of like when something detonates and the delivery guys are not in the vicinity.

Good luck, be creative.
 
This may be a strange question but is there any reason as to why you have a catalytic convertor? Just wondering I thought there was better exhaust flow without them. My truck dose not have one but if there is good reason to have one then I guess I can put one on.
 
Great build man! It INFURIATES me that someone keyed it. Time to break out the game cameras and put them in the front yard/garage area. It would be so nice to catch that DB in the act, beat his a$$ AND prosecute for trespassing AND property destruction.
 
Great 60!

Thanks for all your sharing! I'd be interested to know about the driveability now, both on road and off and get your impressions on that.
 

Users who are viewing this thread

Back
Top Bottom