
Well guys, I'm past the point of no return on this so I figured I'd do something I've always wanted to do: Start my very own build thread and join the ranks of the great and mighty mud contributors!
I've had a 91 FJ80 for a couple years, and it's been great. When I bought it, the brake lines had rusted through and I spent a lot of time bringing it back to life. Birf seals, FZJ front brakes, replaced most of the vac lines, plugs, water pump, all the PM stuff. It has been my DD for a while now.
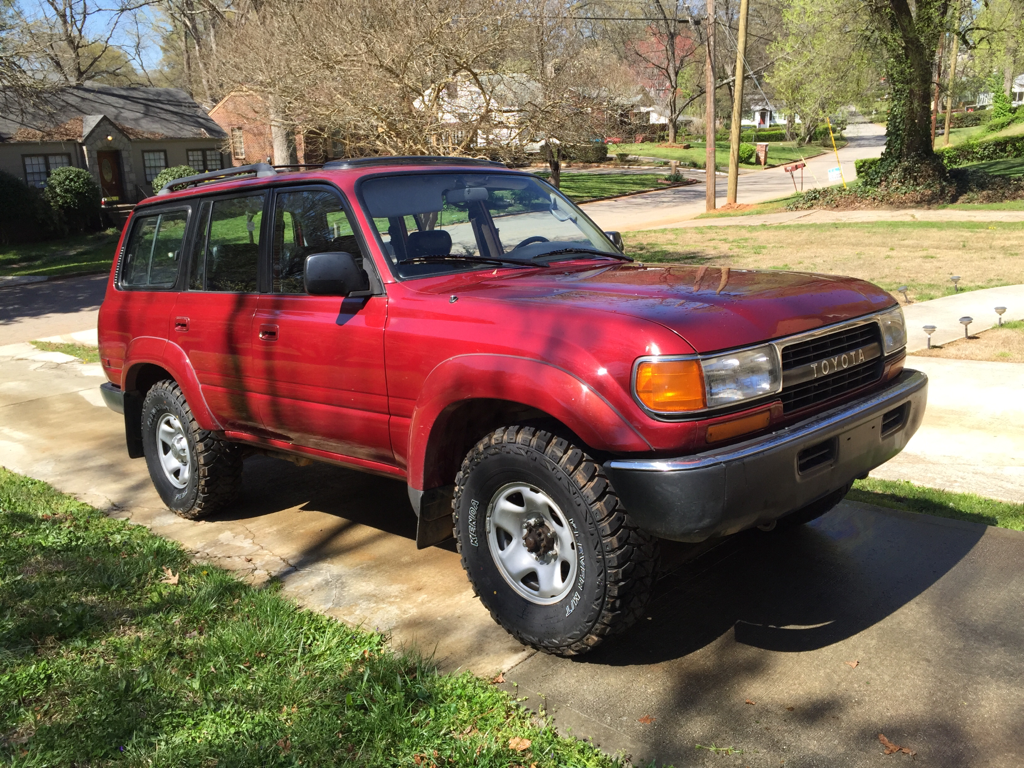
I love the rugged old tractor, but it spent the first few years of it's life in Illinois and has the "patina" underneath to prove it. This has made wrenching less than enjoyable. With the rear brake drums in serious need of a rebuild, I started thinking about a full float axle swap so I could get discs in the rear. I bought an axle from another mudder and had it shipped. The day after it left his place, I got a craigslist alert. A fully locked 97' Collectors Edition in emerald pearl, with 155k miles, and a "seized" engine. It was so cheap I called the guy and told him to take the ad down and that I would be there in the morning to pick it up. The next day, I brought this home:

I spent a while troubleshooting, and actually got it to turn over and start, but it sounded like a couple of skeleton cats fighting in a steel garbage can. Some of the helpful folks here suggested the old "Italian tune up", but I figured I should go ahead and pull the engine and see if it can be rebuilt. I cut open the oil filter and my suspicions were confirmed. Merry Christmas.

So this week, I got busy disconnecting everything. I downloaded the FSM and followed it exactly. It is excellent but it does gloss over some of the connectors that need to be disconnected. For anyone who needs it, here is the link:
http://www.markspeterson.com/FSM/1996 Toyota Land Cruiser Repair Manual v111.pdf
Last night, it came out. My friend who always talks a big game was going to come over and help but he backed out at the last minute. I ended up doing it all myself, which was quite a challenge.


I have never done a job involving moving this much weight before. Some of my methods may have been.. well... questionable, but I got her out and onto the floor after about 4-5 hours. Lessons learned:
-Take off the front valance so you dont mangle it like I did.
-Take off the AC Condenser. It's gonna get in your way.
-Recover your refrigerant and dont just crack open a line filling your garage with strange stinky mist that gets you high and almost makes you pass out.
-When you hook up the load leveler, keep the chain in the back of the engine as short as possible, otherwise it can be hard to tilt the engine to get the last bit over the bumper.
Next step will be getting the engine on a stand and opening it up. From there I will either rebuild or find a good core that can be rebuilt. Also got a lead on a pretty sweet bumper for a good price, so that may happen sooner than I expected.
I've had a 91 FJ80 for a couple years, and it's been great. When I bought it, the brake lines had rusted through and I spent a lot of time bringing it back to life. Birf seals, FZJ front brakes, replaced most of the vac lines, plugs, water pump, all the PM stuff. It has been my DD for a while now.
I love the rugged old tractor, but it spent the first few years of it's life in Illinois and has the "patina" underneath to prove it. This has made wrenching less than enjoyable. With the rear brake drums in serious need of a rebuild, I started thinking about a full float axle swap so I could get discs in the rear. I bought an axle from another mudder and had it shipped. The day after it left his place, I got a craigslist alert. A fully locked 97' Collectors Edition in emerald pearl, with 155k miles, and a "seized" engine. It was so cheap I called the guy and told him to take the ad down and that I would be there in the morning to pick it up. The next day, I brought this home:
I spent a while troubleshooting, and actually got it to turn over and start, but it sounded like a couple of skeleton cats fighting in a steel garbage can. Some of the helpful folks here suggested the old "Italian tune up", but I figured I should go ahead and pull the engine and see if it can be rebuilt. I cut open the oil filter and my suspicions were confirmed. Merry Christmas.
So this week, I got busy disconnecting everything. I downloaded the FSM and followed it exactly. It is excellent but it does gloss over some of the connectors that need to be disconnected. For anyone who needs it, here is the link:
http://www.markspeterson.com/FSM/1996 Toyota Land Cruiser Repair Manual v111.pdf
Last night, it came out. My friend who always talks a big game was going to come over and help but he backed out at the last minute. I ended up doing it all myself, which was quite a challenge.
I have never done a job involving moving this much weight before. Some of my methods may have been.. well... questionable, but I got her out and onto the floor after about 4-5 hours. Lessons learned:
-Take off the front valance so you dont mangle it like I did.
-Take off the AC Condenser. It's gonna get in your way.
-Recover your refrigerant and dont just crack open a line filling your garage with strange stinky mist that gets you high and almost makes you pass out.
-When you hook up the load leveler, keep the chain in the back of the engine as short as possible, otherwise it can be hard to tilt the engine to get the last bit over the bumper.
Next step will be getting the engine on a stand and opening it up. From there I will either rebuild or find a good core that can be rebuilt. Also got a lead on a pretty sweet bumper for a good price, so that may happen sooner than I expected.

 . Luckily the dangerous part is over at least until it comes time to put it back in.


