LANDTANK - Knuckle Studs

This site may earn a commission from merchant affiliate
links, including eBay, Amazon, Skimlinks, and others.

Joined
Mar 27, 2003
Threads
385
Messages
21,383
Location
Groveland MA
Website
landtankproducts.com
So I had yet again another issue on my truck with the knuckle studs loosening, falling out and shearing on the passenger side of my axle. After reading what others were doing and trying some of those ideas I decided to take a closer look at what was going on.

First lets talk about the dimensions of the stock stud and in this case I'm referencing a new stud with a torx head on it and other relative parts.

The stud has:

a 12 x 1.5 threaded section that treads into the knuckle housing itself

a 12 x 1.25 threaded section that a cone washer, flat washer and nut are placed on to clamp the assembly together. The OD of this threaded section is 11.84mm

A shoulder section measuring 11.96mm OD and 11mm in length

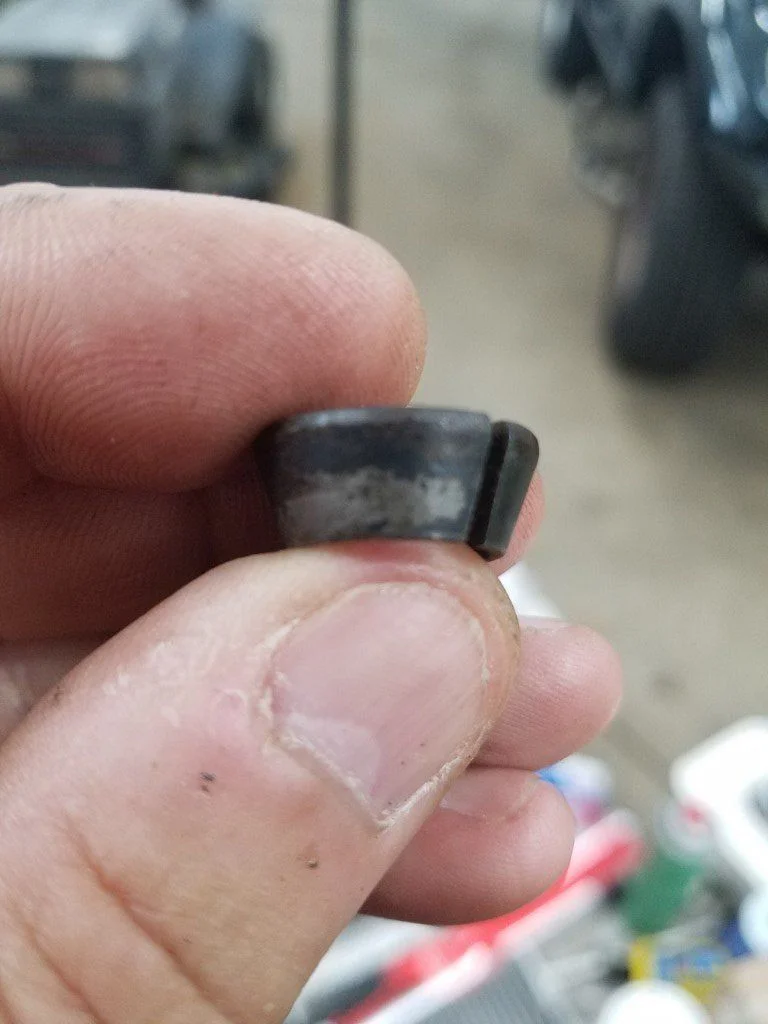
The cone washer has a total height of 8 mm

With the cone washer in place in the arm the total height from the base of the arm to the top of the cone washer is 17.5mm. This means that the bottom of the cone washer is 9.5mm up from the base of the arm or the top of the knuckle.

In this first picture you can see that with the stock stud in place there is 11mm of shoulder exposed.
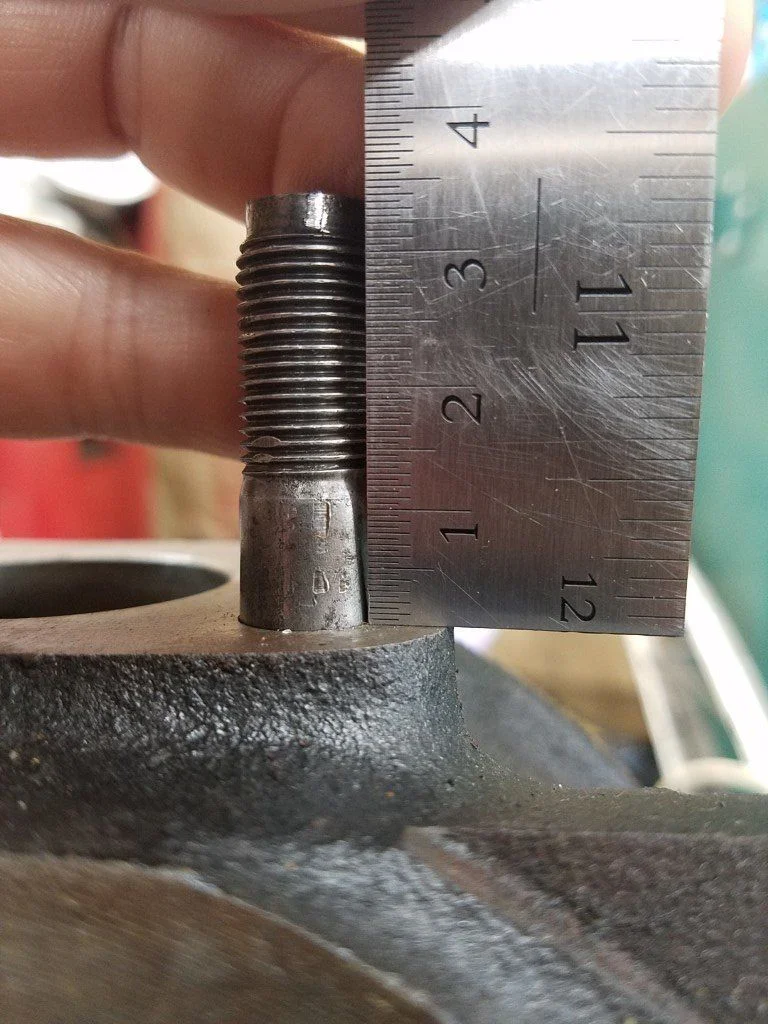
Stock stud.webp


Given that the bottom of the cone washer is 9.5mm up from the base of the arm this equates to only 1.5mm of engagement between the cone washer, arm and stud. This is due to the fact that the shoulder diameter is slightly smaller than the hole in the arm and the threaded section of the exposed section is slightly smaller than the shoulder.

This can be seen when inspecting the tapered holes in the arm.
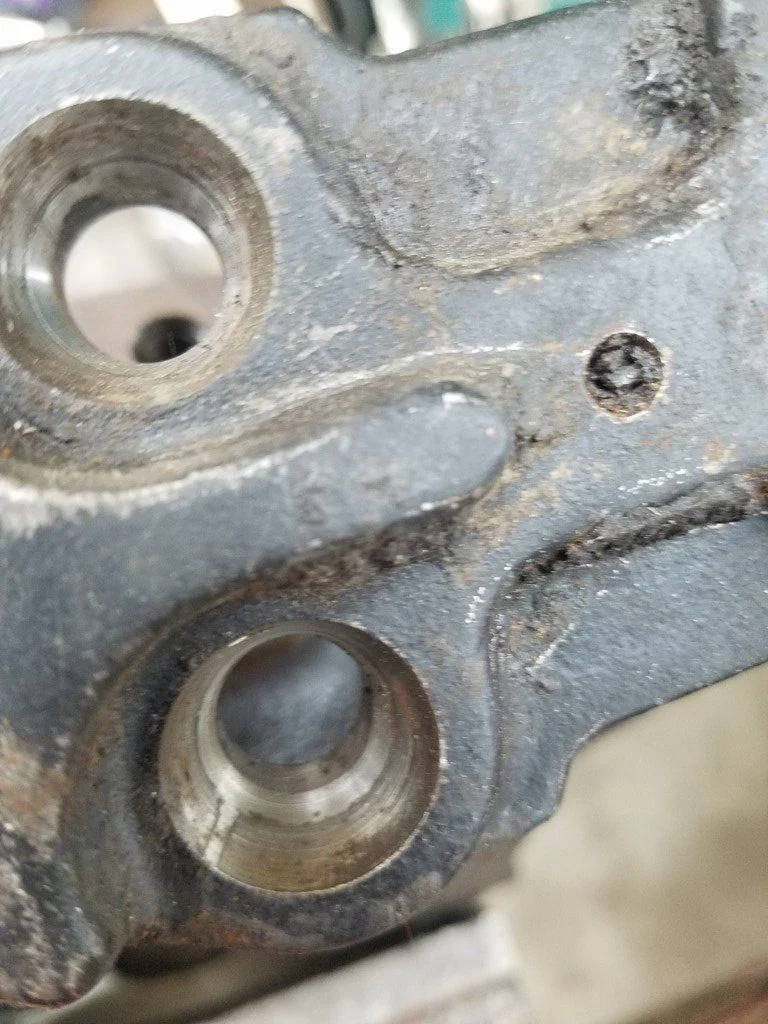
arm hole.webp


Notice the clean ring area where there is continuous contact between the arm, washer and stud and the larger area where no continuous contact is.

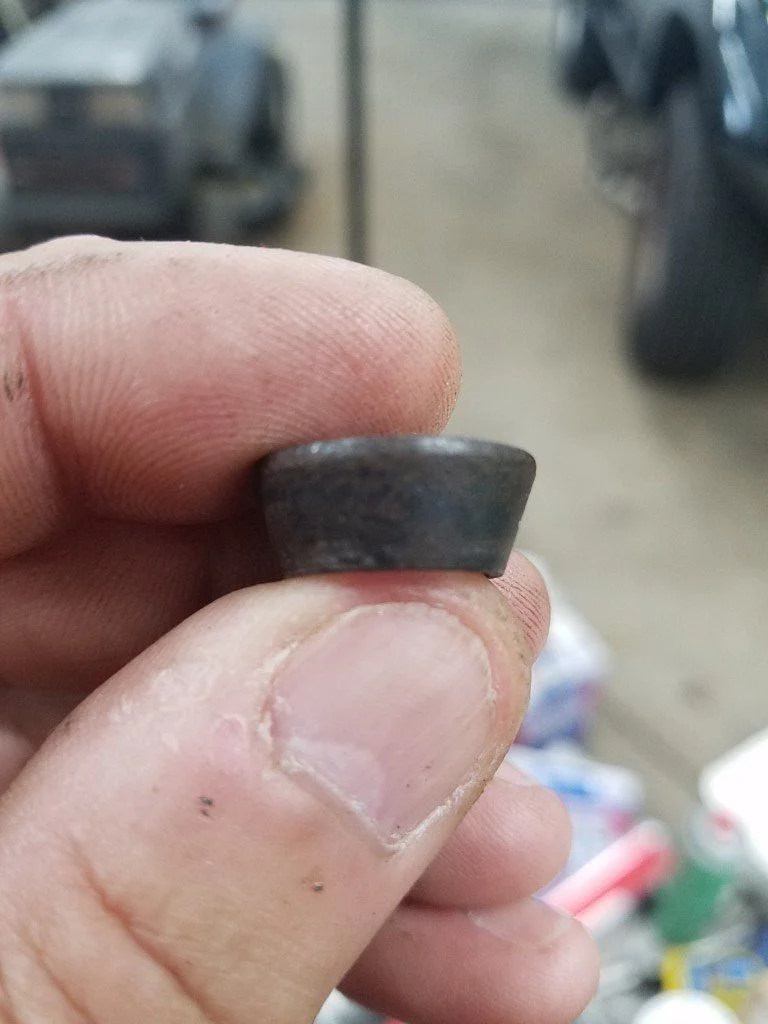
Further signs of this can be seen on a cone washer itself. The next three pictures are of the same washer just rotated to show all sides.
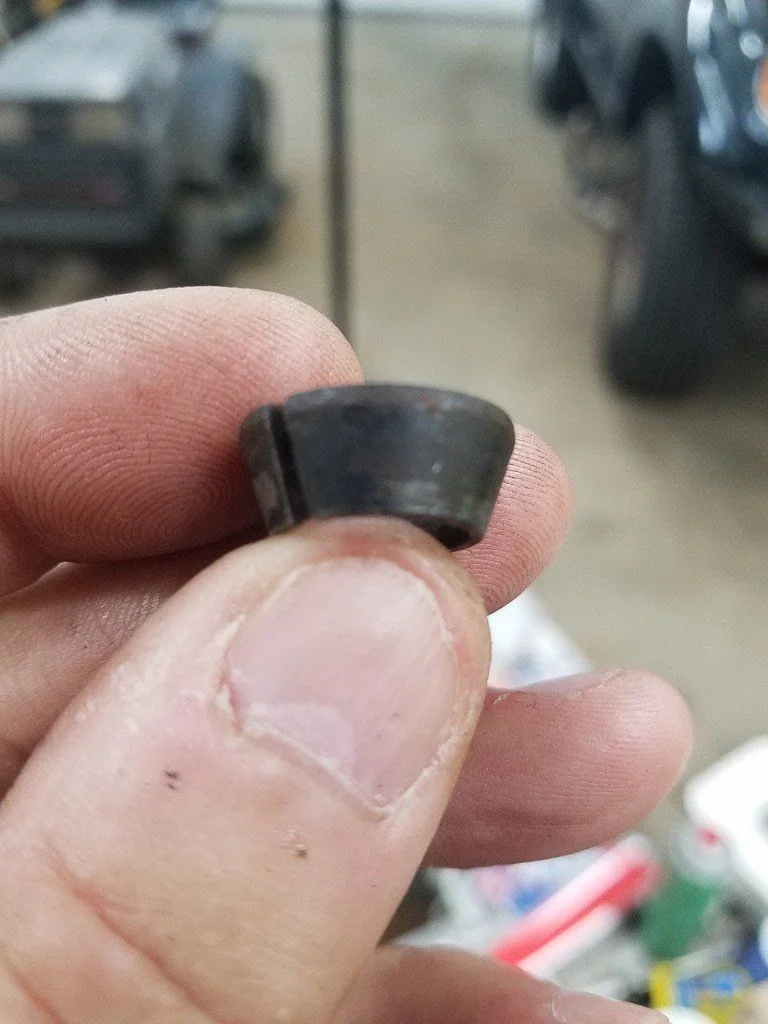
cone 1.webp
cone 2.webp
cone 3.webp


You can see irregular markings which I believe are from the washer being distorted some during install and use.
 
My solution is a new stud with a longer shoulder to provide 5.5mm contact along with being a class 10.9 which when used with class 10.9 hardware will allow you to torque the nuts to 95lbs.

Here is a couple if pictires of a stud installed

LT stud.webp


LT stud with arm.webp
 
well, if it works I'm sure its better than loctite..
 
Neat idea! Do you have any concerns with the higher torque pulling threads out of the knuckle?
 
not really.

I have used the newer OEM with the torx head and when I installed them, I cleaned the knuckle and stud, used RED lock-tite I tightened/torqued them to 48# the studs and #80 for the nut's and they hold pretty well
 
Nice analysis. But I'm curious if you had removed the arms from the housing on previous birf services?

I'm of the opinion that doing so opens up the chance of the studs coming loose. Worst step in the fsm and completely unnecessary. If I'm confident the nuts have never been touched since the factory, I just check their torque (never found a loose one). No issues on over 10 birf jobs using this method.

But back to your new studs. Are you implying that what is needed is a tighter tolerance for stud-shoulder-to-cone to prevent a loose stud? Or that the fact you can torque the studs to 90 lb ft as the prevention?
 
Interesting observation. I think @landtank you could be onto something.
I've had trouble with electric trimmer/routers that use similar cone shaped collet to clamp a tool into a chuck.
I had one that the collet was a poor fit, and the cutting bits would vibrate loose in short order. Changing the cone shaped collet helped it.

I'd take these on as an upgrade if they were available.
Trouble is, how do you test this in the short term with certainty in results?
 
Nice analysis. But I'm curious if you had removed the arms from the housing on previous birf services?

I'm of the opinion that doing so opens up the chance of the studs coming loose. Worst step in the fsm and completely unnecessary. If I'm confident the nuts have never been touched since the factory, I just check their torque (never found a loose one). No issues on over 10 birf jobs using this method.

But back to your new studs. Are you implying that what is needed is a tighter tolerance for stud-shoulder-to-cone to prevent a loose stud? Or that the fact you can torque the studs to 90 lb ft as the prevention?
what I think is going on is that with the stock stud and only having say 1.5mm of contact between the arm/washer/stud you have a small clamping area to stop the stud from moving as well as a pivot point when under load. So the new studs will triple the size of that area along with increasing the clamping force.

But the tapered hole in the arms needs to be addressed as well. The corrosion and wear that I'm seeing isn't helping either. I've got the proper reemer for them but first want to try a cone wire brush I found.
 
Interesting observation. I think @landtank you could be onto something.
I've had trouble with electric trimmer/routers that use similar cone shaped collet to clamp a tool into a chuck.
I had one that the collet was a poor fit, and the cutting bits would vibrate loose in short order. Changing the cone shaped collet helped it.

I'd take these on as an upgrade if they were available.
Trouble is, how do you test this in the short term with certainty in results?

in the short term no. but my measurements where with the parts unassembled. And the amount of engagement would likely increase by .5mm once everything was assembled and torqued. So that would put the stock stud/washer at 2mm and my stud at 6mm. that's a 300% increase and then on top of that add the additional clamping force from torquing at 71ftlbs to 95ftlbs, I don't see how it can't be a significant improvement.
 
Why not make a proper angled cone washer, that should do it, instead of making new studs. What kind of thread contact does the stock stud have, that is a very important thing, and how much contact does you new stud have ???
 
The problem would be gone if the arms were keyed to the knuckle.
Or just up the studs to 9/16” D60 studs and delete the cone washer which is a lot easier then doing a keyway
 
So I got some of the production studs in and wanted to get to evaluate them on the bench by installing them on a knuckle with an arm from an axle I stripped.

First here is a picture of the production stud
new stud.webp


So I installed the studs torqued to 20ftlbs into the knuckle and then torqued the nuts to 92ftlbs and the cone washer almost completely pressed into the arm.

high torque results.JPG


next picture is from looking down onto the arm and the tapered hole

hole wear.JPG


You can see the wear in the hole and the area not making any contact.

This next picture is with a new arm installed. My stud on the left sits heigher and similar to the stock setup on the right.

new arm new stud.JPG


I decided to evaluate how much torque it will take to rotate the studs as a means of determining the increase in clamping force. I did this by incrementally increasing the torque wrench by 5lbs until is started to turn the stuck without clicking.

The stock setup started turning at 80ftlbs while my setup didn't start turning until 120ftlbs. below is a picture of the stud from that test illustrating the contact area on the stud where the cone washer interfaces.

contact new arm.JPG
 
Last edited:
So I had two driver side arms and both of them had issues with the tapered holes being wallowed out. I believe it's from the lack of contact between the stud/cone washer/hole that allows movement even when properly installed. And given that the passenger arm endures the force to rotate both wheels verses the drive arm just one, its the arm that wears which allows the studs to back out.

On my truck I was able to change out the arm without disassembling the knuckle. You just need to remove all 4 studs first and then wiggle it out.

I have put together a kit that contains:

8 - studs
8 - washers
8 - nuts
3 cotter pins
1 pkg ARP torquing lube
1 application brush

anyone who would like one can PM me directly.

IMG_0500.JPG
 
Back
Top Bottom