Reno's LX470 Build Thread (1 Viewer)

This site may earn a commission from merchant affiliate
links, including eBay, Amazon, Skimlinks, and others.

Joined
Nov 16, 2012
Threads
5
Messages
95
Location
Houston
Reno's LX470 Build Thread - Updated 02/26/13

Hello everyone, I figured the time has come to go ahead and start my build thread as I have now accomplished a few of my first additions to the LX.

Let me introduce myself, my name is Joel. I came over from T4R.org as I had a built 3rd Gen 4Runner and figured it was time to move on and upgrade myself. I spend a lot of time away from home so the additions might come in floods every other month as I work on drilling rigs out of state. Currently I am working on a project in Moab, Dead Horse Point. Never thought my first time in Moab would be without my 4x4 as I flew from home in TX. Anyways on to the LX.

Only 1 prior owner
Year/Make/Model: 2003 Lex LX470
Mileage: 120,xxx

First, I adjusted the AHC, which was fairly easy. I pulled off the ball joint arm that connects the sensor arm to the UCA and cut it short and snugged up the ball joints as far as they could go. Then adjusted it all the way up. This was my first mistake as it maxed it out. Simple adjustment back all the way down in the slot and I was sitting back to a little stinky style. Ride is great and back to the stock feel.

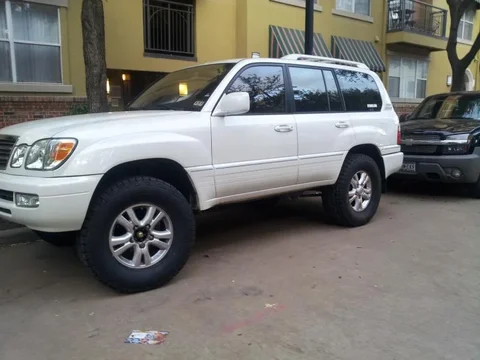
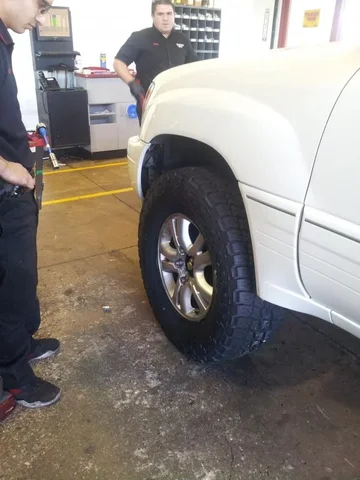
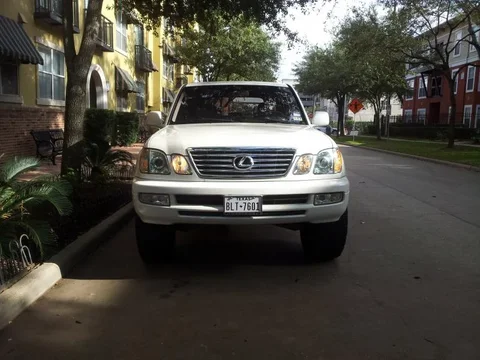
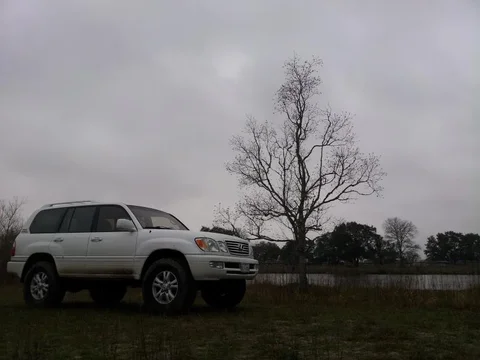
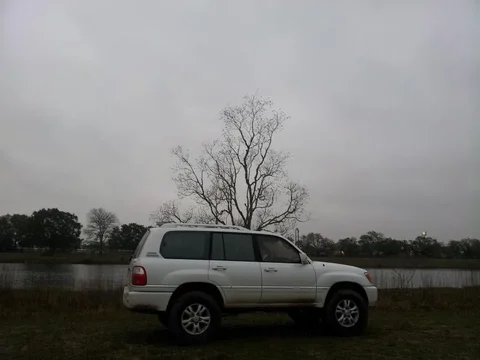
Tires: I decided to push the limits a bit on this one. I went with 325/65/18 Nitto Terra Grapplers (34.88"). Before people ask yes they rubbed. I had to shave a bit of the front fender off (stock) and beat the hell out of my pinch welds with a sledge from my ARB multitool kit so they are nice and flat with no sharp edges. I was excited to beat something as it was the first time I have used the sledge attachment in my kit. I have 1.5" spacers on front and back which were custom made, both hub centric and lug centric. If you want info on the company just give me a shout. They are great, came anodized in black and cost around 120$/pr. Not to mention a lifetime warranty on defects (fingers crossed I dont find out the hard way). The company that make them is an offroad company as well with experience in the 4x4 industry.

Mike from BIOR is building another run of diff drops so I put in my order and I am waiting for them to ship out so hopefully when I am home at the end of Jan. it will be waiting. I do not plan on driving without this as well as doing a re gear to 4.88s which are OTW as well just do not know who is going to do my install. Any suggestions for shops in Houston? Sliders, bumpers, Armor, all to come in the future so stay tuned. I live in a very populated area so I walk most places I go when I am on my time off. By most places, I mean usually to the local watering holes so I do not spend much time driving it. :p

BTW as for the LEX, bought it from a dealership my friends father works at, stellar deal on it, all maintainence done at the dealer including 90k and the 120k service prior to me buying it. New AHC system in the rear at 65k due to the prior single owner hitting some road debris and caused a leak which was covered under warranty, so I was sold after checking it out. Well here are the only pictures I have! Sorry guys I did the lift and tires the day before I flew out to Moab so I was short on time.

You can see the size in comparison to the Chevy Avalanche behind me. Makes it look like a mini truck. One of the pictures is the guys at Discount Tire. When I pulled in with the stock wheels they all agreed the 35s wouldn't fit. As you can see they did, and they stood around staring in amazement! Haha! Enjoy!

20121222_163813.jpg

20121222_165548.jpg

A little IH8Mud flare!

20121222_165608.jpg

So hopefully when I am home in a little less than a month I will have my reverse camera kit, new set of hub caps (only came with two!), diff drop, and 4.88s waiting for me! It's like a second Christmas! Few more pics to follow! :cheers:
20121222_163813.jpg
20121222_165548.jpg
20121222_165608.jpg
 
Last edited:
20121222_122341.jpg


The 4Runner for old times sake...

20120820_144648.jpg

20120708_092556.jpg
20121222_122341.jpg
20120820_144648.jpg
20120708_092556.jpg
 
Love seeing LX470's. Nice. Look forward to seeing your build up.
 
Nice ride

Moab sounds way better then North Dakota right now
 
Loving the aggressive mods right off the bat.

On the AHC, just know that adjusting it as you did makes the AHC system work harder and reduces your payload capacity. That is because AHC is now carrying more of the overall weight to get the car higher and this will require it to operate outside of it's calibrated neutral pressures. It may become an issue once you pile on the armor.

You can remedy the load carrying capability somewhat by cranky the torsion bars up front. The rear may require a more unorthodox approx to get the springs to carry more weight at that height: air bags, spacers, or perhaps 80 series springs.
 
good looking LX, you were asking about shops, I have been using Javiers automotive the last few years.

What part of town are you in? from the pics maybe Midtown? I'm over in the Heights.
 
Looks great! Looking forward to the next step.
 
I also came over from T4R.org, had a 4th gen ('05) runner that was modded. Stoked to see your LX build. I've already cranked torsion bars, new 33" tires and projector HID retro on my LC. Subscribed.
 
Its been a while...time for some BIOR updates!

Well guys, apologies for being gone from the site for so long, I have accomplished a few things over the past few months but work, fortunately in Moab, has kept me away from home for over half the year.

To answer a few questions from prior comments, I live in the Midtown area right by Little Woodrows, I am pretty sure on my time off on the random midweek days I keep this place open while all the 9 - 5ers are sound asleep having to wake up early for work the next morning.

As far as the AHC goes, I have adjusted my torsion bars already a good bit but to be honest you are completely right about the armor and I was thinking the same thing. I don't even see it being possible with AHC and all the extra weight, even though I have seen it done by Slee, guess the AHC to Slee lift conversion is on the list as well...all in good time!


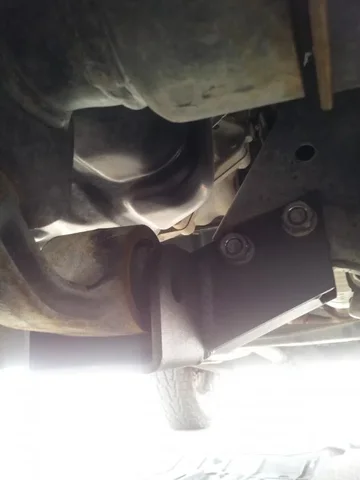
Recently I installed a BIOR diff drop and wanted to share my experience.

First off the quality and craftsmanship of the diff drop is by far above standard. THe quality of materials BIOR uses and the look of the welds and weld penetration is perfect. Now on to the install...


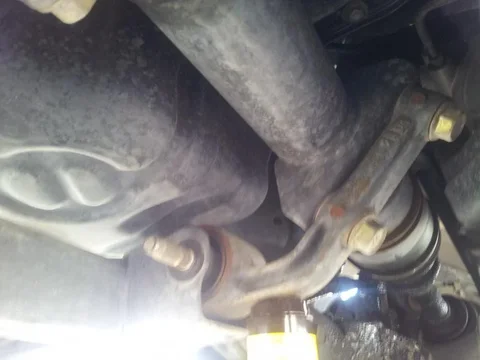
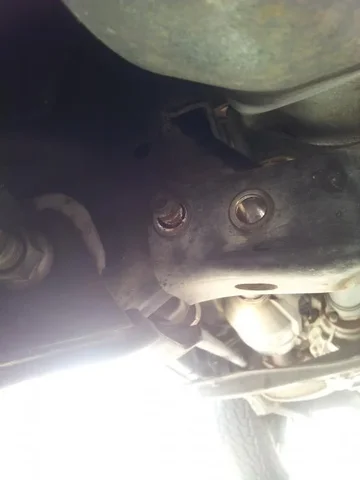
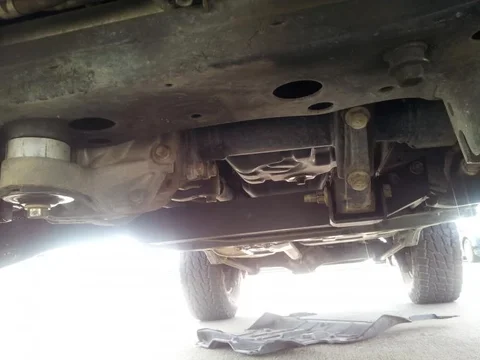
First what I did was jack up the main support to the stock diff cross member. This bolt was by far the hardest part as I went through a crappy socket wrench trying to break it lose. Guess thats why you pay for what you get in tools...So on to the craftsman stiff socket shaft and a cheater bar. Finally broke it loose...The rest was simple and fairly easy...Bolt holes lined up well and everything went together as planned. But as far as that main support bolt...It almost made me give up. In fact I did, and went back at it a few days later once I grew a little hair on my chest and got determined. So here are my pictures of the install please feel free to ask questions!! Pics are cellphone quality btw. the Android S4 hasnt come out yet for me to take advantage of that 13 mp camera :)

Jack supporting the main differential support:

IMG_20130205_123111.jpg

IMG_20130205_122056.jpg

Once the bolt was out I began to remove the cross member bolts (two on each side)

IMG_20130205_123127.jpg

IMG_20130205_123111.jpg


IMG_20130205_122056.jpg


IMG_20130205_123127.jpg
 
Last edited:
Once the bolts were out the cross member came out easily. I left a bolt on each side of the cross member in after removing the nuts on the back side so I could re-position my jack to under the differential housing itself so that I could still support the differential up and remove the stock cross member.

IMG_20130205_123439.jpg

You can see the difference between the stock and BIOR diff-drop

IMG_20130205_123306.jpg

IMG_20130205_123254.jpg

IMG_20130205_123439.jpg


IMG_20130205_123306.jpg


IMG_20130205_123254.jpg
 
Here is a picture of the differential main support now being supported by the jack. Once that was supported out came the POS stocker!


IMG_20130205_123439.jpg

And as easy as the old came out, the BIOR went in like butter!

IMG_20130205_124245.jpg

Next, once that was bolted down, came the front and rear differential frame support spacers provided by BIOR. I am still slightly confused on this, think I did it right, as I could not figure out how they went in so this is what I did, and it worked out great after I snugged the bolt up.

IMG_20130205_133653.jpg

IMG_20130205_123439.jpg


IMG_20130205_124245.jpg


IMG_20130205_133653.jpg
 
Last edited:
And here is the final product! Took me 3 hours start to finish, on day two that is after I got that main bolt out..

IMG_20130205_134655.jpg


On to the next small modification. I have a friend that was a lead tech at the Lexus dealership I purchased my car at. He no longer works there but come to find out he still got his discount. So I went and bought the 07' front grill for 140$...My 03' grill had chipped paint and two broken plastic mounts that were on the grill so it rattled a little...Not anymore! And I love the new look!

IMG_20130128_152131.jpg

IMG_20130128_152139.jpg

IMG_20130205_134655.jpg


IMG_20130128_152131.jpg


IMG_20130128_152139.jpg
 
While bored at work in Moab once more, I got to browsing eBay. That was my first mistake. Cheap quality electronics from China make me warm inside...So here is my new reverse camera and 4.3" screen mounted. No install pictures but it was really easy. Toughest part was running the wires through the back window hatch. 2 hours later...and parallel parking at my place in the heart of downtown became that much easier! I was already a pro at it but now I am a guru!


IMG_20130227_140233.jpg

IMG_20130227_140243.jpg

IMG_20130227_140233.jpg


IMG_20130227_140243.jpg


IMG_20130227_140200.jpg
 
Last edited:
Well for now all I can do is leave you with a little eye candy from a recent trip to my friends property to do a little off the map fishing in some remote ponds on a abandoned horse - race track his family owns on a piece of their property. This place is so cool and massive and a blast to drive through as its all over grown. Through old stables, a collapsed set of grand stands for spectators and a still standing (barely) press box. The track is massive, has 3 ponds in the middle that were stocked with catfish, large mouth, and striped bass. Imagine the size of them now! The track is all over-grown but a few laps in the hundy and I had made a nice little course that kept me smilling... In the middle where the ponds are it has a bunch of dips and climbs from I guess them letting people dump land material there way back in the day....Last but not least, please comment, enjoy, and stay tuned as gears and sliders are next on the list! :cheers: :beer:

IMG_20130220_173001.jpg

IMG_20130220_173018.jpg

IMG_20130220_173032.jpg

IMG_20130220_173001.jpg


IMG_20130220_173018.jpg


IMG_20130220_173032.jpg
 
Last edited:
sweet build! I always enjoy seeing the Lexus half getting it done off the pavement.
 
R&P x ARB'd

......and were back!

Since last time I left off I had done a few modifications, all done by myself until recently. Long story short one of my best friends got his 4Runner stuck on the river bed around were we do some trail riding locally. I go to help him and only get stuck worse then him. A friends Massey Ferg tractor pulls him out easily but I was a different story and at around midnight I had to lock the doors and abandon until the morning. No tow truck or other vehicle was available, or friend for that matter as my buddy had a long awaited interview that day and the rest were working. A shovel, a HiLift, small trailer of pavestones and bricks, and 5 hours later I had 4 small roads paved under and behind each wheel. Once I lowered it down and made sure bricks were under all tires I hopped in with crossed fingers and toes praying I would get out. The frustration and exhaustion had really got to me over the past 12 hours and I was ready to be out and back home so I romped on the throttle, and popped right out, literally, blew my front diff into pieces. I was able to limp the few hundred yards to the closest county dirt rd and called a tow truck.

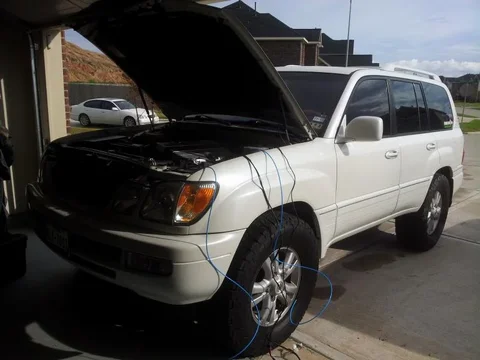
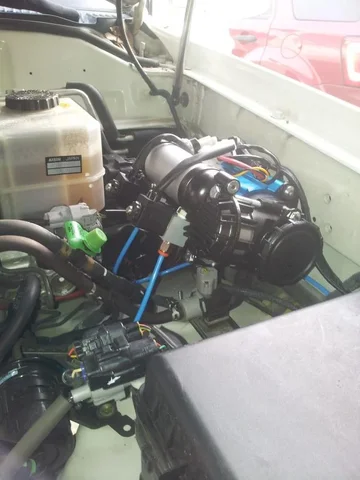
Luckily I had been in Moab for work during the Jeep Jamboree and went to the vendors show and met "Opie" from JustDiffs/Nitro gears, we chatted, he gave me his card and said call when your ready and I will get you set up! Well fortunately I had his card still, and gave him a call. A lot of money later, and only lint in my pockets, I had 4.88 r&p's for the front/rear, ARB air lockers for the front/rear and a free CKMA12 ARB compressor! Originally the plan was do it all myself with the help of my buddy a retired Lexus Technician, until we got the procedures from Lexus. I just did not have the tools, knowledge, or balls to pull this install off.

So once again it was off to Eric @ Lonestar Gear and Axle. We came to an agreement for less $$$$ that he would do the install, but leave the electrical, compressor mounting, and switches up to me which I was fine with. So two weeks later it was ready to go (had a jeep in front of me that he was having trouble with...damn jeeps).

For those who run ~35s, 4.88s is probably the best thing that happened to me. I cruise the hwy now at around 2500-2700 RPMS in the 70 mph range which is fine. Hardly ever does it down-shift in a small climb or passing cars. I did not really want to get onto the throttle too much as I figured there was a break in period of more or less an oil change (3k miles) and that goes for actuating the lockers as well. Anyone have any insight on this?

Few questions...Did anyone plumb their compressor manifold to allow them to hook up an air hose? Id really like to do this and maybe run a tank, but the 1/8th" threads/fittings are hard to come by unless ordered. I can use a fitting to get it up to a 1/4" but then I feel like its adding too much s*** to those manifold ports. Well here are the pictures I have on me as of right now, once I get back home I will throw some more on of how I ran my air lines and so on....hope you enjoy! Stay tuned more to come...including the sliders!

Let the fun begin!

IMG_20130825_172954.jpg

IMG_20130825_183549.jpg

IMG_20130822_113140.jpg

IMG_20130825_172954.jpg


IMG_20130825_183549.jpg


IMG_20130822_113140.jpg
 

Users who are viewing this thread

Back
Top Bottom