Mike's Overhead Console Build (1 Viewer)

This site may earn a commission from merchant affiliate
links, including eBay, Amazon, Skimlinks, and others.

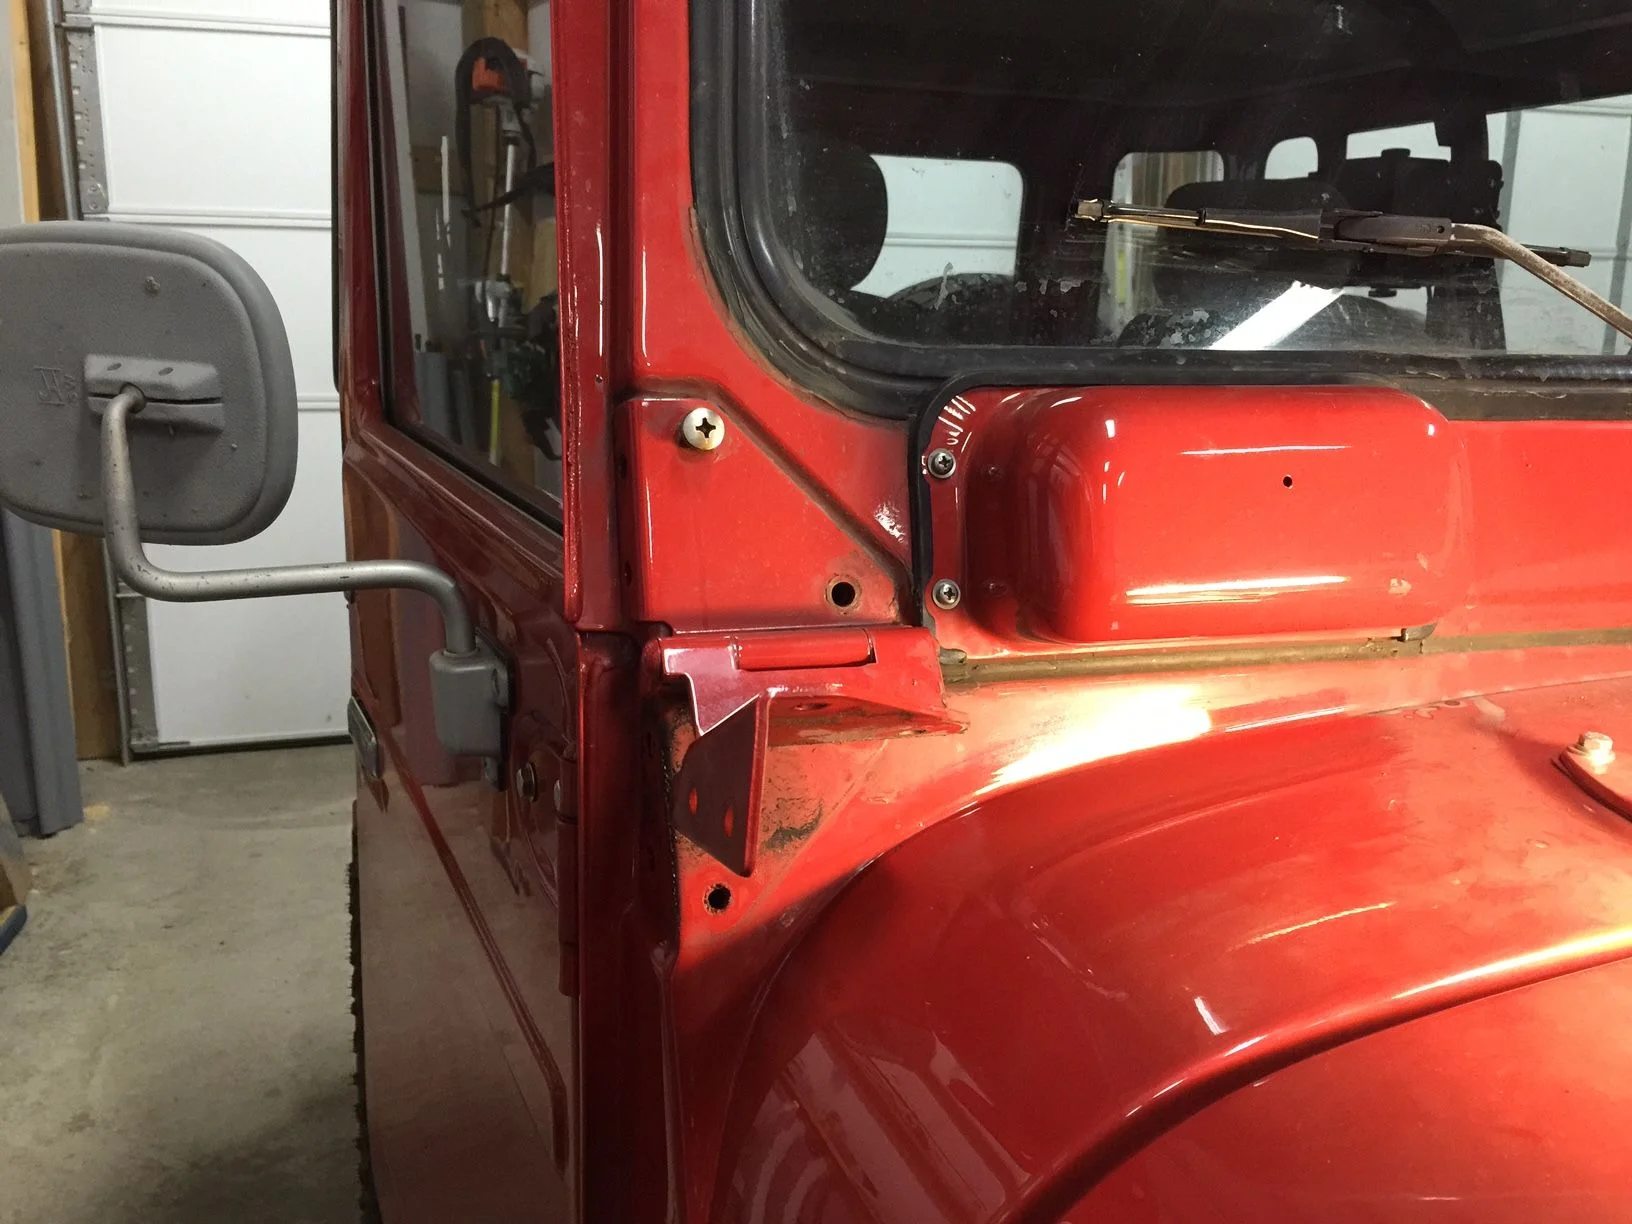
I'm using an existing hole which is located down the left windshield column along an existing power run that feeds the interior light on the driver's side just above the rear door jam. The hole is on top of the column but it's only maybe 1/8 inch dia. a bit too small for all the wires I need to route down to the fuse block, so I may have to elongate the hole, another option is to divide the wires to left and right, the right windshield column has a hole as well, I'm on the fence as to which way to go, do you have any ideas?
With as many electrical devices as you have installed, granted they are mainly low voltage, I wonder if you could set an auxiliary/secondary fuse panel up there? That way you only have to run one or two larger gauge wires down?

Maybe install something like this: http://www.amazon.com/Generic-Black...h+Panel+With+LED+Indicators+Rocker+Auto+Fuses

61C8p8Io7DL._SL1005_.jpg

If I remember correctly, some of the 80's conversion vans had a fuse panel similar this in the overhead compartment? :meh:

FWIW - I'm an Architect, not an electrical engineer....and I didn't stay at a Holiday Inn Express either. ;)
 
The wad of wires from the console will be fished through the existing hole located on top of the left windshield column
28235-1414529248-7ea297cd282b6799c43060e08d5ee3fa.jpg


If I cannot fit all the wires then will divide and use the existing right side hole

28234-1414529227-873b7637396747e5c75fbe69e9242eeb.jpg


This was a temporary connection for the CB and will be revised and incorporated into the new wiring harness

28236-1414529288-c82ef5ca8b4cc75a831eefc5432a9ce7.jpg
 
The wad of wires from the console will be fished through the existing hole located on top of the left windshield column


If I cannot fit all the wires then will divide and use the existing right side hole


This was a temporary connection for the CB and will be revised and incorporated into the new wiring harness
If the inside of my rig looked as good as yours, I wouldn't wallow out the exiting holes just to make room for some wires. I'd find another way to make it happen. I guess using each side, you shouldn't have a problem with your set up......LOOKS GREAT!
 
If you could calculate the amps needed, I'd probably splice all the wires together on a block, and only bring down maybe an 8ga wire with an inline fuse for the power to those devices? That way only one wire is needed vertically.
 
With as many electrical devices as you have installed, granted they are mainly low voltage, I wonder if you could set an auxiliary/secondary fuse panel up there? That way you only have to run one or two larger gauge wires down?

Maybe install something like this: http://www.amazon.com/Generic-Black-Switch-Indicators-Rocker/dp/B00DR8S1NK/ref=sr_1_2?s=hi&ie=UTF8&qid=1414528703&sr=1-2&keywords=Switch Panel With LED Indicators Rocker Auto Fuses

61C8p8Io7DL._SL1005_.jpg

If I remember correctly, some of the 80's conversion vans had a fuse panel similar this in the overhead compartment? :meh:

FWIW - I'm an Architect, not an electrical engineer....and I didn't stay at a Holiday Inn Express either. ;)

Nice panel! I wanted to do something like your panel above, unfortunately there isn't enough room on the console fascia to accommodate a five inch panel, so will accomplish basically the same with a harness. I will need three power sources; first switched for lights, second un-switched for clock and third on dimmer circuit for gauge lighting. Fortunately grounding is not an issue. Unfortunately I'm not an electrical engineer either.
 
Nice panel! I wanted to do something like your panel above, unfortunately there isn't enough room on the console fascia to accommodate a five inch panel, so will accomplish basically the same with a harness. I will need three power sources; first switched for lights, second un-switched for clock and third on dimmer circuit for gauge lighting. Fortunately grounding is not an issue. Unfortunately I'm not an electrical engineer either.
Ah-ha.......the requested power:
1 - Constant 12V
2 - Switched 12V
3 - Switched 12V on the Dimmer circuit

NICE! No engineering needed, you got it under control.
 
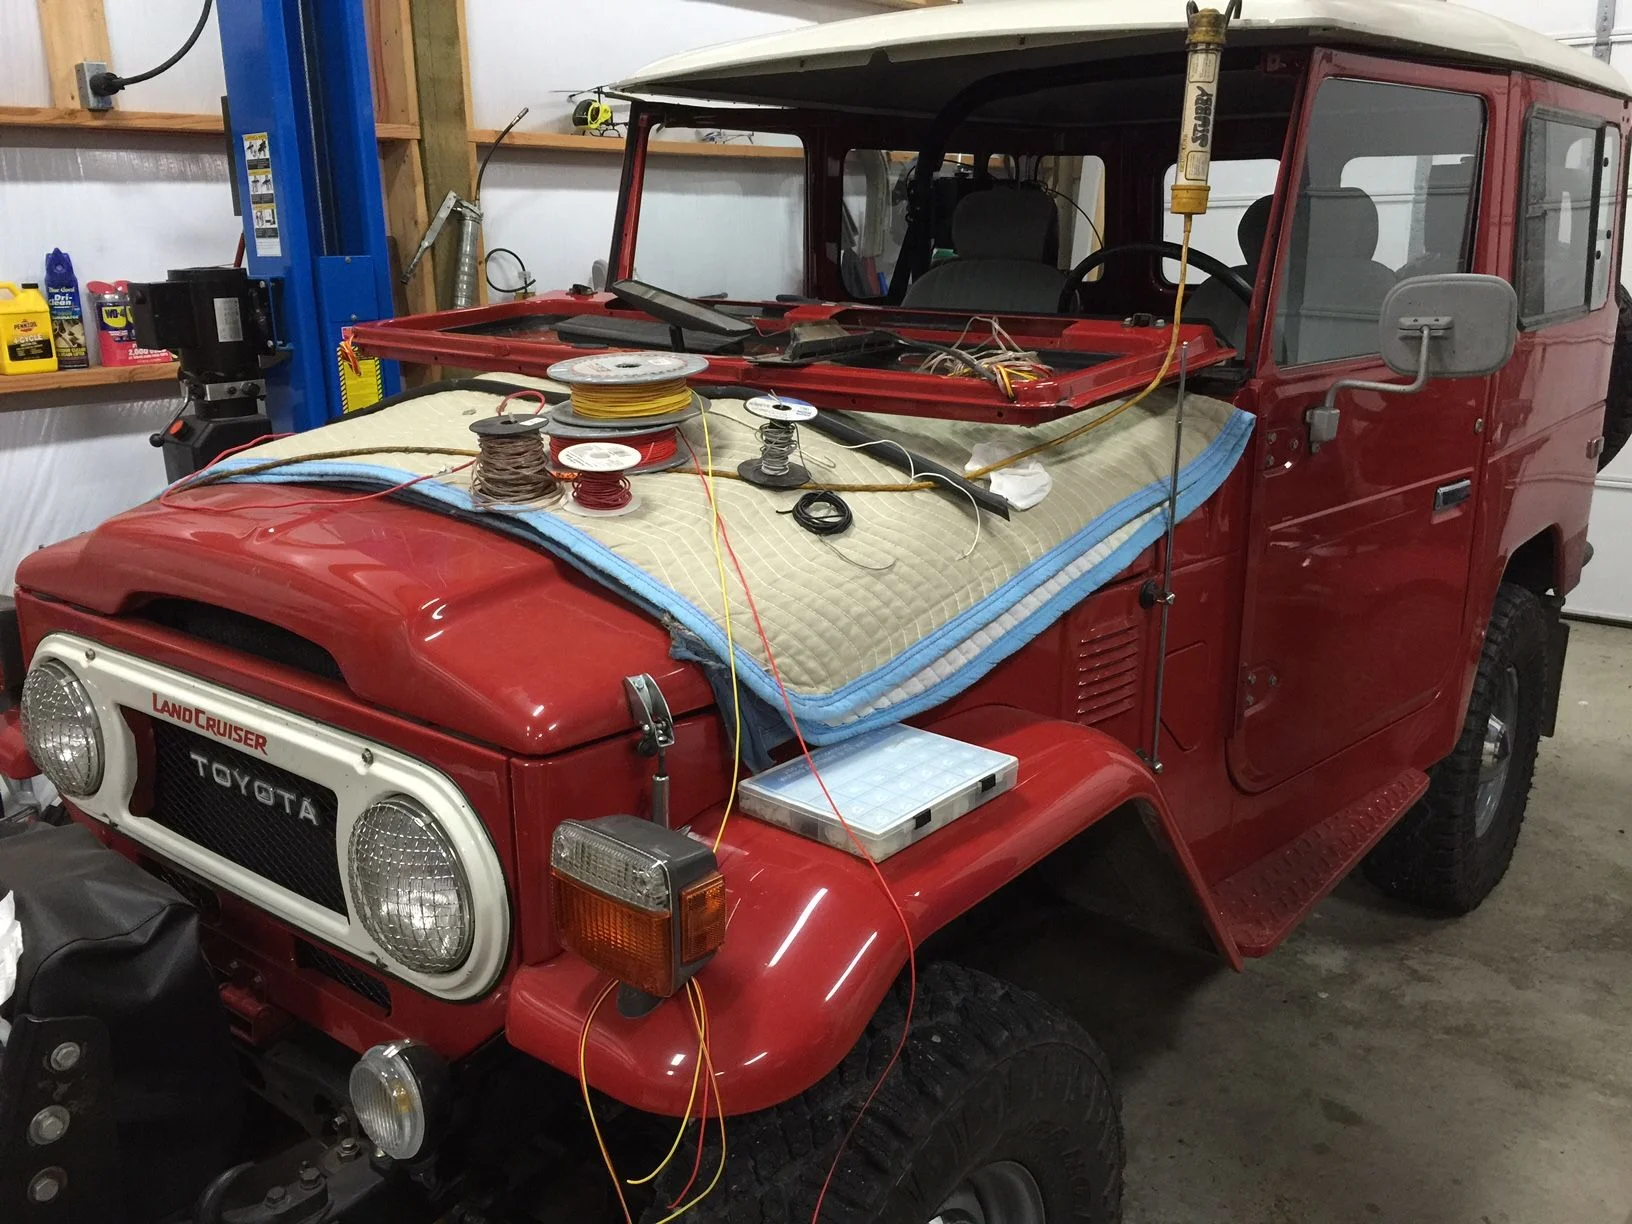
This weekend I resurrected the overhead console project by disconnecting the fiberglass roof from the metal sides and also removed the windshield and prepped for routing the power wires and to also replace all the weather stripping. Upon a closer look at the roof weather stripping it appears to be brand new so it will remain as is, however, I also noticed there are several rubber weather sealing pieces missing, items #70 and #71 as shown bellow.

108b.gif


Also missing is item #40 bellow

hardTopPacking.jpg


I will also be replacing the upper and lower windshield weatherstrip seals item #1 bellow

108D.gif


While in the process I'll be adding a hood rest pad as shown here
63118-90300i-big.jpg
63118-90300i3-big.jpg
 
I removed the hinges specifically to have better access to the windshield pillar holes which will facilitate wire routing

full


full


Rubber weather seal missing in upper corner
full


Disassembly
full


On the drivers, left side, I routed 4 power wires and 2 speaker wires
full
 
On the passenger, right side, I routed 2 additional spare wires in the future I may decide to install additional instruments so the spares will be in place. I also added it a wire grommet to protect wiring from sharp metal hole and prevent chafing due to movement.
full


Rubber grommet installed on driver's side
full
 
The purpose for all the different wire runs is to facilitate the following power requirements:

1. Constant 12V - for clock
2. Switched 12V - for CB
3. Switched 12V on the Dimmer circuit - for instrument lighting
4. Switched 12V - for OEM fog lights

I've decide to also install speakers for the on-board stereo system, and a third speaker will be installed as an external for the CB. The CB internal speaker is too weak for me to hear during normal driv

full
 
This where all the wires will be connected. I'm thinking of adding a secondary power fuse box, but TBD later.

full


full


full


full


Here's the console as of today, still need to install speakers, clinometer, altimeter and a few other instruments such as compas, GPS or an iPhone mount, etc.
full
 
Nice. I love the air-cooled Porsches. My buddy has a wide-body, non-turbo with just under 30K miles. They have gone up sharply in price in the last 5 years.

Definitely an investment and much better than banking your money. I've always had a P car in my personal fleet and always will, I love to drive em, understand them and work on em, so no regrets ever. I've had the water cooled ones and there's no comparison to air cooled performance and growl during acceleration, maneuverability, etc. The prices will continue to spike because of demand and excellent engineering of the air cooled platform. If you are a fan as I've detected,you aught to look for one before the prices go sky high.
 
Definitely an investment and much better than banking your money. I've always had a P car in my personal fleet and always will, I love to drive em, understand them and work on em, so no regrets ever. I've had the water cooled ones and there's no comparison to air cooled performance and growl during acceleration, maneuverability, etc. The prices will continue to spike because of demand and excellent engineering of the air cooled platform. If you are a fan as I've detected,you aught to look for one before the prices go sky high.
Probably already outside the range of my discretionary funds. I've seen them between $80K-$100K. I'd trade my 40 for a nice turbo cab though.
 
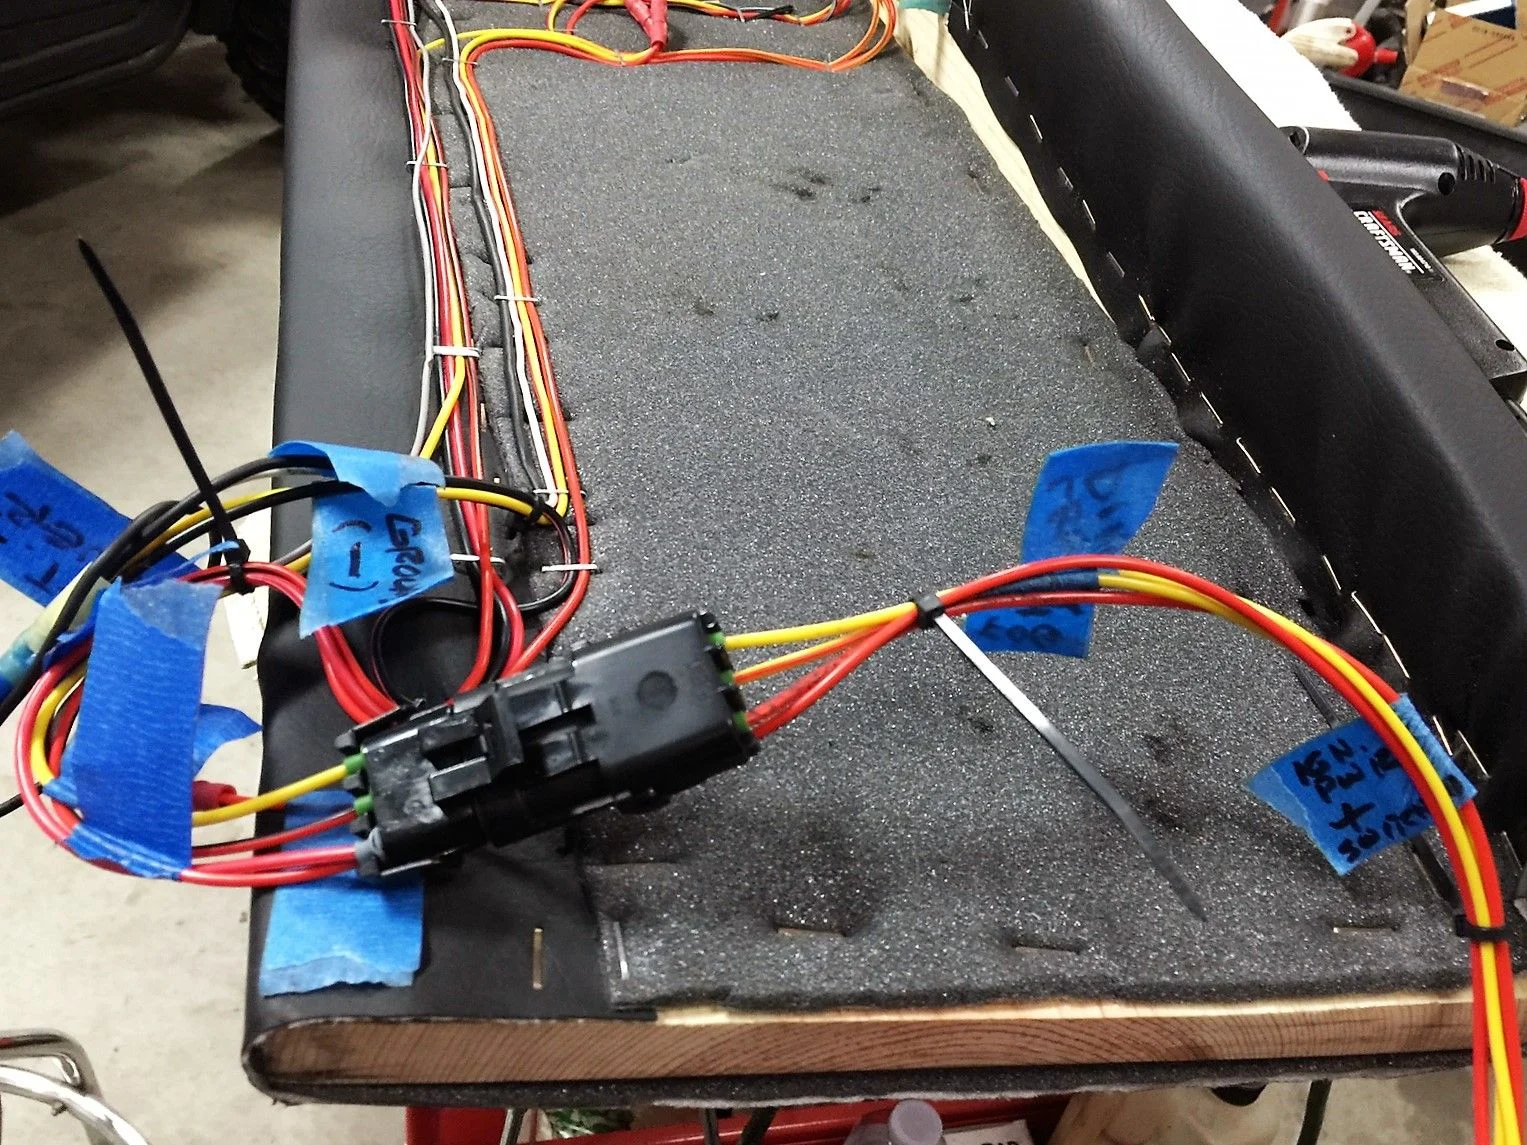
Made the wiring connections between the console and vehicle
full


Used this handy wire connections kit
full
 
Received the upper and lower windshield weather stripping seals and a few other misc seals
full


Cleaning the windshield of PO used silicone remnants prior to installing the new seals

Before
full


After
full
 

Users who are viewing this thread

Back
Top Bottom