This thread covers my light restoration to my 84' FJ60. I started with the Engine, will be moving to the Suspension, and lastly the Body.
I purchased my 1984 FJ60 Land Cruiser in Aug of 09' from a family member. the Truck has very low miles on it considering the usage of many of the Cruisers on here, i picked up the truck with 110,000 miles total. The rig was used as a ski mobile, when i purchased it, it came complete with a side mounted ski rack - my friends affectionately named the " missile launcher tubes" on the side
it was generally used as a ski hauler, taking skiers to and from the ski mountain in the Aspen - Snowmass area of Colorado. it was rarely driven for more than 5 miles at a time, and occasionally made trips into town and to Denver if needed. It spent the first half of its life garaged, but sadly space had to be made and later it sat outside in the Colorado winters and summers, luckly the rust damage is light, consisting of your typical stuff like the quarter panels and tail gate. Surprisingly, the roof rails are perfect.
Ridin' low with the spare set of wheels in the back.
As you can see, the 26 year old Original suspension is a bit tired. she sags in the butt. - That'll change with the suspension refresher
OK -
STEP 1- THE ENGINE
MICKEY - I HATE YOU. --------------- "The Mouse problem"
Because the truck had been sitting outside for so many years, it developed a nasty little problem from the local wildlife- Deer mice. they made nests in the hood liner, on top of the manifold, near the valve cover, in the air cleaner, and under the seats of the truck.
pics of the mess:
when i pulled the hood liner down, this is what i found:
under the back seat:
stashes of seeds and nuts were found all throughout the truck:
SO, we had to pull out the heavy artillery and do some mousing
I ended up catching about 4 mice that had made the trip home with me, from Aspen to Colorado Springs, and went about cleaning up the nests and seeds from the truck- quite a nasty job, but i got it done.
Once the mouse problem and cleanup was solved, it was time to get down to the real work 
The engine had a myriad of problems with it when i took delivery of the truck, multiple vacuum leaks, faulty and non functioning smog equipment, poorly adjusted carb, faulty fan clutch, overheating issues.. the list goes on. so i set about knocking them out one by one.
I did a bit of searching around and found that the fan clutch was toast.. so i replaced the fan clutch, replaced the radiator, and the upper and lower coolant hoses. that seemed to settle the cooling issue for now.. so it was time to sort out the hesitation, stumbling and stalling issues with the engine.
thus, it was time for: THE REBUILD
considering the smog equipment on the truck was not functioning properly, i decided to go with a desmog of the smog components, and a general clean up and refresher of the engine.
I was inspired by Elliot B's desmog and rebuild and used his thread as a reference many times during the engine work. Elliot helped with the initial tear down of the engine, I went about doing the rest myself. Thanks for the help E !
pics:
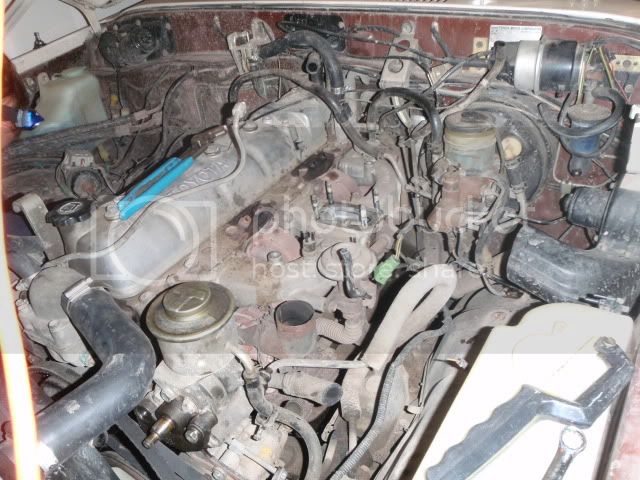
Here she was, quite dirty as you can see:
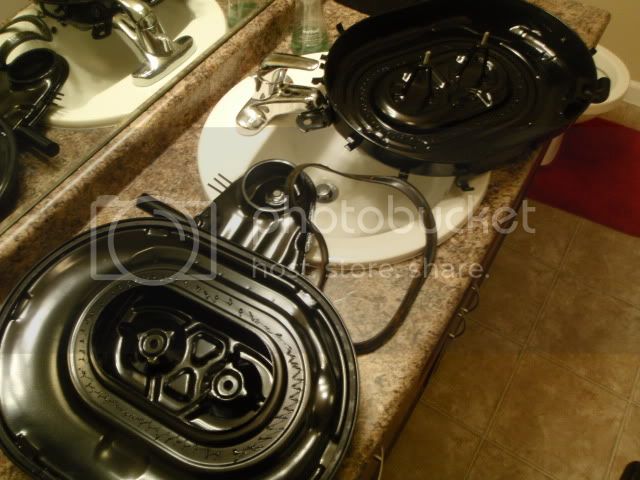
Pulled the Air cleaner and Carb, air rail, and smog assemblies:
I purchased my 1984 FJ60 Land Cruiser in Aug of 09' from a family member. the Truck has very low miles on it considering the usage of many of the Cruisers on here, i picked up the truck with 110,000 miles total. The rig was used as a ski mobile, when i purchased it, it came complete with a side mounted ski rack - my friends affectionately named the " missile launcher tubes" on the side

it was generally used as a ski hauler, taking skiers to and from the ski mountain in the Aspen - Snowmass area of Colorado. it was rarely driven for more than 5 miles at a time, and occasionally made trips into town and to Denver if needed. It spent the first half of its life garaged, but sadly space had to be made and later it sat outside in the Colorado winters and summers, luckly the rust damage is light, consisting of your typical stuff like the quarter panels and tail gate. Surprisingly, the roof rails are perfect.

Ridin' low with the spare set of wheels in the back.
As you can see, the 26 year old Original suspension is a bit tired. she sags in the butt. - That'll change with the suspension refresher
OK -
STEP 1- THE ENGINE
MICKEY - I HATE YOU. --------------- "The Mouse problem"
Because the truck had been sitting outside for so many years, it developed a nasty little problem from the local wildlife- Deer mice. they made nests in the hood liner, on top of the manifold, near the valve cover, in the air cleaner, and under the seats of the truck.
pics of the mess:

when i pulled the hood liner down, this is what i found:

under the back seat:

stashes of seeds and nuts were found all throughout the truck:

SO, we had to pull out the heavy artillery and do some mousing

I ended up catching about 4 mice that had made the trip home with me, from Aspen to Colorado Springs, and went about cleaning up the nests and seeds from the truck- quite a nasty job, but i got it done.


Once the mouse problem and cleanup was solved, it was time to get down to the real work
The engine had a myriad of problems with it when i took delivery of the truck, multiple vacuum leaks, faulty and non functioning smog equipment, poorly adjusted carb, faulty fan clutch, overheating issues.. the list goes on. so i set about knocking them out one by one.
I did a bit of searching around and found that the fan clutch was toast.. so i replaced the fan clutch, replaced the radiator, and the upper and lower coolant hoses. that seemed to settle the cooling issue for now.. so it was time to sort out the hesitation, stumbling and stalling issues with the engine.
thus, it was time for: THE REBUILD
considering the smog equipment on the truck was not functioning properly, i decided to go with a desmog of the smog components, and a general clean up and refresher of the engine.
I was inspired by Elliot B's desmog and rebuild and used his thread as a reference many times during the engine work. Elliot helped with the initial tear down of the engine, I went about doing the rest myself. Thanks for the help E !
pics:
Here she was, quite dirty as you can see:


Pulled the Air cleaner and Carb, air rail, and smog assemblies:
Last edited: