

Rear Sill Conundrum

This site may earn a commission from merchant affiliate
links, including eBay, Amazon, Skimlinks, and others.

Joined
Mar 17, 2015
Threads
45
Messages
605
Location
SW Colorado
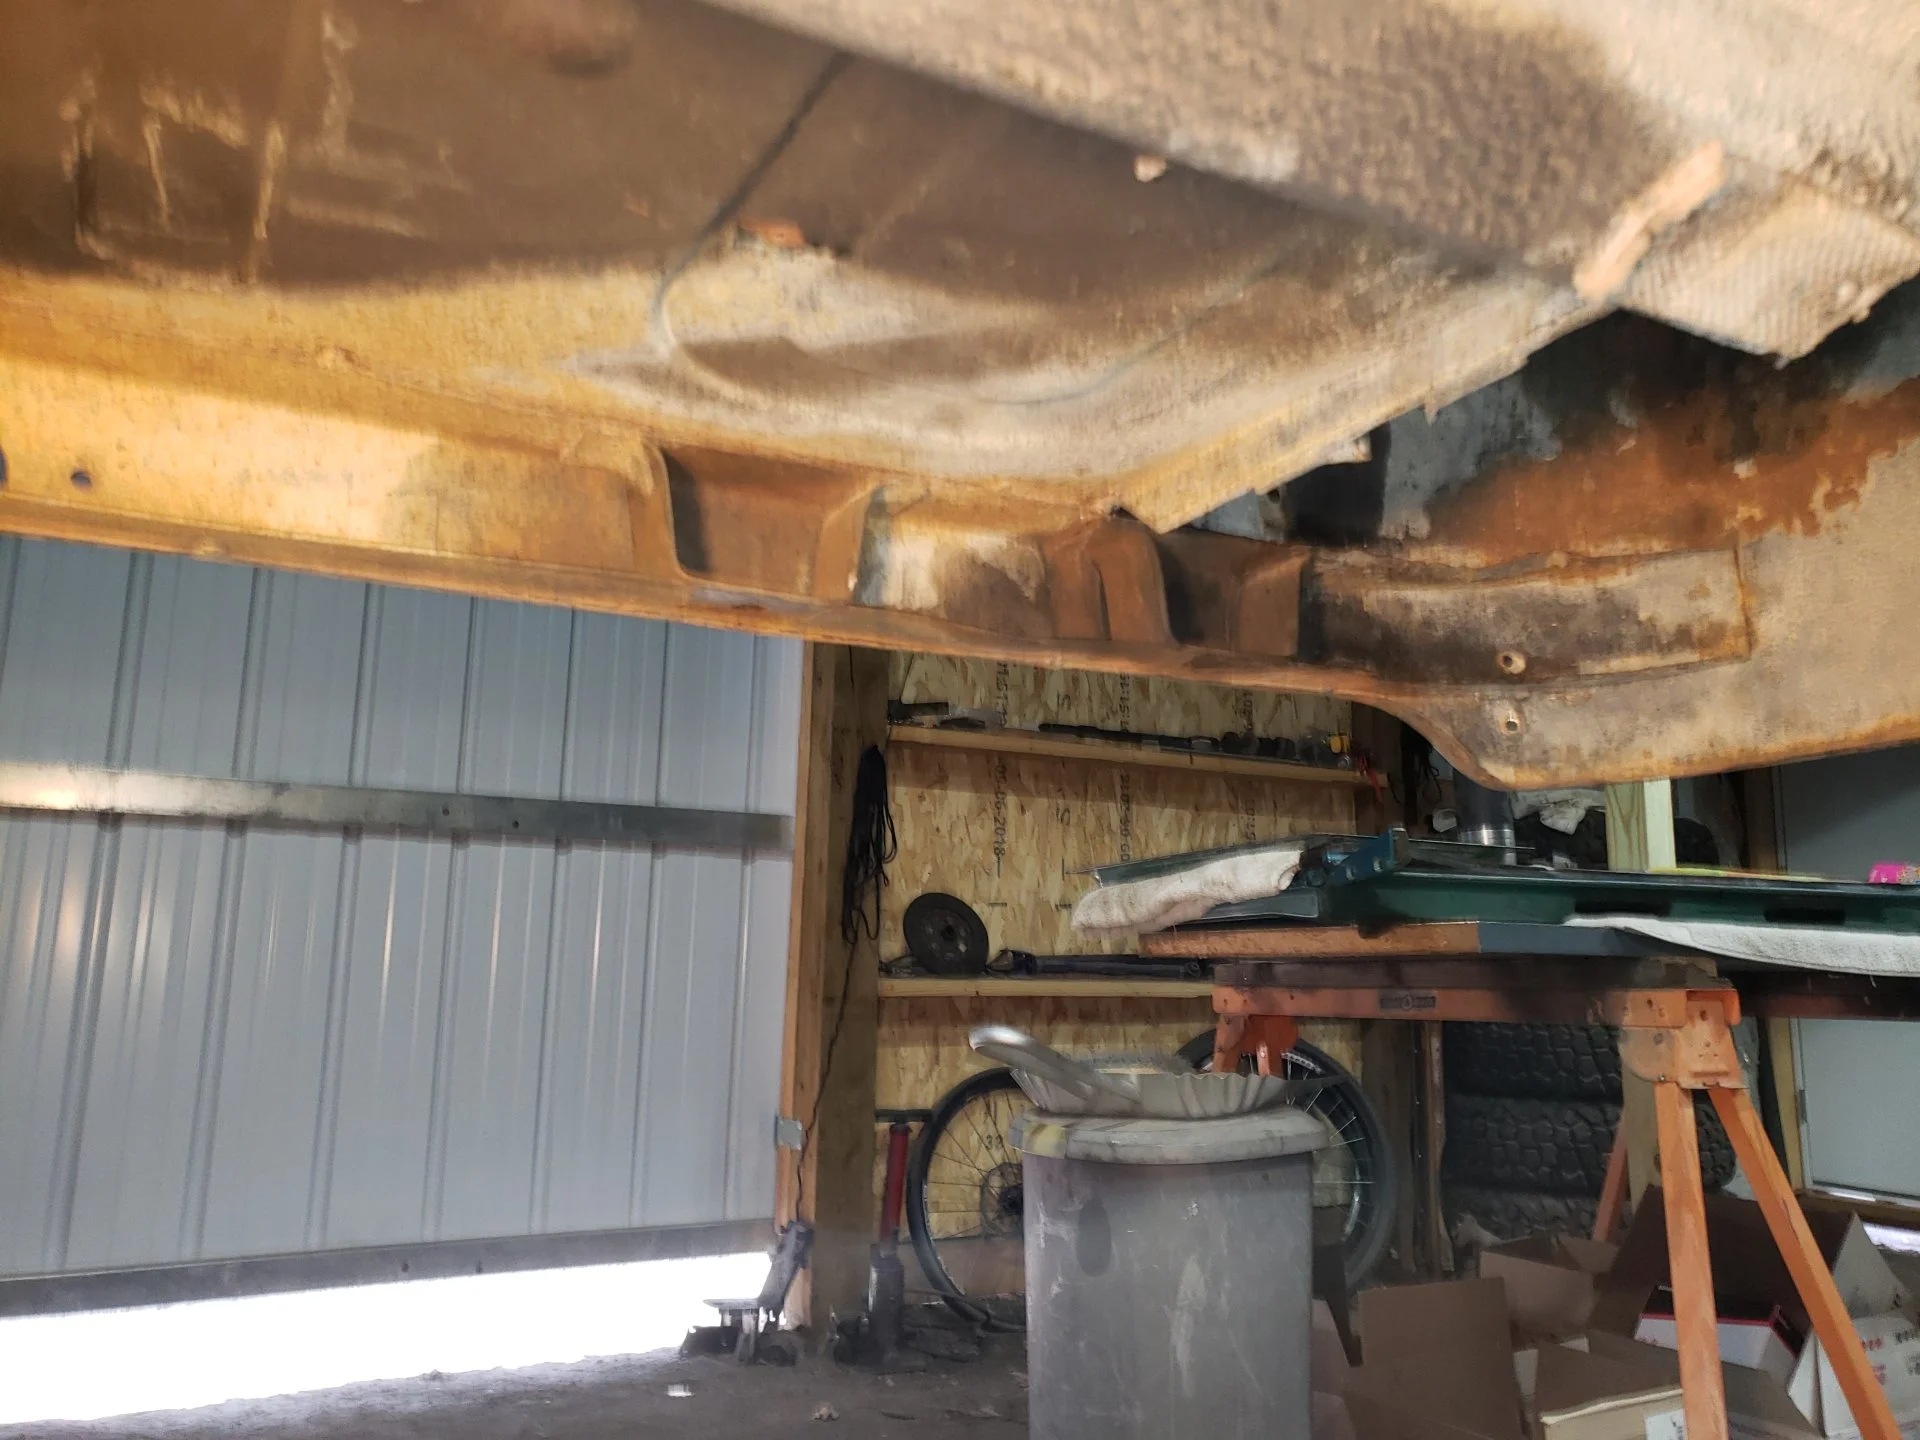
Getting into the tub of my first frame-off. Good news is I am lucky the tub is in good shape and the only area of concern is the rear sill.The bad news is, even though the sill area is very solid, there is rust.

Can the sill support be removed without destroying the body panels? I'd like to just remove it to inspect the extent of damage without having to cut out the lower corners or sill cover. Or is it futile and I'll just have to replace it all?
20220422_083757.jpg


20220422_083747.jpg


20220422_090411.jpg
 
I’ve seen people surgically remove the rear sill and only have to patch the quarters right where the sill was. You’ll probably have to replace the sill cover anyway.
If you can start the cut with a cutoff wheel and then lay a sawzall blade on the sill, you should get nice straight cuts that make for an easy repair.
 
Realistically, if you can see any rust on the outside of the body where the rear sill is located, it is probably rusted all the way through. Zooming in on your last picture, it's tough to tell if those inclusions are actually rust. But it's definitely in a gray area.

I would get out some cheap black rattle can paint and dust the outer panels with a guide coat, and then sand it with a sanding block or DA, to identify where the spot welds are, and drill them out... see if you can get the rear sill out that way. That vertical weld bead on the left of our last picture might be tricky if it penetrated through to the sill support though.

Having replaced my rear sill and the quarter panels, I would say that honestly it's not much more work to just replace the sill cover and do the corner patches while you're at it. If you have signs of rust already, I think you're highly likely to uncover some pretty deeply pitted sheet metal after spending all the time to surgically remove the sill.
 
I’ve seen people surgically remove the rear sill and only have to patch the quarters right where the sill was. You’ll probably have to replace the sill cover anyway.
If you can start the cut with a cutoff wheel and then lay a sawzall blade on the sill, you should get nice straight cuts that make for an easy repair.
I guess the point of my question is to remove the sill to inspect the extent of the damage. I don't see spot welds on the corners, just on the sill cover. I would like to get sill out and see how much of the body panels are rusted through. If it is just a few areas, patch repair.
Are you just going to replace the outer sill cover?
I'm not sure yet. Still exploring the damage and hoping to do repair patches.
 
For what it's worth I believe this is going about this ass backwards. I would certainly not remove a structural body component to inspect a cosmetic sheet metal part. It sure looks like your cover is toast already...I would remove the obviously damaged cover and inspect the sill, especially since it appears to be fine.
 
For what it's worth I believe this is going about this ass backwards. I would certainly not remove a structural body component to inspect a cosmetic sheet metal part. It sure looks like your cover is toast already...I would remove the obviously damaged cover and inspect the sill, especially since it appears to be fine.
Good points. The more I look and explore, the more clear it becomes that I am going to have to replace the sill cover. While I agree the sill is the stronger component, it appears to be just a doubler and is just hanging from the cosmetic sheet metal.
 
Good points. The more I look and explore, the more clear it becomes that I am going to have to replace the sill cover. While I agree the sill is the stronger component, it appears to be just a doubler and is just hanging from the cosmetic sheet metal.
I'm not certain as your rig appears to be earlier than mine but on my 79 the rear sill is also the support for the rear edge of the bed floor and is spot welded there as well. Best I can tell from your pics I believe you may find the same on yours.
 
For what it's worth I believe this is going about this ass backwards. I would certainly not remove a structural body component to inspect a cosmetic sheet metal part. It sure looks like your cover is toast already...I would remove the obviously damaged cover and inspect the sill, especially since it appears to be fine.

Spot on...^^^ For the record, I'll be kicken' this can down the road too.
 
I'm not certain as your rig appears to be earlier than mine but on my 79 the rear sill is also the support for the rear edge of the bed floor and is spot welded there as well. Best I can tell from your pics I believe you may find the same on yours.
Yes, it is a 74 and has about 10 across the top and 5 on the rear face. I did find a couple on the rear corners. Also, don't mistake my observation. I know the sill supports the rear of the tub as it rests on the frame, but is only attached by those spot welds and and several tack welds on the back sides.
 
I think "Real Steel" has a decent product. "CCOT" I believe manufactures the cover as well.
 
For what it's worth I believe this is going about this ass backwards. I would certainly not remove a structural body component to inspect a cosmetic sheet metal part. It sure looks like your cover is toast already...I would remove the obviously damaged cover and inspect the sill, especially since it appears to be fine.

Once you remove the cover you will see the floor is folded over and goes half way down the back side. Moisture enters where floor and top meet on the top front edge of the sill. That is only stitched welded allowing moisture to enter. Seen many sills including three of my cruisers rust where the floor ends and the drain channels plug holding dirt and moisture in. I would bend the floor up so can inspect top inside of the sill. Most cases rust is worse between the sill and floor verses cover and floor.
 
Once you remove the cover you will see the floor is folded over and goes half way down the back side. Moisture enters where floor and top meet on the top front edge of the sill. That is only stitched welded allowing moisture to enter. Seen many sills including three of my cruisers rust where the floor ends and the drain channels plug holding dirt and moisture in. I would bend the floor up so can inspect top inside of the sill. Most cases rust is worse between the sill and floor verses cover and floor.
TKS. Another reason to get the sill out. Then I can address the rust and properly preserve the metal.
 
Once you remove the cover you will see the floor is folded over and goes half way down the back side. Moisture enters where floor and top meet on the top front edge of the sill. That is only stitched welded allowing moisture to enter. Seen many sills including three of my cruisers rust where the floor ends and the drain channels plug holding dirt and moisture in. I would bend the floor up so can inspect top inside of the sill. Most cases rust is worse between the sill and floor verses cover and floor.
Those spot welds on the top of the sill cover, they bond all three parts then?
 
Those spot welds on the top of the sill cover, they bond all three parts then?
Well, looking at the piece removed on the JNH Classics video, it appears his was just the sill cover to the floor with spot welds. The sill to everything else are the tack welds underneath.
 
Those spot welds on the top of the sill cover, they bond all three parts then?


I have never torn one down. While some with rusted rear sills have more that are still intact. Can tell by those the rear sill is actually off on the back so when the floor folds over on goes half way down the surface is flush for the rear cover. If I were to tackle a rear sill would grind the welds on the sides of the cover drill any exposed spot welds and remove the cover. I would have to inspect the back side of the rear sill to see if I could find any signs of spot welds where the floor is.

Didn't watch the video but sounds right me.
 
I have only had a little bit of time to work on this lately but, here's what I've learned. The spot welds on the sill cover do not engage the sill, only the bed sheetmetal. The sill has a couple of spot welds on each corner radius quarter panel. then there are the visible tack welds seen from under the tub. The welds on the top side ends of the sill cover have partially penetrated to the sill. I have about an hour total invested and it is almost out. I'll post photos once it is out. This is on a late 74 tub.
 
Back
Top Bottom