Builds indycole's 2016 200 Series Build and Retrospective (2 Viewers)

This site may earn a commission from merchant affiliate
links, including eBay, Amazon, Skimlinks, and others.

indycole

GOLD Star
Joined
Jan 28, 2016
Threads
29
Messages
1,783
Location
Los Gatos, CA
This forum and the members have been a huge influence in my build process and I figured it was time to give back. This is less of a how-to build thread and more of a retrospective. I’ve lived with most of these modifications for a while and try to focus on lessons learned through iteration, trial, and error.

First, a little background.

Why a Land Cruiser?

Growing up, Ouray, Colorado was our family’s favorite summer vacation destination. We would drive out for two weeks of four-wheeling in the San Juans every couple years from the late eighties until the early 2000s. I remember originally renting jeeps but after a couple trips my father got a Bronco and later a Suburban but he was always envious of the Land Cruiser.

Fast forward fifteen years and my wife and I were in a position to get a new weekend vehicle for camping and adventures. I’d been driving a 2008 GMC Yukon that was starting to require some significant investment despite the fact that it had been perfectly maintained. Our search for the perfect replacement vehicle didn’t take very long but we did consider a number of options: Tundra, Tacoma, LR4, Dodge PowerWagon, used LX, used LC, and a new LC.

We ultimately decided on a new 2016 Land Cruiser after the test drive and my super-scientific method of concluding that it was a “solid vehicle” based on the sound of opening-and-shutting the door. We placed our order in October of 2015, sold the Yukon, and eagerly awaited our December delivery.

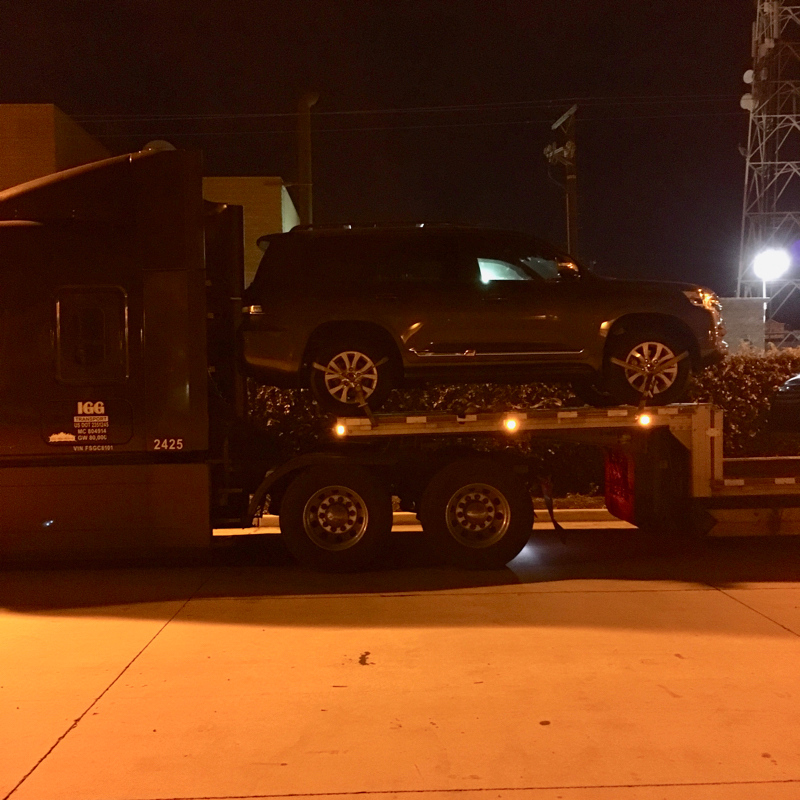
Unfortunately, the delivery was delayed and then delayed again due to the factory running out of terra leather (at least that’s what the dealer said). As of early January, the estimate from the dealer was that it would be delivered in April or May. We were down to one vehicle at this point which was pretty annoying. A buddy of mine in North Carolina called his local dealer who happened to have stock on the exact vehicle we wanted. So, we canceled our order with the local dealer, bought the car from the North Carolina dealer, and ended up getting $8k off the price we would have paid in California and split the shipping cost.


We named the truck Pennypacker because my wife and several of our friends have a strange obsession with Seinfeld. H.E. Pennypacker was one of Kramer’s alter-ego’s in the show, so it’s basically a joke.

The truck was delivered in February of 2016 and we’ve been enjoying it ever since.

This is more of a build retrospective than an active build thread. I’ve spent about eight months with the truck and have learned many lessons through iteration, and trial and error.

Build Goals

Both of us grew up in rural, farm country in Indiana and have never gotten used to the amount of people in the SF Bay Area. We’re also busy folks (who’s not these days) and wanted the truck to be ready for spontaneous trips to the Santa Cruz Mountains, Big Sur, the Lost Coast, the Sierras, Death Valley, and longer off-road vacations throughout the west. Maybe we’ll eventually go on an extended trip to Baja, Alaska, or further afield.

My perspective on the build is to simply make self-sufficient camping as simple and easy as possible over time. As you all know, that’s a tricky balance given the weight of the truck, fuel economy and capacity of the stock gas tank, and built-in storage space.

I’m writing this thread in hindsight and focus on lessons learned along with answers to questions I had along the way to help the next guy/gal.
 
Last edited:
Tires and Suspension

The first upgrade was an OME lift, new wheels, and tires. I went with an OME lift (2722 rear, 2702 front, and new UCAs) primarily due to the simplicity and the cost. In hindsight, I would have given more thought to the BP-51s for more flexibility. I'm already considering new springs as I add weight to the vehicle. The current ride is great off-road, but a little stiff when driving around town. Still, it's a very economical setup (even more so if I decide to sell my stock components).

The tires are KO2 A/T 285/65/r18 on Procomp 7032 wheels. The tires measure about 32.5" in diameter.No complaints so far -- the size is a happy medium between the stock tires and a 33/34" tire. The width is also nice and I've been able to get plenty of traction on all types of terrain especially when aired-down. The wheels are black, no-fuss, and relatively cheap. I like the way they look, but if I had it to do over again I would have seriously considered just plasti-dipping or powder coating the stock wheels. I was able to sell them on Craigslist, but I was actually under the impression that I had to get new wheels to fit the tires based on feedback from the folks at 4WheelParts. Oops. It's on me as I hadn't done my research yet.


The irony is that I actually had to do a ton of trimming because the Procomp wheels have some significant offset. The mud flaps had to come off, large swaths of the wheel well were cut, and even a smidgeon of the bumper. I don't mind the trimming, but I'm pretty sure at this point I'd be able to fit a larger tire.

Lessons Learned:
  • I wish I had the space to do the suspension work myself as it's one of the only parts of the truck I haven't worked on and I don't like not having the knowledge.
  • The stock wheels were likely higher quality than my aftermarket wheels -- I could have kept them and pocked the wheel money.
  • If I'd known just how many modifications I'd end up talking myself into, I would have gone with the BP-51s (or some other adjustable system) right off the bat.
  • The tire width is great but I wouldn't mind a bit more height especially once I'm aired-down. 10 PSI in the sand really decreases the clearance.

Sources: Slee (Suspension), 4 Wheel Parts (Wheels and Tires)
 
Last edited:
Onboard Air

The second modification I made was adding the ARB CKMA12 air compressor. I've always been paranoid about tire pressure and repair; I used a cheap 12v air compressor (the plug-in variety) and tire repair kits multiple times on my Yukon and have always wanted something more reliable.

Tire inflation is the primary purpose for the onboard air, though the idea of lockers will always be looming (so far the center diff, crawl control, and recovery tracks have worked just fine). Originally, I considered the larger, twin compressor model in order to use air tools, but the practical feedback was that it's still not enough air to reliably use air tools.

I went with the Slee air compressor bracket and mounted the compressor behind the fuse box. While the power was initially hooked up to my primary battery, I eventually moved power to the spare battery circuit simply because I wanted flexibility to use air while the truck is off (yeah, I know it would drain the deep cycle in short order, but that's something I'll remember to pay attention to.


The install was super-simple. I used the air-on-board switch instead of the ARB switch. It took a bit of trial-and-error to find the correct dash +/- to tap into. I built a harness to accommodate future switches and tapped into the green and white wires from one of the other switches for dash illumination. I ran 12v/gnd into the cab from the auxiliary circuit to use for switching the relays. Don't forget diodes on the 12v line to prevent reverse current if you go this route.

Lessons
  • The Slee bracket makes this a super easy install. Overall, it's a cost-effective and often-used modification. I'll even put in a bit of extra air on long road trips for an extra 1-2 mpg.
  • Running wiring through the firewall grommet always takes longer than I expect. I also managed to scratch the paint a bit with a coat hanger in the process (truck was 3 weeks old at this point). I read in someone's thread recently that teflon tape helps a guideline slip through the grommet.
  • The open storage compartment in the tailgate is a great place to store a tire repair kit, inflator, Staun deflators, and the ARB orange hose.
  • The only thing I'd do differently is orient the hose attachment on the air compressor such that I can still semi-close the hood.

Sources: Slee (Bracket, Compressor, Switch, Inflator), Amazon (Staun Deflator)
 
Last edited:
Secondary Battery System and Electrical

This was a fun project that required some planning, though nothing was particularly difficult. I wanted a deep cycle battery system to power camping accessories while the truck is off and also for peace of mind to help start the main battery (though I have a micro starter for that purpose).

I decided to go with a battery system based on the Blue Sea ACR. I didn't really care as much about controlling the system from the cab (though I still can if I want) and also thought it was a cost-effective approach. So far I've been very happy with the system.

First things first -- I installed Slee's primary and secondary battery trays. Only 3/4 of the bolts could be used on the primary tray due to some changes to the fender on the 2016. No big deal -- it's not going anywhere. The secondary battery tray install was a breeze. I went with the Odyssey Group 35 deep cycle battery. It seems like a good battery but I wish it had accessory posts.

Let's run through all the items on the secondary battery circuit:
  • Primary Battery via ACR
  • ARB Compressor (though will mostly be operated while the truck is on and the batteries are connected)
  • ARB 50qt Fridge/Freezer
  • HAM Radio
  • CB Radio
  • Battery Monitor
  • Auxiliary 12v Power Outlet in Cargo Area
  • Auxiliary USB Power Outlet in Cargo Area
  • Roof Lights (Light Bar + Camping Lights on Front and Rear)
  • Dashboard Switches

There were also some future items that I wanted to plan for:
  • Charge via Solar
  • Winch (this would connect to the main battery but I still wanted to take it into consideration)
  • Interior Cargo Lighting

Here's what I ended up implementing given the requirements above:
  • 0/1 battery cable from the secondary battery to the ACR through an ANL fuse. This cable follows a short path from the battery to the ACR mounted on top of the cruise control fuse block (I think???). The ACR is screwed into the top of the block and secured with a rubber tension strap.
  • 0/1 battery cable from the ACR to the primary battery through an ANL fuse. This cable is run along the firewall.
  • 0/1 battery cable from the secondary battery (-) to the primary battery along the firewall. I originally had this running along the radiator and decided to move it to the back for safety purposes.
  • There is one 60A circuit breaker and one 80A circuit breaker screwed into the fender sheet metal just behind the air filter assembly. 6 awg battery cable runs from the 60A breaker into the cabin through the passenger side firewall grommet. 6 awg cable runs from the 80A breaker to a Blue Sea fuse block on a relay board I built on mounted on top of the driver side fuse panel behind the battery.
  • I ran the 6 awg cable from the from cabin to the cargo area through the door jam. In the cargo area, the cable goes into a Blue Sea fuse block where I power the battery monitor, refrigerator, cargo auxiiliary outlets, and the radios. The radios are connected directly to the fuse block, but everything else goes to another Blue Sea fuse block installed as part of the ARB drawer fit kit where I installed a Blue Sea panel with 12v outlet and USB outlets. There's also flush-mount anderson power pole connector for the ARB fridge.
  • Knowing I'll likely end up with more gizmos switched from the cabin, I built a relay board that handles six relay circuits. I'm currently using 3 circuits for the air compressor, roof light bar, and roof camping lights. I'm also running 12v/gnd into the cabin for the switches but have considered a fuse block under the dash in the future if needed.
  • There's also a fuse block on the roof for roof rack lighting. It's housed in a project box, uses gland connections on each side, and currently has the lights on two circuits: 1.) the front light bar, and 2.) the side and rear camp lights. I ran 10 (or maybe it was 12) awg for the ground and 3 x 14 (or maybe it was 16) awg wires to the roof. The extra wire is there for auxilliary power to run into the RTT for charging devices.


Lessons
  • I've yet to hook up the battery control switch that comes with the Blue Sea ACR. I haven't needed it yet though I have made use of the manual switch on the ACR while working on the truck.
  • Maybe I went overboard, but I don't regret the decision to put marine grade sheetshrink and the fancy red/black loom over the cables in the engine compartment.
  • If you do an excellent job placing the components and measuring, you could consider having Genuine Dealz make your cables.
  • I had to route cables under the paneling between the front and second seats as it would not fit through the channel. You can't tell, though.
  • It may have made more sense to run signal wires and a single power line to the roof. Meh.
  • A hydraulic crimper is a must for the 0/1, 6 awg, and even the 10 awg terminals.
  • I'm close to running out of blank switch panels in the cabin. Perhaps I should have gone with a more scalable switching solution? That SPOD thing?
  • * I picked up a lot of special tools for this project: ratcheting wire cutter, hydraulic wire crimper, a heat gun (my tiny culinary torch didn't do a good job), a butane-powered soldering iron (there's no power available in my condo garage), anderson power pole crimpers.
  • * The National Luna battery monitor in the rear is provides enough information for me. I don't have anything mounted in the cabin.

Sources: Slee (Battery, Battery Trays), Blue Sea (ACR, Fuse Blocks), GenuineDealz (Battery cable, wiring), Amazon (marine grade heat shrink, hydraulic crimper, marine grade spade connectors, other tools), Equipt1 (battery monitor)
 
Last edited:
Armor / Protection

I had ARB skid plates and Slee sliders installed by Slee Offroad prior to the Ouray trip. The skids came in handy on my very first day in Ouray during a solo trip up Mineral Creek. Prior to the install, the lack of proper sliders was a source of significant anxiety while off-roading in the Sierras. I kept thinking about the photo in the FAQ addressing why one should get sliders. Getting them was always a foregone conclusion -- it was just a matter of getting my truck from San Jose to Golden. The Ouray trip was a perfect excuse to get some work done.

Pre-Sliders


I wasn't dead-set on replacing the stock skids but ultimately decided to get them done at the same time as the ARB skid plates had not been installed on a 2016 at Slee's shop, so I had a hard time figuring out whether they'd even fit. I didn't really want a science project on my hands; fortunately, they went on without a hitch.

Skids


Sliders


I'm still running the stock front and rear bumpers. The front took a gnarly stab from some pine tree brush on Buck Lake trail in the Sierras. I'm pretty sure I was the first to run all of Bear Lake and Buck Lake last spring and wished I'd brought a chainsaw. At least the headlight washer still works. The rear bumper took a couple minor scrapes in Ouray. I don't really care about beating up the plastic, but would eventually like a rear bumper for the clearance and storage, and a front bumper for the winch and something to tie a hammock to.

Oops


It's really just a matter of time. I'd like to see what Slee's final product looks like for the rear and am simply waiting until after the holidays to do the front bumper. I'm leaning toward the 2016 ARB Summit or Sahara with a Comeup Winch.

Lessons:
  • Watch out for brush.
  • No regrets on the skids or sliders.
  • There's really not much to the stock sidebars (I have some available if anyone wants to replace a broken one)
Sources: Slee (Sliders, ARB Skid Plates)
 
Last edited:
Communications

I'd never used CB or Ham radio prior getting this truck and decided to get a license based on various threads here and in Expedition Portal. I'm glad I did... it's been an interesting and fun part-time hobby.

The trickiest part was determining where to mount the antenna. I wanted something with good quality, but I also knew that the roof was not an option given the rack and RTT. Ultimately, I found the hood mount that Gamiviti makes.

I ended up with a Yaesu 8800 dual-band radio and Cobra 75 WX St CB Radio. Both radios were mounted to the ARB cargo drawers on the passenger side behind the seat. I ran coax from the engine bay to that area by following the path of the 6 awg power cable. I exclusively used PL259 connectors throughout the system. The coax goes into a duplexer which is then connected to both radios. This lets me use the same mount for both radios though it does limit me to one radio at a time.

I don't use the radios too often and simply run wiring for the CB transceiver or Yaesu faceplate to the front seat. The wires go under the seat and under the floor mat to keep things clean. The Yaesu powered speaker is mounted to the cargo drawer fit kit near the electrical panel. It provides plenty of volume.


I had to do some minor bending/modification to get the Gamiviti NMO mount to work but it's worked out very well. I also painted it recently and have not noticed any transmission issues.

Lessons:
  • I rarely use CB -- the quality is just hard to get used to compared to 2m/10cm.
  • I've considered running RJ-45 (or whatever the connector is) from the Yaesu through the door jams to the dash area to streamline the connection. From there, some kind of ram mount would keep things pretty clean.
  • The hood mount has worked out very well but I'll probably move the antenna to a front bumper when/if I have one.
  • Beyond radio, I'd eventually like some kind of satellite phone / DeLorme, etc.

Sources: Gamiviti (NMO Hood Mount), Antenna Farm (antennas, splitter, radio), Right Channel Radios (CB and CB stuff)
 
Last edited:
Recovery

My primary recovery tools consist of one set of Maxtrax, an X-Jack, 2 shackles, a Viking Offroad Kinetic Tow Rope, a Max (ax-based multi-tool), and a shovel. Also, the stock bottle jack is pretty nice especially now that I added the cross-member support from @LandCruiserPhil to the kit.

There's not much to say here though I imagine the most interesting thing to folks has been that I've opted for the inflatable X-Jack over a hi-lift. That said, if I had a place to store a hi-lift, I'd probably have both. I've never had to use the X-Jack for myself, but have used it a number of times for other vehicles. I really like it assuming it doesn't rocket off of the exhaust pipe due to poor fit.

The tow rope and shackles are stored below the driver-side cargo drawer side panel. The X-Jack and recovery tracks are usually stored on top of the RTT in a storage bag but are kept on top of the cargo drawers if there's nothing else in the cargo area.

Lessons:
  • Sometimes I think about leaving the shovel at home because the Max has a shovel attachment. I'm consistently glad I have it with me.
  • The X-Jack is great... especially when you don't have many good recovery points for a hi-lift.
  • When you bail out others using your Maxtrax, remind them not to spin their wheels in a fury on top of them or they'll be ground down.
  • Airing down is often a reasonable first step in getting unstuck.
  • Even if you don't have a winch, consider bringing along some of the winch-related gear, or at least some shackles.
Sources: Maxtrax (recovery tracks), Amazon (X-Jack), Forest Products (Max Multi-tool), Viking Off-road (shackles, rope)
 
Last edited:
Roof Rack and RTT

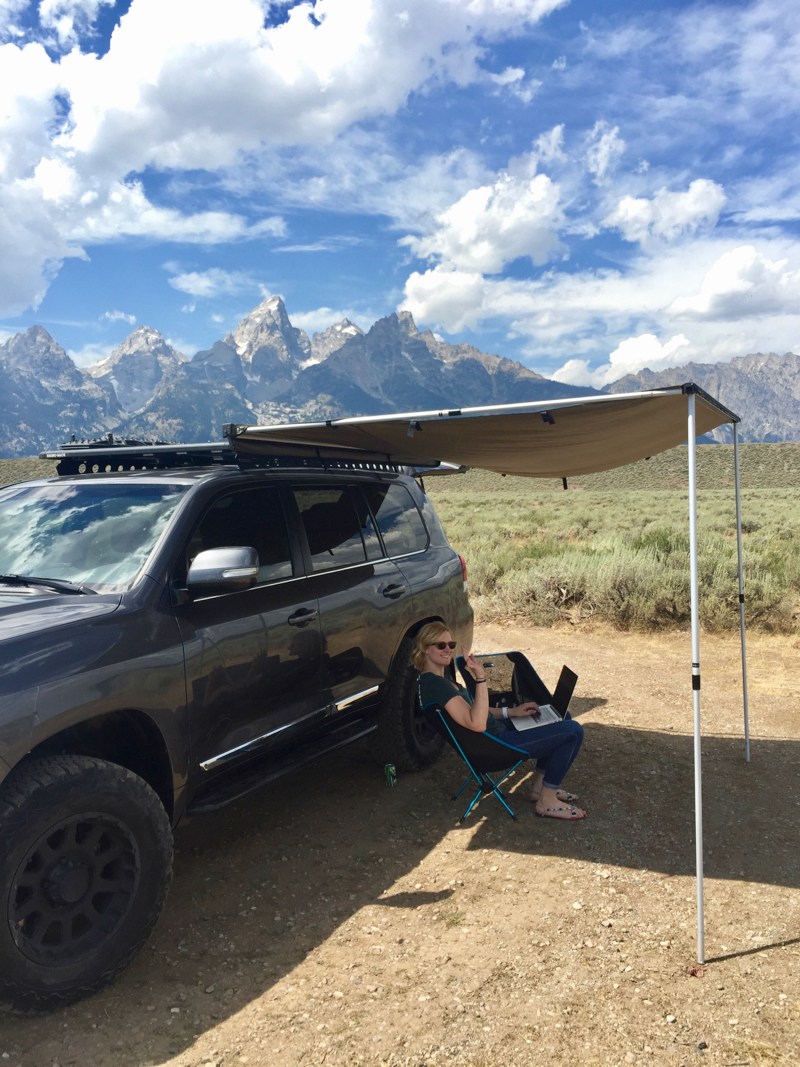
Getting the roof rack and tent situation figured out has been quite a journey. In an ideal scenario, we wouldn't have anything other than some recover tracks and maybe an awning on the roof. However, we both love camping in RTTs (first a Tepui and now an unbelievably awesome James Baroud hard-shell). We also end up needing every bit of storage space we can get to keep the inside from getting cluttered.

The first version of the rack + tent was inherited from my Yukon. The rack was a Rhino Rack Pioneer Platform and the tent was a Tepui Autana with Externded Annex. Now, the Pioneer Platform is actually a super-functional and handy roof rack. There are tons of easy-to-install accessories and overall I still like the rack. The struggles started when I needed to find a new mounting solution for it. Our local Rhino Rack dealer suggested a new system called Backbone that Rhino Rack recently released in Australia for Jeeps and LCs. It's supposed to be rated for 300-400 pound dynamic loads.

First Rack


In general, there's nothing wrong with the Backbone system, but it did not work well for my use case. The primary issue is that it's both very low profile and entirely restricts access to the underside of the rack except for the very front and the very back. This made mounting and dismounting the Tepui a tricky, frustrating, and time intensive process. I also never felt like I was able to really get the bolts tightened due to the restricted access. I explored other tent mounting solutions, longer tools, etc. and ultimately decided the last time I removed the Tepui that it would be the last.

Ultimately, we decided on a Gamiviti rack and a James Baroud Discovery Extreme tent and really like the combination so far. The JB Tent takes less than a minute to deploy and the Gamivit rack is much easier to work with. The lighting install went together pretty well and overall seems like a great solution for camp-lighting.

New Tent, Old Rack


New Rack


I'm currently working on modifying the Gamiviti awning mounts to eventually work with an Eezi-Awn Series 2000 awning which I plan on getting in early 2017.

Lessons:
  • The Rhino Rack Pioneer system is great if you want to mount a bunch of gizmos to the roof.
  • Avoid the Backbone mounting system at all costs if you are using a roof top tent.
  • Be careful when removing the stock rack. "Break" each bolt before fully removing otherwise you may mess up the mounting brackets like I did. I ended up having to install after-market nutserts on the rear most locations and the front driver side location. Removing the broken mounts was fun.
  • Conventional wisdom still says to keep stuff off the roof. We do the best we can and at the mount have probably 200 lbs (rack + tent) spread out over the entire roof. You can definitely feel it on top though the current set up is much less noticeable (and quieter) than the Rhino Rack + Tepui.

Sources: Gamiviti (Roof Rack, LED Lights), Adventure Ready (JB Tent and Bag), Equipt1 (Eezi-Awn Awning)
 
Last edited:
Storage and Camping

Optimizing storage in a Land Cruiser is an iterative process. That said, adding the ARB/Outback rear cargo drawers and side panels has been the biggest game-changer in that department. Not only does it maximize storage space, but it also keeps things clean and organized.

I actually did the drawer install prior to the secondary battery system in terms of chronology. The install was pretty easy but took a few hours. It's a very tight fit in 2016 and parts of the drawers had to be wedged between the wheel wells. The only issue during the install was that I needed to trim some plastic to fit the spacers on the forward drawer bolts. Other than that, easy-peasy.

Spacer Doesn't Fit


Trimmed with Dremel


This is the extended edge that need filed-down


Camp furniture resides in the left drawer while tools and general supplies are kept int he right drawer. The left side panel houses recovery equipment, a first aid kit, and fluids. The right forward panel features power outlets, fridge power, and a speaker for the ham radio system. The right rear panel stores odds-and-ends and sometimes camera equipment.

I moved from a gigantic Yeti cooler to an ARB refrigerator last spring and love not having to get ice any longer. The problem wasn't really getting the ice, but more of how heavy the cooler was when full of food and ice plus the fact that Yetis keep everything so cold that we'd have to chip away ice for 5-10 minutes to get anything out. The ARB refrigerator is installed on a pull-out drawer top on the right drawer.


Our remaining camping gear is stored on the left side in Frontrunner boxes secured with those removable tie-down points (forget what they're called) and max straps. We use two frontrunner boxes for short trips and 4 for longer trips. Other items such as food, duffel bags with clothing, etc. are stored atop the boxes or in the open areas on the sides.

Lessons:
  • Drawers are awesome whether they come from ARB, Goose, Frontrunner, or are homemade.
  • We had some squeaking problems with the top panel of the arb drawer but fixed it by using a bit of loctite on the screws.
  • One of those fancy Tembo Tusks refrigerator pulls that move the refrigerator up and down would be nice.
  • We use a ton of pouches and storage components from Blue Ridge Overland -- highly recommended. Velcro will stick to the drawer exterior. The "attic" is also super helpful for storing lightweight, bulky stuff like blankets and jackets as long as you don't mind not being able to see out the back.
  • We also store MSR dromedary bags in the left-and-right side panels. Somehow we manage to stuff 8-12 gallons of drinking water in various places using bags.
  • We use Lexington jerry cans for gas and plastic Scepter cans for regular water. One can can fit behind the refrigerator and can be strapped down, but most of the time we carry jerry and water cans with a hitch storage option (Curt basket or Stowaway box).
  • We'd love to have a rear bumper to help store some of the messy items.

Sources: Wits End (Fridge Cable), Slee (Drawers, Refrigerator), Blue Ridge Overland (Storage Bags), Frontrunner (Storage Boxes). Adventure Tool Company (Tarps and Blankets)
 
Last edited:
Current Status (December 2016)

I'm taking a little break from making modifications to enjoy winter camping in California. I do have some seat covers on order from Equipt as we recently adopted a large dog who will be our new camping buddy. The seat covers will both protect the seat and give him something to grip on to. Those should arrive sometime in December or January. I also need to install the awning back on the truck.

I'm interested in doing one or both bumpers before next summer. The bigger question is whether I'll factor in a suspension upgrade as well since I'll need to replace the springs.

I'll eventually do lockers, a regear, and slightly larger tires, but will probably wait until the current set kick the bucket.

The one thing I'd love to do but probably never will is an auxiliary gas tank. I'd love being able to go 600 miles on a fill up, but just don't think the added complexity is worth it. I wish a secondary tank was stock.

Lastly, I'm also looking into putting in a Helton heat exchanger, but can't find an open place to mount it. Anyone have any bright ideas?
 
1) gorgeous truck and fantastic mods

2) do you have any interior pics of the RTT tent to show the inside botttom area where you would lay down ?

3) thank you for writing a terrific post, breaking them down nicely, well sourced and well organized. You are the perfect demographic of a NEW 200 owner

Bravo!
 
Thanks for the kind words! I'll snap some interior photos of the tent next weekend. The interior area is pretty spacious... it's about the size of a queen bed.
 
Great writeup, beautiful truck. Thanks for the pics and lessons learned.
 
Amazing writeup. I love seeing you put the 2016 through its paces!!!
 
Thanks for sharing this. The details and lessons learned are great resources for all. Looking forward to hearing more as your truck evolves!
 
Very enjoyable early morning read. Better than the NY Times!

:)
Good God man, who reads The NY Times, that paper should be :ban:
 
That updated frontend is growing on me so much, I'm actually thinking of selling my '14 in Spring and getting the new one, just not 100% sold on an 8spd., yet.
 

Users who are viewing this thread

Back
Top Bottom