



- Joined
- May 19, 2009
- Threads
- 11
- Messages
- 136
After being a lurker for a few years and doing nothing to contribute much to the forum, here is me giving back to the community....
Parts required:
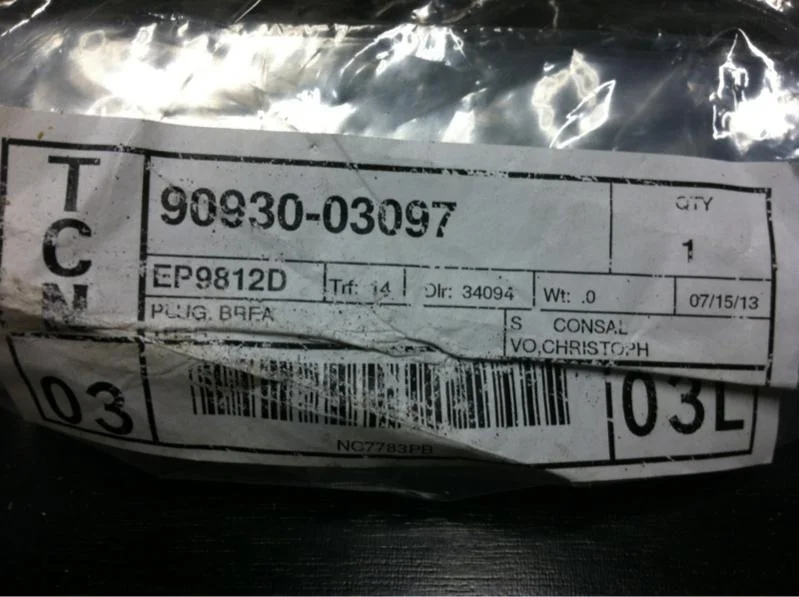
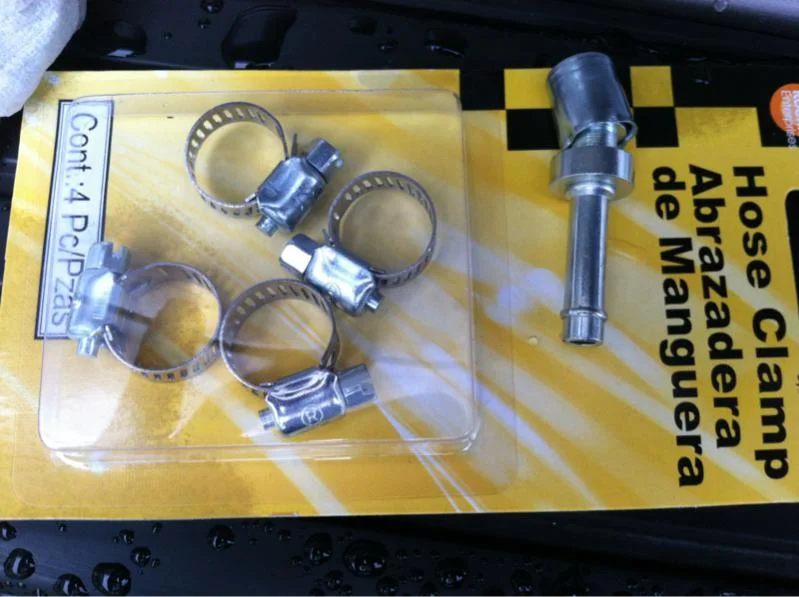
2 x Toyota diff breathers p/n 90930-03097
25 ft of 5/8 fuel line from your local auto parts store
8 x small hose clamps for 5/8 line
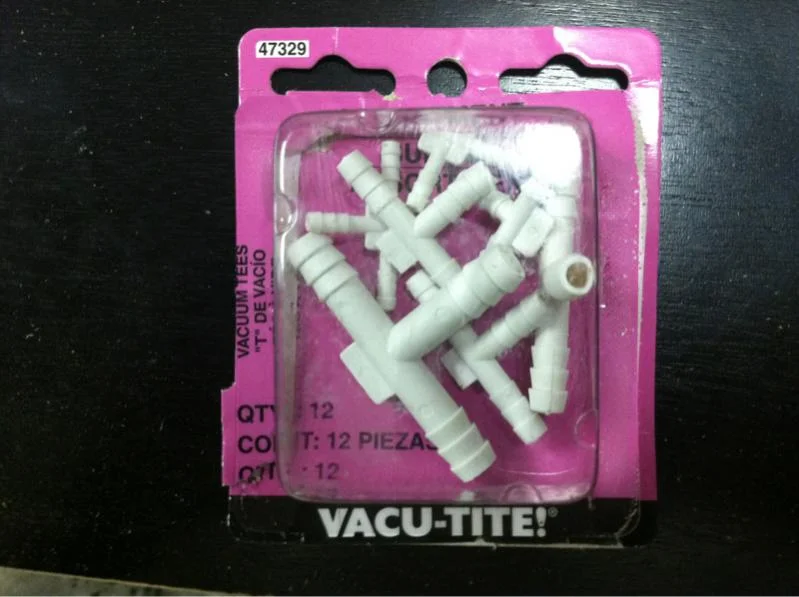
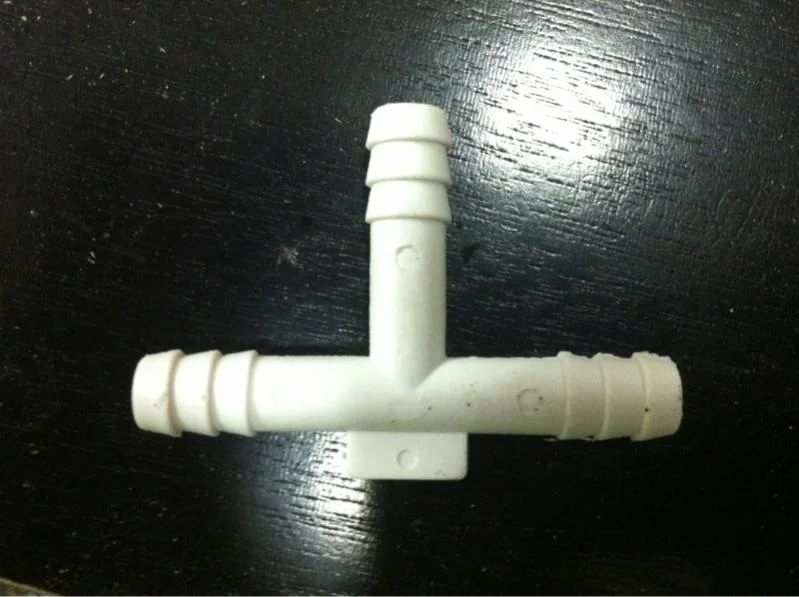
1 x metal or plastic T to connect the transfer case and front diff lines together - I had to buy a assorted pack from autozone to get the right one (Dorman p/n 47329)
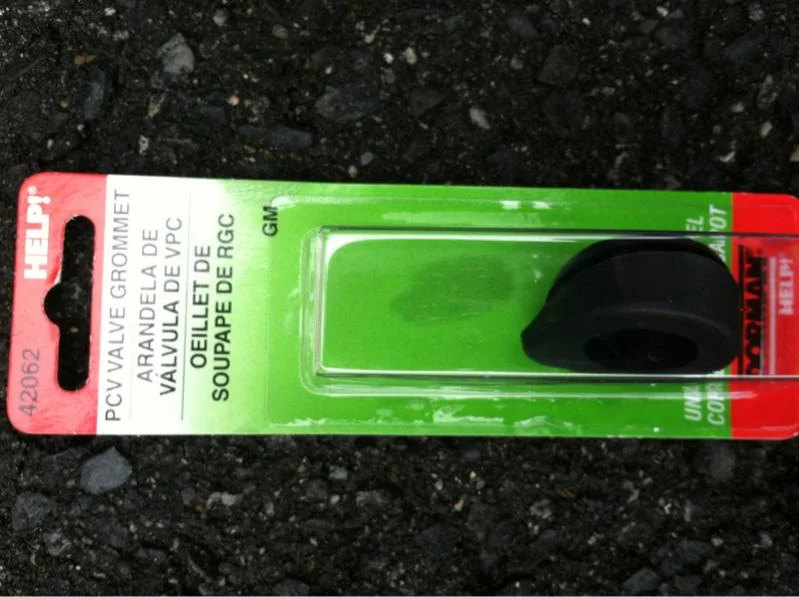
2 x grommet (I used a PCV valve grommet from autozone that matched up (Dorman p/n 42060)
Tools required:
7/8 or 1 inch hole saw
Common screwdriver
Pliers for the stock clamps in old breather lines
Assorted zip ties
Spray paint to ensure the holes you drilled do not rust too bad
Step 1.
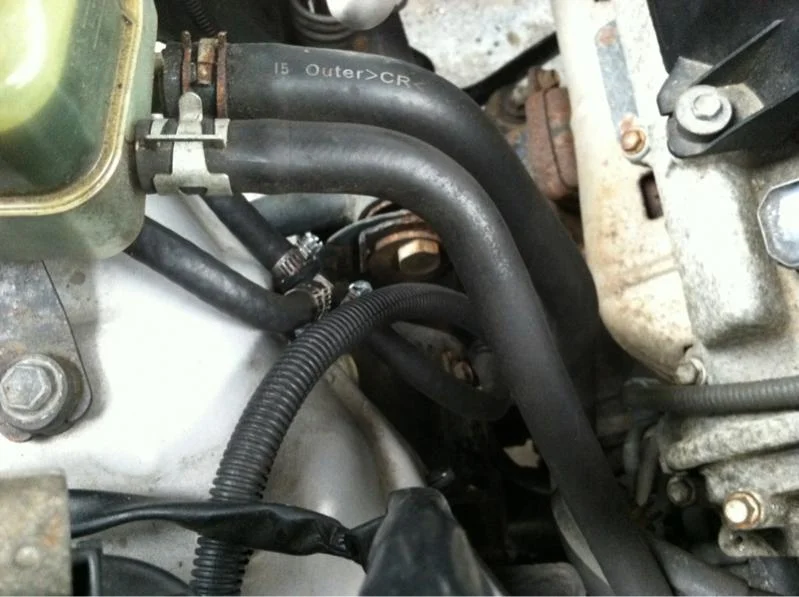
Find your front breather line located on top of your front differential, remove it and save the plastic c clamp holding it up so you can use it later. Now route your new line and avoid the suspension, then clamp it on the front diff. You can route the line to the firewall or to the power steering reservoir (imagination in use). Connect the plastic T to one end.
Step 2. ( I know, big steps huh? That's what she said)
Find your transfer case breather, time to get dirty. Get under your cruiser and find your transmission dip stick tube ( I know you 2002 and up cruisers do not have one and well, I don't know where yours is, just get under there and look). So somewhere on the tube, your transfer case breather and transmission breathers connect to it. The lowest tube is your transfer case and this is the one to remove and replace. It does not go into the dip stick, even though it looks like it, the top line does go into it and that is your transmission breather and it uses the transmission dip stick tube (no need to mess with this one). Follow that lower line back to the transfer case and remove the connection. Install new line and route back up to engine bay from here, zip ties are great. Be sure to avoid the exhaust, mmmkay? Connect it to the other side of the plastic T you used for the front diff.
Step 3.
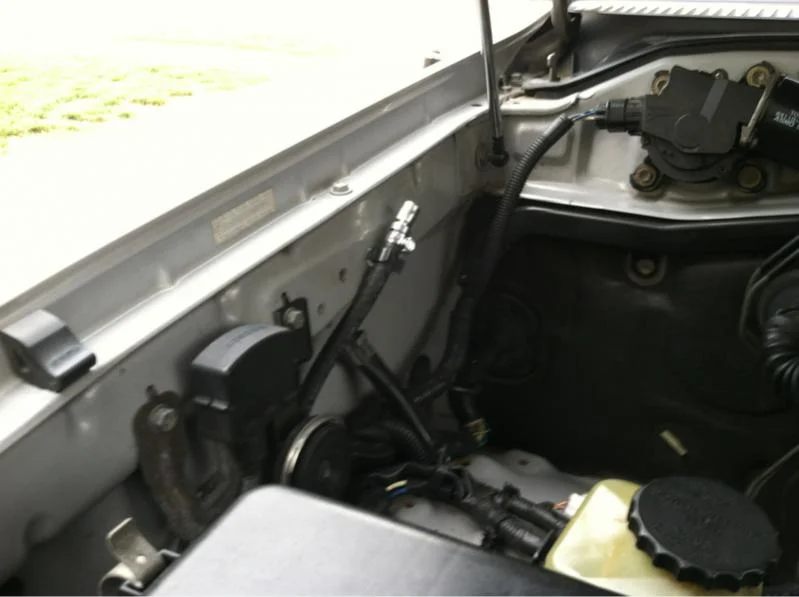
You can use that OEM plastic C clamp that was holding your old front diff breather line up and stuff it in a empty screw hole along the side of the engine bay like I did. Obviously, if you have AHC you probably don't have a lot of empty screw holes, I'm sorry but you can use your imagination on where to mount the breather. Attach your brand new Toyota breather to the new 5/8 tubing and connect it to the last open spot on the T.
Step 4. (The rear)
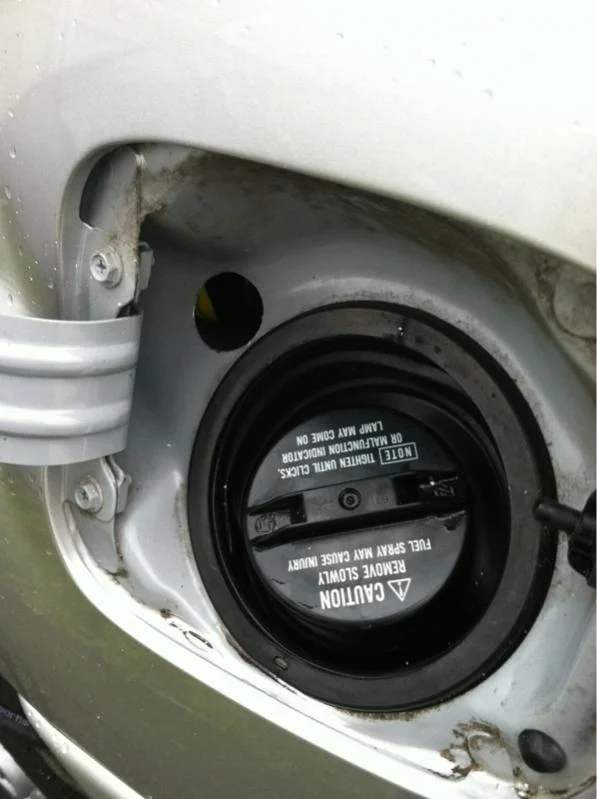
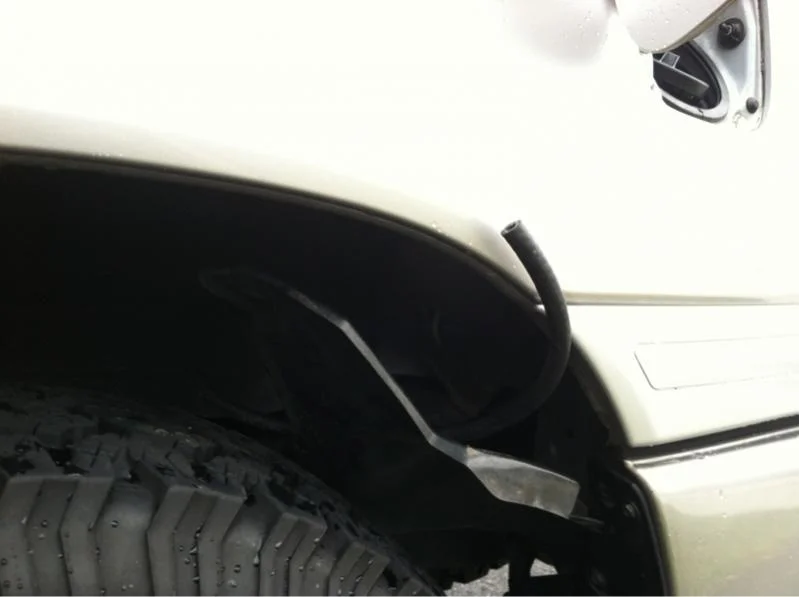
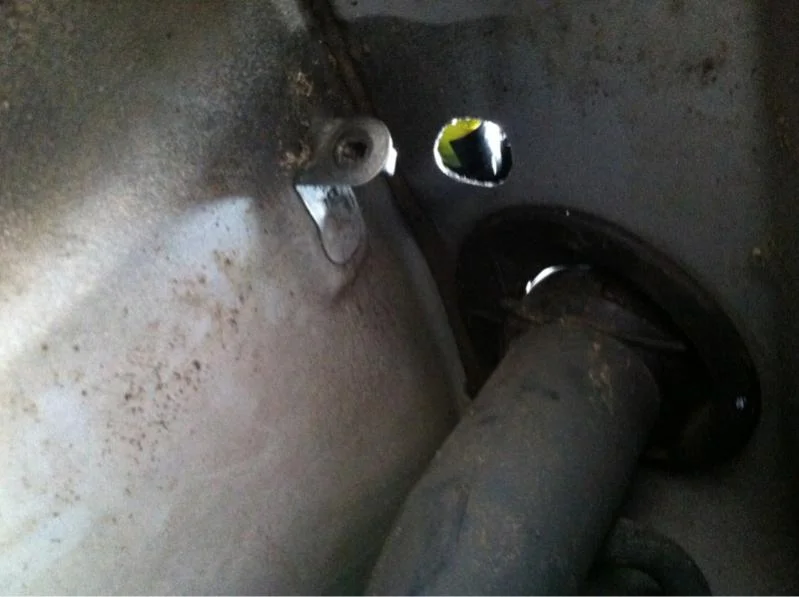
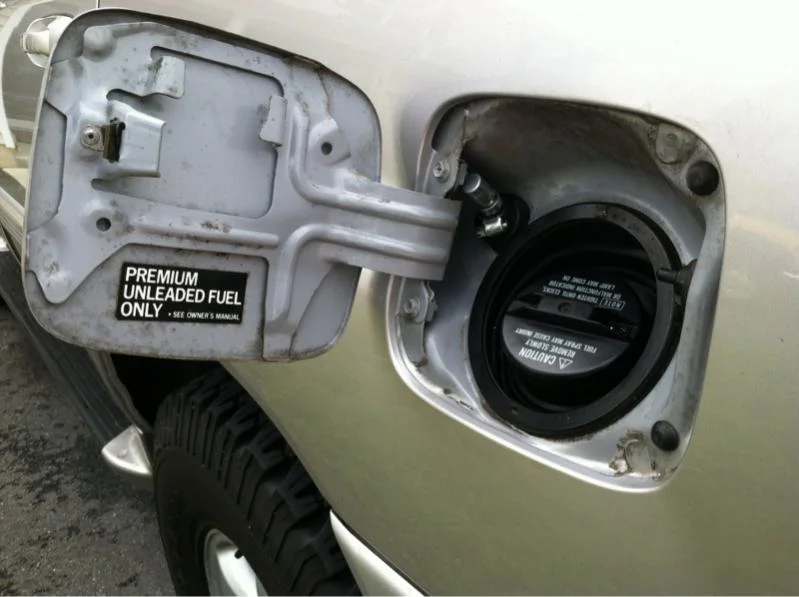
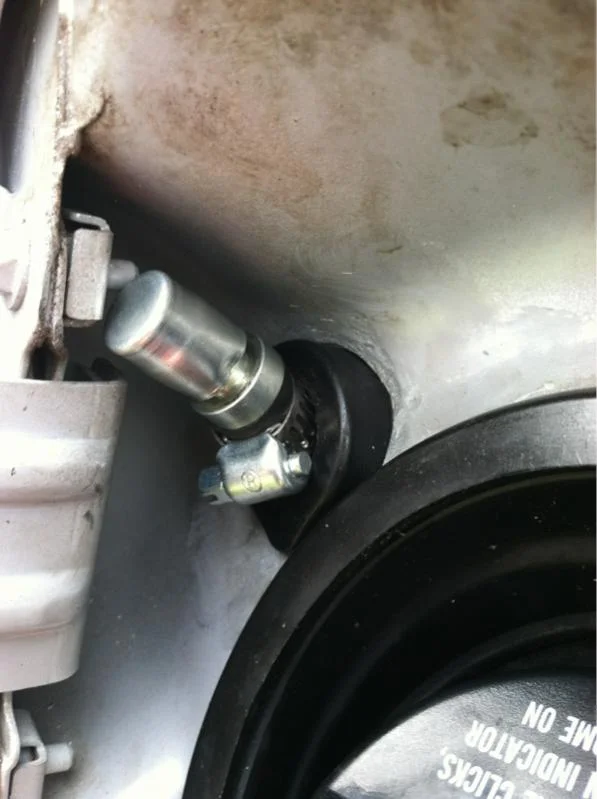
Find your rear diff breather line on your rear axle. Ok great, you already know where it is and you should. Remove the lining on your driver side rear wheel well. It's only 2 screws and a plastic popper thing. Now open your fuel door and to the left of of the gas cap and take a deep breathe, because that's where you are about to drill. Drill where I did and you will be safe. DO NOT GO DEEP - DO NOT GO DEEP - FOR THE LOVE OF GOD DO NOT GO DEEP - ok? or mmmmkay? There is a wiring bundle for who knows what about an inch under there - so you will have a huge headache on your hands if you drill into a bunch of wires. Now, once you drill a nice little 7/8 to 1 inch hole there, you will see another panel you have you drill into from the bottom - that's why you removed the wheel well liner. Find a good spot and just drill it, don't you go deep in there now....mmmkay - same rule as earlier. You can put a little spray paint on these fresh holes to minimize rusting - I'm completely screwed because I live in Jersey. Then use the grommets to perfectly fill the holes and route your diff breather line into them. Stick a Toyota breather on the one end and the clamp will ensure it does not fall through the hole in the gas cap area (see pic). Then just route your line with zip ties following the fuel line and connect it to your rear axle, make sure to leave slack above the axle. This is so you don't rip in the line when your axle moves up and down.
DONE


Parts required:
2 x Toyota diff breathers p/n 90930-03097
25 ft of 5/8 fuel line from your local auto parts store
8 x small hose clamps for 5/8 line
1 x metal or plastic T to connect the transfer case and front diff lines together - I had to buy a assorted pack from autozone to get the right one (Dorman p/n 47329)
2 x grommet (I used a PCV valve grommet from autozone that matched up (Dorman p/n 42060)
Tools required:
7/8 or 1 inch hole saw
Common screwdriver
Pliers for the stock clamps in old breather lines
Assorted zip ties
Spray paint to ensure the holes you drilled do not rust too bad
Step 1.
Find your front breather line located on top of your front differential, remove it and save the plastic c clamp holding it up so you can use it later. Now route your new line and avoid the suspension, then clamp it on the front diff. You can route the line to the firewall or to the power steering reservoir (imagination in use). Connect the plastic T to one end.
Step 2. ( I know, big steps huh? That's what she said)
Find your transfer case breather, time to get dirty. Get under your cruiser and find your transmission dip stick tube ( I know you 2002 and up cruisers do not have one and well, I don't know where yours is, just get under there and look). So somewhere on the tube, your transfer case breather and transmission breathers connect to it. The lowest tube is your transfer case and this is the one to remove and replace. It does not go into the dip stick, even though it looks like it, the top line does go into it and that is your transmission breather and it uses the transmission dip stick tube (no need to mess with this one). Follow that lower line back to the transfer case and remove the connection. Install new line and route back up to engine bay from here, zip ties are great. Be sure to avoid the exhaust, mmmkay? Connect it to the other side of the plastic T you used for the front diff.
Step 3.
You can use that OEM plastic C clamp that was holding your old front diff breather line up and stuff it in a empty screw hole along the side of the engine bay like I did. Obviously, if you have AHC you probably don't have a lot of empty screw holes, I'm sorry but you can use your imagination on where to mount the breather. Attach your brand new Toyota breather to the new 5/8 tubing and connect it to the last open spot on the T.
Step 4. (The rear)
Find your rear diff breather line on your rear axle. Ok great, you already know where it is and you should. Remove the lining on your driver side rear wheel well. It's only 2 screws and a plastic popper thing. Now open your fuel door and to the left of of the gas cap and take a deep breathe, because that's where you are about to drill. Drill where I did and you will be safe. DO NOT GO DEEP - DO NOT GO DEEP - FOR THE LOVE OF GOD DO NOT GO DEEP - ok? or mmmmkay? There is a wiring bundle for who knows what about an inch under there - so you will have a huge headache on your hands if you drill into a bunch of wires. Now, once you drill a nice little 7/8 to 1 inch hole there, you will see another panel you have you drill into from the bottom - that's why you removed the wheel well liner. Find a good spot and just drill it, don't you go deep in there now....mmmkay - same rule as earlier. You can put a little spray paint on these fresh holes to minimize rusting - I'm completely screwed because I live in Jersey. Then use the grommets to perfectly fill the holes and route your diff breather line into them. Stick a Toyota breather on the one end and the clamp will ensure it does not fall through the hole in the gas cap area (see pic). Then just route your line with zip ties following the fuel line and connect it to your rear axle, make sure to leave slack above the axle. This is so you don't rip in the line when your axle moves up and down.
DONE
Last edited:


 so no water goes into differential even if you cabin is flooded.


