
As some of you may have seen from my build thread, I've been working on welding up my new front bumper for several weeks now. It's finally done! This was a crapload of work. I can no longer complain about the price of bumpers because I know firsthand how much labor goes into it.
I really liked my AOE bumper. No complaints about it really. That is until I saw the prototype 4x4Labs bumper on Luke's personal truck. After I went wheeling with him I knew I had to have that bumper.

So it was time to get rid of this big ol fat thing

Bumper found it's home on a new 80. Off I went to Luke's shop to pick up the parts. Decided to go the DIY kit route to save a ton of money and help improve my welding skills. At this point I'm wondering WTF I got myself into

Starting on the winch plate and mounting points. Luke built this thing so it uses 8 total bolts on each side.

Got the wings welded up. This was a PIA to do with one set of hands. First thing you'll notice is how high the wings come up leaving everything exposed behind it.

Here I did the center stinger and the side tubes.

But I wasn't satisfied. I wanted to run my 30" light bar which would require fabbing up some mounts. The result would look way too busy I thought. So I cut out the stinger tubes and put in a 2" straight tube instead.

From the point on the bumper took a different shape than what Luke makes as the finished version. Here's how he builds it, this is @Bimrunner rig

Mounts for the light bar and smaller pods built to give it my personalized look

Gotta have turn signals, so I bought some of these really cool LEDs, six on each side. Do a search for "eagle eye LEDs" on ebay if you need some. Cheap and freaking bright!

Working on my precision grinding. This stuff is hard. Takes an artist's touch. Too easy to screw it up and make it look wavy.

AC dryer is an issue with all these offroad bumpers. But with this one, the issue is exaggerated by 300% since you have to cut everything if you away, if you want the install to look good. My solution? Tuck it up behind the turn signal. Problem is it won't fit. But since the turn signals are covered, you won't be using them anyway.
So I trimmed off the back

Pushed the dryer as far up as it would go

Blacked out the turn signals and voila! No more dryer

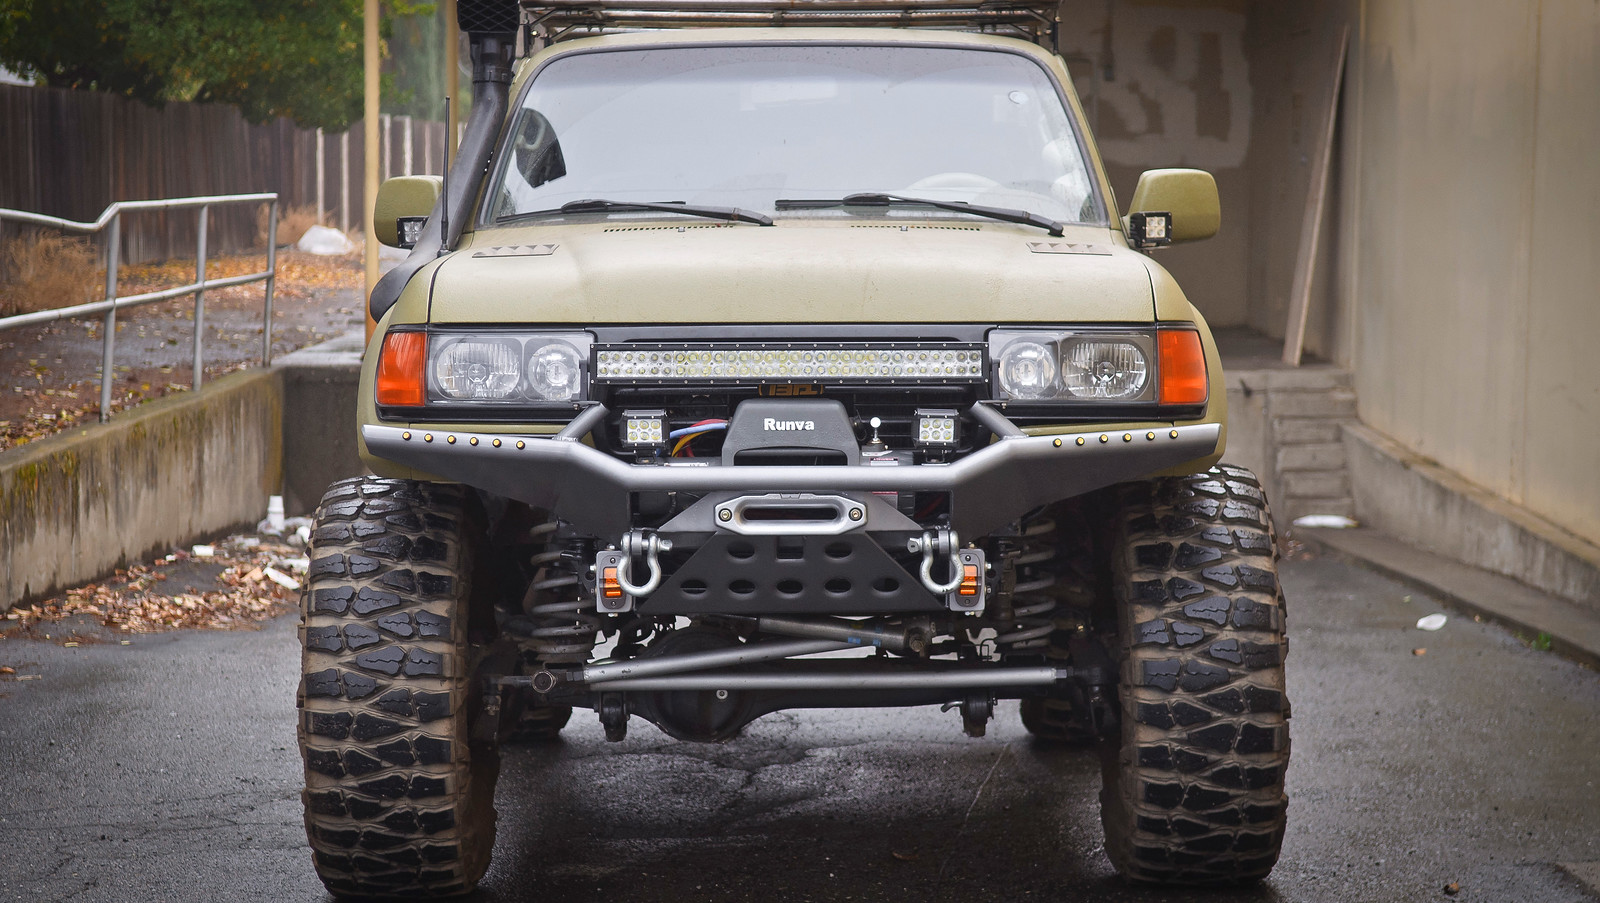
High clearance you say? After trimming the core support and everything that hangs down, you can see the whole 37" tire from the front
Check out the difference before/after cutting

Also added some LED running lights to cap off the frame. Spent a whole day grinding down the welds. Here she is ready for paint.

I really liked my AOE bumper. No complaints about it really. That is until I saw the prototype 4x4Labs bumper on Luke's personal truck. After I went wheeling with him I knew I had to have that bumper.
So it was time to get rid of this big ol fat thing
Bumper found it's home on a new 80. Off I went to Luke's shop to pick up the parts. Decided to go the DIY kit route to save a ton of money and help improve my welding skills. At this point I'm wondering WTF I got myself into
Starting on the winch plate and mounting points. Luke built this thing so it uses 8 total bolts on each side.
Got the wings welded up. This was a PIA to do with one set of hands. First thing you'll notice is how high the wings come up leaving everything exposed behind it.
Here I did the center stinger and the side tubes.
But I wasn't satisfied. I wanted to run my 30" light bar which would require fabbing up some mounts. The result would look way too busy I thought. So I cut out the stinger tubes and put in a 2" straight tube instead.
From the point on the bumper took a different shape than what Luke makes as the finished version. Here's how he builds it, this is @Bimrunner rig
Mounts for the light bar and smaller pods built to give it my personalized look
Gotta have turn signals, so I bought some of these really cool LEDs, six on each side. Do a search for "eagle eye LEDs" on ebay if you need some. Cheap and freaking bright!
Working on my precision grinding. This stuff is hard. Takes an artist's touch. Too easy to screw it up and make it look wavy.
AC dryer is an issue with all these offroad bumpers. But with this one, the issue is exaggerated by 300% since you have to cut everything if you away, if you want the install to look good. My solution? Tuck it up behind the turn signal. Problem is it won't fit. But since the turn signals are covered, you won't be using them anyway.
So I trimmed off the back
Pushed the dryer as far up as it would go
Blacked out the turn signals and voila! No more dryer
High clearance you say? After trimming the core support and everything that hangs down, you can see the whole 37" tire from the front
Check out the difference before/after cutting
Also added some LED running lights to cap off the frame. Spent a whole day grinding down the welds. Here she is ready for paint.


 I'm sure you will find a way
 ")

 I've managed to get it (boxed) from my office to my garage and staring at the project before me.
 But he did already say if I get into an accident a car is going to take out my axle and kill all kinds of children
