
Navigation
Install the app
How to install the app on iOS
Follow along with the video below to see how to install our site as a web app on your home screen.
Note: This feature may not be available in some browsers.
More options
Style variation
You are using an out of date browser. It may not display this or other websites correctly.
You should upgrade or use an alternative browser.
You should upgrade or use an alternative browser.
5/71 FJ55 field rescue
- Thread starter jdfording
- Start date
This site may earn a commission from merchant affiliate
links, including eBay, Amazon, Skimlinks, and others.
- Thread starter
- #22
Pulled the oil pan today and notice some water in the bottom of the pan...wasn't a lot but it's there. Cleaned the pan good and noticed a crack on the edge of the front curve. Hopefully it can be welded. The PO that put the seal on did a half ass job so no wonder it's leaking.
Friend said I should just put on a new seal and drive it for a while then change the oil and see what it looks like. If it has water in it I guess I could change the head gasket or put in some block sealer. Eventually I want to do a sbc swap so it's no point in dropping a ton of money into an upper engine rebuild. Not sure yet what I should do. I haven't noticed any water dripping out of the exhaust though.
Can anyone recommend a good block sealer if I decide to go this route? I saw some stuff at Orielys that was $70bucks and some for $10.
Also are the 22 bolts that hold on the oil pan the same size? I noticed a few of mine have different heads on them. Some have phillips screw with bolt heads that look factory and some don't.
the mixed bolts are kind of normal. when you got the water out, did you seperate it from the oil at all? if so, sounds gross but dip your finger in the water and taste it. maybe it's just moisture from sitting and not necessarily antifreeze. with a crack in the pan and a poor seal anything is possible (that said, i doubt it, but who knows)Pulled the oil pan today and notice some water in the bottom of the pan...wasn't a lot but it's there. Cleaned the pan good and noticed a crack on the edge of the front curve. Hopefully it can be welded. The PO that put the seal on did a half ass job so no wonder it's leaking.
Friend said I should just put on a new seal and drive it for a while then change the oil and see what it looks like. If it has water in it I guess I could change the head gasket or put in some block sealer. Eventually I want to do a sbc swap so it's no point in dropping a ton of money into an upper engine rebuild. Not sure yet what I should do. I haven't noticed any water dripping out of the exhaust though.
Can anyone recommend a good block sealer if I decide to go this route? I saw some stuff at Orielys that was $70bucks and some for $10.
Also are the 22 bolts that hold on the oil pan the same size? I noticed a few of mine have different heads on them. Some have phillips screw with bolt heads that look factory and some don't.
nuclearlemon said:if so, sounds gross but dip your finger in the water and taste it. maybe it's just moisture from sitting and not necessarily antifreeze.
This quote just made my night ... just because I know only us loony gear heads can separate the the faint sweetness of exhaust infused antifreeze from plain old oily water
")
Tucker
- Thread starter
- #25
Wasn't able to taste the fluid lol. I'm hoping it's moisture from sitting for so long or because the oil lines are all hacked up.

Cracked oil pan

Pulled off the oil filter bracket. Still trying to figure out why the manifold has 4 mount holes and the bracket has 3 in a triangle shape. Am I missing a backing plate or something?


The PO stripped the steering box service plug and drilled a hole through it and plugged it with goop. I used an easy out and got the piece out. Now I just need a new plug. Steering box looks dry.

Spent a couple hours cleaning the oil pan seal off the block. Nice and clean now.


Headers?

Also found the engine code...looks like the engine was swapped at some point. The build date on the 55 is May 71 but the block code is F419019. That would make the engine built in December of 72...I hope the new oil lines I ordered from SOR still fit. I ordered the ones for a 71.
I think the carb is original but the PO used different bolts to mount it. I called a cruiser yard in Salida, CO and they have insulator plates since the tube on mine is broken. Will call them back and get the proper mounting bolts too.
It's been a long day of scratching my head and scraping old gasket off the block. I am beat.
Cracked oil pan
Pulled off the oil filter bracket. Still trying to figure out why the manifold has 4 mount holes and the bracket has 3 in a triangle shape. Am I missing a backing plate or something?
The PO stripped the steering box service plug and drilled a hole through it and plugged it with goop. I used an easy out and got the piece out. Now I just need a new plug. Steering box looks dry.
Spent a couple hours cleaning the oil pan seal off the block. Nice and clean now.
Headers?
Also found the engine code...looks like the engine was swapped at some point. The build date on the 55 is May 71 but the block code is F419019. That would make the engine built in December of 72...I hope the new oil lines I ordered from SOR still fit. I ordered the ones for a 71.
I think the carb is original but the PO used different bolts to mount it. I called a cruiser yard in Salida, CO and they have insulator plates since the tube on mine is broken. Will call them back and get the proper mounting bolts too.
It's been a long day of scratching my head and scraping old gasket off the block. I am beat.
That cable is your 4wd engagement. The box it's going into is the vacuum actuator
If you can't pull the 4wd knob or lever out, your cable is toast.
Don't know if it helps or not but here is a picture of the oil filter on my early 72. It has the three bolt pattern and matches up perfectly to the manifold. Almost makes me wonder if somebody changed the intake manifold when they put the headers on. If you look at my picture you will see the TEQ stamp on the manifold but yours looks to have some numbers where the stamp should be. That might not be the original manifold on your engine.

- Thread starter
- #29
Those numbers are the firing order stamp. The manifold is different for sure. I'll have to take a closer look at it. There used to be an aftermarket company that made a manifold for the F engine but I'm not sure the name. I can still fit the bracket to it either way.
- Thread starter
- #31
Did some more work today on the 55. Cleaned the windows for the first time since 71.  Vacuumed the interior and pulled the front bench..or whats left of it. The heater sure looks clean compaired to the rest of the inside. I think it works too.


I pulled the firewall insulation and the front side panels to see the extent of the rust. The passenger floor is the worst. All fixable I think.

Those wires hanging down are for the after market 3 guage cluster under the dash. None of them work because the PO never finished hooking them up. I'll probably just remove them and the wiring.

This is the worst spot on the cruiser for rust cept the front fenders. The hole was filled with dirt and crud. I poked the firewall with a screw driver and it's still solid.


I'm going to pull the heater core soon to see if it's ok. Can these be recored?

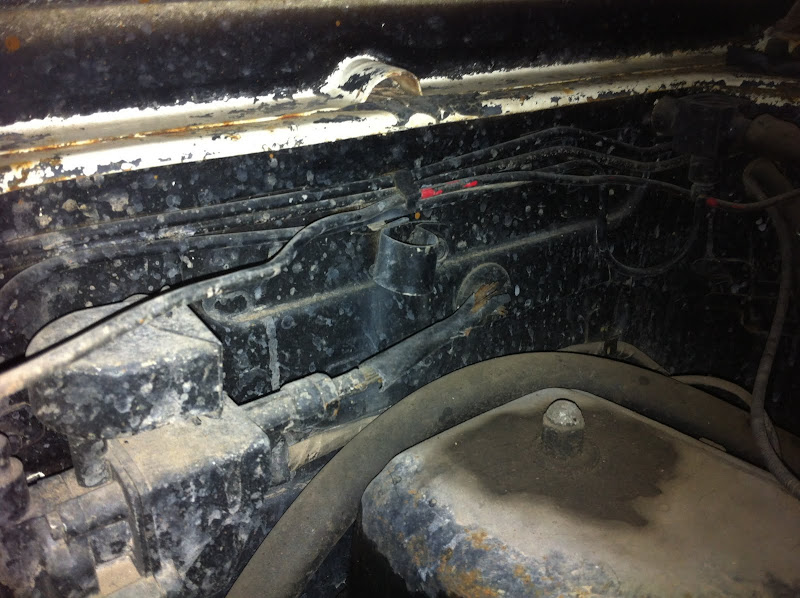
It's hard to see in this pic but there is a little drain hose in the bottom center next to the left hose. Anyone know what this is for or if it's supposed to be connected to anything? That heater sure is shiny.")

Love those Ansens with the 31" Duratracs

More to come...
Vacuumed the interior and pulled the front bench..or whats left of it. The heater sure looks clean compaired to the rest of the inside. I think it works too.
I pulled the firewall insulation and the front side panels to see the extent of the rust. The passenger floor is the worst. All fixable I think.
Those wires hanging down are for the after market 3 guage cluster under the dash. None of them work because the PO never finished hooking them up. I'll probably just remove them and the wiring.
This is the worst spot on the cruiser for rust cept the front fenders. The hole was filled with dirt and crud. I poked the firewall with a screw driver and it's still solid.
I'm going to pull the heater core soon to see if it's ok. Can these be recored?
It's hard to see in this pic but there is a little drain hose in the bottom center next to the left hose. Anyone know what this is for or if it's supposed to be connected to anything? That heater sure is shiny.
Love those Ansens with the 31" Duratracs
More to come...
- Thread starter
- #32
Didn't do much to the 55 today cept try out some Plasti-Dip on some trim parts. Didn't get any pics though. I instead painted my winter wheels for my 05 Evo VIII.
This is my go fast car and daily driver. Car has a few mods but nothing crazy. AWD and turbo charged she will get up and go. It's also great in the snow. Easy to work on as well.


Blizzaks on stock Evo 8 Enkei wheels.

Colorado is gettin cold. Got a feeling I'm gonna be mounting these real soon.
Plasti-Dip works well although white is a bit tricky to spray. Those 4 wheels took 3 cans to do and I could of used 4 cans. Black and red spray easier and cover more area. I did the front headlight bezels and the front fender side grills on the 55. They came out nice.
This is my go fast car and daily driver. Car has a few mods but nothing crazy. AWD and turbo charged she will get up and go. It's also great in the snow. Easy to work on as well.
Blizzaks on stock Evo 8 Enkei wheels.
Colorado is gettin cold. Got a feeling I'm gonna be mounting these real soon.
Plasti-Dip works well although white is a bit tricky to spray. Those 4 wheels took 3 cans to do and I could of used 4 cans. Black and red spray easier and cover more area. I did the front headlight bezels and the front fender side grills on the 55. They came out nice.
- Thread starter
- #34
Hehe don't worry
Didn't get much done over the last couple days. Sorry no pics. Waiting on parts sucks.
I put the new oil lines in and remounted the oil filter bracket. I think my manifold might be off a 2F or something. Maybe when the PO added the headers something didn't fit right. I'll continue to use my 1 bolt to mount the bracket... Hoping I got the 2 oil lines installed correctly. The line from the back of the sending unit goes to the <--in arrow on the oil filter? The line that goes into the block didn't seem to go in very far. Hoping it won't leak.
Put on some new pedal pads, installed the rear window felt and installed the metal gear for the rear window. I was suprised that my gear was still intact. There is a slight crack starting in the middle though.
Pulled the old speedo cable and removed the instrument cluster. Decided to take it apart to clean it. Got too carried away and broke the 1/10ths ODO gear. The needle was also cleverly taped on the center. Would of never known if I didn't open it.
Gonna send it out to a shop and have it rebuilt. Should of just left it alone...lesson learned. failed.
Was going to start installing my new oil pan but going to wait till a friend can help thats done it before. I got some RTV and blue loc-tite and all new bolts. I'm hoping this will fix the massive oil leak I had before pulling it.
Plans for the weekend. Get oil pan installed, install the carb insulator and mount studs. Install air filter box. Install rear window assembly. install battery tie down. Get title hopefully Monday and drive her!
Still need to sort out some wiring. I have to tap the fuse block and wiggle the light switch to get the lights to come on. The PO installed a 3 guage pack under the center of the dash. I'm going to pull it out and hopefully rewire the dash cluster. My fuel guage, temp and oil guage don't work.
The list goes on and on and on....
As long as you don't put those rims and tires on your 55, everything will be cool!
Didn't get much done over the last couple days. Sorry no pics. Waiting on parts sucks.
I put the new oil lines in and remounted the oil filter bracket. I think my manifold might be off a 2F or something. Maybe when the PO added the headers something didn't fit right. I'll continue to use my 1 bolt to mount the bracket...
Hoping I got the 2 oil lines installed correctly. The line from the back of the sending unit goes to the <--in arrow on the oil filter? The line that goes into the block didn't seem to go in very far. Hoping it won't leak.Put on some new pedal pads, installed the rear window felt and installed the metal gear for the rear window. I was suprised that my gear was still intact. There is a slight crack starting in the middle though.
Pulled the old speedo cable and removed the instrument cluster. Decided to take it apart to clean it. Got too carried away and broke the 1/10ths ODO gear.
The needle was also cleverly taped on the center. Would of never known if I didn't open it. Gonna send it out to a shop and have it rebuilt. Should of just left it alone...lesson learned.
failed.Was going to start installing my new oil pan but going to wait till a friend can help thats done it before. I got some RTV and blue loc-tite and all new bolts. I'm hoping this will fix the massive oil leak I had before pulling it.
Plans for the weekend. Get oil pan installed, install the carb insulator and mount studs. Install air filter box. Install rear window assembly. install battery tie down. Get title hopefully Monday and drive her!
Still need to sort out some wiring. I have to tap the fuse block and wiggle the light switch to get the lights to come on. The PO installed a 3 guage pack under the center of the dash. I'm going to pull it out and hopefully rewire the dash cluster. My fuel guage, temp and oil guage don't work.
The list goes on and on and on....
- Thread starter
- #35
Pulled the 4wd cable today. Mine was frayed from rubbing against the firewall. I had to pull the vacuum actuator apart to get the end of the cable out. I wouldn't wish this job on my worst enemy.
Anyone know where I can get firewall grommets or recommend something to keep the cable from rubbing the firewall. This cable is no longer made so I would like to keep it nice.
Going to work on the ujoints tomorrow. The rear driveshaft has a lot of play in it. Front is tight. Any tips?
Anyone know where I can get firewall grommets or recommend something to keep the cable from rubbing the firewall. This cable is no longer made so I would like to keep it nice.
Going to work on the ujoints tomorrow. The rear driveshaft has a lot of play in it. Front is tight. Any tips?
Going to work on the ujoints tomorrow. The rear driveshaft has a lot of play in it. Front is tight. Any tips?
Normal wear and tear for the rear to go 1st.
If the uni's are the same design as the Aussie Toyotas, cut them out with a 4" grinder to save hours of work, bashed fingers and crushed yokes. Getting them back in is easy.
- Thread starter
- #37
Didn't get as much done this weekend as I wanted. Got my carb insulator and mounting studs installed. Carb is all back together and the airbox. Installed the proper fuel line from the fuel filter to the fuel pump. The bracket for the fuel filter is all bent up. Not sure how it mounts. It's just hanging in place right now. Looks like I need to replace the in line next it's a bit short and starting to wear out.
Pulled off the center skid plate and cleaned it. Talk about nasty! I love having access to a pressure cleaner. Probably going to leave it off for a while till I can degrease everything and check for leaks. Had a couple drops of oil hanging off the clutch plate and fork. Hard to tell whats leaking there is just so much crud under there. The drain plugs on the tranny and xfer case were wet also. Going to service the fluid next.
Pulled the rear driveshaft. The bolts were very loose. I actually pulled one with just my fingers. I think this is the problem not the ujoints. Going to change them anyway. The front joint in the driveshaft had no wear. I need a press to get the rear one out.
Started the tie rod ends but have to wait till I get a puller. They are tight!
Things left to do/finish:
Ujoints
Oil Pan
Tie rod ends
Rear window install
misc seals for side markers, doors etc...
turn signals not working think it's in the steering column
head liner removal
rust repair (in the spring)
front seats
speedo cable
instrument cluster install
And I'm sure a whole lot more...
I'll try to start taking more pics.
Last edited:
- Thread starter
- #38
Pulled the xfer case and tranny. I'm glad I did, the rear main seal was leaking. The PO forgot to pull off the old spring that rides in the seal so there were 2 springs in the bearing cap. The flywheel needs resurfaced as well.
Going to replace all the seals and gaskets on the tranny and xfer case. Waiting on parts for now.
Questions:
Do I need to drop the bellhousing to replace the cam cap? If I do will I need to support the engine or will the front mounts hold it in place? I would like to pull the bellhousing anyway just to clean all the crap off it.
Pulled the rear dif cover because it was leaking. Fluid looked suprisingly clean. I also drained the front dif and the fluid in that looked like chocolate milk. Looks like I got some birf rebuilds to do in the future. Can I use gasket maker to attach the rear dif cover or do I need the cork gasket?
I hate waiting on parts...
jdfording said:Pulled the xfer case and tranny. I'm glad I did, the rear main seal was leaking. The PO forgot to pull off the old spring that rides in the seal so there were 2 springs in the bearing cap. The flywheel needs resurfaced as well.
Going to replace all the seals and gaskets on the tranny and xfer case. Waiting on parts for now.
Questions:
If I do will I need to support the engine or will the front mounts hold it in place? I would like to pull the bellhousing anyway just to clean all the crap off it.
Can I use gasket maker to attach the rear dif cover or do I need the cork gasket?
I hate waiting on parts...
You must support the rear of the engine if you take off the bh. The front mounts will snap if you don't!
I've used silicone when a gasket wasn't available, put prefer a nice new cork gasket if given the choice.
- Thread starter
- #40
You must support the rear of the engine if you take off the bh. The front mounts will snap if you don't!
I've used silicone when a gasket wasn't available, put prefer a nice new cork gasket if given the choice.
Good to know!
I went ahead and ordered the cork gasket.