The Ultimate Ultimate Air Thread

This site may earn a commission from merchant affiliate
links, including eBay, Amazon, Skimlinks, and others.

Joined
Dec 27, 2005
Threads
83
Messages
530
Location
Tucson / Vail, AZ
Website
kartchcustoms.com
A while back I decided that I wanted to install an on board air system using CO2. Eventually I will probably add a redundant system with a York. My initial impression was to buy all the parts myself and save some coin. After doing some research comparing buying individual parts vs. buying the various companies that sell CO2 systems, then crunching the numbers in a spreadsheet (I am the spreadsheet king!) I realized that I could save some money, but not as much as I thought and would end up with an inferior set up.

I knew I wanted an adjustable regulator as I want to be able to use the system for a lot of different uses (i.e. nail guns, air tools, etc.). All the adjustable regulators that I found stuck out really far from the tank and weren’t really designed to be moved around.

After a lot of deliberation, I called Ultimate Air and ordered a Multiforce 15# system. They give a discount to mud members and are a sponsor of Ih8mud. After all the discounts offered by Ultimate Air, the deal really made sense for me.

The package included a new tank, adjustable regulator, air hose w/ quick release air chuck, and tank bracket. I also got the protective boot and a pair of roll bar mounting brackets.

The ordering process was personable and painless. When the package arrived, I was very impressed with the packaging of the product. Everything was packed in new boxes and protected well.

Well, let's get on with the pics. First of all was the tank itself. They are dang good looking. I got the brushed aluminum tank and must say it looks great. Knowing me, it probably won't stay that way very long! :D It has a kind of clearcoat stuff over the whole tank portion. The sleeve was a nice addtion and besides adding some protection, makes it easier to set down without feeling like you are going to gouge your tank

CO2 tank web.webp

ultimate sticker.webp

co2 tank sleeve.webp

One thing to keep in mind is make sure beforehand that there is a place that will fill YOUR tank. You don't want to get one of these nice tanks to find out you can only get exchanges.
CO2 tank web.webp
ultimate sticker.webp
co2 tank sleeve.webp
 
Last edited:
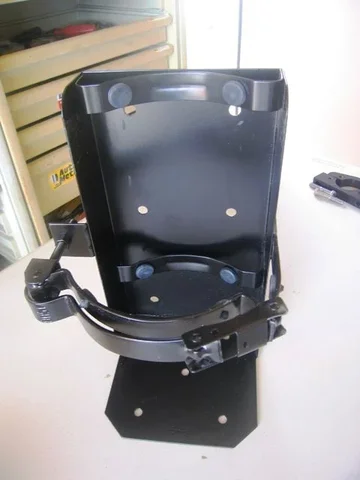
The bracket is a basic fire extinguisher bracket that can be bought at any fire supply house. I'll probably get one to fit my fire extinguisher, order up some more roll bar brackets and mount it on the oppossite side of my CO2 tank installation. It's strong, it works, and with a huge flat side is pretty easy to mount.

The only thing lacking is a locking mechanism. I'll probably end up fabbing something up myself.

co2 bracket.webp
co2 bracket.webp
 
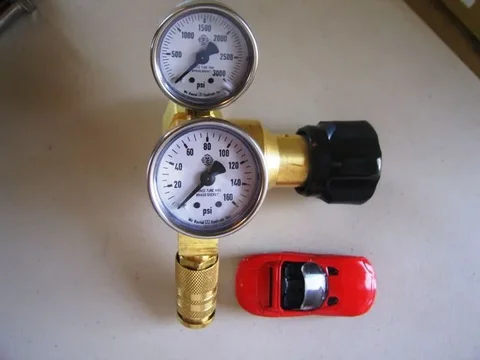
Now for the part that pushed my decision over the edge; the regulator. I have to say I'm impressed with the design of the regulator. It appears to be very well built and with it's angled design, is very compact. I have always questioned the need for two guages on a CO2 system. I would rather have just the regulated pressure guage. The other is worthless IMHO. That said, the design keeps the guages out of the way as much as possible. The angle design keeps everything nice and compact, even when the hose is attached.

reg car pic.webp

Reg side view.webp
reg car pic.webp
Reg side view.webp
 
A coiled 25 foot polyurethane hose is included in the kit. As an added touch a quick release attachement is included along with an air chuck. I use the tank for my welder as well. To make the changeover smooth and easy, I added a male quick release fitting on the hose of my gas line for my welder. All I have to do is take the tank out of my FJ, put it next to my welder and hook it up. No need for changing regulators, no wrenches needed.
 
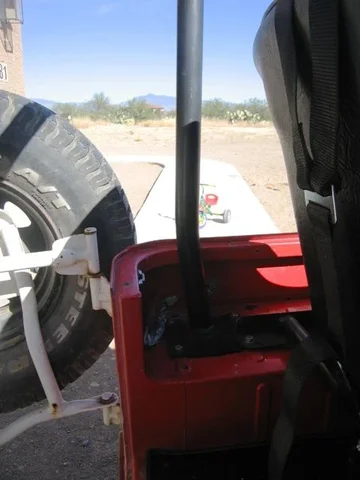
The rear tub of an FJ40 has a lot of flat spots for mounting a tank. I knew I didn't want to mount the tank on the floor though as this wastes a lot of space in my opinion. I have a family cage by manafre and decided the best place to mount was in the back corner of the vehicle off the roll bar.

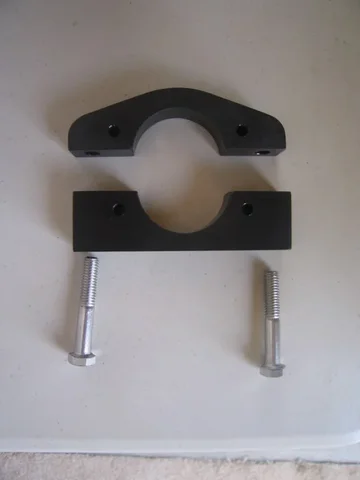
To do this, I ordered a set of roll bar clamps. The only thing missing is some washers to spread the load. Probably not needed, but can't hurt. The clamps work great. They are designed to match up with the predrilled holes in the bracket. Because my back pillar takes a small bend, i had to drill a couple new holes for one of the brackets.

bar clamp.webp

Bar clamp 2.webp
bar clamp.webp
Bar clamp 2.webp
 
I'll probably be ordering more of these brackes for other fabrication things I have in mind. Again, they are very well made. They come in different sizes for different tube diameters.
 
I wanted as much capacity as I could and still be able to fit the system on top of my rear fender and still have everything under the roll bar. I was worried the 15# system would be too big but it fits like a charm. Enough for tonight. Tommorrow I'll post the install pics.

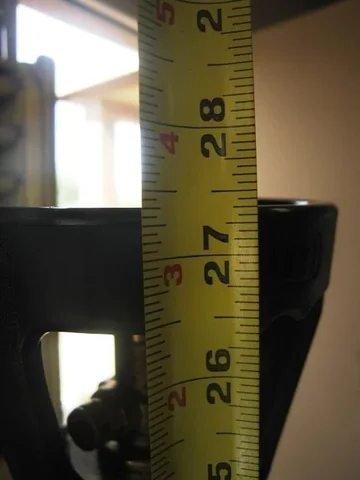
Here's the height of the 15# tank FYI. Hows that for a picture not needed!

tank height.webp
tank height.webp
 
I'm taking pictures today. It really turned out nice and takes up minimal space. Another benefit is the bracket turned out to be a great place to mount my 2m radio as well.

Brian was great to deal with from start to finish.
 
OK, back at it. Here's a pic that shows how the manafre pillar takes a slight bend that requires the bottom mount be drilled out to mount at an angle. Very simple to do.

Manafre back leg.webp
 
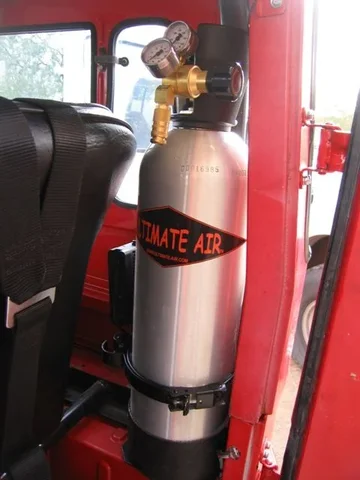
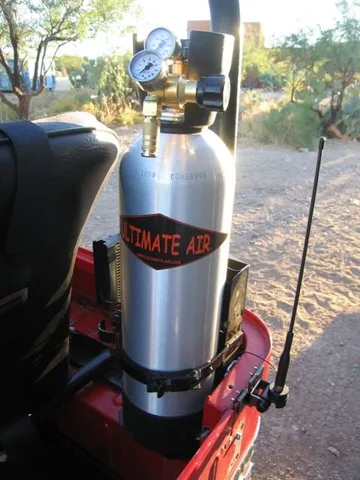
There's not a whole lot to say about the installation pictures. I'm just going to post some that show how the tank fits with and without the top on. I am really pleased at how the tank fits. It's a great use of space in my opinion.

You will also see that I used the front of the bracket to mount a quick release bracket for my FT-8900 Ham radio. Again, taking advantage of space that is otherwise pretty much unusable.

Top bracket .webp

Bracket side.webp

You can see the quick release bracket for the Yaesu Ham radio. The quick release mount work wonderful. It also opens up additional mounting locations as you don't have to have side access to the screws of a typical mount
Top bracket .webp
Bracket side.webp
 
Last edited:
install with top 2.webp

outside back view.webp

This is a K400 Diamond lip mount. As you can see from the other pics, it works great with and without the top installed. I am going to add a strap to help with grounding soon.

Ultimate Air 1.webp
install with top 2.webp
outside back view.webp
Ultimate Air 1.webp
 
Last edited:
Well, not super technical but hope it gives you some ideas. I will be making a shield out of sheet metal that I will weld to the rollbar to protect the radio when the top is off. As it is now, the radio and the antenna connection could easily be damaged by trees, brush, etc.
 
Top corner view.webp

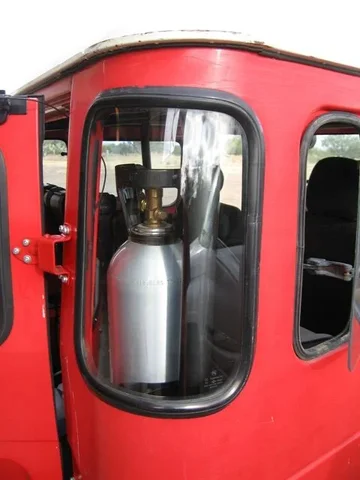
Here's what you see through the rear corner window. The funny thing is I've had three people ask me why I added nitrous! :)
The tank is easily removeable for use outside of the vehicle and for when I need to weld.

I would highly recommend you give Ultimate Air a chance if you are looking for an excellent system and company to deal with. Make sure you let them know you are part of mud to get the discounts.

I would also recommend you get the largest tank you have room for. The aluminum tank is a LOT lighter than the steel tanks. My 15# aluminum is easily moved when full.
Top corner view.webp
 
He is also a big supporter of our sport. He always sends something for the Southern Cruiser Crawl raffle! Support those that support us!
 

Users who are viewing this thread

Back
Top Bottom