Razor One's Armor Build Thread (1 Viewer)

This site may earn a commission from merchant affiliate
links, including eBay, Amazon, Skimlinks, and others.

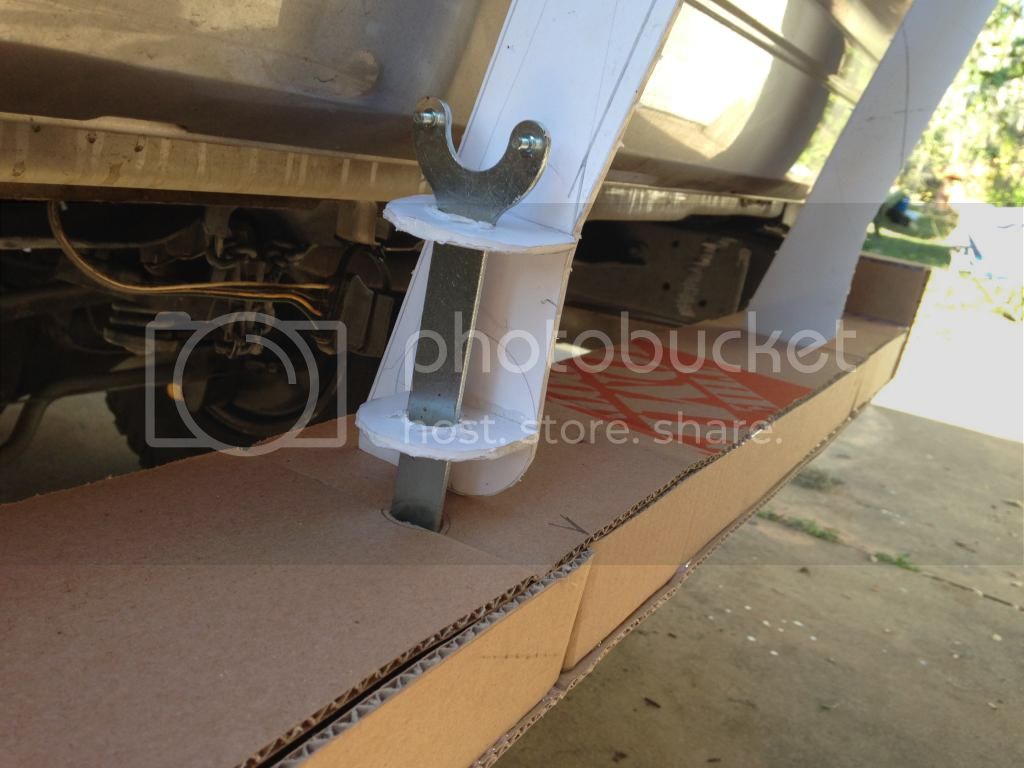
Welded tabs so the bumper can rest on the top of the frame rails. Now the bumper just slides on or off. The tabs also add rigidity in case of a collision.

ImageUploadedByIH8MUD Forum1412048524.321644.jpg

ImageUploadedByIH8MUD Forum1412048537.639411.jpg


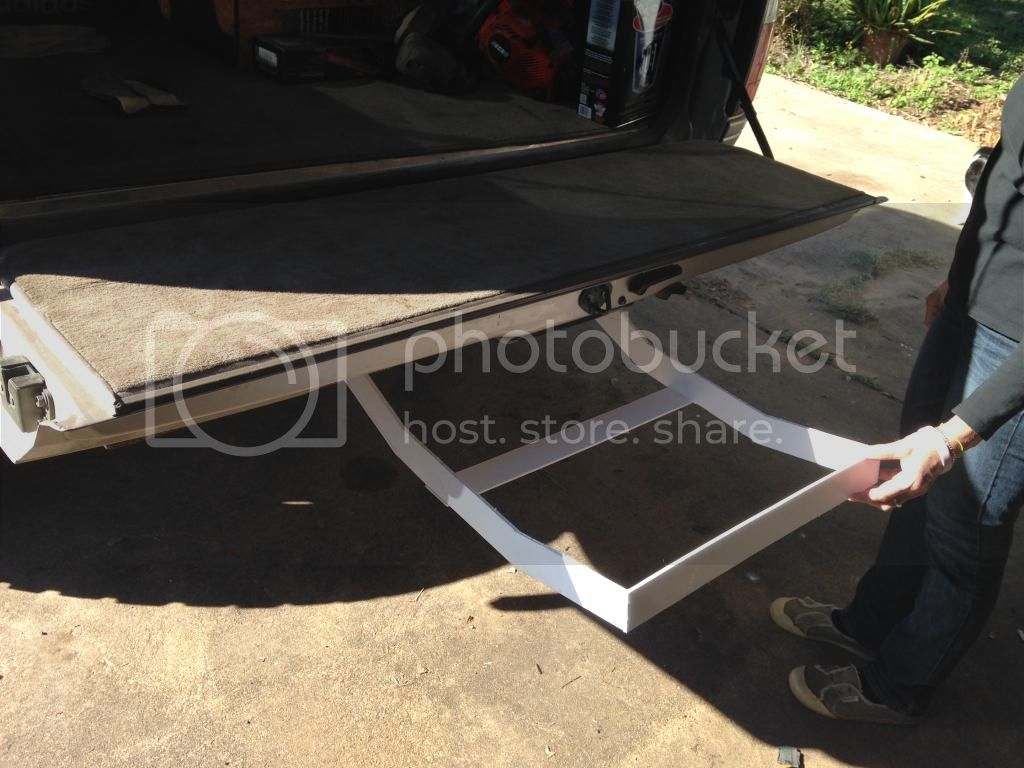
Almost ready to blast and paint!

ImageUploadedByIH8MUD Forum1412048287.589891.jpg

ImageUploadedByIH8MUD Forum1412048298.655819.jpg

ImageUploadedByIH8MUD Forum1412048311.520500.jpg

ImageUploadedByIH8MUD Forum1412048324.539652.jpg

ImageUploadedByIH8MUD Forum1412048338.889296.jpg
 
My original plan was to paint it tan, but someone I highly respect said to leave it black for a week to see if I like it......

So black has one week to win me over.

If I paint it tan, I'm just going to use regular krylon camo tan paint instead of bed liner. Over time, the tan will get scratched up, showing the black bed liner underneath. I don't baby it, and I want people that drive slow in the fast lane to know that. I thought of even scratching up the tan on all the corners with a stainless steel brush, to speed up the process.
 
That came out nice! I've been watching your and Booger weldz's from the scrap bin build... thank you for keeping up with this thread!

Dan
 
Nice in black IMHO! Do love the double bottle openers!!! Great addition.
 
Started on the rear bumper today. I think I'm going to do a tire carrier, too, but I'm not sure yet.

Before

ImageUploadedByIH8MUD Forum1417834150.636825.jpg


Tire out!

ImageUploadedByIH8MUD Forum1417834168.552874.jpg


Tow package off!

ImageUploadedByIH8MUD Forum1417834230.219310.jpg


Cutting off bits left over.

ImageUploadedByIH8MUD Forum1417834259.002175.jpg


Bare frame rails.

ImageUploadedByIH8MUD Forum1417834318.252768.jpg


I have everything I need to design and build, now. Tomorrow I'll start the foam board process, again.

ImageUploadedByIH8MUD Forum1417834359.319592.jpg


Can I cut this thing off?

ImageUploadedByIH8MUD Forum1417834446.553027.jpg
 
I have some ideas in my head for how I want to do the tire carrier. I'll probably do a swing-down carrier like Nay's:

tire-carrier-jpg.482381


tire-carrier-latch-jpg.482382


tire-carrier-unlatched-jpg.482383
 
Okay, so I've started R & D on the rear bumper. I'm going with a swing-down design that allows me to use both the tire mount as a tailgate/utility table (when folded down), while still clearing the actual tailgate when it's dropped. So far I haven't seen a design like this, but if all my measurements are right, this should work pretty well.

It shouldn't be extremely heavy either. I expect it to be about what my front bumper weighs, not including the tire. Because I'm not sure how much sag I'll get, I have the OME heavy springs on standby and the mediums on already. If I had to guess, I expect to keep the mediums.
 
Progress:
02F73B3C-2960-47F9-A570-EEC6C4175DFF_zpslq7kjnuc.jpg

This is how the swing-down latch will work. I'll have around a 1" pin on both sides that go through the tabs in the arms and straight through the bumper.
B807A6DD-17C6-4322-B19A-933AF46FE192_zpsdgzz1zef.jpg


64E42A9D-CF7C-4EE7-8CF9-B51803B7D144_zpsobgxdz6h.jpg

The hinge will be a 20" long section of 1.5" schedule 80 pipe inside a 2" schedule 80 pipe. When both the arm and the tailgate are dropped, it clears the tailgate by a 1/2".
C41198D3-D733-4272-9A23-5CFC7BDA06AC_zpsonvaohzm.jpg


02CC4ABC-736C-4A36-BD51-7406D40B376D_zpsracwiqqn.jpg


0FC76934-A16D-448E-BFA5-13ED663976CD_zpsmkc3vqxx.jpg

I haven't started working the angles on the wings yet. The tire will mount here:

d453ef8b-b676-4cbb-b3a7-dde6dfecfed3_zpsfe47778b.jpg


And the whole tire will take up about this much room dead center. I'm aware that this placement will cause some problems.

94f62b7e-ac7c-4a98-99d2-82cc91752e03_zps199202bf.jpg
 
Update: Wow, it's almost been 8 months and I kinda had to put welding on hold. Now that I have my degree in Biochemistry, I have some time off. Here's some pictures!

Tried to cut the tabs off the tow package to use it as a cross beam, but something didn't look right, so I scrapped it.

32FB4FEB-478F-4F36-B698-289D5023B5CD_zpsz11p0qfp.jpg


Couple days ago welded up 11ga rectangular tubing to some 3/16" plate and bolted it up

0B4AD0CC-CD7C-4FC0-9B22-462992B8FA93_zpsma52eysg.jpg


Yesterday, I took a torch to some scrap 1/4" steel to make the wings. I'm about to tack up both sides to see how it looks and make changes from there.

F84714B4-F1F9-4312-AE99-5DFBF42AE06D_zpslbvdmfu5.jpg


After thinking about it, and doing some pricing and R D, I decided to mount the tire carrier inside the cargo area. I just don't want to deal with the issues of having a swing out or swing down. So right now, I'm just designing and building the bumper, and I'll go from there.

94f62b7e-ac7c-4a98-99d2-82cc91752e03_zps199202bf.jpg


I'm waiting on an extra pair of hands to make sure I tack everything up right in a little bit. Stay tuned.
 
First side pieces tacked up

ImageUploadedByIH8MUD Forum1438647039.107362.jpg


ImageUploadedByIH8MUD Forum1438647059.360332.jpg


Working on cutting out the other bits, and getting the other side tacked. Should have more by the end of the day.
 
So I didn't get to it today. Had a few things come up, but I'll get to it faster this time than the front bumper. I'm really looking forward to getting it finished so I can start the fab work on the tire carrier. I ordered a spare 315/75/16 Goodyear Wrangler Duratrac that I need to mount inside the cargo area, and I think while I'm at it I'll go ahead and put a shelf for a spare gas can, and a spot for ammo cans on the other side.
 
Nice mock up! Subscribed!
 
So I tacked up the other side tonight, and I'm a little dissatisfied. Even after adding the rest of the pieces, the bumper looks like it's missing something, but I don't know what it is. I'll have to take a look at it tomorrow in the daylight, when I can work on it some more.

9F80A45D-CC2F-4324-AC8A-303629B2CB14_zpsn9ydau8r.jpg
 
So I had some help, but I think I know what I was missing. Check it:

ImageUploadedByIH8MUD Forum1438830037.458556.jpg


ImageUploadedByIH8MUD Forum1438830053.298330.jpg


Ignore the rust, that piece isn't long enough anyway, but you get the idea. I'm going to reinforce the rectangular tubing with some 3" angle iron to close the gap, and give a better surface area to step up on. This was what I was missing.
 
Worked on the bumper some more, today.

ImageUploadedByIH8MUD Forum1438918884.577785.jpg


Ground off the left over bits from the cross-member.

ImageUploadedByIH8MUD Forum1438918945.827308.jpg


Marked the bumper for a few minor cuts.

ImageUploadedByIH8MUD Forum1438918979.793798.jpg


I cut 3" angle iron to the correct length and it's almost ready to be tacked up. I'm going to tack it where it's flush on top, after I take the surface rust off.
 
I built a small welding table to make this next part easier.

ImageUploadedByIH8MUD Forum1439000947.986302.jpg


Tacked!

ImageUploadedByIH8MUD Forum1439001177.367930.jpg


Mock up

ImageUploadedByIH8MUD Forum1439001205.951350.jpg


ImageUploadedByIH8MUD Forum1439001262.884416.jpg


Now for my favorite part... Coming up next!

ImageUploadedByIH8MUD Forum1439001371.334352.jpg
 

Users who are viewing this thread

Back
Top Bottom