Irish's Slow 1978 Rustic Green Build (1 Viewer)

This site may earn a commission from merchant affiliate
links, including eBay, Amazon, Skimlinks, and others.

Great thread, job well done...I'll quit whining now and get busy on my own project!!;)

Thanks! It just takes a little time. I keep tinkering with it and sometimes bite off a little more than I can chew, but that's part of the fun, right? Good luck with your Rig!
 
Took the 40 for its first real trip this weekend. 180mi of highway driving up the Cascade Loop Highway. It was awesome. Bikini top makes a difference, but it needs some warmer clothes added in for sure. I almost learned the hard way how far you can get on a tank of gas and how quick the gauge drops from half to a quarter or lower.

2i77R1y.jpg


5l8J101.jpg


I added a Tuffy Console (not pictured) for some additional storage. I will need to bend the shifter to make it more comfortable to drive though.
 
Last edited:
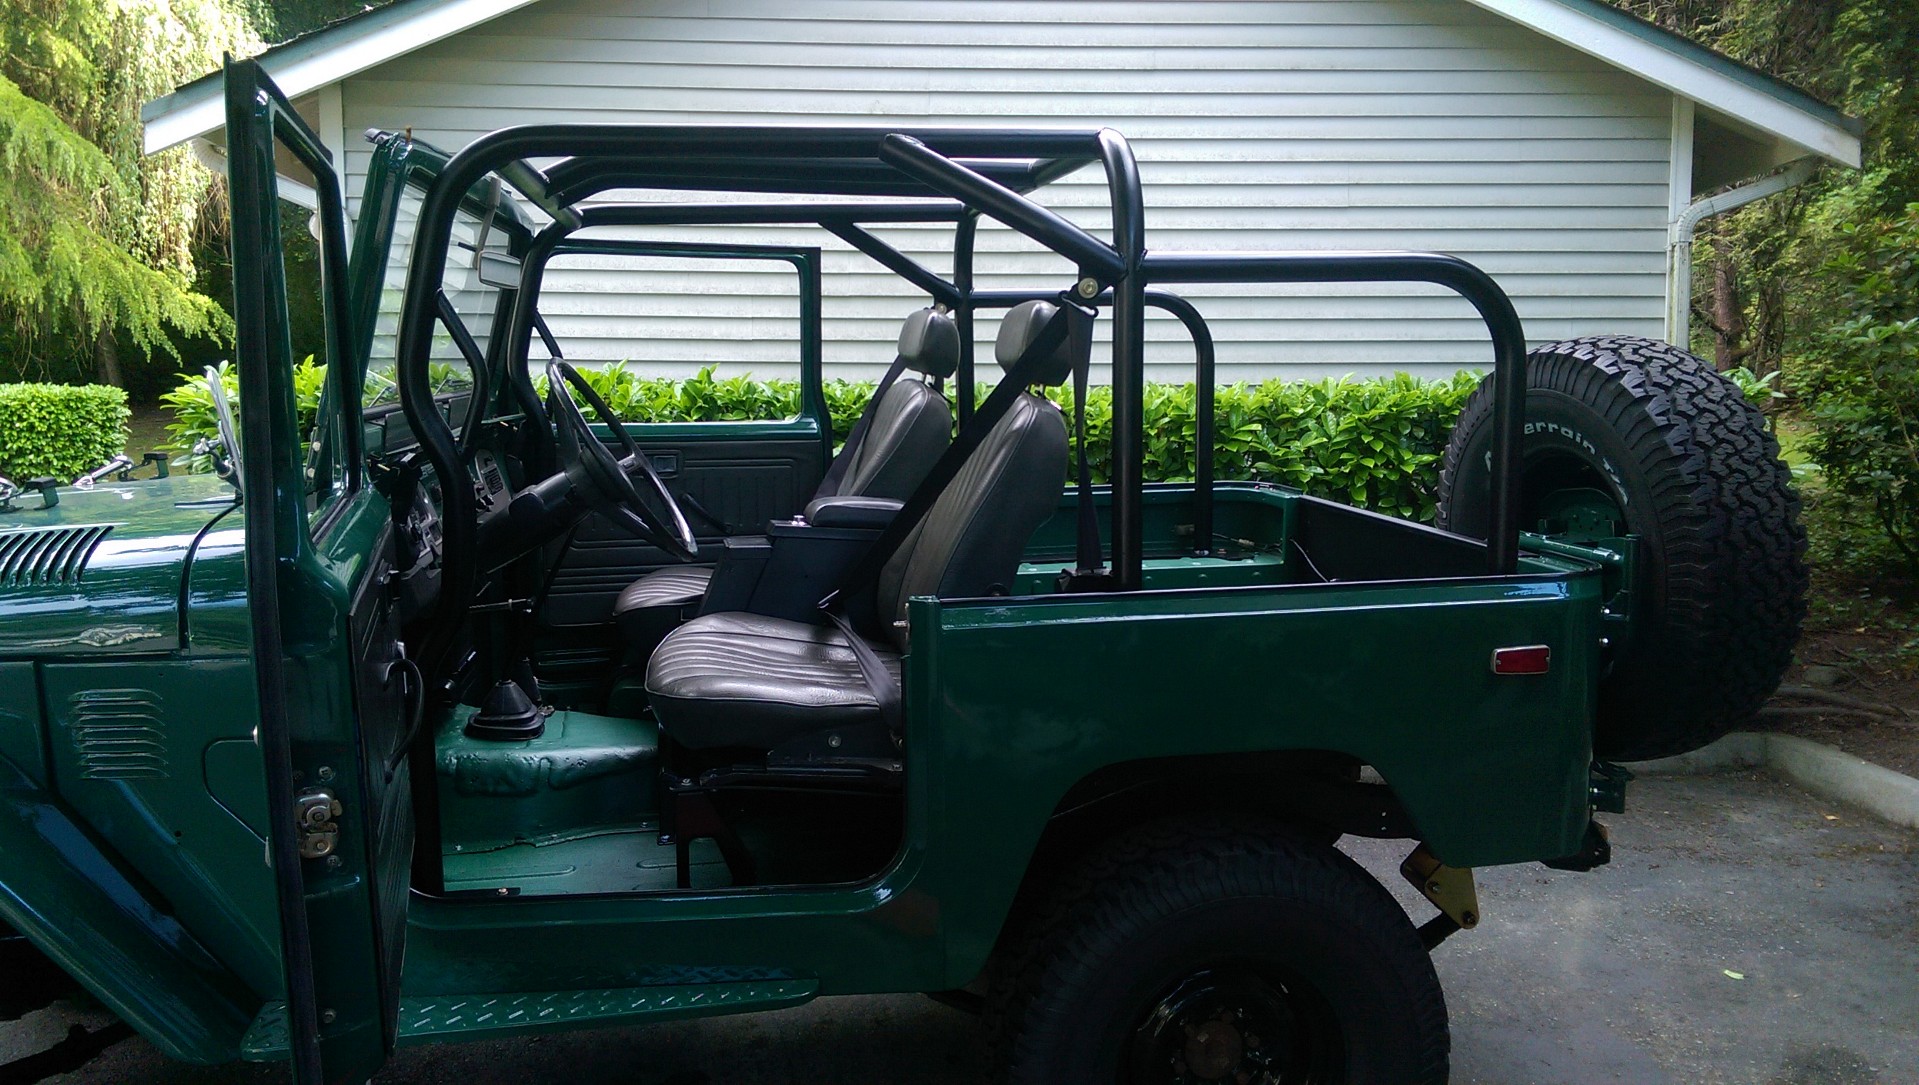
I installed a Metal-Tech Jackson roll cage to make my resto-mod a bit safer. There are not a lot of photos of them from different angles, so I decided to add a few in case someone else was looking. I opted to have the cross dash bar not added.

tEoPCN7.jpg


zlcFT6Q.jpg


Note, when ordering one make sure you ask about the seatbelt mounts. They do not list them on their website as optional (and an additional cost) yet show them in all their photos. Mine shipped without them and I had to order a pair. I don't have the ability to weld right now, so I ordered a pre-built model and not having the belt mounts was a long set back. Luckily for me there was an awesome guy in my club who was kind enough to weld them in for me. He is also working on a start up for some awesome looking ExPo trailers. They weigh around 800lbs empty and I rolled it around in the driveway myself, they are balanced really well. Maybe someday the 40 will tow one.

BkTN7PE.jpg
 
Last edited:
Very cool! Cruiser is looking great.

I want to get that exact cage, and debated whether to go with the pre-welded version vs having it welded up. How was the fitment? Any issues? If you don't mind me asking, since you and I are nearly neighbors, what was the shipping cost from Portland?

Thanks!

Peter
 
Thanks! As always its a work in progress.

The fitment was good, it took a little tweaking to fit. A few of the holes (the seatbelt holes) on the rear section were cut to the wrong size and needed widening. Otherwise it was good. It was $149 for freight shipping to a depot in Woodinville and I picked it up from there.
 
Its Summer time in Seattle (or as close as we get it) so its doors off time. I also added correct rear jump seats just in time too.

Question: What does everyone do with their rear seatbelts when not in use?

Also this thread would be worthless without pics so:
qogltVy.jpg
 
Last edited:
Looking good Irish11! :)

I always buckle my rear belts and fold the jump seats up with them in-between when not in use. My jump seats are pretty stiff and take a bit of force to fold down so I don't have to worry about the seats flopping open on bumps. :cool:
 
Looking good!

Question: What does everyone do with their rear seatbelts when not in use?

Well, I just took mine off (along with the jump seats). All my kids are grown, I never take more than one passenger, and I like the extra space to pack stuff over the wheel wells. Sorry that doesn't help you much though.
 
I haven't had any updates on additions this summer. I've just been driving it. After almost two years of tinkering its been amazing to do just that. Slowly I've been going through the POs "updates" to the engine and was wondering if someone could shed some light on what this is? The tube coming up comes off the side of the gas tank, into a hard line that runs down the frame and up into the engine compartment where the PO capped it with a bolt. Is it a breather for the gas tank? Some return line?

I have a weber carb and the PO has done some de-smogging work. The engine runs like a top right now, but I do get a gas smell when I up shift so I would like to track that down eventually.

WP_20150826_002.jpg
 
Looks like one of the charcoal canister hoses from the size of it, but I'm away from home and can't look at mine right now. The canister/vapor recovery system does keep the gas odors down.
 
If you have a Weber and that line comes from the inboard side of the fuel tank, it's the stock fuel return. Does it run side-by-side with the fuel line along the frame?

I haven't had any updates on additions this summer. I've just been driving it. After almost two years of tinkering its been amazing to do just that. Slowly I've been going through the POs "updates" to the engine and was wondering if someone could shed some light on what this is? The tube coming up comes off the side of the gas tank, into a hard line that runs down the frame and up into the engine compartment where the PO capped it with a bolt. Is it a breather for the gas tank? Some return line?

I have a weber carb and the PO has done some de-smogging work. The engine runs like a top right now, but I do get a gas smell when I up shift so I would like to track that down eventually.

View attachment 1125927
 
If you have a Weber and that line comes from the inboard side of the fuel tank, it's the stock fuel return. Does it run side-by-side with the fuel line along the frame?

That line does run parallel with the incoming fuel line. I was looking for a return port on the weber, but I cannot seem to find one.
 
Yep, that's why the return line is capped off.

That line does run parallel with the incoming fuel line. I was looking for a return port on the weber, but I cannot seem to find one.
 
Its been a while since I had an update. Work on the cruiser has been slow. I am saving up for a hardtop rebuild in the near future. In the mean time I have just been driving it:
1kD7h2B.jpg


That being said I have added a few small things.

EL Wire mod:
I don't know why I didn't do this earlier. Makes a HIGE difference. It was a little bit of work since the kit doesn't exist any more so I had to make up my own. I used the same coollights that the kit used as well as the regulator. I soldered the light power and negative into the back of the gauge drum connector (this was the best connection I could think of. I hid the regulator (about 1" square) behind the gauges inside of the cluster for a bit cleaner install.

(bad photo, my phone didn't want to pick up the light correctly, they are "cool-white" 2.3mm EL wire)
fPaTlmY.jpg


pI7YV6b.jpg


Kaymar Hi-Lift Mount:
Since Kaymar doesn't have a US distributer I picked one up last week when I was down in Sydney (drooling over their rigs). I ordered a passenger side mount, but was shipped a driver's side. I wanted to swap it out, but it was going to be a week for shipping and I was not going to be in town to receive it. It was another $45 to have it shipped from the land of aus to my house in seattle so I decided to just live with it. I am working on mounting for the foot.

egilj7I.jpg
 
Last edited:
Hi all,

Hey Kyle, does that DS Kaymar HiLift mount clear the door hinges?

Regards,

Alan

P.S. How about some better pics of the Kaymar jack mount?
 
Hey Alan,

It does clear the door. I need to drill into the running board to secure the foot before I try any wheeling with it. Right now I have some foam tape to give it enough friction to keep it in place. I'll try and snap some better pics tonight. The mount is a pretty simple design actually, it wouldn't be hard to make a very similar one.
 
@Josie'sLandCruiser Here are some photos of the Hi-lift mount and the clearance between the door and the jack. Top bolt on the bottom door hinge just barely rests on the jack when the door is fully opened. Note I haven't drilled anything to mount the foot yet. I am trying to see if I would rather build one for the passenger side first.


SyXOoox.jpg


VlDoJRd.jpg


ngzJkbo.jpg


Sorry for the delay I've been distracted with a different Fj40 project... I now have a hard top!

egilj7I.jpg
 
Hard Top:

I was working at night otherwise I would have taken more photos. It was interesting putting it back together after 2 years apart. Some of the holes didn't line up as planned and needed some coxing to get into the right spot:
DEZLEaO.jpg


All and all though I am really happy with it. @Racer65 's seals worked great. The rear doors seals are on their way and will be here shortly. In the mean time I need to figure out how to put the windows back in. My OEM seals are still good so I would like to use them if I can. I just need to figure out the trick to it. I was hoping the string method would work, but the lip doesn't appear large enough.
Vif0zFe.jpg
 
Okay, Ive done a few searches and I have tried the string method without luck. Is there a trick to getting the OEM one-piece window seals back in? (I assume mine are OEM, they all match).
 

Users who are viewing this thread

Back
Top Bottom