Next: '77 FJ45, sure to test my sanity... (1 Viewer)

This site may earn a commission from merchant affiliate
links, including eBay, Amazon, Skimlinks, and others.

Mtbcoach

Moderator
Joined
Jun 29, 2006
Threads
179
Messages
4,394
Location
Carolina Beach NC
Here she is, arriving from her previous home via trailer. Thanks to Jason, it all worked out. He passed on the info on the rig after he done the deal for his current FJ45. Never saw it other than pics over the internet. Had several conversations with the owner, a fellow ih8mudder so I felt ok with buying it sight unseen. Some say brave, some say stupid...I say, it is what it is and I'll deal with them...
77FJ-45-a-1.jpg


Jumped in, started right up with some choke and drove it home...
77FJ-45-a-4.jpg


In the light of day, it will need some work...
77fj45-b-005.jpg


One of the worst spots...
77fj45-b-017.jpg


And, being that its a "northern" FJ45, it has a bit of crud on the underside...
77fj45-b-041.jpg

77fj45-b-097.jpg


Yet, all in all, it grows on you...
77fj45-b-151.jpg

77fj45-b-161.jpg

77fj45-b-164.jpg
 
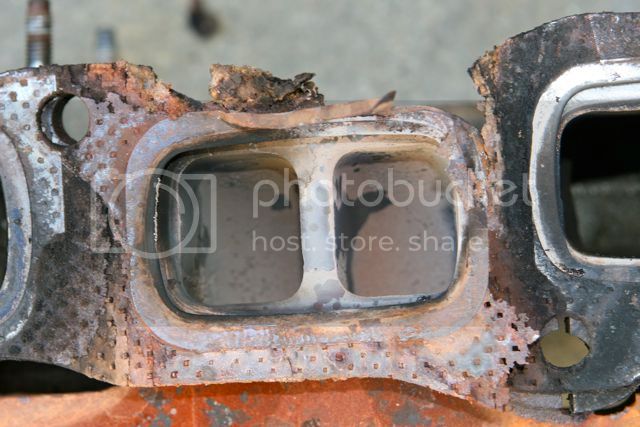
Drove it around town a few times and all seemed fine, on short trips. Once I drove it until it fully warmed up, I couldn't give it any gas. This led to a trouble-shooting affair that went from fuel delivery (pump) to carb re-build to the eventual problem, a blown intake/exhaust gasket...

fj45intake-exhaust-114.jpg


Note the nut on the right, that is how I found it. I guess its a bit light on the torque spec for the part...
fj45intake-exhaust-116.jpg

fj45intake-exhaust-117.jpg


With the manifolds removed, you can see the blow-by, its no wonder why it didn't want to run well...
fj45intake-exhaust-127.jpg

fj45intake-exhaust-132.jpg

fj45intake-exhaust-134.jpg


Manifolds before...
fj45intake-exhaust-105.jpg

fj45intake-exhaust-162.jpg


Manifolds after blasting...
fj45intake-exhaust-10.jpg

fj45intake-exhaust-15.jpg


Manifolds after high temp paint...
fj45carb-done-02.jpg

fj45carb-done-03.jpg

fj45carb-done-06.jpg

fj45carb-done-08.jpg


Here is excerpts from the thread on my carb re-build...
FJ60carbrebuild-01.jpg

FJ60carbrebuild-03.jpg

FJ60carbrebuild-05.jpg

fj45carb-done-09.jpg
 
Last edited:
After all that, someone puts a bug in my ear about building up a 2F-E. Not more than a few days later, the donor 3FE makes an appearance and I'm allowed to rape the top end off of it. So, now I need to remove the engine so I can attempt to build up a 2F-E.

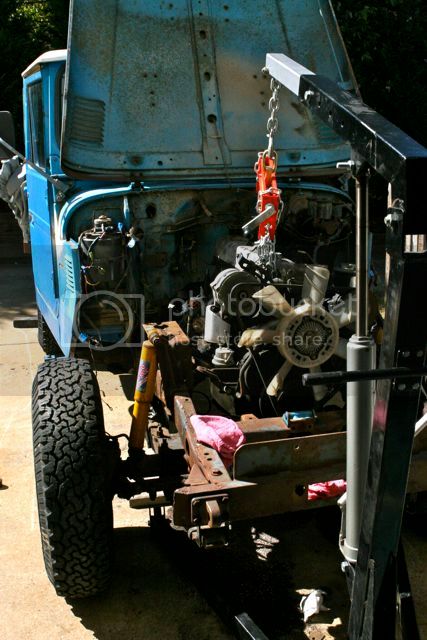
So, the tear down begins to remove the engine. No good reason to not take off the fenders, bib and radiator.
fj45td-202.jpg


Lots easier to move around in the engine bay and get a good look at all those places you can't really see without them removed...
fj45td-204.jpg

fj45td-235.jpg

fj45td-236.jpg

fj45td-251.jpg

fj45td-3-08.jpg

fj45td-3-17.jpg


All this build up is making me more and more concerned...
 
Last edited:
Time to get the engine out. This became way more work than it needed to be. First disclosure, stick with your first instincts.

I spent hours underneath, around, over, under, back, forth, up, down, jacking the engine in every manner to get it out without having to take off the crossmember. Why? Good question. I loosened the bolts but could not get to the nuts which were inside the frame rail. There was/is so much build up/debris inside the frame that I couldn't get a socket on the nut. The next step in my mind was to cut the heads off and drop the crossmember now.

No, I can squiggle it through. Wrong...Failed. Three hours later, I cut the heads off the bolts, dropped the crossmember and had it out 5 min later.

But, here are the pics of my trails and tribulations of the n00b...
fj45td-4-01.jpg

fj45td-4-06.jpg


It should have been obvious from this view, it wasn't going to go over that crossmember without the transmission hitting the firewall on the way...
fj45td-4-07.jpg

fj45td-4-16.jpg

fj45td-4-14.jpg


So, what I should have done hours before, cut the heads off the bolts and get that thing out of the way...
fj45td-4-17.jpg


Its free (note my daughter's "victory" position even though she got home just in time for the extraction)...
fj45td-4-19.jpg

fj45td-4-25.jpg


It looks so empty...
fj45td-4-31.jpg


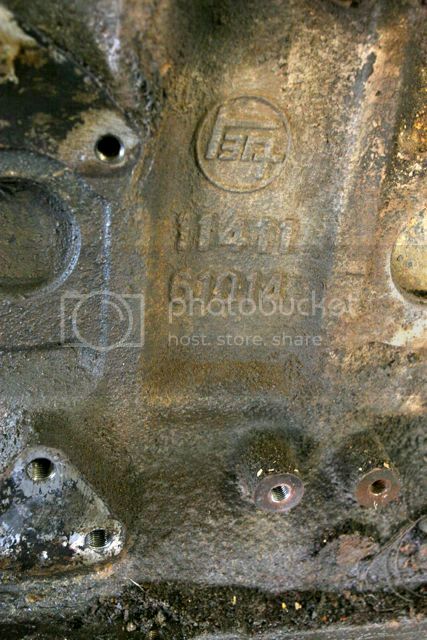
But, what is it? I know its a '77 2F from the engine code, we have 3F embossed on the bellhousing, 4 speed tranny, split transfer case but is that a spacer I spy in there. I'm not literate enough to know for sure what I "should" have as compared to what I do have. Not that it matters, just good info to know, right...
fj45td-4-43.jpg

fj45drivetrain-03.jpg

fj45drivetrain-04.jpg

fj45drivetrain-11.jpg

fj45drivetrain-12.jpg


Tomorrow I'll throw some clean up time on it before I free the tranny/transfer case from the 2F and put it up on the stand...
 
Last edited:
Very nice! It looks like someone began the rehab on the bed, but didn't get to the cab just yet.

jC
 
I hear you. Just go for it. So you spent a few hours fixing a problem that you no longer need to. It is more fun to work on these things than it is to drive them, "some times".

On to the next MOD.
 
After all that, someone puts a bug in my ear about building up a 2F-E. Not more than a few days later, the donor 3FE makes an appearance and I'm allowed to rape the top end off of it. So, now I need to remove the engine so I can attempt to build up a 2F-E.

So, the tear down begins to remove the engine. More pics to follow...

I might have put the bug in your ear but at least I helped you pull all the parts :p
 
Worthy project indeed. WHen you are through you'll have something that is all yours, built with your own sweat and blood, oh yeah and ca$h. I have never gotten past building vehicles since my first car, a 57 Chevy Belair, at age 15. Building it yourself is a huge game changer. Have at it bubba!
 
Very nice! It looks like someone began the rehab on the bed, but didn't get to the cab just yet.

jC

It's just paint, the floor of the bed non-existent in some places. As I get caught up with pics, you'll see the task at hand. It will be a fun project...

I hear you. Just go for it. So you spent a few hours fixing a problem that you no longer need to. It is more fun to work on these things than it is to drive them, "some times".

On to the next MOD.

So true. At least the manifolds are nicely set up for someone's project down the road...

I might have put the bug in your ear but at least I helped you pull all the parts :p

Tis true, I couldn't have got it done without your help. Still owing you some payback...:beer:


Worthy project indeed. WHen you are through you'll have something that is all yours, built with your own sweat and blood, oh yeah and ca$h. I have never gotten past building vehicles since my first car, a 57 Chevy Belair, at age 15. Building it yourself is a huge game changer. Have at it bubba!

Thanks bud, but, what is this ca$h you speak of? It's going to cost money, oh crap, nobody told me that...:grinpimp:
 
Are you speaking of the spacer between the tranny and transfer? I think that is the casting that houses 5th gear in later units?
 
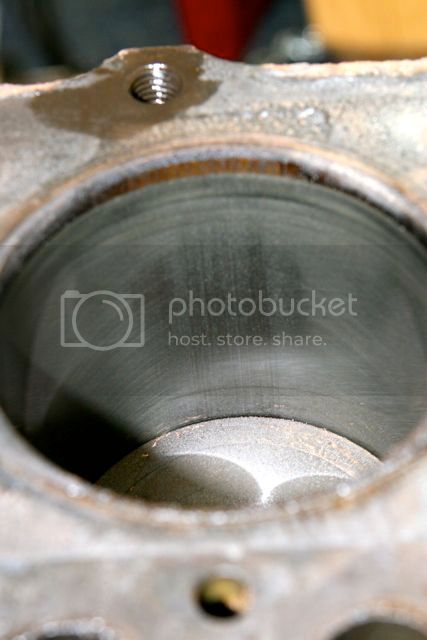
Finally got some time to get busy again on this. Tear down continues with the engine. I wanted to get a look at the cylinders before I invested too much time on other things.

I swear it took me hours to figure out how to get the beefy 2F on the cheap Harbor Freight engine stand. Thankfully for ih8mud, I found a thread that helped.
fj45head-engine-01.jpg

fj45head-engine-03.jpg

fj45head-engine-06.jpg

fj45head-engine-07.jpg

fj45head-engine-08.jpg

fj45head-engine-09.jpg


Now for the cylinder walls, consensus says...
#1, 160 lbs/sq in...
fj45head-engine-10.jpg

fj45head-engine-12.jpg


#2, 140 lbs/sq in...
fj45head-engine-14.jpg

fj45head-engine-15.jpg

#3, 140 lbs.sq in...
fj45head-engine-16.jpg

fj45head-engine-17.jpg


#4, 150 lbs/sq in...
fj45head-engine-18.jpg

fj45head-engine-19.jpg


#5, 150 lbs/sq in...
fj45head-engine-22.jpg

fj45head-engine-21.jpg


#6, 170 lbs/sq in...
fj45head-engine-23.jpg

fj45head-engine-25.jpg


Decisions, decisions...
 
Last edited:
I need to look at your pictures better. But my northern tool engine stand will not work either. I managed to get three of them in there but even then I was scared. The depth of the threads on the block are so shallow and with all of the leverage on the long six I figured it would all snap. I used a small jack to prop up the front of the pan.

Decisions is...go for it. Compression numbers are fine and you won't put that many miles on it anyway.
 
Last edited:
Numbers are good. Walls look good in the pics.

I would clean it up. Have the head done while it is off. IE new valve seals. Valves done. And run it.
 

Users who are viewing this thread

Back
Top Bottom