Help with 3-link on '99 4-Runner (1 Viewer)

This site may earn a commission from merchant affiliate
links, including eBay, Amazon, Skimlinks, and others.

Joined
May 5, 2008
Threads
16
Messages
345
Location
Missoula, MT
3-linking the Heepetr

I am new to linked suspensions but a capable fabricator. I want to build a new suspension for the rear of my '99 4-Runner to match a 3-Link + panhard front (probably ORSs' kit) I downloaded a 3-link + panhard calculator from Pirates but am unclear as to what all the calculated values mean and their effects. I thinking 3-link + panhard because the fuel tank presents problems with a triagulated 4. Passenger side exhaust could easily be changed allowing plenty of room for upper link. Could so somebody explain?...ideas?
 
Last edited:
Thanks for the link. My eyes are burning from all the reading so I must also be learning. Is it safe to assume the upper third link will follow the same design as the uppers on a 4-link? What about guidelines for the Panhard? I have looked at Trail Gear, but their 4-link would not work without me relocating my fuel tank and I don't think its designed around a third generation 4-Runner. They have a 3-link also but I'll run into the same problems with the fuel tank as all the mounts utilize a pre-fabbed crossmember...I think...
 
honestly with all the space restrictions that you have your going to be really limited in how your going to be able to get it to all fit under there, not sure the 4 link calculater really helps to much in that situation. i think the main keys to try to follow are keep your lower links as flat as reasonably possible, or close to 5 degrees as possible, triangulate as much as you can, try to get your lowers at least 39inches long and make your uppers around 75% of the lower length, and build some adjustablity into the upper links
 
Last edited:
Thanks Mookie. There definately is a space issue but from the measurments I've taken it seems as though it will all fit. I was planning on going about 40" on the lowers but my only reasoning was that is seemed like a "nice" number with relation to frame possitioning. Do you have a more practical reason than me for "at least 39"? Also I'm still looking for advice on the panhard? I've heard and read to keep it as level as possible at ride height. Is this right?
 
Don't make the project more difficult than it really should be. Relocate your fuel tank so you can do a 4 link setup that does not require a panhard bar.

Here are some reference links for the fuel relocation - more reading (sorry):
UltimateYota.com - Fuel Tank relocation
Who used a Ford gas tank in the toyota? - Pirate4x4.Com Bulletin Board

The 4-link can be calculated differently based on what kind of plans you have for your 4runner. Whether it's high speed, slow speed or even all around, the values will change accordingly. I built my 4runner for more or less in between because I wanted to make sure it wasn't extreme on either end of the spectrum. You will have to play around with the figures and make that decision on your own.

Don't forget that once the links are setup you'll have to figure out whether or not you want to retain your coil/shock locations or build your own using coilovers or some kind of coil/shock combination. Whatever you do the biggest limitation will be the shocks as if you plan to keep the stock location you really won't be able to utilize the travel your links potential. If you plan to cut into the cabin then you won't have any problems at all. :)

Here are some numbers I tried to use on my setup.
Roll Axis Angle - tried to keep it close to 0 (no rollover steer)
Anti-Squat - 75-90% (based on the 4 link calculator - same place where you got the 3-link version) This part will change for you - I believe higher % for rock crawling and lower % for high speed (it might be backwards but it's something like that - don't have my pirate links on hand but you can search for em)
I kept my upper to lower ratio 75%.
All link ends were heims (3/4x7/8) and fully adjustable for fine tuning of the axle alignment.

Lastly if you plan to utilize coilovers, don't forget that you'll then need to figure out what kind of coil + shock combination you can utilize along with the right valving. I'm in the process of fine tuning my valving but will probably take me (a long time) unfortunately cuz it's a pita.

Good luck
 
Link suspensions for dummies? - Page 6 - Pirate4x4.Com Bulletin Board

this is a good thread to read, if you can sort through the chest pounding and typical pirate b.s. there's some really good info....the lower link length thing isn't written in stone, most folks seem to agree that somewhere between 36-40" is ideal though....i haven't done a 3-link yet so hopefully someone else on here can help you out with that....Mace?
 
Thanks again for the help/links guys. I'm going to stick with the 3-link as I have no interest in relocating the fuel tank. I do plan on cutting into the body though. My 4Runner has no roof and the cargo area is already like a utility bed so it won't ruin its already "luxurious" feel.
 
run a 1/2 wishbone 3 link (one "link" with the wishbone only angled on one side). No need for a panhard bar.


find out what fits, post up the numbers and ask :)
 
keep antisquat pretty much as low as you can get away with, if you can get it down to 50% you will be so money. Roll center height is personal preference: High roll center = more stable in off camber situations but not as reactive to impacts. You can compermise a lower roll center w/ the addition of a sway bar. Suspension design is all about compermise. Like mace says post numbers when you get a starting point.
 
Well I'm finally ready to revive my post. I've decided a on a three link w/panhard front and rear. I'm gonna use 1" johnny joints and 2"x1/4 dom for my links. I've already had some say it won't be enough but the stuffs been bought and if it doesn't hold up I'll replace it with 1 1/4 and cromoly. I finally got my housing in today w/ axles and most of the high steer stuff. It seemed like forever but Diamond delivered one hell of a housing. I built my diff a couple weeks ago and finally got around to pressure testing the locker. I will start posting pics in the next day or so as the axle build begins.

a couple specs, though not very original

high pinion diff, 5.29 yukon and ARB
67" diamond w/ the knuckle gussets
Allpro high steer arms, tie rod and drag from Front Range
30 spline Longfield inners and outers
everything else is from an '85 axle ( I still want the cromoly hub gears but money....)
 
axle build

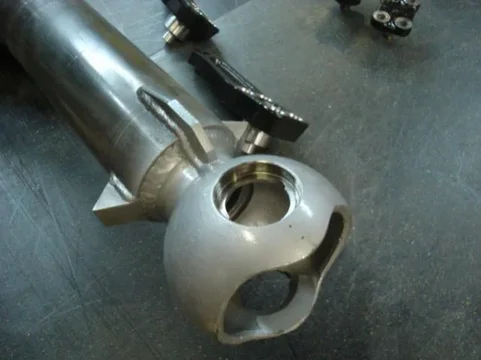
I finally got started building the front axle for the Heepetr. The next page or so is all instructions on how to assemble one of these axles. I felt like there wasn't a lot of axle builds with complete instructions/torque values so I decided to document mine. I have cleaned all the '85 parts with solvent and a wire brush and repainted. With a little patience and tape I managed to avoid all mating surfaces. Here I've removed all the knuckle studs and after cleaning them, I'm reinstalling them with a little high strength Loctite at 30ft/lbs.
040.jpg
Everything ready to go.
041.jpg
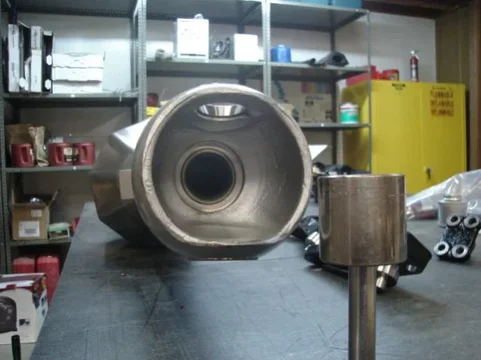
The Diamond axle shipped with used knuckle bearing races installed. You'll want to remove these with a brass drift and reinstall new races.
042.jpg
040.jpg
041.jpg
042.jpg
 
Last edited:
With the help of a deadblow hammer and a block of wood, the new races were a breeze. I've read about people freezing them, but with a little motivation they went right in at room temp.
043.jpg
Next I installed the "inner" axle seals. I used a 1 1/2" socket with a 1/2" extension in it backwards. It made a perfect seal driver.
044.jpg
Next came the diff seals. The working room was a little tighter but the back of the spindle nut socket did the trick this time.
045.jpg
043.jpg
044.jpg
045.jpg
 
Don't forget to go ahead and grease those seals at this time. It's alot easier now then once the knuckles are on.
046.jpg
After the seals were greased, I slid on the knuckle wipes. First the felt, then the rubber wiper, and last the split ring. When I took the '85 axle apart I assumed the split ring would come with the rebuild kit and threw the old ones away. Not correct. $
047.jpg
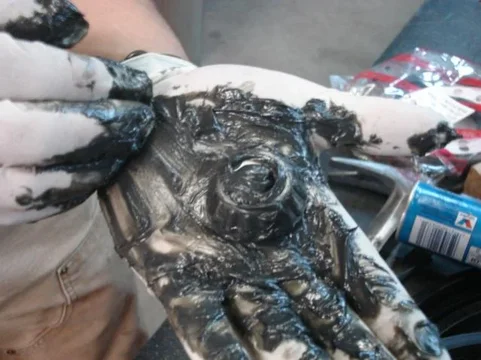
Next up, pack the knuckle bearings with new grease. I used Moly fortified grease because thats what my local master techs told me to do. Also make sure whatever grease you use that it's certified for use in wheel bearings...(high speed, high pressure).
049.jpg
046.jpg
047.jpg
049.jpg
 
Go ahead and set the top knuckle bearings into place on the knuckle balls.
050.jpg
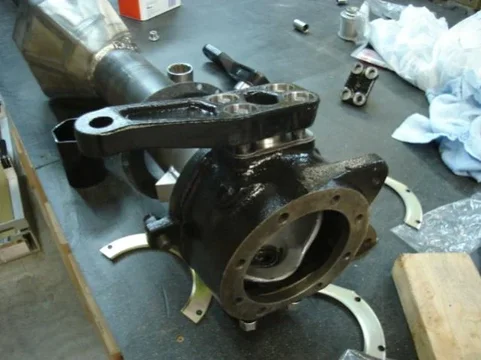
From there I assembled the lower half of the knuckles. When I took the '85 axle apart it had a thin and thick shim top and bottum. This is what I put back on the studs, followed by the cap, new wavey washers, and the nuts. Only run the nuts on far enough to hold everything on so that you can slip the knuckle into place. Too tight and it won't fit over the knuckle ball.
051.jpg
At this point you can slip another wheel bearing (already packed) onto the pin of the lower cap.
050.jpg
051.jpg
052.jpg
 
Slip the knuckle over the knuckle ball. I again added a thin and thick shim (like it had been on the '85) and dropped on the steering arm.
054.jpg
The cone washers go on next. It is helpful to apply a little anti-seize to them as they can be a real pain to remove later.
055.jpg
Install the flat washers and nuts on top of the cone washers.
058.jpg
054.jpg
055.jpg
058.jpg
 
Once you have all the nuts installed torque the nuts to 71ft/lbs. I used a rotation similar to a tire install to try to bring the caps and steering arms down evenly.
063.jpg
After everything is torqued up, use a pull scale to measure the turning resistance in the knuckles. Make sure to use the inside hole on the drag link side so that you're measuring both sides equally. The pull resistance should be between 7 - 13 lbs.
064.jpg
My knuckles ended up too tight at about 22 lbs. If you're too tight you need to add shims, too loose and take some shim out. An easy way to combat the cone washers is a heavy brass drift to the top of the knuckle studs. A few hits, and they ride right back up. The anti-seize didn't hurt either.
065.jpg
063.jpg
064.jpg
065.jpg
 
I tried the thin shim and two thick ones and ended up too loose. Next up was just two thick shims and the knuckles ended up good at about 10 lbs one side and close to 12 lbs on the other. After you're satisfied, you can move on to bolting up the wipes. Split ring first, followed by the rubber seal and finally the felt.
066.jpg
I opted to use Trail Gears' rock rings instead of the stock rings. You can see the difference here.
048.jpg
Make sure the rubber seal is seated all the way around and you can go ahead and tighten up the rings. I used a small 1/4" ratchet on these fasteners to make sure I didn't get carried away.
067.jpg
066.jpg
048.jpg
067.jpg
 
Last edited:

Users who are viewing this thread

Back
Top Bottom