Mtbcoach's LIVNSTRNG build up thread... (1 Viewer)

This site may earn a commission from merchant affiliate
links, including eBay, Amazon, Skimlinks, and others.

Mtbcoach

Moderator
Joined
Jun 29, 2006
Threads
179
Messages
4,394
Location
Carolina Beach NC
Please excuse the images hosted on another site, I'm in the process of moving them. They will be updated soon...

I've been asked to do a build up thread and have always wanted it to be "done" before doing so. The realization after more than 3 years with my FJC is that it will never be done, so I guess its time to get off my @ss and do the build up thread.

I don't have a true classification for my rig, not a pure expedition rig, nor a pure rock crawler, not that an IFS rig could be truly considered that. I simply consider it capable of most anything I want to do, when I want to do it, how I want to do it.

Its so named due to having a "personal" relationship with cancer, my wife having the same and support the Livestrong - Lance Armsrtong Foundation greatly, simple as that.

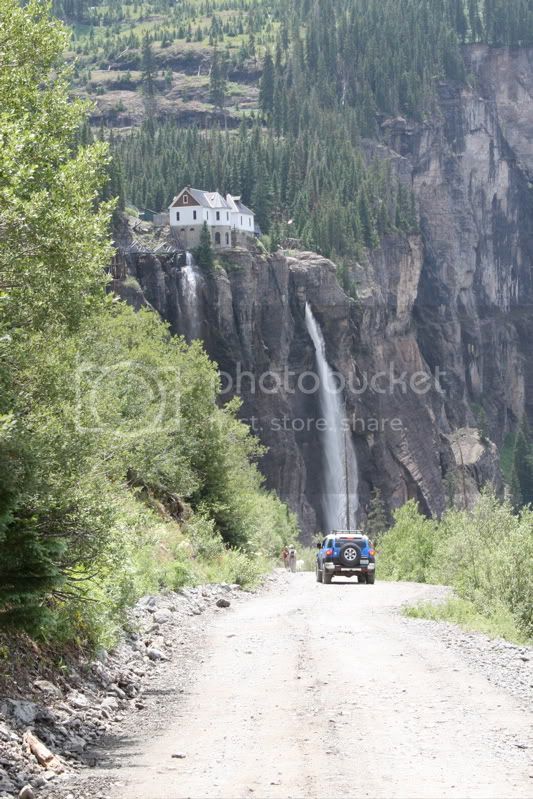
That being what it is, more of just a pictorial of how my baby has grown up through the years...

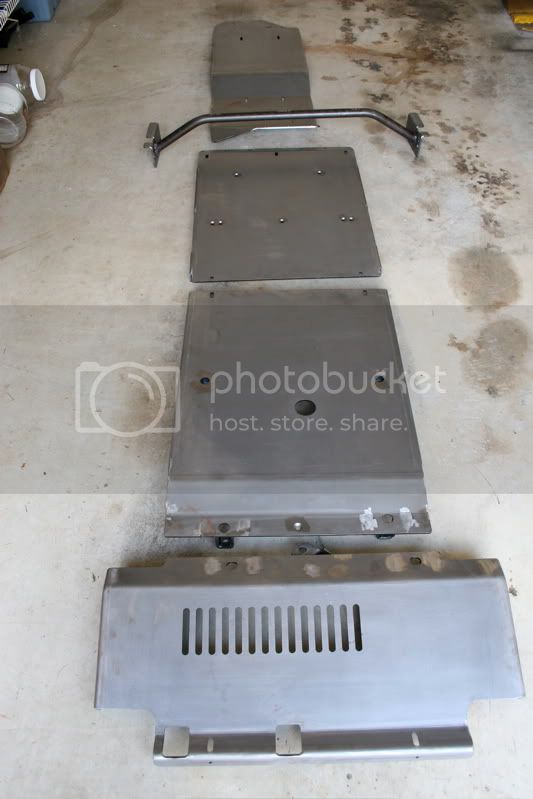
First mods, Demello sliders and OME 885/N140 front, 895/N71e rear, got to get some primary body protection and some fresh suspension...
fj_lift_6.jpg

fj_lift_1.jpg


Along with that, I also had to find a way to attach Yakima racks to the stock roof rack so I could cart around my bicycles and kayaks. So, I found that the Yakima "X-towers" fit the stock roof rack tubes perfectly. The mounts were designed such that one could move the "head" around to fit most any angle. I elected to mount them as low as possible so that I could still fit it in the garage....
IMG_7183.JPG


Next came the Demello front bumper. After seeing Jason's craftsmanship on his sliders, there was no hesitation when I put my name on the list for his version of a front bumper for the FJC. Of course, I was too impatient to mount the bumper AFTER my winch arrived...
IMG_9048.jpg

IMG_9046.jpg


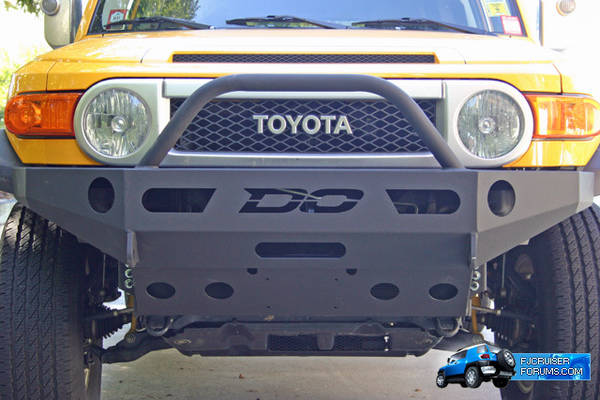
Then, just a couple days later, the winch arrived so I got to take it off, install the Warn M8000 winch, synthetic line and aluminum fairlead...
IMG_1529.jpg

IMG_1530.jpg

IMG_1532.jpg

IMG_1542.jpg


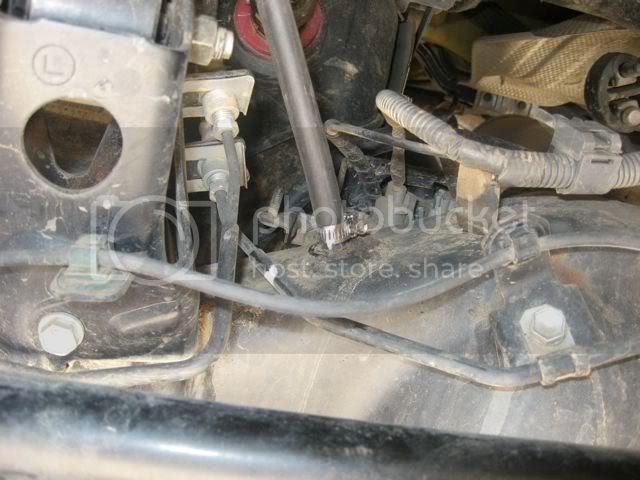
Quick measure of change in ride height, measured at the exhaust cross-over pipe. Stock height measured at the same place with stock tires (265/75/16) and suspension = 9.5". Measured after OME suspension and 12.5"...
fj_lift_3.jpg


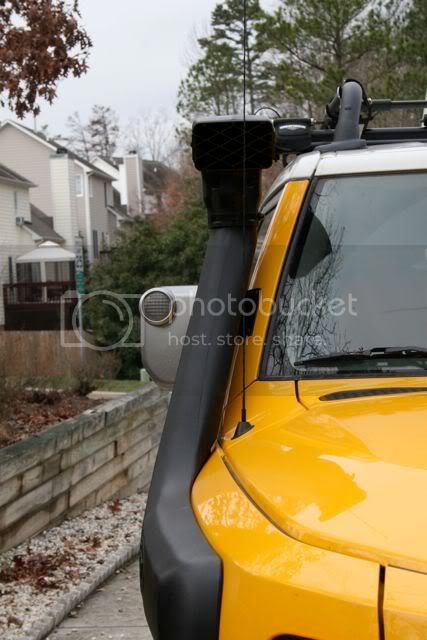
Can't really go off-roading without a reliable way to communicate, so next came the CB radio install. The "Big Bill Combo" became available via Walcott CB and I was one of the first to take advantage of this offering by Walcott. Cobra 75WXST, Firestik antenna, spring, quick release and Bandi Mount...
cb_install_1.jpg

cb_install-4.jpg


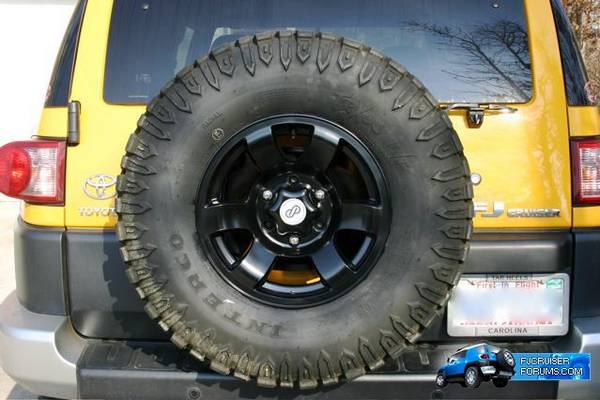
Finally felt I wore down the stock rubber enough to justify moving to a more aggressive tread pattern, stronger sidewalls and a little taller. Opted for the Super Swamper TrXus MT's in 255/85/16's. Turned out to be an excellent choice, great size, didn't need to do the body mount chop and performed well off-road without bad on-road manners...
IMG_1744.jpg

IMG_1745.jpg

IMG_1747.jpg


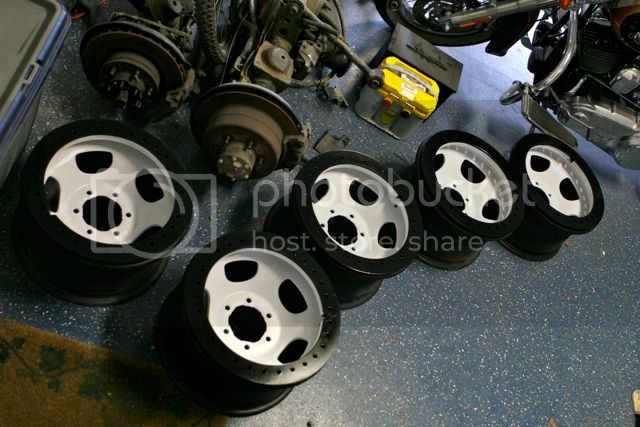
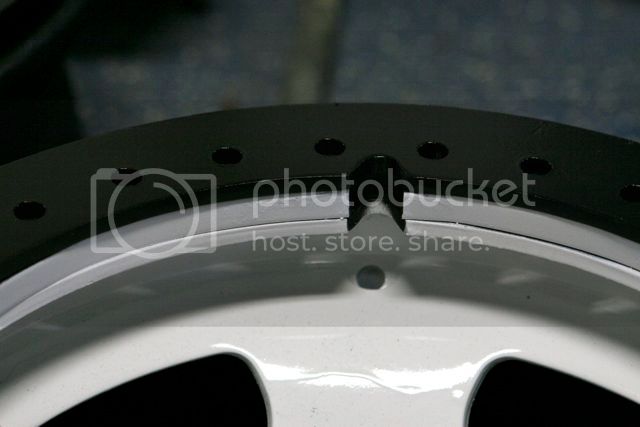
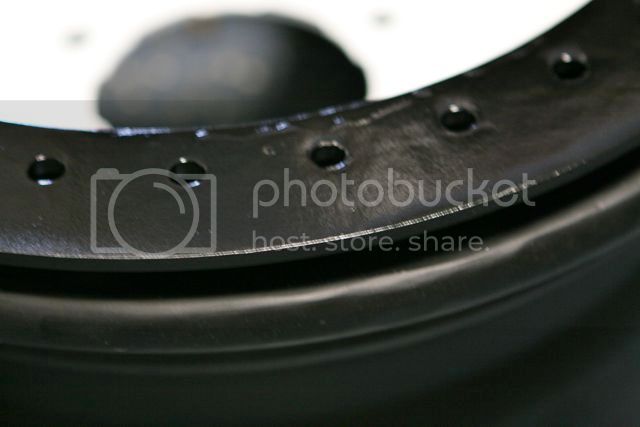
Then, of course, I couldn't stand the silver wheels and went with the Duplicolor wheel paint, giving them a new look with some black. Made a nice difference in the overall appearance...
painted_wheels_2.jpg

painted_wheels_1.jpg


cont...
 
Last edited:
Cont...

Next up came the Scuba Mod, had to keep the drivetrain free of water. I had my fluids change at 15k just because and found it contaminated though I hadn't been in any real water other than a couple stream crossings...
IMG_0360.jpg

IMG_0362-1.jpg


Next up came a Wet Okole seat cover group buy, hard to turn down such a nice deal on some fine covers. Had to get them to match of course...
IMG_7174.jpg

IMG_7166.jpg


Another critical protective measure is to eliminate the weak rear lower control arms. I picked up a set from All-Pro. I also ponied up for the lower control arm bracket skids since I've already damaged them and could see an easy way to help prevent that. Nothing special, just way beefier and something that will help reduce the chance of being stranded on the trail...
IMG_0563.jpg

IMG_0577.jpg

IMG_0575.jpg


That's how we went to Moab and Ouray for FJCS1, couple of pics for no good reason...
IMG_6350.jpg

IMG_6628.jpg

IMG_6630.jpg

IMG_6661.jpg


I was lucky at the FJCS1 and won a full suspension kit. Already having something I was very happy with, I sold it to a fellow member for the cost of what I really wanted to win...a full set of Budbuilt skids. So, on my way home from Ouray, I stopped by Bud's and picked up a set...
IMG_7101.jpg

IMG_7110.jpg

IMG_7114.jpg

IMG_7113.jpg


Now that it was well protected, I wanted to give it some more protection in another area, the motor. In as much as I don't do a bunch of mudding or deep water travel, it is easy to drop the passenger front into a deep hole and swallow some water, so the snorkel came next. Still nothing I've done on this thing was more stressful than cutting that 4 1/8" hole in the fender but, sometimes you've just got to trust your measurements and do it...
IMG_8674.jpg

IMG_8679.jpg

IMG_8718.jpg

IMG_8721.jpg

IMG_8725.jpg


more to come...
 
cont...
Now, I couldn't be sporting Demello sliders and front bumper without getting his rear bumper, just wouldn't make any sense. So, on the list I go again, stressing this time since I wanted it before I planned on heading west in order to run Rubithon '08, hit Moab again then the FJCS2 on the way home. Thankfully, it arrived just in time for installation before I headed west. For those that came to the FJSC2 and witnessed the raffle, I came in second in the "Irony Award". Athena won a set of Budbuilt skids, winning the 1st place Irony award, I won a Demello rear bumper, placing second in the Irony awards. No worries though, traded it to another member for a prize they won...
IMG_1243.jpg

IMG_1261.jpg

IMG_1279.jpg

IMG_1280.jpg

IMG_1284.jpg
 
cont...

Also added before heading west for Rubithon/Moab/Ouray '08 was a full size ARB roof rack. Knowing I'd be carrying full gear for Rubithon as well as the rest of the trip, I thought it best to have a rack that I could pack well for the trip. I didn't have a specific pic of the install but thought this one worked well...
IMG_4381.jpg


The last planned mods before this big trip is a set of the "thick" 4.56 Nitro gears. However, production delays kept me on edge to get it done locally. It finally became apparent that it wasn't going to happen so I had a set of the Nitro 4.88's dropped shipped to Inchworm in CA, just miles from the Rubicon trailhead. Jim @ Inchworm put some time away for me so all I had to do was arrive a couple days early, have them install the 4.88's, Inchwork Lefty transfer case and an ARB front locker. Nothing like throwing a few new mods on right before taking on one of the toughest trails for an FJC.

Thankfully, Jim and his crew did a great job and my girls and I had a great time with the Robbie, Ron, Woody and the rest of the Toyota Trail Teams crew, along with a handful of other FJC's where we talked the Rubicon trail with hundreds of other Toyota's of all years, models and sizes. No real pictures of these mods so pics of the trail will have to suffice. The last true mod was the addition of Rubi the wonderdog, becoming a regular fixture in/on/under my rig whenever I hit the trail...
IMG_2486.jpg

IMG_2488.jpg

IMG_2506.jpg

IMG_2387.jpg

IMG_2674.jpg

0ea26921.jpg


Getting home after this trip of a lifetime, now re-geared, it was time for some fresh meats for the FJC. Decided to follow the theme of having tall and skinny, getting some Super Swamper SSR's in 35 X 10.5 X 16's...
IMG_4977.jpg

IMG_4979.jpg

IMG_4988.jpg


As you can see, Jason Demello had the foresight to know his bumper needed to be able to fit 35's...
IMG_4981.jpg


And, the obligatory measure of the difference the tires made in ground clearance at the exhaust cross-over/Bud's skid support...
IMG_5102.jpg


Then came the debate to go commando or not, as in with or without the plastic flares. Something about all the plastic on the FJC just doesn't sit well with me. So, I posted a thread asking which everyone liked better. Of course, I had those who agreed with me and those who were, umm, wrong. The biggest rational for keeping them on were those who like the protection from overspray and rocks, believing that the plastic flares offered some protection for this. Well, I can say now after running them w/o for almost a year, no new chips or other signs of any side effects running w/o the flares...
IMG_5044.jpg

IMG_5049.jpg

IMG_5051.jpg

IMG_5096.jpg


more to come...
 
Last edited:
Inspired by a conversation with Jim of Inchworm and Bud of Budbuilt at the FJCS2, I talked with Bud and the idea of the Tummy Tuck came to fruition. I dropped my rig off at Bud's for a few days while Bud took the necessary measurements and made the plans to create the new transmission cross-member for the Tummy Tuck. Amazing at the difference made at the "belly" of the FJC. Gained 4" of clearance with the flat belly, nothing is below the frame rails anymore, no fear of getting hung up on anything under the belly anymore...
IMG_0290.jpg

TT-13.jpg

TT-14.jpg

TT-2-17.jpg

TT-2-9.jpg

TT-2-6.jpg

TT-2-4.jpg


New measurement where the cross-member used to be, net gain 4"...
IMG_6515.jpg


Yes, still more to come...
 
Cont...

Somewhere along the line, I picked up the Metal Tech tube doors. Another great modification that puts even more "fun factor" into the FJC. I added some diamond screen to help keep things inside and some speakers from West Marine that can handle the outdoor elements...
IMG_8156.jpg

IMG_8159.jpg

IMG_8161.jpg


Sometime before going to Rubithon, I added a Kenwood DNX 7100 with a back up camera. Love the hard drive Garmin navigation engine and how well the back up camera works now that I can't see a thing out the back window...
IMG_9547.jpg

IMG_9548.jpg

IMG_9549.jpg

IMG_9553.jpg

IMG_8165.jpg

IMG_9563.jpg


Also, met Doc of MPAC fame, he had a great deal at FJCS2 and installed his rear door unit on the FJC while there. Love the ability to keep things organized, helps keep the wife happy knowing where everything is. Like his stuff so much, also picked up the pet barrier when it came available in the group buy...
IMG_9554.jpg

IMG_9555.jpg


Can't forget the Powertank and fire extinguisher, two necessary mods IMHO...
IMG_9558.jpg


Does a roof top tent count as a modification? I guess, even though now its on my homebuilt tube expedition trailer, gives me an excuse to show them both off...
IMG_8172.jpg

IMG_8174.jpg

IMG_8169.jpg

IMG_8164.jpg

SpringFling-07.jpg


still more...
 
Cont...

Talking with Bud during the Tummy Tuck process, I discovered the he is an ICON dealer. Never being unsatisfied with my OME suspension, being 3 years old, I couldn't resist an upgrade to something adjustable as well as rebuildable. So, on go the ICON's up front, keeping the OME 895/N71e's in the rear...
Icon-1.jpg

Icons-2.jpg

Icon-6.jpg

Icon-8.jpg


They seem to be working just fine...
IMG_5810.jpg

IMG_5822.jpg

URElastcall-166.jpg

ONSCMayURE-091.jpg


more to come...
 
Front end upgrades...

I finally got around to upgrading my front end components. I've been doing fine with the stock UCA's but got a good deal on some Total Chaos UCA's from a member who had them rebuilt. I also got a deal on the All-Pro HD steering links, so that went on the install list as did a set of the Total Chaos weld on spindle gussets. Lastly, I ponied up for the RCV "Ultimate CV axle" for the FJC. I had been carrying around a brand new CV as a spare and bought another new one to send in for the upgrade. Yes, its an expensive venture and I have some concerns. If these are as strong as they claim, what will be the next weak link to be exposed along the chain in the front drivetrain.

Oh well, we will see. Here are the pics...

Here are the CV axles side by side, stock and the RCV upgraded units. With this upgrade, no longer would one need to pull the CV axle if a boot needed to be replaced, the inner stays in place and one just removes the allen head bolts to remove/service the inner CV...
FJCfrontmod-01.jpg

FJCfrontmod-06.jpg

FJCfrontmod-08.jpg

FJCfrontmod-11.jpg

FJCfrontmod-12.jpg

FJCmods-05.jpg


Total Chaos UCA's, with them pre-rubbed so I don't have to ruin the paint job...
FJCfrontmod-15.jpg

FJCfrontmod-21.jpg


Weld on spindle gussets and HD steering links...
FJCmods-01.jpg

FJCmods-09.jpg


Next up, home made beadlock wheels...
 
Beadlock DIY...
After popped my bead last year, I'd been on a quest to find some "reasonable" beadlock wheels. Yet, I couldn't justify spending $400 a wheel for something decent nor could I justify spending $300 for some crap beadlocks.

So, I found some FJ80 steel wheels that I bought off this board (nice find, 5 for $200), picked up the beadlock rings (~$300) from Stan (Thetoyoutfitters.net) and got busy. Well, not busy, got working slow but sure. This will make the total cost of the wheel ~$100 each, more to my liking.

The wheels were in great shape with a "double" powdercoating on them. They had few nicks and I couldn't justify getting rid of the nice coating. I also debated keeping them black or going old school with white wheels. Kind of tough decision.

So, let the pics begin...

Nice, shiny start, probably should have left them alone but oh well...
FJ80steel-03.jpg


Taped and scuffed with a 3M pad, ready for base paint...
FJ80steel-10.jpg


The beadlock rings to be welded onto the wheels...
FJCbeadlocks-02.jpg


I found a few holes had to be cleared. They are cut with on a plasma table and it left a little "tab" where it started and stopped. All it took was running a 3/8" drill bit through them to clear. Not a big deal, just something to be aware of before assembly, it will save time down the road...
FJCbeadlocks-08.jpg


After clearing and sandblasting...
FJCbeadlocks-03.jpg


My home made turntable. Stan suggested finding a hub to put the wheel on to make welding easier. Thankfully, I still had a 40 hub/spindle from when we did the front disc swap last year on the 40. Made it really easy to drop the wheel on and spin it around to spread the heat during the welding process...
FJCmods-13.jpg

FJCmods-18.jpg


With all I'd read before deciding to do this, one issue is that the rings can "cone" when being tightened/torqued to spec (10-20 ft/lbs). I saw a few others had installed an "anti-coning ring" on the inside of the beadlock ring. This way, when torqued, it will put pressure on the ring and transfer additional pressure onto the bead side of the ring, not toward the center of the wheel. I just used 1/8 X 1/2" stock steel from the local "big box" store since its relatively cheap and easy to work with...

I did the first one by hand, then used it as a guide to pre-bend the next piece. Made it much easier on the following rings...
FJCbeadlocks-18.jpg

FJCbeadlocks-20.jpg

FJCbeadlocks-17.jpg

FJCbeadlocks-14.jpg


Getting ready to do the real work. Clamping the rings on so I can tack it into place...
FJCmods-20.jpg

FJCmods-23.jpg


I bevelled the ring and wheel to have a nice, clean surface to weld into...
FJCmods-21.jpg

FJCmods-22.jpg


Tacky, tack, tack...
FJCmods-26.jpg

FJCmods-28.jpg


part II to come...
 
Part II...

Time to burn some metal...
FJCbeadlock-02.jpg

FJCbeadlock-01.jpg

FJCbeadlock-02.jpg

FJCmods-33.jpg

FJCmods-31.jpg

FJCmods-30.jpg


I wanted to be sure that I had solid welds and no pin-holes and thinking it should be easier to slip the inner bead over a smooth surface, I elected to grind the welds. Took about 30 minutes each to make them nice and smooth...
FJCbeadlock-08.jpg

FJCbeadlock-11.jpg


End results, not bad IMHO...

beadlock-02.jpg

beadlock-06.jpg

beadlock-05.jpg

beadlock-10.jpg

beadlock-08.jpg


Now, just to find a set of 37's to go with them...:hmm:
 
Finishing things up, at least trying. I give a heightened respect to those who work with tires like these. I'm only having to pull one bead over the lip and it killed me. I've still got the spare to do but I couldn't help but get some pics loaded up of the finished product.

Weight of the Enkei wheels without tires...
beadlockdone-01.jpg


Weight of complete set up w/Enkei wheels...
IMG_7590.jpg


Weight of the new beadlock wheels, w/tire, bolts, nuts, washers and outer ring. Think I'll need to upgrade the brakes...
beadlockdone-02.jpg


I used washers to keep track of the torque pattern. Started at 10lb, finished at 15lbs. I ran around the bolts twice to make sure I had an even torque of the tire on the wheel...
beadlockdone-04.jpg


I opted to try the Airsoft pellets for this round of "dynamic balancing". I've used the Dynabeads before but they are hard to recover and expensive. I bought two "jugs" of .12g pellets, 6500 count each, 13k total. Divided them equally between the 5 tires gave me ~11 oz of bead/tire. Dynabead website recommends 8 oz but I've found that it isn't enough. I planned on 10 oz, this worked out to be a bit more, I've got no problem with that. Cost me $22 from Wally World as compared to over $100 from Dynabead...
beadlockdone-05.jpg

beadlockdone-06.jpg


I had to resort to "redneck" methods to set the bead. I tried the strap, with a 3", heavy duty ratchet strap w/o success. Found a bit of "aerosol propellant" worked well, just cleaned off some hair on my lighter hand the first try. Sorry, no pics of that, both hands were busy then...

Finished product, not bad IMHO...

beadlockdone-03.jpg

beadlockdone-07.jpg

beadlockdone-08.jpg

beadlockdone-09.jpg

beadlockdone-10.jpg
 
That's pretty rad, Jerry. I still think those wheels would look better on my rig. LOL.
 
Looks good Jerry! Are you coming to CA this year?
 
Last edited by a moderator:
Looks good Jerry! Are you coming to CA this year?
The wheels are turning and that is the plan as of today. My oldest (Mikaela) is graduating from HS this year and going to Greece with some of her HS classmates on a school chaperoned trip. That is right when Rubithon is going on so I thought it a good idea (as did the girls) to keep Regina "off the grid" so she can't call her every 10 minutes while she is in Greece. I've got a couple of my local club members committed and we are looking at shipping options for my FJC and 2 80's, picking up a BJ40 along the way. Just like in '08, if the shipping drops through, I've got the time to drive out again.

At least, thats my story and I'm sticking to it, for now...:beer:
 
Nice build thread Jerry. Your rig is by far one of the best builds out there. No fluff, all purpose. In an age where appearance is king and posers abound seeing a vehicle where function is the driving force is refreshing to say the least. Good job my friend :)
 

Users who are viewing this thread

Back
Top Bottom