Overhead LCD install problems

This site may earn a commission from merchant affiliate
links, including eBay, Amazon, Skimlinks, and others.

and the last one...
AVNsm.webp
 
and a few more..

Your LCD can rotate and that's good but the display is not enough upfront for the the second row side passengers if you seat 2 or 3.

I was thinking about your situation as for all the ones who have moonroof (mine doesn't, so it allowed me to install the LCD about the middle of were the moonroof should be) and It's possible to install a sliding platform with a front / rear locking position which could hold the LCD in a upfront location with the moonroof closed, because I guess you will have it closed when watching movies.

Many years ago Rosen was selling a roof monitor on a sliding plate for the 4Runner which I adapted on my wife's Nissan Quest and allowed me to clear her van's moonroof.

I bet there should be something that could work for you.

I don't recomend individual headrest mounted monitors because (unfortunately as I did and later had to remove my two 4" small LCD's), the Land Cruiser and Lexus headrest supporting rods are too close versus american made vehicles which preclude the installation of flush mounted wide monitors.

Before I moved upfront my roof LCD I had two small 4" LCD's on the driver and passenger headrests to cover the missing 2nd row view angle provided by the roof LCD (kids loved this setup because the olders could play the Nintendo 64 , and the younger could watch a movie and of course the parents could enjoy the trip because all the kids were distracted , wearing their own headphones and that was 10 long years of peace !!!!).

Since my older is now a grownup and doesn't travel with us anymore I removed both headrest LCD's and it's quite complicated electronics, moved upfront the roof monitor, seat my two younger boys on the sides seats of the second row with both center arm rest down as a fight barrier :crybaby:, the third row were removed for cargo, so both kids must view the same source and that's it. Of course they suggested I install our Nintendo Wii, well you guess my :censor: :flipoff2:answer.
 
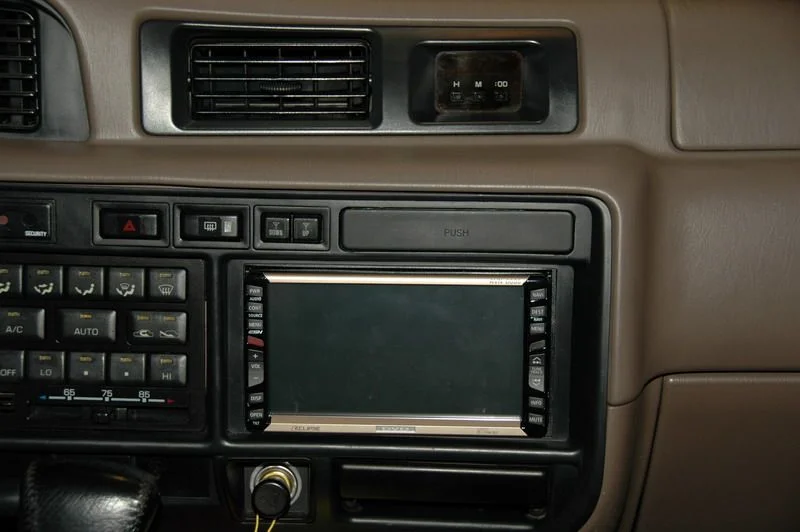
B-- That looks incredible. I got to give it to you for some of the cleanest installs. Especially wiring up the console, from the speaker to the vga connects, to the switchboard in back, it all looks original and profesionally installed. Still got the i/c writeup bookmarked just not ready to hack up the s/c :)
Where did you get the hard door panels (is that fiberglass) that replaced the pleated leather? That looks really good and sets off the cab giving it a super clean and updated look.
 
Thanks to all... it has been a lot of work and money, but I am happy with it now.. as for the rear LCD location, it will work for 5 of the 6 people in the back and the other will just have to deal with it... He He. they can bring a book to read.. :-)
As for my door panels, they are stock LX door panels, they are dark vinyl (speaker location) and cream leather..
Now I just need to plan a trip to Moab so that the kids can use it..
later
Bret
 
Wow! Well done! I really like this setup. It will now go on the never ending list of mods I would love to do.
 
As for the subwoofer, I didn't take any pictures, and you have to remove the drivers seat and loosen the bolts to the ebrake to fit it in there (or take it out for pictures)
I found out where the Sub would fit and cut the hole..
I purchased a roll of rubber/tar flashing from Lowes.. it is the same thing as Dynomat but WAY cheaper. I put almost 1/4 thick of that everywhere on the inside of the center console (and the stock 4"sub grill).
I ran my wires into the console and bolted it back into position..
with it in position I put a small piece of wood from the bottom of the large compartment to the metal plate on the floor.
I then put the flashing over the board and down each side of the console where it meets the metal plate.
at the very front of the console after you get it installed there are a few spots that are a little hard to get to and they are open to the shifter console.
I cut some hard plastic foam that fit in the holes at the front and then covered it with the flashing.
I then sprayed the inside with contact adhesive, sprayed a large chunk of carpet padding and after they were dry, I covered the entire inside with the padding.
I then filled the rest of the open space with very fluffed up quilting material, the very fine white stuff on the inside of all quilts..
The quilt filler makes the inside of a sealed box seam 30% bigger to the speaker.
I then places the JL Audio sub in the correct location, marked the holes, drilled the holes, slid the automotive clip nuts over each hole.
put the speaker in place and tightened the screws..

I also installed the 6 disc changer below the large compartment and installed the AV hook-ups in the back and that is why I sealed it off at the large compartment.. if you didn't do the CD or AV you could seal the entire console and get more free space..

the space is sealed amazingly well, but does flex with the Sub.. I didn't have it in me to line the entire console with wood!!
It sounds great..
later Bret
 
Back
Top Bottom