
Navigation
Install the app
How to install the app on iOS
Follow along with the video below to see how to install our site as a web app on your home screen.
Note: This feature may not be available in some browsers.
More options
Style variation
You are using an out of date browser. It may not display this or other websites correctly.
You should upgrade or use an alternative browser.
You should upgrade or use an alternative browser.
FJ62 destruction --> turbo HZJ62
- Thread starter esh
- Start date
This site may earn a commission from merchant affiliate
links, including eBay, Amazon, Skimlinks, and others.
- Thread starter
- #22
The Garrett isn't that much different than what comes on an HD-T. Factory pressure is 7psi and you can go up around 14 without extra cooling. As you boost you increase fuel and try to keep your exhaust temps under 1200F.
I am going to run it at 10psi or less, though lynchmob has been driving it without the turbo the past few days and says the 1HZ has plenty of power without a turbo at all. An HD-T is 30 more hp and about 80ft-lb more torque over an HZ, so the turbo should bring it somewhere in the ballpark of that, though it is a different motor-
HD-T, 165hp@3500, 268ft-lb@2000
1HZ, 135@4000, 187@2200
today's pics-

pre-turbo pyrometer


factory turbo air cleaner housing with 90* downturn

I am going to run it at 10psi or less, though lynchmob has been driving it without the turbo the past few days and says the 1HZ has plenty of power without a turbo at all. An HD-T is 30 more hp and about 80ft-lb more torque over an HZ, so the turbo should bring it somewhere in the ballpark of that, though it is a different motor-
HD-T, 165hp@3500, 268ft-lb@2000
1HZ, 135@4000, 187@2200
today's pics-
pre-turbo pyrometer
factory turbo air cleaner housing with 90* downturn
Last edited:
- Thread starter
- #23
Looks nice. I'm a big fan of turbos but more familiar with them on gas engines. What type of numbers do you expect with that garrett? What happens if you run more boost?
Great thread on what you can do with this hardware. I think he's using the same turbo I have, but on a pretty upgraded 12H-T
https://forum.ih8mud.com/diesel-tech-24-volts-systems/269939-12h-t-performance-build.html
- Thread starter
- #24
Took some video of it idling today. Missing one turbo connection and no exhaust, but it is smooth.
http://www.youtube.com/watch?v=hEAzoLrB75U
My camera takes HD video, so if you want to see in full 1920x1080, 40kbps, 30fps H.264 video, hit full screen and 1080 HD in youtube.
http://www.youtube.com/watch?v=hEAzoLrB75U
My camera takes HD video, so if you want to see in full 1920x1080, 40kbps, 30fps H.264 video, hit full screen and 1080 HD in youtube.
Last edited:
that sound is music sir. it just purrs. How much longer at the shop for?
Clint
Clint
Dude. Sweeeeeeet
- Thread starter
- #27
I guess an update is due.
I took temporary possession last weekend so I could get some things done down at my shop. I have a list of about 30 things to get done before a trip mid-may.. so maybe 1 thing every day? Dang I did nothing today but buy some Mobil 1 15w-40 and take the old rear driveshaft in to get cut down for a front. Using a 60 series rear DS and it works but is 1/2" too long so I need to get that cut down before working it.
We have an issue in the engine. A clack/rattle that appears in a certain RPM range it seems like. There is some play in the gears that drive the injection pump so it might be we decide to replace them. Researching at the moment. (EDIT: this appears to be a normal noise and has been heard in and reported from a few other motors, HD-T first hand) (really really later on edit: this might be a clutch plate noise)
However! The combo is sweet. I don't have fuel turned up at all and it has plenty of power. Boost, pushed, gets to 9psi. Pyro never gets above 750F, usually it is 450-550F and 650F around 70mph on the freeway. I am in 5th gear at about 40-45mph, and that lasts easily up to 75 (as far as I've dared take it for now). 5th pulls all the normal hills around here but I haven't headed over the mountains. Have a bit to do before a test like that.
Economy-wise, it is starting to look pretty good. I am looking at hitting about 200+ miles where I would normally be at 110 or so, and at one point I was estimating 500-600 miles on the stock tank, where normally I could push it to 300 miles. That seems a little high to me.. about high 20s, so I'm going to see how it works out instead of theorycrafting a number. If I get near 24 (doing mixed driving) I will be ecstatic. UPDATE: winter fuel ~19-20mpg US, summer fuel ~20-24mpg US
So now I have 2 mornings to get part of a floor covering in and the bench seat so we can go pickup trash in the woods this weekend, then I can plug away at more intricate things- fan shroud, more sound deadner, shifter cover leak, (that noise), maybe start getting work on the rear axle, designing and assembling the rear storage/platform, on and on.
Nothing exciting to see for pics, the only apparent difference is a much larger exhaust pipe and the HJ turbo badge.
Last edited:
- Thread starter
- #29
I would estimate 3 weekends to pull the motor and do most of the heavy lifting parts. It would have been 2 had we kept the auto, but I feel like I made the right decision going with the H55. However, we started planning back in November and since he'd done a few Toyota diesel conversions in the past, most of the known issues weren't difficult to deal with. A lot of time was remembering everything to order and waiting until parts came in, and then waiting for the shop space to be available.
Honestly by the time we picked a weekend to start, I was preparing for an overseas trip and was pretty worthless with help. I got part of a day in and did a few small necessary things only! Then when I returned I had picked up the month-long cold thing (still have it), and was further worthless to help. That part of this was very frustrating. Distance driving to where the work was being done didn't help either. Anyways, I owe lynchmob a lifetime of beer.")
Honestly by the time we picked a weekend to start, I was preparing for an overseas trip and was pretty worthless with help. I got part of a day in and did a few small necessary things only! Then when I returned I had picked up the month-long cold thing (still have it), and was further worthless to help. That part of this was very frustrating. Distance driving to where the work was being done didn't help either. Anyways, I owe lynchmob a lifetime of beer.
- Thread starter
- #31
It honestly isn't. I guess without the turbo it is better.. custom flanges needed to be made, and about 100 other little details to deal with.
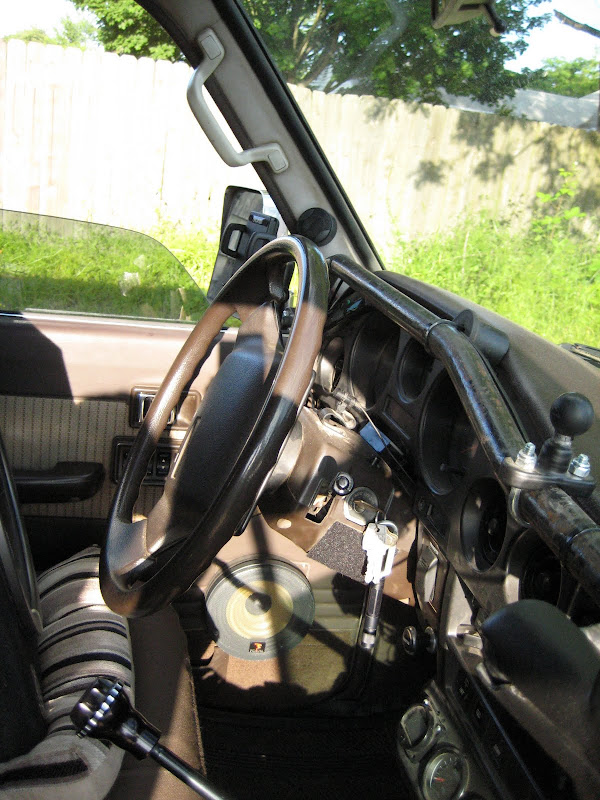
I really don't know about the H55.. they did come with 1HZs, but I didn't pay attention. Looks like more than 10 from this shot-

I really don't know about the H55.. they did come with 1HZs, but I didn't pay attention. Looks like more than 10 from this shot-
Last edited:
- Thread starter
- #33
Nothing like 2 weeks until a long trip to kick you in the butt. My list is much longer than time I've got to get things done, so low priorities like rear ARB install, rear discs, etc are falling off the list fast.
After getting the truck back and installing the front bar/winch with a host of other little things, I am getting onto new stuff.
Got some work done on the interior this weekend and started designing a new fan shroud. The truck is back in Portland to do more troubleshooting on an RPM based loud rattle, so I got the fan/radiator layout measured and hope to get that built before I have the truck back.
My gf was sweet and took part of a day to install RAAMmat on the floor while I measured and thunk through the fan shroud. I found a lettering kit in my toolbox so she stamped her name into the foil. I think that is called branding. She enjoyed the detail work, and I was very glad for her help!
Tuffy setup.. found a good place for the CB. I bought a 12V mixer and cables online to mix the CB/2m/Ipod together through the stereo. Hope I have time to install it and it works out. Console stereo slot will eventually get a mobile 2m radio.

other side, this is actually a benefit of doing a 6" wide stereo console over the 8".. more room for crap! I found a sweet dual USB/dual 12v socket charger on Amazon.. most of them only have 1 USB port

room under Tuffy with the OEM rear heater gone. Might be enough room to mount one of the amps.

middle fingers point to the two rear heater mount holes. I need to modify the Tuffy bracket and extend to the holes to get it solidly mounted

rough idea of the dash layout. I have the glow switch to install into the transfer/H4 plug(currently hanging red thing). Can never have enough 12V sockets.

swank and melted wooden Toyota shift knob

interior removal-

I am rich!!!

interior is gone, have to clean and fill that oval hole (heater hoses) between seat belt clips

patched up hole.. ugly but it just needs to be sealed and will live out it's life under RAAMmat. Floor cleans up nicely.

auto shifter hole and two other drilled holes need filling

the wonders of time lapse.. things get done so fast!

more slop! grinding revealed a missed a spot

laying down small sections of RAAMmat made it go easier than working with larger strips. Black duct tape was to just keep clean from butyl-like gunk from seams. Can see black paint from patched holes in the floor.

couple shots of the process. The black goop on the hands cleaned off easily.

utility knife's butt was nice to shape the RAAMmat around bumps and ridges in the floor

After getting the truck back and installing the front bar/winch with a host of other little things, I am getting onto new stuff.
Got some work done on the interior this weekend and started designing a new fan shroud. The truck is back in Portland to do more troubleshooting on an RPM based loud rattle, so I got the fan/radiator layout measured and hope to get that built before I have the truck back.
My gf was sweet and took part of a day to install RAAMmat on the floor while I measured and thunk through the fan shroud. I found a lettering kit in my toolbox so she stamped her name into the foil. I think that is called branding. She enjoyed the detail work, and I was very glad for her help!
Tuffy setup.. found a good place for the CB. I bought a 12V mixer and cables online to mix the CB/2m/Ipod together through the stereo. Hope I have time to install it and it works out. Console stereo slot will eventually get a mobile 2m radio.
other side, this is actually a benefit of doing a 6" wide stereo console over the 8".. more room for crap! I found a sweet dual USB/dual 12v socket charger on Amazon.. most of them only have 1 USB port
room under Tuffy with the OEM rear heater gone. Might be enough room to mount one of the amps.
middle fingers point to the two rear heater mount holes. I need to modify the Tuffy bracket and extend to the holes to get it solidly mounted
rough idea of the dash layout. I have the glow switch to install into the transfer/H4 plug(currently hanging red thing). Can never have enough 12V sockets.
swank and melted wooden Toyota shift knob
interior removal-
I am rich!!!
interior is gone, have to clean and fill that oval hole (heater hoses) between seat belt clips
patched up hole.. ugly but it just needs to be sealed and will live out it's life under RAAMmat. Floor cleans up nicely.
auto shifter hole and two other drilled holes need filling
the wonders of time lapse.. things get done so fast!
more slop! grinding revealed a missed a spot
laying down small sections of RAAMmat made it go easier than working with larger strips. Black duct tape was to just keep clean from butyl-like gunk from seams. Can see black paint from patched holes in the floor.
couple shots of the process. The black goop on the hands cleaned off easily.
utility knife's butt was nice to shape the RAAMmat around bumps and ridges in the floor
Last edited:
Looking good Ken!! I though your hair was shorter?? 
What all are you doing with speakers? Where?
Clint
What all are you doing with speakers? Where?
Clint
- Thread starter
- #35
Just a pair of component speakers is all I'm planning. Very nice components that can take a lot of power thrown at them cleanly. Building baffles out from the front door panel as far as I need to and installing the tweets directly above, just below the window along that metal strip of door (I bought OEM trim that doesn't incorporate the door panel material and am planning on using plastic panels from TAP).
EDIT: quite a while later with new speakers in (no custom door panels yet)
EDIT: quite a while later with new speakers in (no custom door panels yet)
Last edited:
- Thread starter
- #36
A year later.. time for an update!
The 1HZ is fantastic. I get about 19mpg and an easy 350 mile range no matter how it is driven. A tank around town or at 70mph gets 19. The H55 is a great combo with the engine to trundle about on dirt and gravel roads. That is the primary reason I went to the expense of this swap; slow exploration driving with long range and ample power when I need to get on it to pass (in 5th, hah!) or cross mountain passes and steep climbs.
Using Mobil 1 5W-40 Turbo Diesel Truck oil seems to work the best. So does Amsoil in the transmission/tcase. Much smoother on startup, idle and shifting all around. I have tried Rotella non-synth and a couple other weights of Mobil 1 in the engine. Using large OEM filters made for 1HZ (can get in NA).
Things I need to tackle-
I have reasonable EGTs but I think they can do better so that issue will get tackled next winter. Compared with kmrowland's 60 setup very similar but his with an HD-T turbo and mine with the Garrett, the turbo flow could be contributing, or maybe an injection pump. I am going to get the pump inspected and tested by a good shop when the summer trips are done. Could also probably solve with an intercooler, but I would rather try to find the issue first. Temps don't get high enough for concern. At worst I have to back out and do steep highway hills at 55mph in 4th. Life is rough.
Exhaust may get redone this week. It is hard to find a shop with a mandrel bender locally, but I got the largest flowmaster with 3" ports and have a better path worked out underneath. Some people like the Semi-like sound the current cherry bomb setup gives, but I am all for quiet on the slow road puttering.
Have developed 2 leaks and have had TO bearing chirp since the swap. Got it on a lift a couple weekends ago and dropped the trans/case. One leak on the H55 shift plate was from a missing freeze plug. We have no idea how it was missing but robbed one from another trans and it seems to be ok. I should have replaced the gasket and may have to as I think it seeps a little. TO bearing was replaced, greased, and no more chirp (heaven, god that sound is annoying). The other two new OEM TO bearings and the (new at install, now a year old) OEM bearing all rotate out of round so we picked the least out of round one and installed it. I was shocked that any of them were like this but it must be normal?? These were all Japanese made, new.
The other leak is at the front of the engine, somewhere near the oil pump gear. Need to get everything cleaned up and the timing gear cover off to see what's going on.
..and an endless list of upgrades- finish dual battery hookup, install OBA, install ARBs, build new front bumper (tube/pre-runner like this time), build new storage/sleeping platform, finish sound deadening, build door panels, install front speakers, onboard water system, never ends...
Last edited:
- Thread starter
- #37
I have been meaning to mount my amps in final locations. After measuring and monkeying with ideas I decided to mount the sub amp under my Tuffy and build a bracket to mount the 2-channel speaker amp under the passenger seat.
For anyone looking for a quality amp, I have been very pleased with Zapco. I've run the 500W sub amp for a couple years in pretty harsh conditions without any kind of issue. I have also come to appreciate the little things, like how they designed their mounting feet system. Zapco tends to under-rate their gear and with some decent speakers you can get an appreciation for SPL vs loud noise.
test fit after cutting the Tuffy bracket

close fit, but more subtly this shows how flexible the amp feet mount system can be

passenger side

driver side, note this is a 6" Tuffy stereo console.. the amp would be hidden with the 8" but I'm glad for the smaller one because I can find crap that falls between the seats easier

console sitting in place

wires connected. I'll clean it up... some day.

For anyone looking for a quality amp, I have been very pleased with Zapco. I've run the 500W sub amp for a couple years in pretty harsh conditions without any kind of issue. I have also come to appreciate the little things, like how they designed their mounting feet system. Zapco tends to under-rate their gear and with some decent speakers you can get an appreciation for SPL vs loud noise.
test fit after cutting the Tuffy bracket
close fit, but more subtly this shows how flexible the amp feet mount system can be
passenger side
driver side, note this is a 6" Tuffy stereo console.. the amp would be hidden with the 8" but I'm glad for the smaller one because I can find crap that falls between the seats easier
console sitting in place
wires connected. I'll clean it up... some day.
- Thread starter
- #38
Onto the 2-channel amp...
checking the lay of the land.. there is nothing square about FJ62 seat brackets..
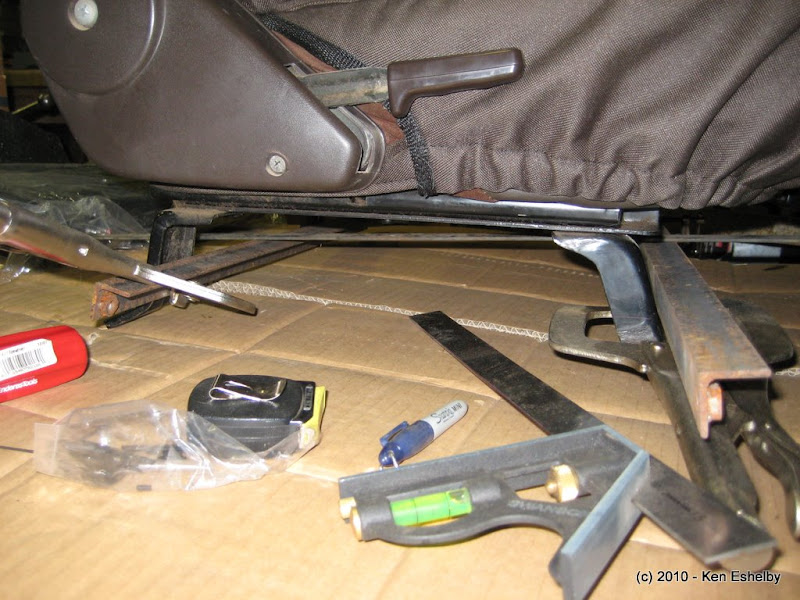
this is what I came up with from scrap on hand


finished and painted.. rounded off some of the more accessible corners and left the hidden ones for a surprise for my hands one day

final amp location, again with the harping on about how cool the Zapco install feet system is

possibly a design flaw.. have to install the bracket and then the amp. I clearanced the outside bracket to be able to shove yet more crap under the seat

payoff.. amp sits nice and high, tucked under the seat. out of the way and can still get to the adjustment doodads easily. it would be hard to steal without a few minutes of frustration")

checking the lay of the land.. there is nothing square about FJ62 seat brackets..
this is what I came up with from scrap on hand
finished and painted.. rounded off some of the more accessible corners and left the hidden ones for a surprise for my hands one day
final amp location, again with the harping on about how cool the Zapco install feet system is
possibly a design flaw.. have to install the bracket and then the amp. I clearanced the outside bracket to be able to shove yet more crap under the seat
payoff.. amp sits nice and high, tucked under the seat. out of the way and can still get to the adjustment doodads easily. it would be hard to steal without a few minutes of frustration
Last edited:
- Thread starter
- #39
I popped the front door panels off to do (yet another) temporary hookup for the 2-channel amp. Let's call it "testing." I have some really nice Focal 6" components that will go into the fronts with plenty of RAAMMat covering sheet metal when I get door panels built.
Shots of the current 5-1/4 front speakers. Had to laugh at the site of the mount I made up years back. It is from a plastic toilet drain collar I found at Home Depot. Tore into it with a dremel. But hey it all fits stealthlike behind the front OEM grills without hitting the window.


Shots of the current 5-1/4 front speakers. Had to laugh at the site of the mount I made up years back. It is from a plastic toilet drain collar I found at Home Depot. Tore into it with a dremel. But hey it all fits stealthlike behind the front OEM grills without hitting the window.
Last edited:
- Thread starter
- #40
Found a rubber pickup bed mat at Lowes (EDIT: called "exercise mat"). Took some time and cut it for width and around the wheel wells and it works fine over the sound deadening/foam underneath.
I forget how much space the rear of a 62 has without all the junk in it.


Then I reinstalled my storage/sleeping platform. This is the eternal first draft. v2 will be nearly up to window height so I can put my Waeco fridge under and just behind the Tuffy console on the floor. I will have friction drawers in the rear and get rid of the rubbermaid under-bed shoe containers I use for repair/spares and camp gear. Probably make it out of cabinet grade plywood. I have Kevin making me up some custom rear fender storage panels to work with what I envision to be the final storage design (yeah right).

the subwoofer is part of the structure, pointed at the floor (works well and is protected from gear)

I forget how much space the rear of a 62 has without all the junk in it.
Then I reinstalled my storage/sleeping platform. This is the eternal first draft. v2 will be nearly up to window height so I can put my Waeco fridge under and just behind the Tuffy console on the floor. I will have friction drawers in the rear and get rid of the rubbermaid under-bed shoe containers I use for repair/spares and camp gear. Probably make it out of cabinet grade plywood. I have Kevin making me up some custom rear fender storage panels to work with what I envision to be the final storage design (yeah right).
the subwoofer is part of the structure, pointed at the floor (works well and is protected from gear)
Last edited: