
This Saturday we headed out for a 6-hour drive to Calgary, to pick up a brand new Rockwood 1640ESP tent trailer. I wouldn't normally buy new, but these were being blown out at cost, and the price was only a bit higher than many 4-5 year old used models on the market.
I had not seen one in person before, but knew the quality would be poor. What I didn't know was just how poor it would be. Luckily I can do everything the trailed requires to be properly road worthy, and will do so in the near future.
The dealer prepped the trailer, gave us a quick walkthrough, and balked at the request to fill the water tank all the way. The techs there stated that the trailer is not meant to be moving with a full water tank, as it is bolted in on one side, but only screwed in on the other, and would likely not hold the weight in transit. Umm... what? I had them fill it up anyways, then got under it, confirmed the horrible mounting setup, and ran a ratchet strap across the bottom of the tank to give it that little bit of extra support until I came up with a proper fix.
When it came to connecting the 7-pin plug, the trailer's wiring barely reached it, and would instantly pull out the first time I did a left-hand turn. The dealership's owner was passing by and happily offered to have their tech make me a 2-foot extension for $129. Yeah, no thanks.

Drove it as it was to the local Canadian Tire, bought wiring and male+female plugs, made the extension right in the parking lot in 20 mins flat.

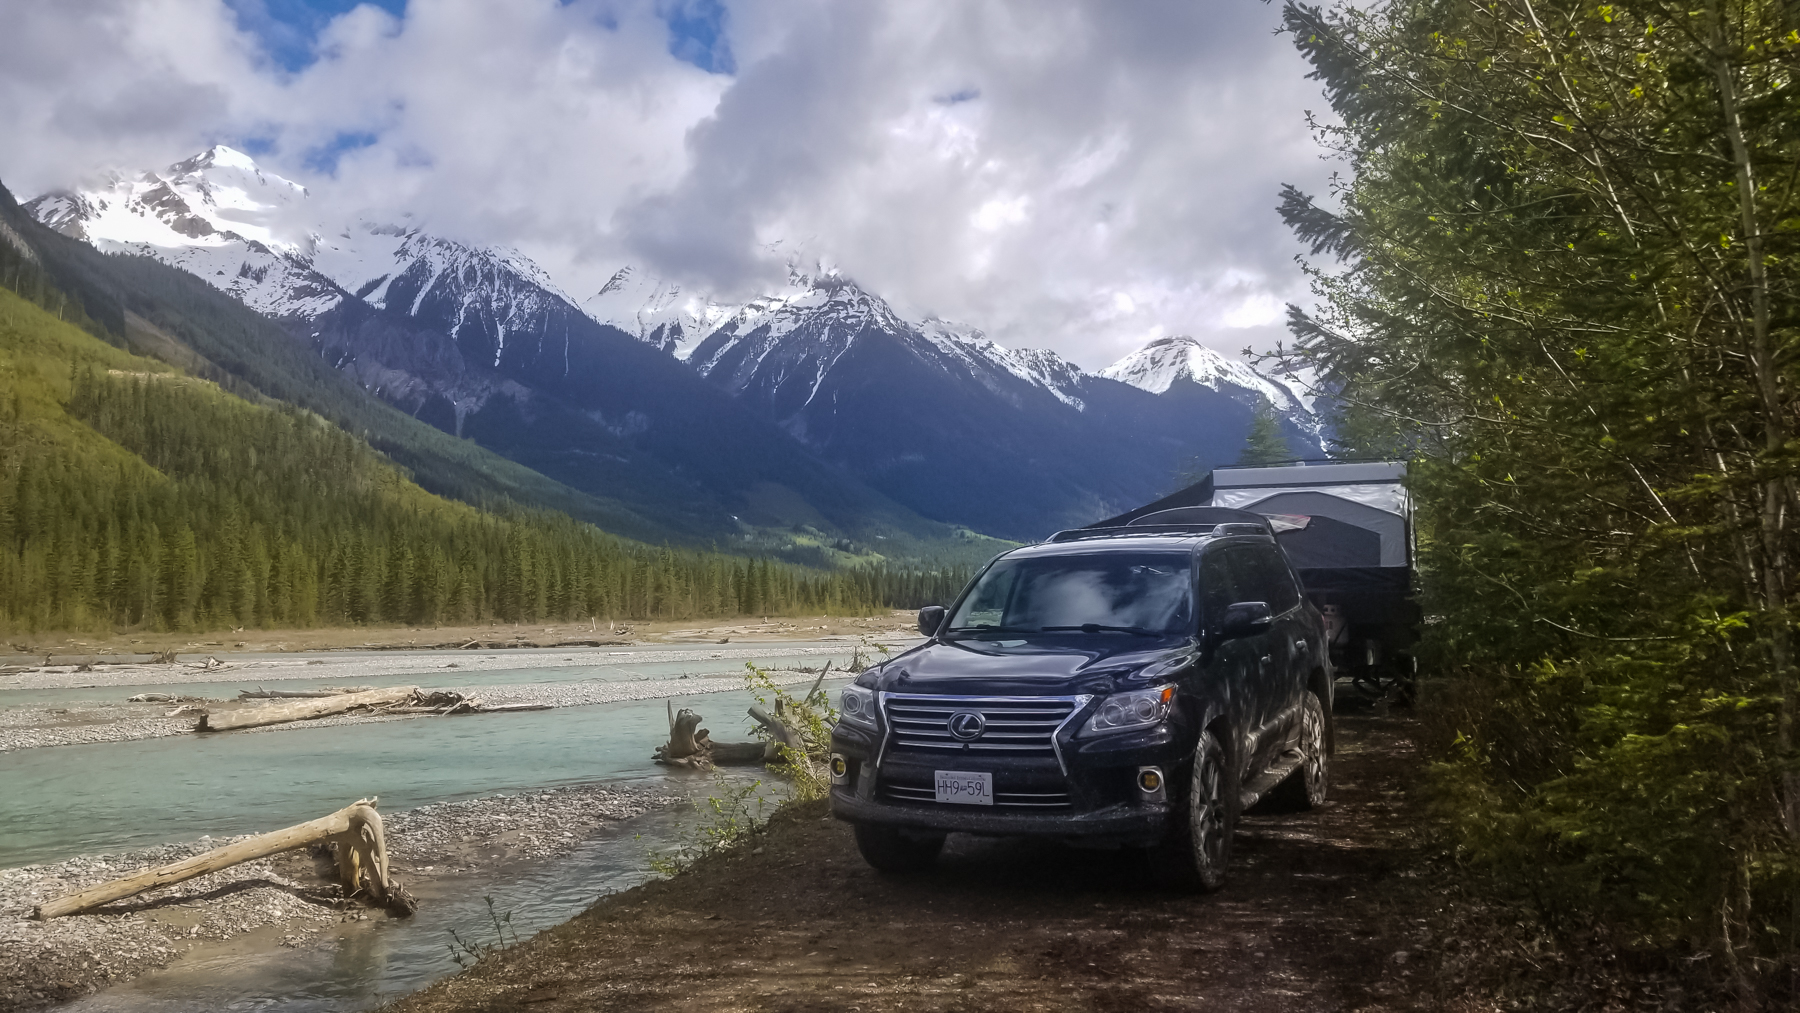
Then we hit the highway for another ~3.5hrs of driving to a favourite camping area near Golden, BC.
We stopped at a pull out for a break, and found it had a scale. The LX weighed in at 3360kg (two people, large dog, camping gear, trailer on the hitch), and the attached trailer weighed in at 800kg even.

We found an awesome (new, to us) camp spot right on the water, and got super lucky in taking it, as another vehicle (which we had passed on the highway some 30 mins earlier) pulled up behind us no more than 60 seconds later.


After bouncing around on 12km of a dirt road, we found that the only two drawers had both opened in transit:

A quick look-see showed that these drawers are assembled via staples. Horrible construction that will need fixing.

The weather seal on the transit-door was also torn:

And a lot of the original sealant is already cracking:

... also note that the dealer's techs unequivocally believe in "more is better," instead of using a quality sealant to begin with.
On the other hand, being inside the trailer is fantastic, and is a complete game changer for us. Tons of room, I can stand with room to spare, lots of sleeping areas, running water, propane heater, tiny fridge, stereo, lights, etc.


The attached awning did not come with any guy lines to stake it down, and the very first, lightest breeze you can imagine flipped it up on the roof:

I mentioned that on the way in to the campsite, the trailer bounced around like mad. After setting up camp I did a quick walk-around, read the warning labels, and it occurred to me to check the tire pressure (I didn't bother airing down as we weren't going far, were exhausted and in a rush). Tires are rated for a max of 50 PSI. The spare was at 46.5 PSI. The passenger-side tire was at 49.5 PSI. And the driver-side tire was at... 62.5 PSI. Amazing techs strike again! Dropped all tires to 30 PSI and it rode way nicer on the way out.
--
Immediate plans for the trailer:
- water proof the exposed mdf/plywood on the bottom, as well as on the insides of the lid
- re-seal... everything
- figure out why there's a switch that doesn't do anything, and why we could not figure out how to turn off the interior lights (I'm thinking that's not a coincidence)
- replace all accessible metal screws (which seem to be the only hardware holding literally everything together) with proper bolts or rivets
Short-term plans for the trailer:
- have the tongue cut + extended a few feet
- add a removable max-coupler
- add an XO750 trailer jack
- have a metal box built on top of the extended coupler to house a proper fridge (incoming in a few days)
Long-term plans:
- new suspension; probably Timbren
- wheels of matching bolt pattern, and larger AT tires
- add a water heater
I had not seen one in person before, but knew the quality would be poor. What I didn't know was just how poor it would be. Luckily I can do everything the trailed requires to be properly road worthy, and will do so in the near future.
The dealer prepped the trailer, gave us a quick walkthrough, and balked at the request to fill the water tank all the way. The techs there stated that the trailer is not meant to be moving with a full water tank, as it is bolted in on one side, but only screwed in on the other, and would likely not hold the weight in transit. Umm... what? I had them fill it up anyways, then got under it, confirmed the horrible mounting setup, and ran a ratchet strap across the bottom of the tank to give it that little bit of extra support until I came up with a proper fix.
When it came to connecting the 7-pin plug, the trailer's wiring barely reached it, and would instantly pull out the first time I did a left-hand turn. The dealership's owner was passing by and happily offered to have their tech make me a 2-foot extension for $129. Yeah, no thanks.
Drove it as it was to the local Canadian Tire, bought wiring and male+female plugs, made the extension right in the parking lot in 20 mins flat.
Then we hit the highway for another ~3.5hrs of driving to a favourite camping area near Golden, BC.
We stopped at a pull out for a break, and found it had a scale. The LX weighed in at 3360kg (two people, large dog, camping gear, trailer on the hitch), and the attached trailer weighed in at 800kg even.
We found an awesome (new, to us) camp spot right on the water, and got super lucky in taking it, as another vehicle (which we had passed on the highway some 30 mins earlier) pulled up behind us no more than 60 seconds later.
After bouncing around on 12km of a dirt road, we found that the only two drawers had both opened in transit:
A quick look-see showed that these drawers are assembled via staples. Horrible construction that will need fixing.
The weather seal on the transit-door was also torn:
And a lot of the original sealant is already cracking:
... also note that the dealer's techs unequivocally believe in "more is better," instead of using a quality sealant to begin with.
On the other hand, being inside the trailer is fantastic, and is a complete game changer for us. Tons of room, I can stand with room to spare, lots of sleeping areas, running water, propane heater, tiny fridge, stereo, lights, etc.
The attached awning did not come with any guy lines to stake it down, and the very first, lightest breeze you can imagine flipped it up on the roof:
I mentioned that on the way in to the campsite, the trailer bounced around like mad. After setting up camp I did a quick walk-around, read the warning labels, and it occurred to me to check the tire pressure (I didn't bother airing down as we weren't going far, were exhausted and in a rush). Tires are rated for a max of 50 PSI. The spare was at 46.5 PSI. The passenger-side tire was at 49.5 PSI. And the driver-side tire was at... 62.5 PSI. Amazing techs strike again! Dropped all tires to 30 PSI and it rode way nicer on the way out.
--
Immediate plans for the trailer:
- water proof the exposed mdf/plywood on the bottom, as well as on the insides of the lid
- re-seal... everything
- figure out why there's a switch that doesn't do anything, and why we could not figure out how to turn off the interior lights (I'm thinking that's not a coincidence)
- replace all accessible metal screws (which seem to be the only hardware holding literally everything together) with proper bolts or rivets
Short-term plans for the trailer:
- have the tongue cut + extended a few feet
- add a removable max-coupler
- add an XO750 trailer jack
- have a metal box built on top of the extended coupler to house a proper fridge (incoming in a few days)
Long-term plans:
- new suspension; probably Timbren
- wheels of matching bolt pattern, and larger AT tires
- add a water heater


") )))
)))