Double swingout continued. Thoughts? (1 Viewer)

This site may earn a commission from merchant affiliate
links, including eBay, Amazon, Skimlinks, and others.

Make it easy to grease.

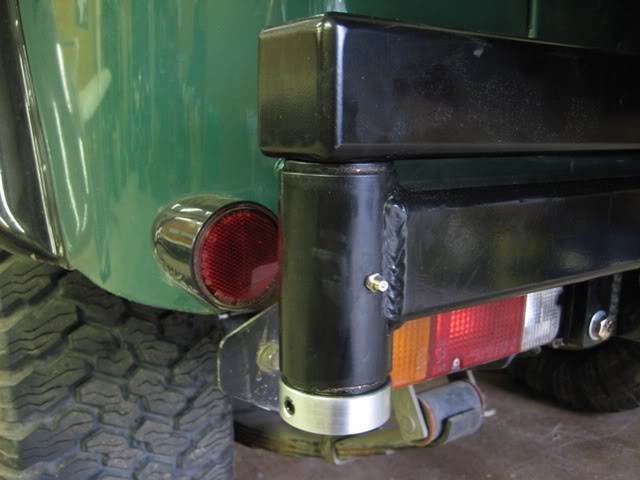
I have been having troubles opening my swing outside lately so I decided to grease them up. I had to use the floor jack to push them out.

15782825450067359958900026914396.jpg
15782825570006152616468339245047.jpg
 
Small bits of time yield small improvements.
AC1562D2-7D3D-42E3-8FDE-7B9423A1FF11.jpeg

First order of business was a gas strut for the new arm. I pulled these off a RX300 hood, so there’s a Toyota in this project. The tire arm had a little too much swing on it and would make contact with the body. I moved the mounting point further out on the arm to solve this issue.

Next I made a new bail for the latch, now it reaches from the arm to the bumper. Broke a tap on the fourth hole on the arm, leaving a nasty bit the hole. I was running out of time, so I welded hook on to the bumper.

Last thing was to weigh it: bumper 61#, tire swing out 41# and cooler arm 45#. Not sure what exactly to do with this tidbit, but thought it might be useful somehow.

Hopefully more time next week. Powder is here, so it’s time to ski.
 
So this is a wrap on the bumper build( unless it fails) the bumper build there are still a couple minor things to do, but they don’t warrant another addition to this thread
I’m happy with the results. Took it for a spin on some icy back roads and rattles were no more than usual.
B5C90C17-097B-4567-8E41-2F0D701918D2.jpeg
C6D8C56D-9885-41A9-AA88-C192D34B8FF5.jpeg
07C5C571-9357-4F2E-B9F9-ABE259D2F144.jpeg

Final thoughts:
  1. It’s heavy and I expected that.
  2. Love the gas struts. They’re a little fast, but nothing crazy.
  3. I like the overall look and feel
 
Small bits of time yield small improvements. View attachment 2179021
First order of business was a gas strut for the new arm. I pulled these off a RX300 hood, so there’s a Toyota in this project. The tire arm had a little too much swing on it and would make contact with the body. I moved the mounting point further out on the arm to solve this issue.

Next I made a new bail for the latch, now it reaches from the arm to the bumper. Broke a tap on the fourth hole on the arm, leaving a nasty bit the hole. I was running out of time, so I welded hook on to the bumper.

Last thing was to weigh it: bumper 61#, tire swing out 41# and cooler arm 45#. Not sure what exactly to do with this tidbit, but thought it might be useful somehow.

Hopefully more time next week. Powder is here, so it’s time to ski.
I like what you did with the cooler (bracket and arm attachment). Over time, have you had any issues with the brackets you bolted to the bottom?
 
I like what you did with the cooler (bracket and arm attachment). Over time, have you had any issues with the brackets you bolted to the bottom?
Overall the bumper is holding up well. I’m not gentle on it, but I don’t balance the weight of the truck in it either. Rattles really seem to be coming from the “tool bin.”
  • The swing outs have yet to come loose while driving.
  • The RuffStuff pivots are probably way overkill, but I like that about them. I (185#) could likely be on the swing arms while open. Also, I’m pretty poor about greasing them, but they are still tight and smooth.
  • The deStacho latch is holding up well, no complaints
  • The basket is not the prettiest on close inspection, but I enjoyed making the bending apparatus and the final unit.
  • I have had to repair the gas struts, but that had more to do with my skill set. 100% would do that as part of a swing out again. They are also my stops and work flawlessly.
I’m not sure what brackets you are asking about? The basket is bolted to the right swingarm, but truth be told, next time I’d probably just weld it on. I’d thought I might make a bike rack for that, but I found a hitch bike rack I like more. One more thing I added was diagonals to the backside. The oem frame braces had rotted away long ago. These give the bumper four points of attachment, should I ever really apply force to the bumper.
Thanks for the response :) Yes, bolting it to the swing arm was what I am referring to. I will be doing similar with parts from 4x4Labs as I'm trying to build modular pieces that I can throw on or off as needed.

Also, that secondary red tab on the Destaco - what is the purpose?
 
Thanks for the response :) Yes, bolting it to the swing arm was what I am referring to. I will be doing similar with parts from 4x4Labs as I'm trying to build modular pieces that I can throw on or off as needed.

Also, that secondary red tab on the Destaco - what is the purpose?
Making it modular was my plan as well. I looked to the 4x4labs kit for some inspiration, he’s got a good looking system. Ultimately, I wanted space for three Mtbs- if my son keeps going, dh bikes in the future. So I ended up with a Yakima stand up type rack. This also seemed a simpler solution to me.

One added bonus to the separate bike rack- storage. Truth be told, I rarely use the cooler for food. But the ‘40 is tight on space, so the cooler gets used as needed. An action packer would likely be a better choice, but the cooler has style…

The second tab is a “lock”. Press it with your thumb while pulling up on the handle. McMaster carries a good collection of these patches. Like the pivot, I’m not sure the lock is needed, but similar to the RuffStuff spindles- piece of mind.
 

Users who are viewing this thread

Back
Top Bottom