

Cirrhosis: '87 turbo build

This site may earn a commission from merchant affiliate
links, including eBay, Amazon, Skimlinks, and others.

That truck reminds me of the one I bought in '07 (for $700, delivered to my driveway) just to get the R151F I have now. Same color, but it was in worse condition. No bed, and the engine had a badly blown head gasket, hydrolocked. Frame folded in half while I was under it removing the tranny. :eek: I had dreams of rebuilding the 22RTE, but a some research changed that tune, I didn't want that hassle of trying to keep it on the road. Sold the engine and all wiring for $400, got enough for the rest of the parts so I basically got the tranny for free. :bounce:

Everything left after 2 weeks went to the dump, including the entire blue interior and that awful bench seat. Got $25 for all the metal at the scrap yard.
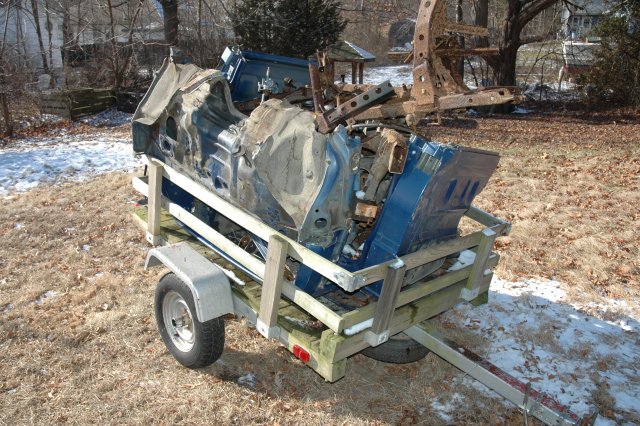
BodyParts1.jpg


I made a similar "cart" to set my cab on for paint work, I used all scrap lumber and some casters I had lying around, it worked really well. I can send you my building sketches and dimensions if you want, but mine was for an Xtra cab.
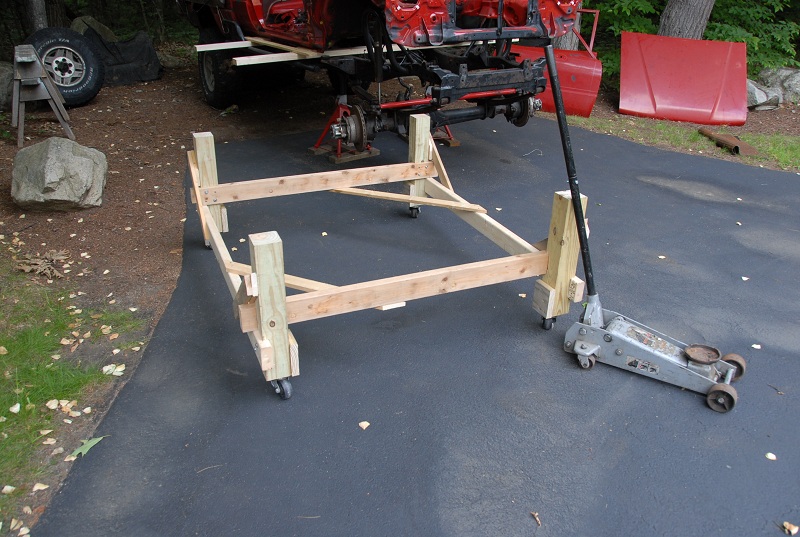
Cart1.jpg
 
The truck I bought was in probably worse condition. Mostly due to the over-populated mouse population living in the cab.

I fortunately (or unfortunately) was never talked out of selling the 22rte. So I rebuilt it.
It has been a fun project, but there are days that I wish I had bought the 97 T100 w/ 5 speed that I looked at right before I pulled the trigger on the engine rebuild. Woulda, coulda, shoulda...
 
[QUOTE="KLF, post: 9484965, member:]

I made a similar "cart" to set my cab on for paint work, I used all scrap lumber and some casters I had lying around, it worked really well. I can send you my building sketches and dimensions if you want, but mine was for an Xtra cab.

Cart1.jpg
[/QUOTE]


Thanks for the offer but once I have the cab of I will take measurements off the frame to get the cart configured.
The large wheels will help me move it around in my gravel driveway for when it has to get kicked out of the garage.
 
Last edited by a moderator:
Now that everything has been taken off I'll get to some damage pics.

.

.

The circled area shows some deformation. This is the right side "A" pillar inside.

.

... And the sock they used for sound deadening and/or splash control for the ecu.

 
This picture is shows some of the deformation of the trans tunnel. When compared to the top of the firewall you can see how it is raised on the drivers side.

.

The shifter hole tells a lot of how the damage carried through the cab.

.

This pic shows the floor rib that was crushed from the accident and then abused with a hammer during the repair.

.

 
Aside from the rust hole.the lower hinge mounting surface is rolled in at the front. I chant seem to get a good pic that shows that other than the damage to the surrounding area.

.

 
With over 20 years of structural/auto body repair this would be my bet on what happened to this truck.
Right side hit to something very solid (ie: car/tree...) that caught just enough of the radiator support to destroy the front structure. I would also suspect that the right front wheel was driven into the "A" pillar and probably messed up the frame enough to get a new frame. The cab, I assume, shifted forward enough to contact the bell housing/ engine and cause all the floor and firewall damage. There is a whole lot of secondary damage that would not get seen in a complete vehicle. With everything stripped off it seems way more obvious.

Soap box rant:
In the past older body repair techs were sought after by insurance companies to become estimators in an attempt to save the company money. Old time estimates would get "padded" to allow for secondary damage so the shop wouldn't lose there a$$. By having old techs they could eliminate a lot of the unwanted "padding". New time estimates are written by people with no shop experience and expected to write as low as possible. Without experience of knowing what to look for and where to look for it they can write it cheap and always fall back on the "well, I didn't see that" excuse. Case in point just last week one of the other techs got a job to repair a bumper cover. Body time was just over 2 hours for the repair. Before it was even started on or any parts removed it was written by our shop for an additional 10 of hidden repair. Upon tear down and inspection the estimate is now just over 22 hours for damage to the reinforcement, rear body panel and trunk floor.

If you are in an accident the insurance companies are taught to write only what they can see, and that leads to a lot of people getting screwed if they just take the check as first written by the insurance company.
Soap box off.

Now back to work.
 
Wow you certainly have a lot of work ahead of you to get that back straight. I'm certainly no expert but that doesn't look like it's worth it to me. The one I hacked up was in better shape than that...
 
I believe the frame was replaced (no signs of damage and measures out correctly) so all I have to do is the cab damage. Worst case scenario I'll have to replace a section of the "A" pillar. I think I can repair the crash damage in a couple of days.
 
When I set the cab I found I had welded the front 2 mounts 4" too far forward. :doh: :censor: :censor: :censor:


They were going to get designed different than the rears to accommodate the pivoting for access to the bottom side. This just makes for some additional thought time. Guess what I'll be thinking about during the Christmas play today.

 
"T" mount to hold the front at tilt.


.


Only the cross tube needs removed for return to standard position.


One clue as to how old the last paint job is ...


Lacquer crack.

The last time I had seen any lacquer sprayed was back in the early '90's.
 
After getting the sound deadener removed I got started on the straightening process.

.

.

First position for the porta power. During this process I applied just enough pressure to see some movement in the metal then started to work the areas that needed straightened.

.

.

I changed the angle and tips of the porta power around 5-6 times while working the metal in all areas.

http://i204.photobucket.com/albums/bb185/ohsewgood/Cirrhosis/image_zpsb101a02a.jpg[/IMG].

.

A few pics of what I have currently. I still need to do some light hammer work and straighten the wiper/ cowl areas.

.

.


Interesting. I always wondered what the body shop guys did with those Porta-Powers.

Your project reminds me of the house a builder friend is working on up the street from me. It was built back in the 40's very cheaply, meaning minimal framing and not very square. No sheet sheathing. He bought it after a small fire in the basement, figuring on flipping it after gutting the inside. He found the thing was so much out of square he had to jack it all over the place and put a bunch of steel bracing in. He admitted to me the other day he would have better off knocking it down and starting over from scratch, but then it wouldn't have the character of an old house. The same is true here, right? :)
 
With all the extra work involved it would have been a good choice to abandon the project if I wasn't a bodyman. This just creates a good excuse to not feel guilty about modifying everything.

I wish it had been in better condition. I would have liked to kept it stock on 32's. All in all, it will still be a blast to build.
 
Last edited:
Back
Top Bottom