


Irishpilot
SILVER Star
I installed my SAE amber dual fog light kit from @BenCC and I'm very happy with the quality, his shipping speed, and customer service. All top-notch!
Here's my installation notes for those who decide to do this on a LC100. Overall, it's not exactly a plug and play, but it's darn close. Even with sending Ben an email, I installed both sides in an hour.
1. Remove the OEM fog light housing. Remove the 1x 10mm nut and unplug the bulb from the harness. Assembly slides out.

2. Modify the Ben3Dbuild plug that connects to the OEM harness. There are two small tabs that caused binding. I used a thin razor blade to shave them off. I also had to slightly bend the two prongs outwards to line up with the OEM plug.
Here are the two tabs:

After tab removal:

3. Widen the OEM bolt hole. The new LED housings almost line up and mine took just a little bit of widening.

4. Measure and drill the second mounting hole. The OEM housings have a hook and the LED housings have two mounting bolts.

5. Install the new housings, bolt them and bundle the wiring harness as it is a lot longer than stock. I used a bumper frame hole on each side to attach the zip tie and hold the wires.

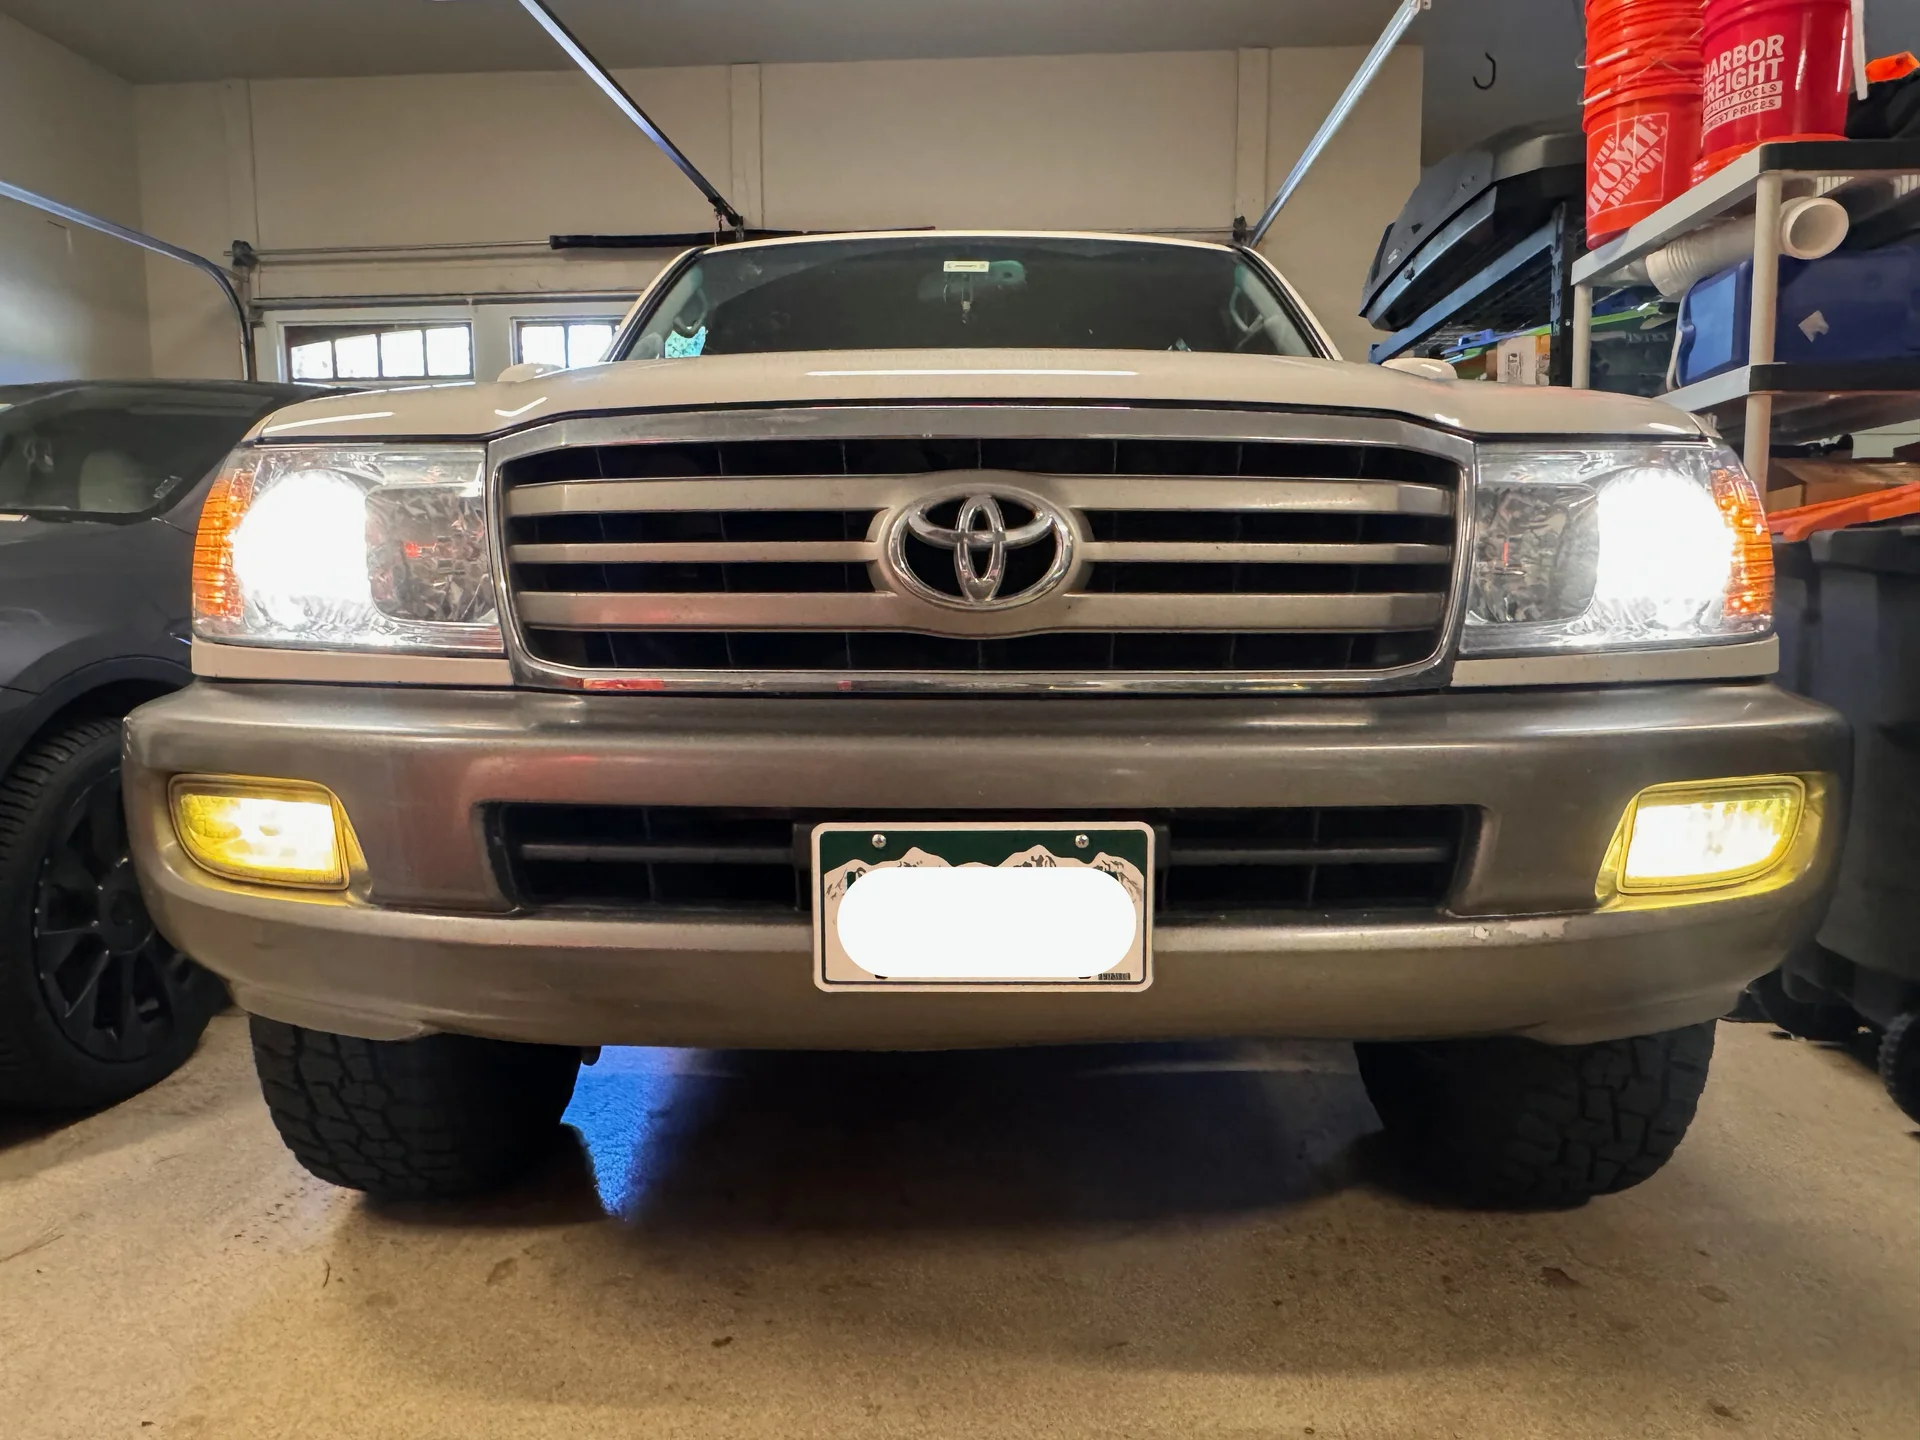
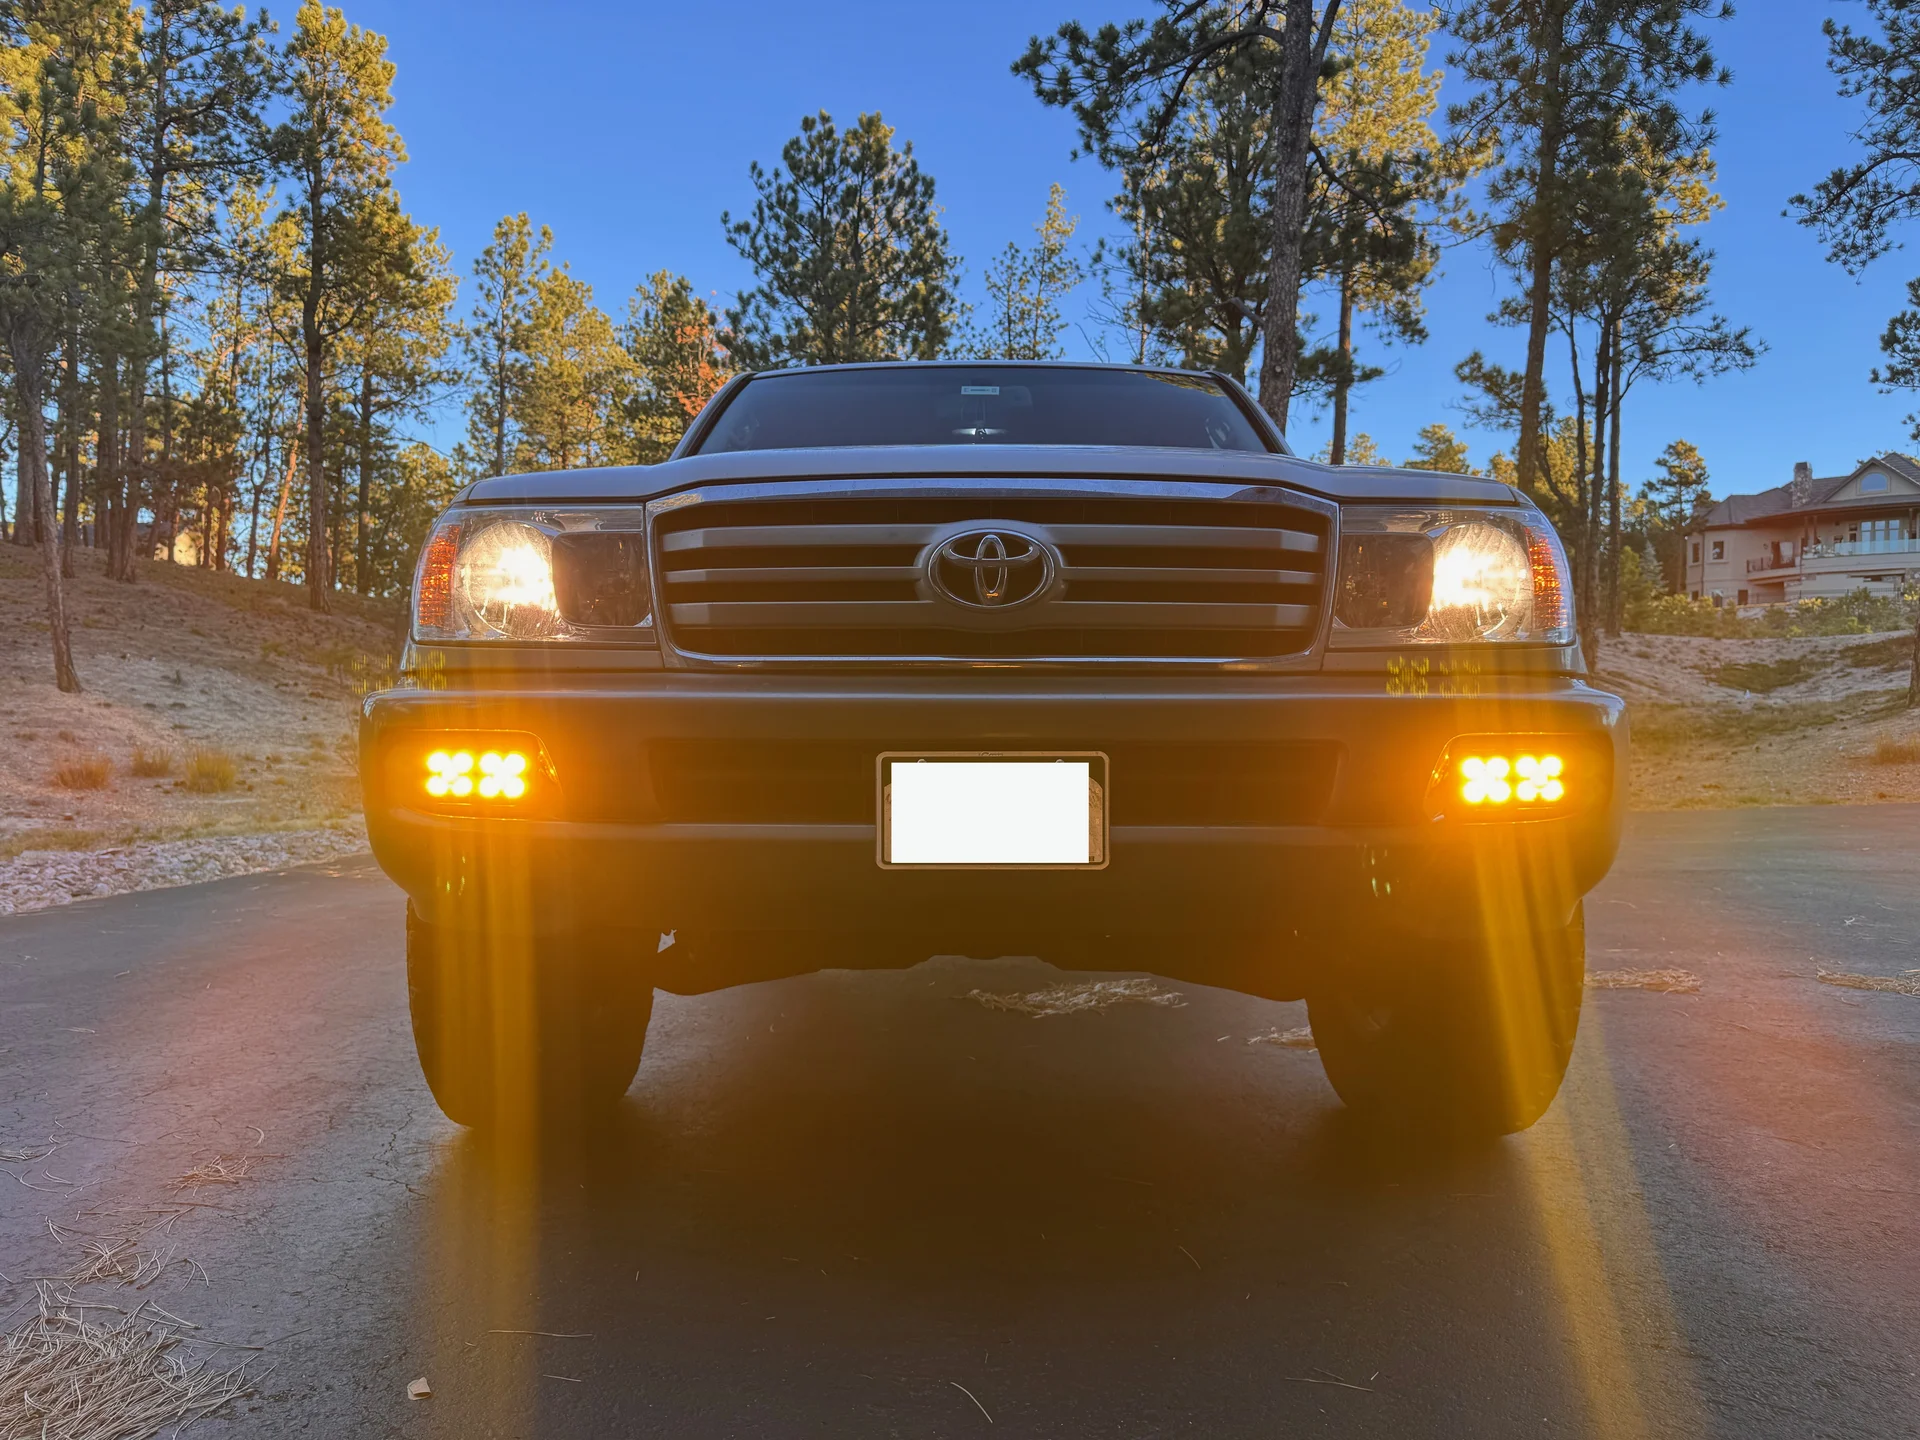
I drove the truck last night and the LEDs are super bright. I'll get a few pics tonight so ya'll can see the difference. After talking to Ben, I'm glad I went with the street legal versions as I use the truck on rural back roads and going into the mountains where I don't want to blind folk. My stock housings had the upgraded halogen bulbs I purchased through Daniel Stern. They worked much better than stock, but the bulbs don't last long and my reflective material was peeling. The LED fogs are much, much brighter and throw a really wide pattern, which I like. I hope this write up helps.
Before:
After:
Here's my installation notes for those who decide to do this on a LC100. Overall, it's not exactly a plug and play, but it's darn close. Even with sending Ben an email, I installed both sides in an hour.
1. Remove the OEM fog light housing. Remove the 1x 10mm nut and unplug the bulb from the harness. Assembly slides out.
2. Modify the Ben3Dbuild plug that connects to the OEM harness. There are two small tabs that caused binding. I used a thin razor blade to shave them off. I also had to slightly bend the two prongs outwards to line up with the OEM plug.
Here are the two tabs:
After tab removal:
3. Widen the OEM bolt hole. The new LED housings almost line up and mine took just a little bit of widening.
4. Measure and drill the second mounting hole. The OEM housings have a hook and the LED housings have two mounting bolts.
5. Install the new housings, bolt them and bundle the wiring harness as it is a lot longer than stock. I used a bumper frame hole on each side to attach the zip tie and hold the wires.
I drove the truck last night and the LEDs are super bright. I'll get a few pics tonight so ya'll can see the difference. After talking to Ben, I'm glad I went with the street legal versions as I use the truck on rural back roads and going into the mountains where I don't want to blind folk. My stock housings had the upgraded halogen bulbs I purchased through Daniel Stern. They worked much better than stock, but the bulbs don't last long and my reflective material was peeling. The LED fogs are much, much brighter and throw a really wide pattern, which I like. I hope this write up helps.
Before:
After:


