

ABS and VGRS issues

This site may earn a commission from merchant affiliate
links, including eBay, Amazon, Skimlinks, and others.

Joined
Mar 21, 2017
Threads
12
Messages
110
Location
Cincinnati, OH
I've been having a problem with my ABS VSC TRC and intermittent with the VGRS. I have had the issue for a year or so but only showed up in snow conditions and it was always the right rear speed sensor. So I went ahead and replaced it last night hoping it would fix it. But the issue still persists. But in addition to the abs lights I have a VGRS light that comes and goes.

I think its water getting somewhere but can't figure out where.
Any ideas where to look?

Attached are the codes prior to the abs sensor replacement.
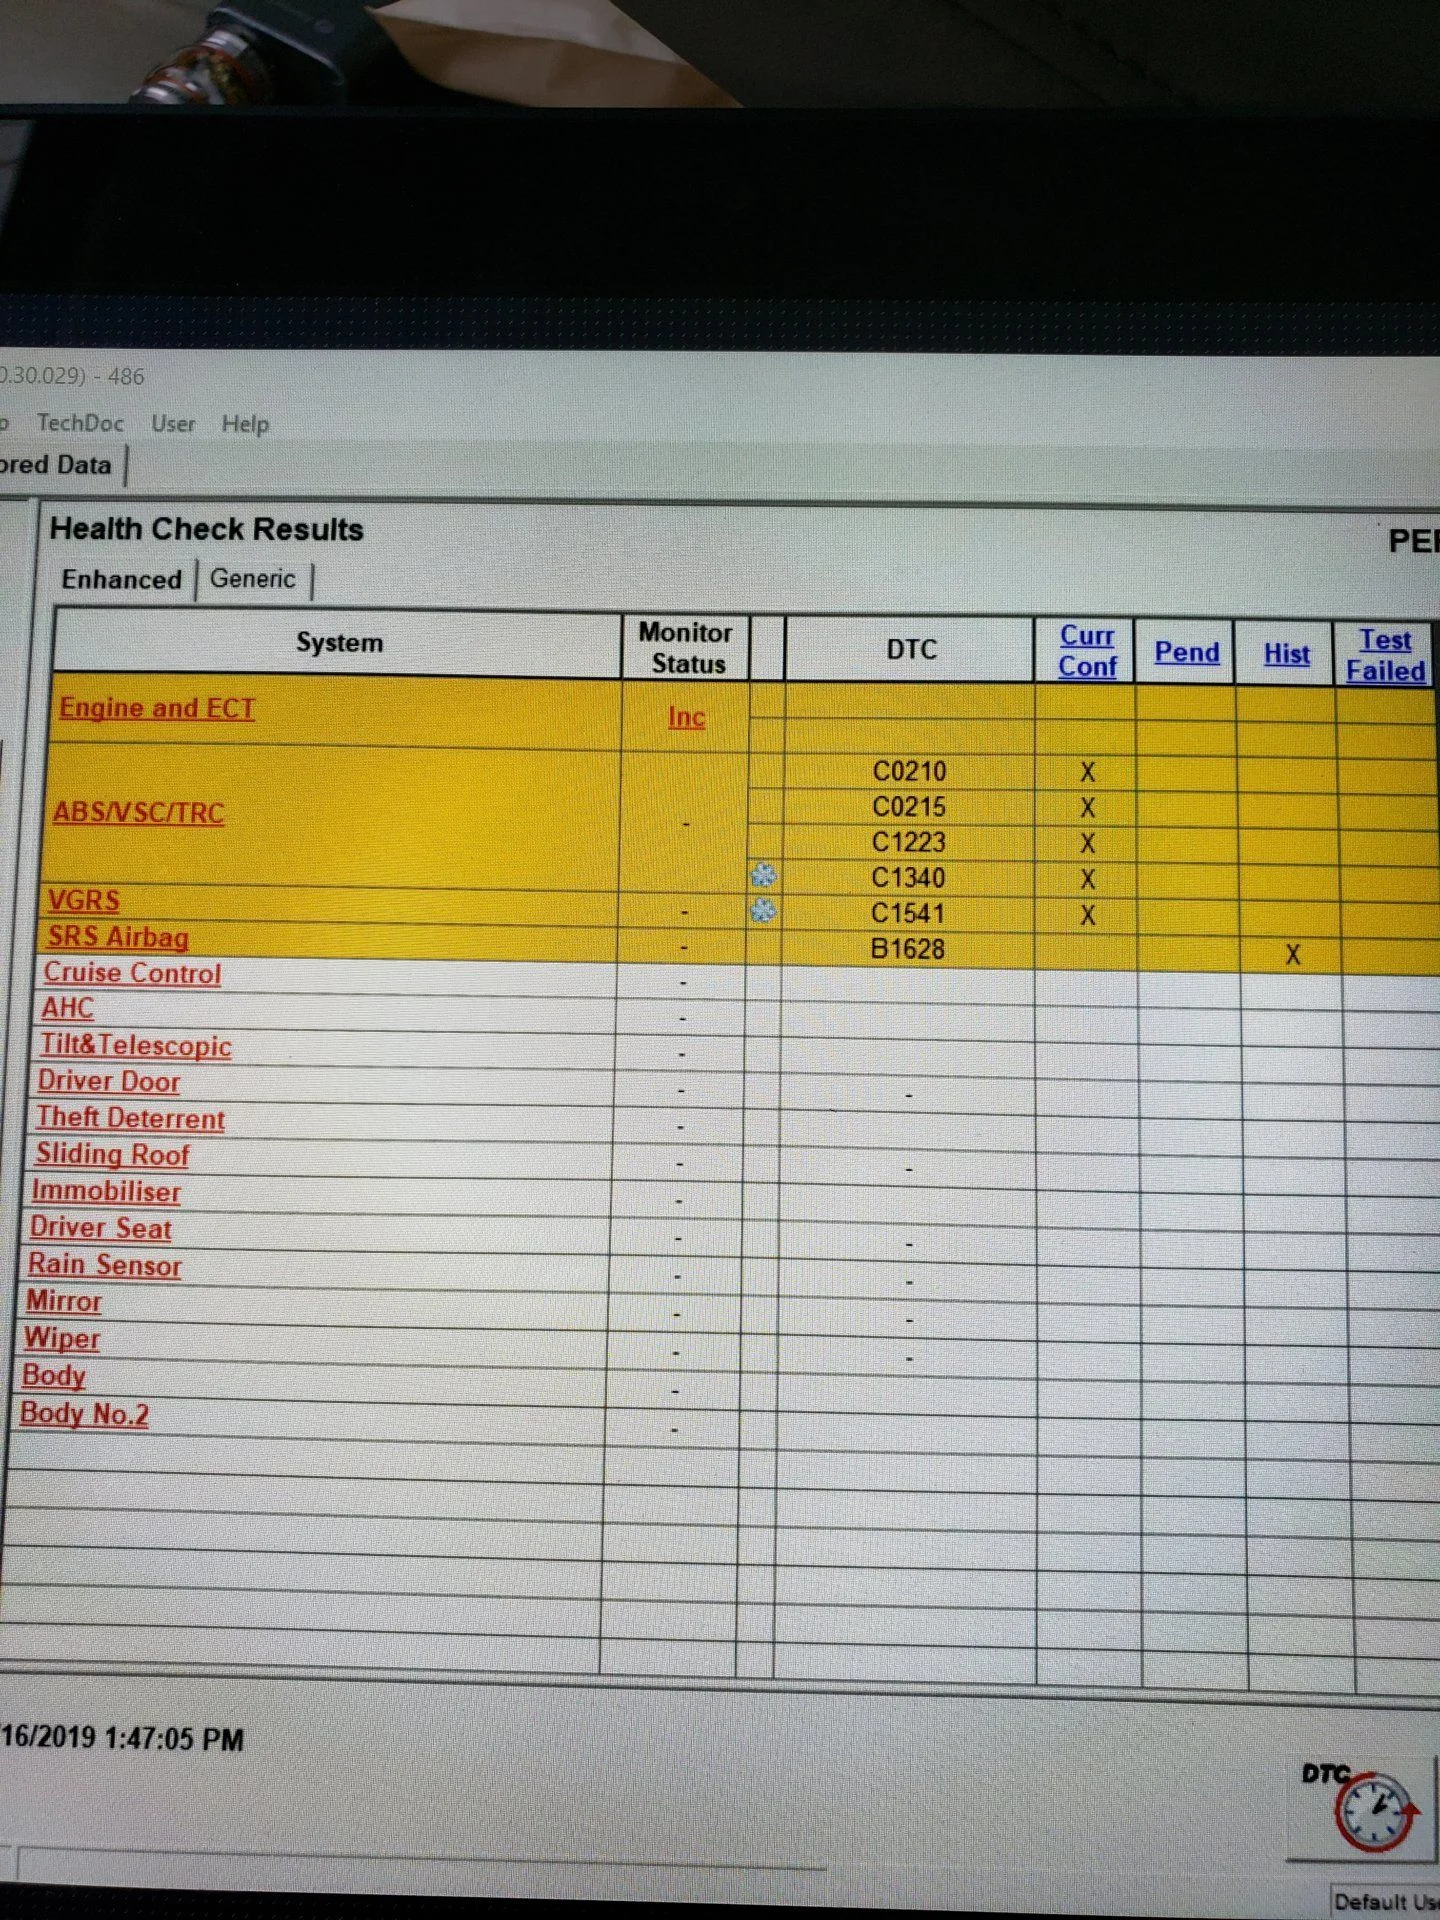
20190116_164934.webp
 
After clearing the error codes I still get the c0210, c0215, and c1541 right away. I checked and wiggled the wires I could find related. But not sure what area to focus on. I was hoping to go down to KY to go on some trails tomorrow, but I'm thinking this won't be resolved by then. Makes me wish I could afford rear lockers haha.
 
Well I figured out the culprit here after I started getting a vsv error too. They all use the same connector. Now I need to figure out how to fix this. I have no idea how corroded connectors are fixed. Looks like the pin for the VSV corroded enough to get stuck in the female connector. I can't seem to figure out what the part number is for the male connector. Or how I go about fixing this. Any ideas? There is a rust spot behind the rear wheel that was allowing water to splash up to the connectors. Will address that temporarily today with some foil tape.
20190413_111931.webp
20190413_111922.webp
20190413_111824.webp
Screenshot_20190413-111607_Samsung Internet.webp
 
Finding alternatives then starting with cheapest easiest first, which is cleaning.

So I'd try reconditioning first. Many electric contact cleaning chemicals on the market are safe for plastic and effective. Cleaning should help a great deal.

But unfortunately oxidation (blue) has likely gone under sheathing following wires. This will increase resistance more on hot days and with use. So you may have to come back and replace harness end to end in the end!

Most all connector housing can be purchased. I find getting the new ones often helps me decipher how to remove pigtail with fitting end from block housing. This one has many pigtails, making even more difficult, so take pictures and notes.

Look into replacing the whole wires harness end to end. It may be where you end up!
 
number or label the males, de pin them, the males are easiest. Id' then remove the male from the car and search it with a magnifying glass for a part number and clean it up. Maybe you can reuse it.
IF you go searching for it online, use the toyota female part number 90980 xxxx. the generic te # is 1318917-1

use that # and search for a male, the equivalent male will be on a data sheet for that part # (1318917-1)
unless you find a number on the male which is hit and miss.
The data sheet will also list compatible terminals male and female for both part numbers on their respective data sheets.
looks like regular standard terminals. It;s easy to buy repair wires also if you just need one or two.

actually here are the female terminal numbers # 1123343-1 female.
here is the male connector # 1318853-1 actually this is the PCB mount, not free hanging. Use this number to search other websites for a non PCB mount male.
female connector # 1318917-1

male terminals # will be on corresponding data sheet (going to be standard 025 terminals) something like 11233xx x


actually, look here. should be all the info you need. They just don't list the male #, those two numbers in the link are female. Reaad the description though.
US $4.98 |High quality 24 pin auto electric connector wiring harness Plug male nature connector 1318917 1 1717112 1-in Connectors from Lights & Lighting on Aliexpress.com | Alibaba Group
 
Okay so if I understand this correctly. I can take apart the male connector and repin the male (where do I find these pins? And do they just crimp on or is there a generic guide to doing this sort of repair?

Now for the female with a pin broken inside I could take this one apart and remove the pin then clean and reassemble? If I need to replace a female pin on the female is that doable? Also where would I source the female pin?

If I'm understanding this right it seems like my plastic connectors are good just the pins inside that need to be replaced. That is if I can take them apart without damaging them.
 
Back
Top Bottom