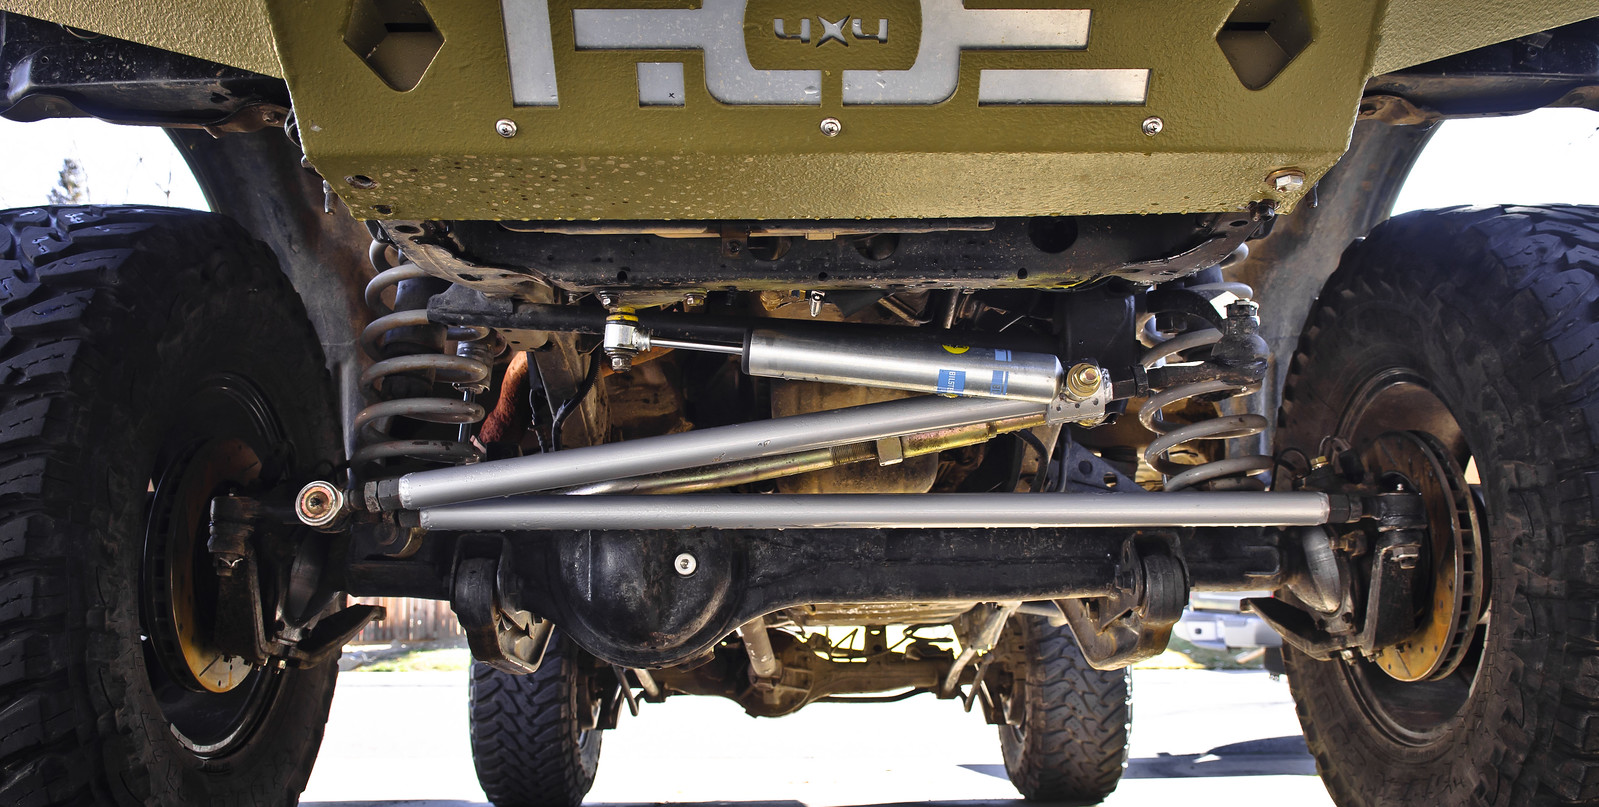
A real steering upgrade: Y-link & 1-ton TREs

This site may earn a commission from merchant affiliate
links, including eBay, Amazon, Skimlinks, and others.

jcardona1

Supporting Vendor
Joined
Aug 12, 2011
Threads
127
Messages
5,023
Location
Sacramento, CA
Well this long project is finally done! This is all started when I noticed all my stock TREs were shot and leaking grease. I looked around at OEM TREs and didn't like the price. After a bit of research, I decided I would just redo the whole steering system with much beefier parts and future-proof the build since the stock tie rod presents many problems due to its location.

I know folks here cringe at the though of cutting stock parts out and running non-OEM stuff, but my reasons for doing this are:

- It puts the tie rod where it should have been from the factory. Having the tie rod in the back is a very funky setup.

- Easier to adjust toe with the weld-in bungs

- Gets rid of the clearance issues when trying to correct caster on lifted trucks, mine is rubbing already.

- Putting the tie rod on the front raises it a bit, so gets it away from rocks

- GM 1-ton TREs are greasable with a zerk fitting, cheaper and stronger than Toyota and available everywhere since they're widely used.

- I'm not sure what the future holds. Engine swap? Taller lift? Custom 3-link? I don't want to limit myself now. When you go more extreme the tie rod will always be an issue. So I might as well upgrade now.

- Setting myself up with the steering this way gives me more options down the road, crossover steering, full high-steer, hydro-assist, etc.​

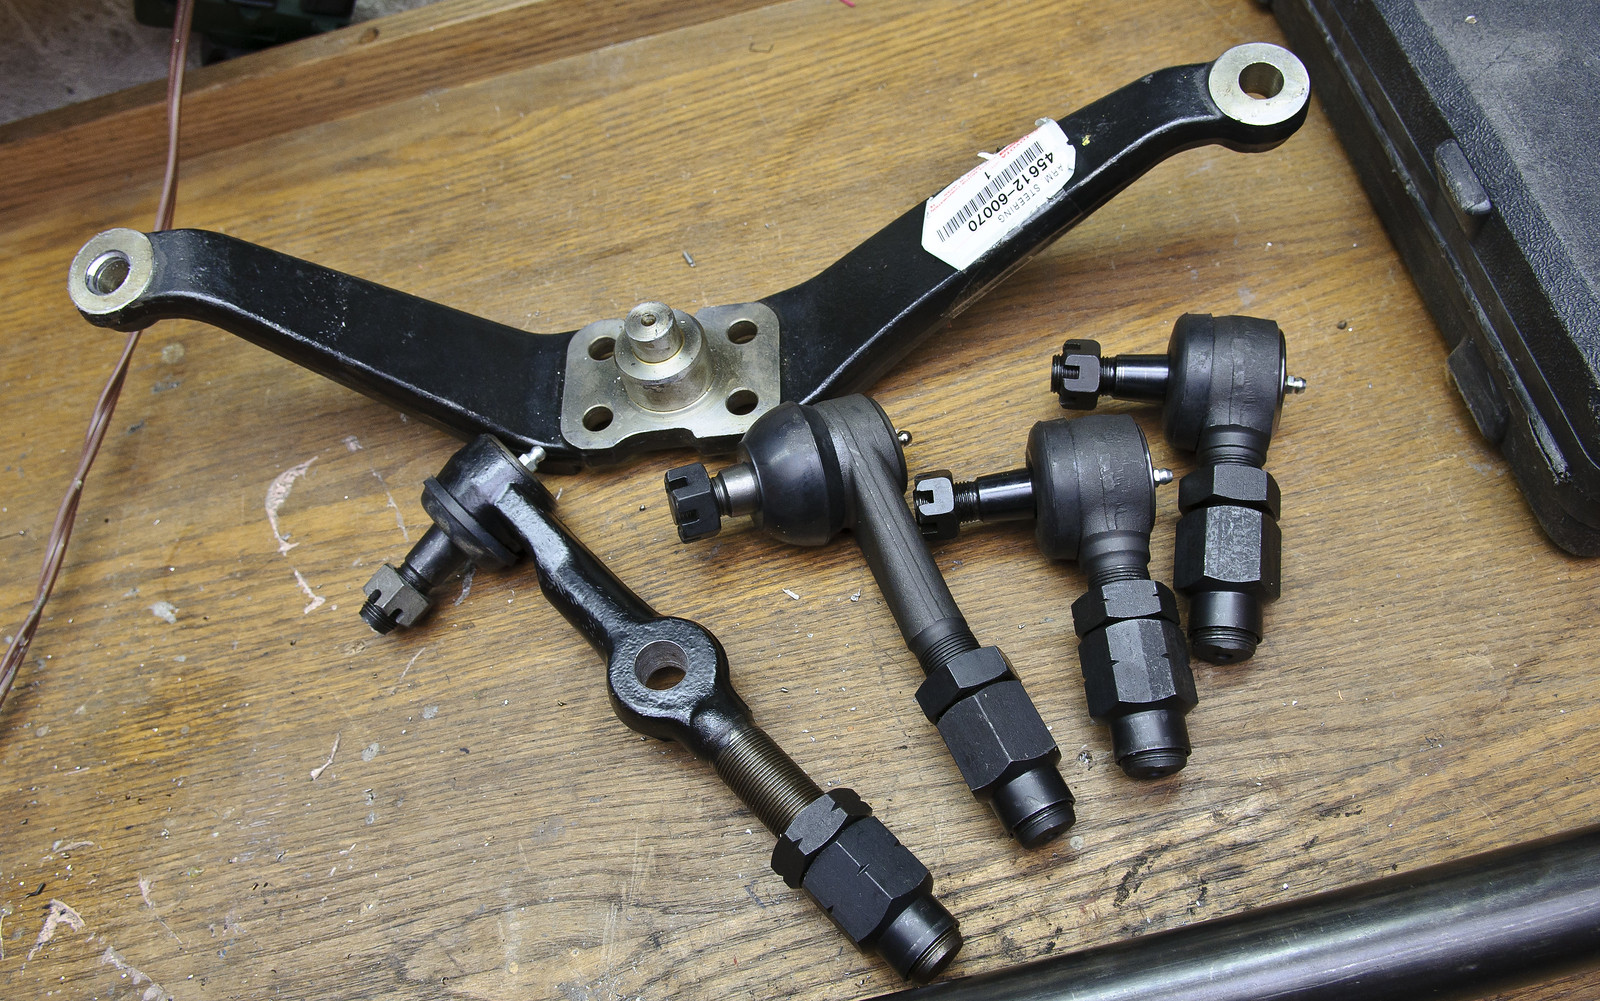
Let's start off with a parts list:

Y-link kit from Ruff Stuff complete with GM 1-ton TREs ($245)
http://www.ruffstuffspecialties.com/catalog/YLINK.html

RHD double steering arm that goes on the driver's side ($139)
http://shop.cruiserparts.net/index.php?main_page=product_info&cPath=6_73_239&products_id=22472

OD Tube Clamp for the steering stabilizer ($35)
http://www.trail-gear.com/od-tube-clamps

Re-tapering the pitman arm to the correct .795" taper of the draglink TRE, done by 4x4Labs ($20)
http://www.4x4labs.com/products/steering/pitman-arms/

7/8" inserts that go on the steering arms that give the correct taper for the 1-ton TREs ($16)
http://www.ruffstuffspecialties.com/catalog/INSSTEER.html

Collecting the shiny new parts

10620795695_b40bf1971e_h.jpg


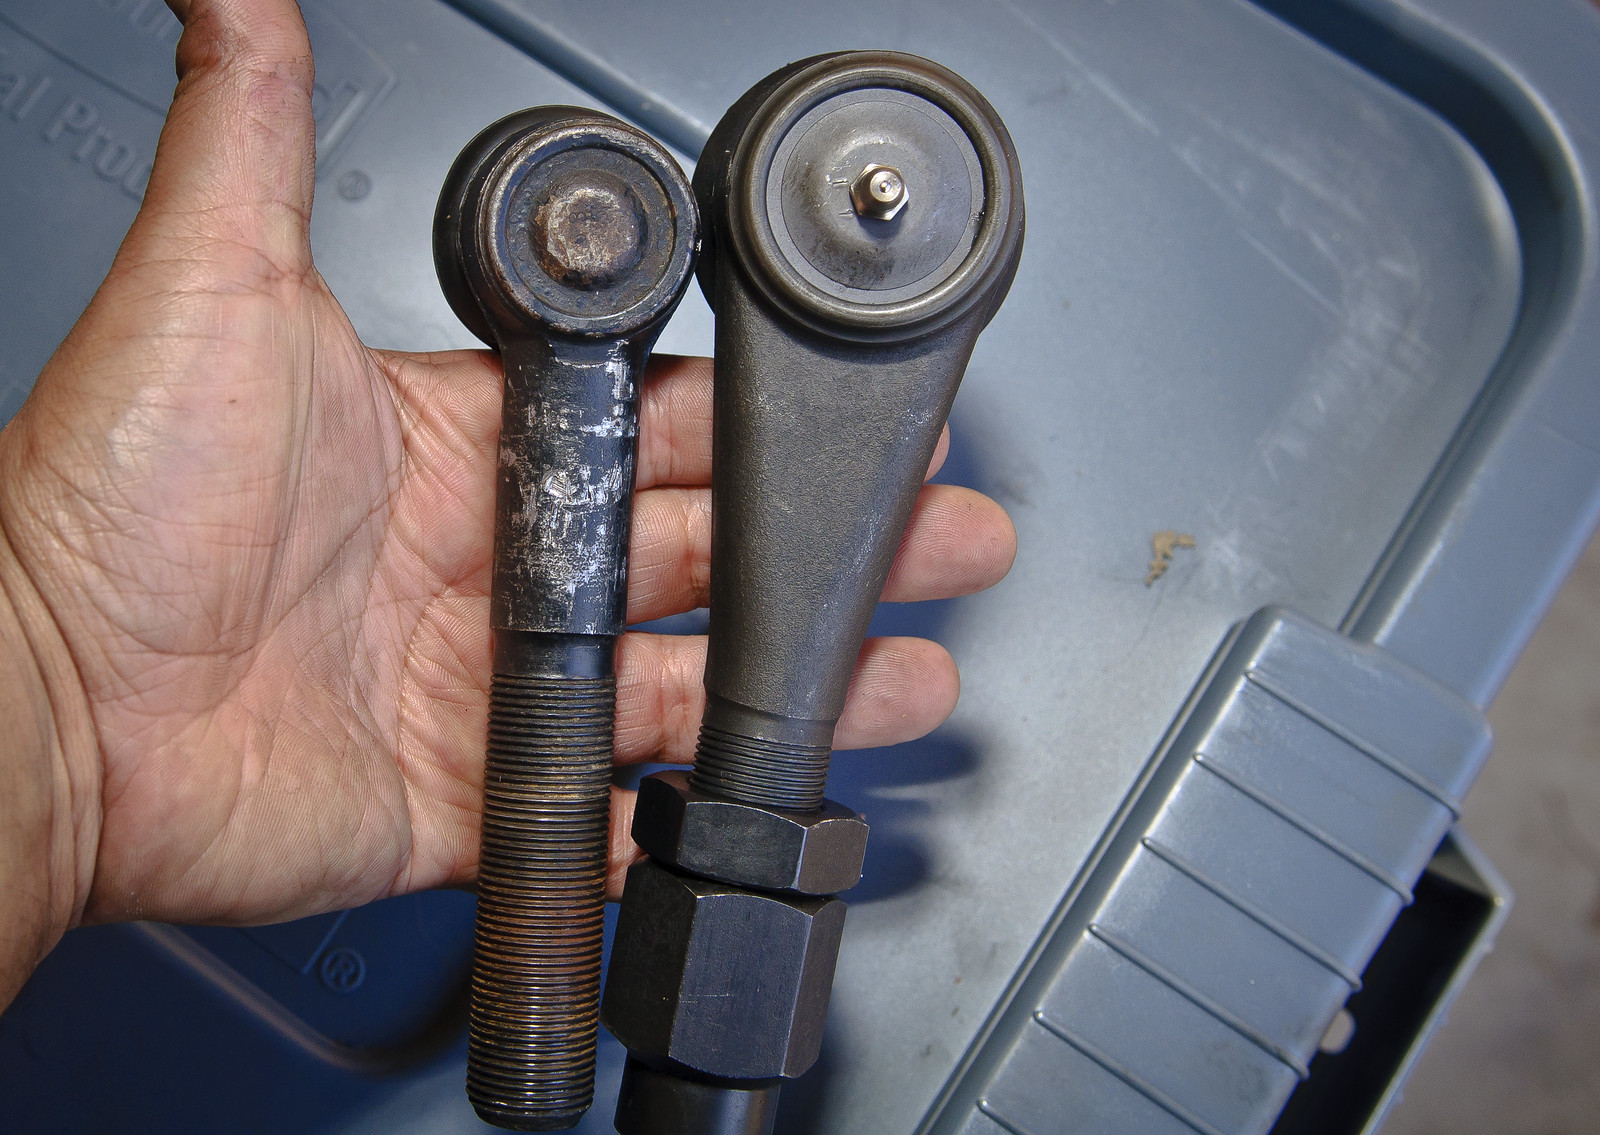
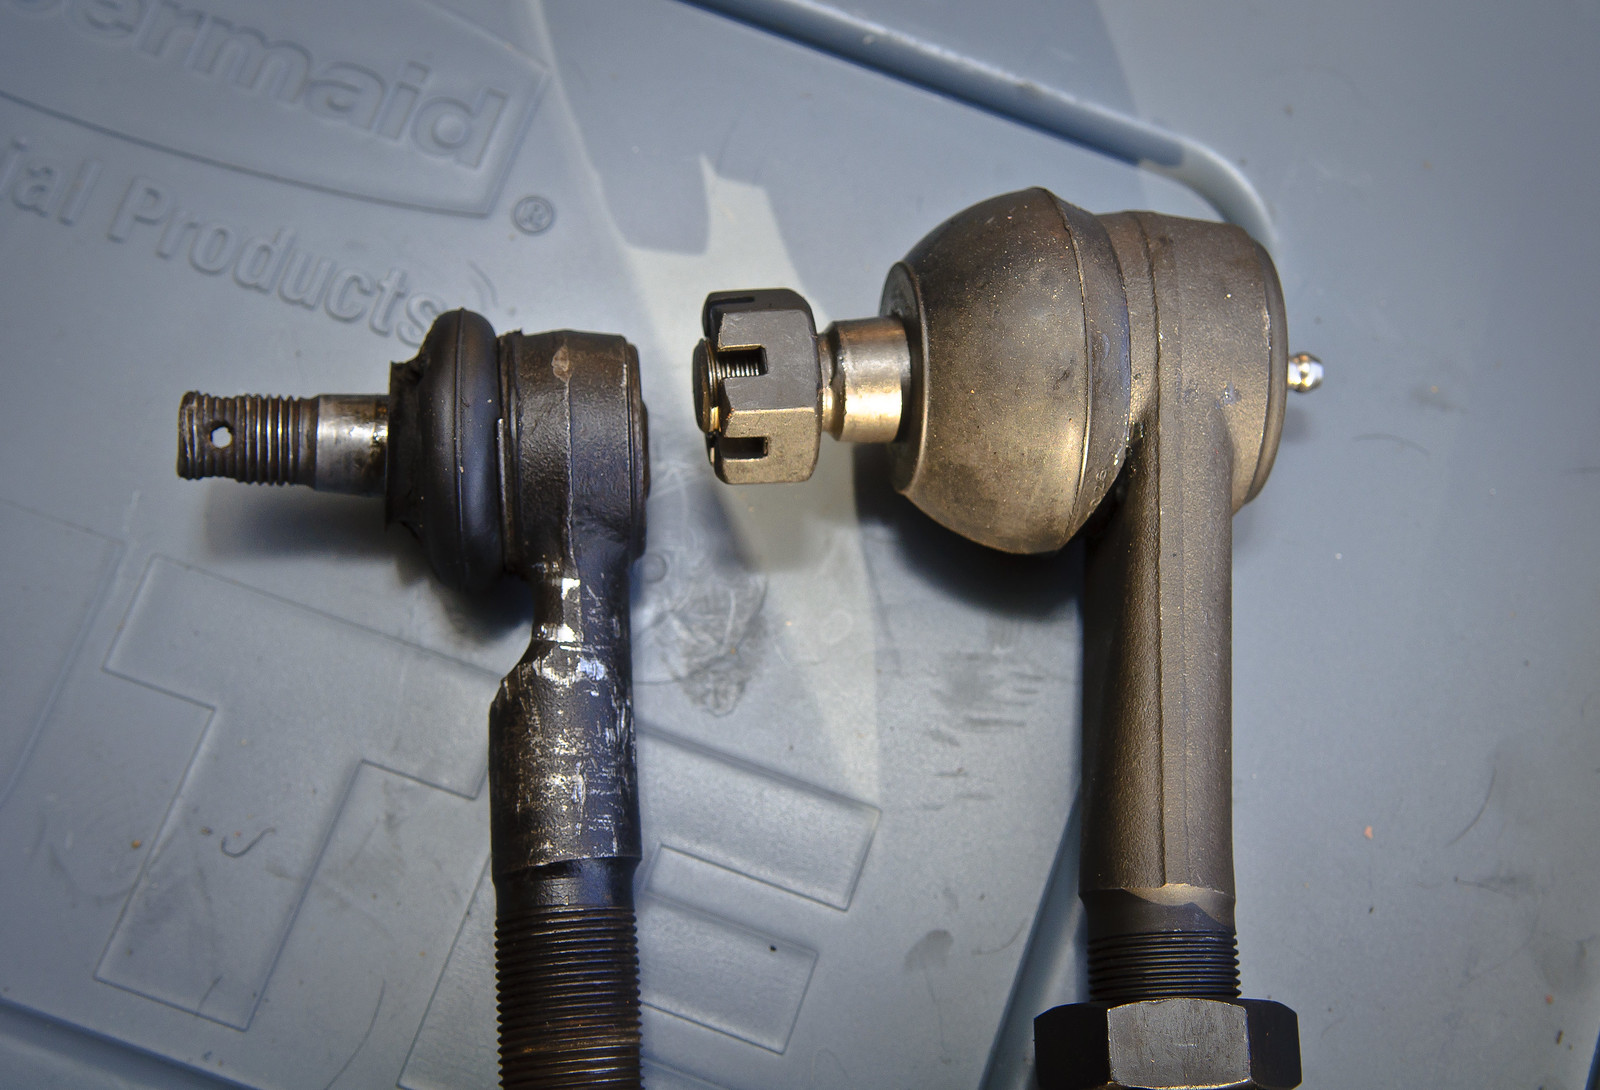
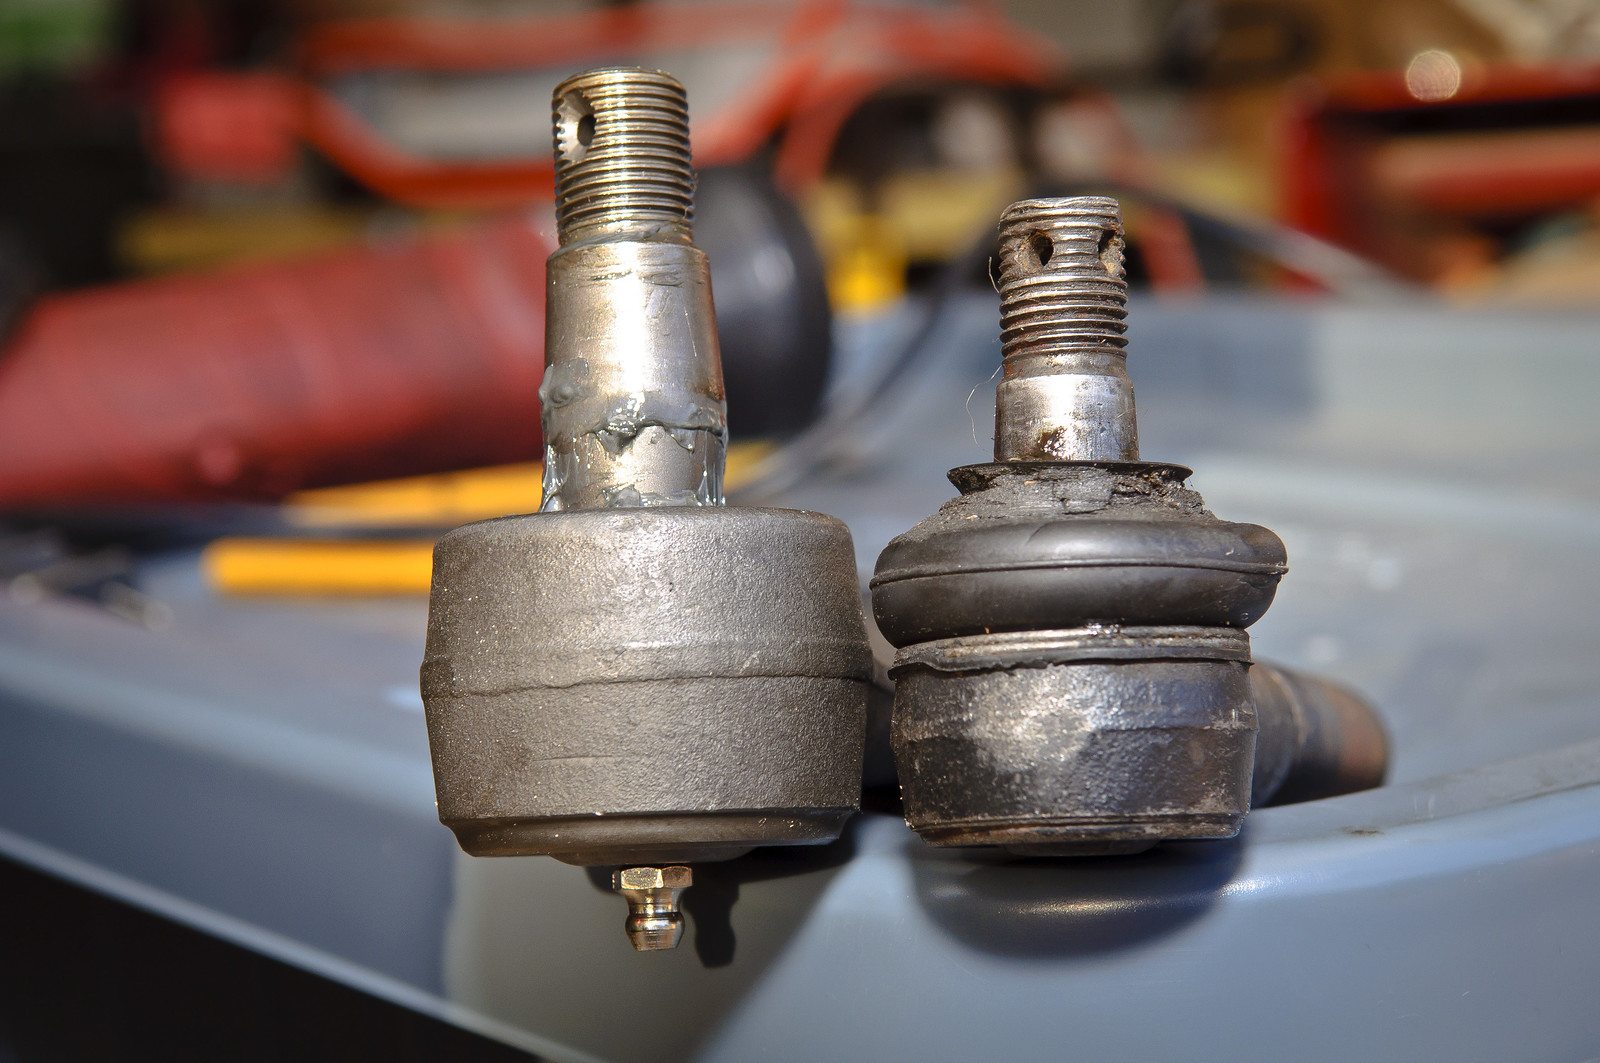
Beefy 1-ton TREs vs the wimpy stock parts

10620822334_df8cb77177_h.jpg


11700922926_f053ad7b97_h.jpg


11700168645_856192b3d1_h.jpg


11700167405_12581def43_h.jpg


11700919306_9c4a31a83d_h.jpg


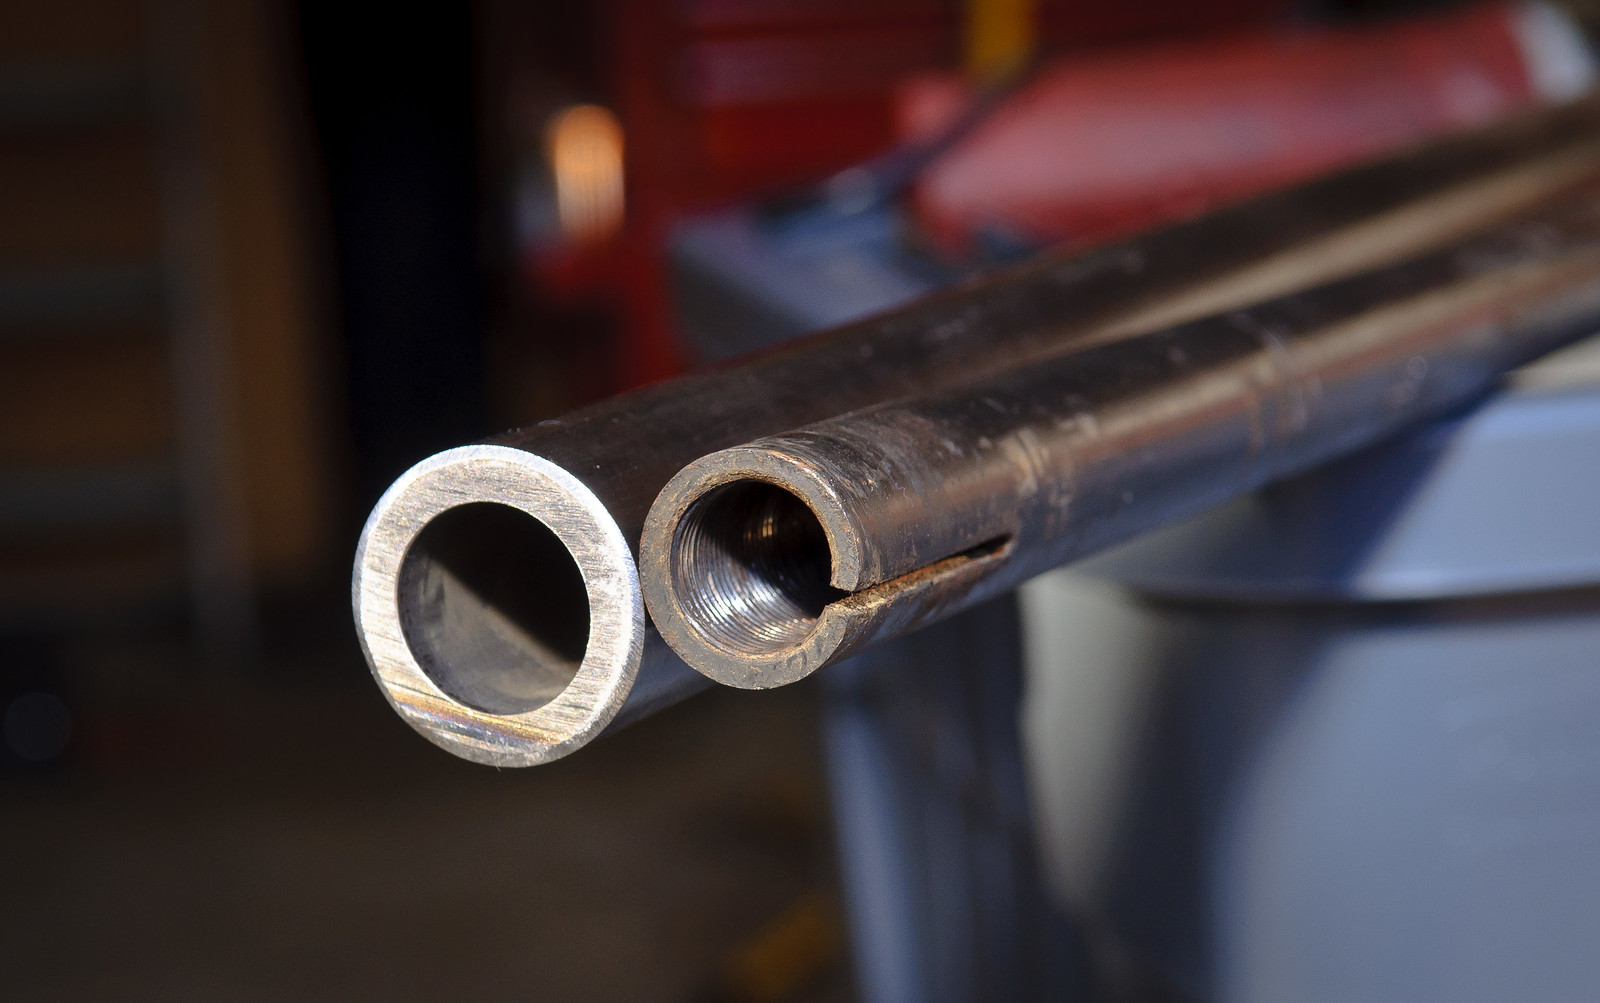
1.5" x .25" wall DOM tubing vs stock tube, huge difference!
11700416543_5b9cd0b41e_h.jpg


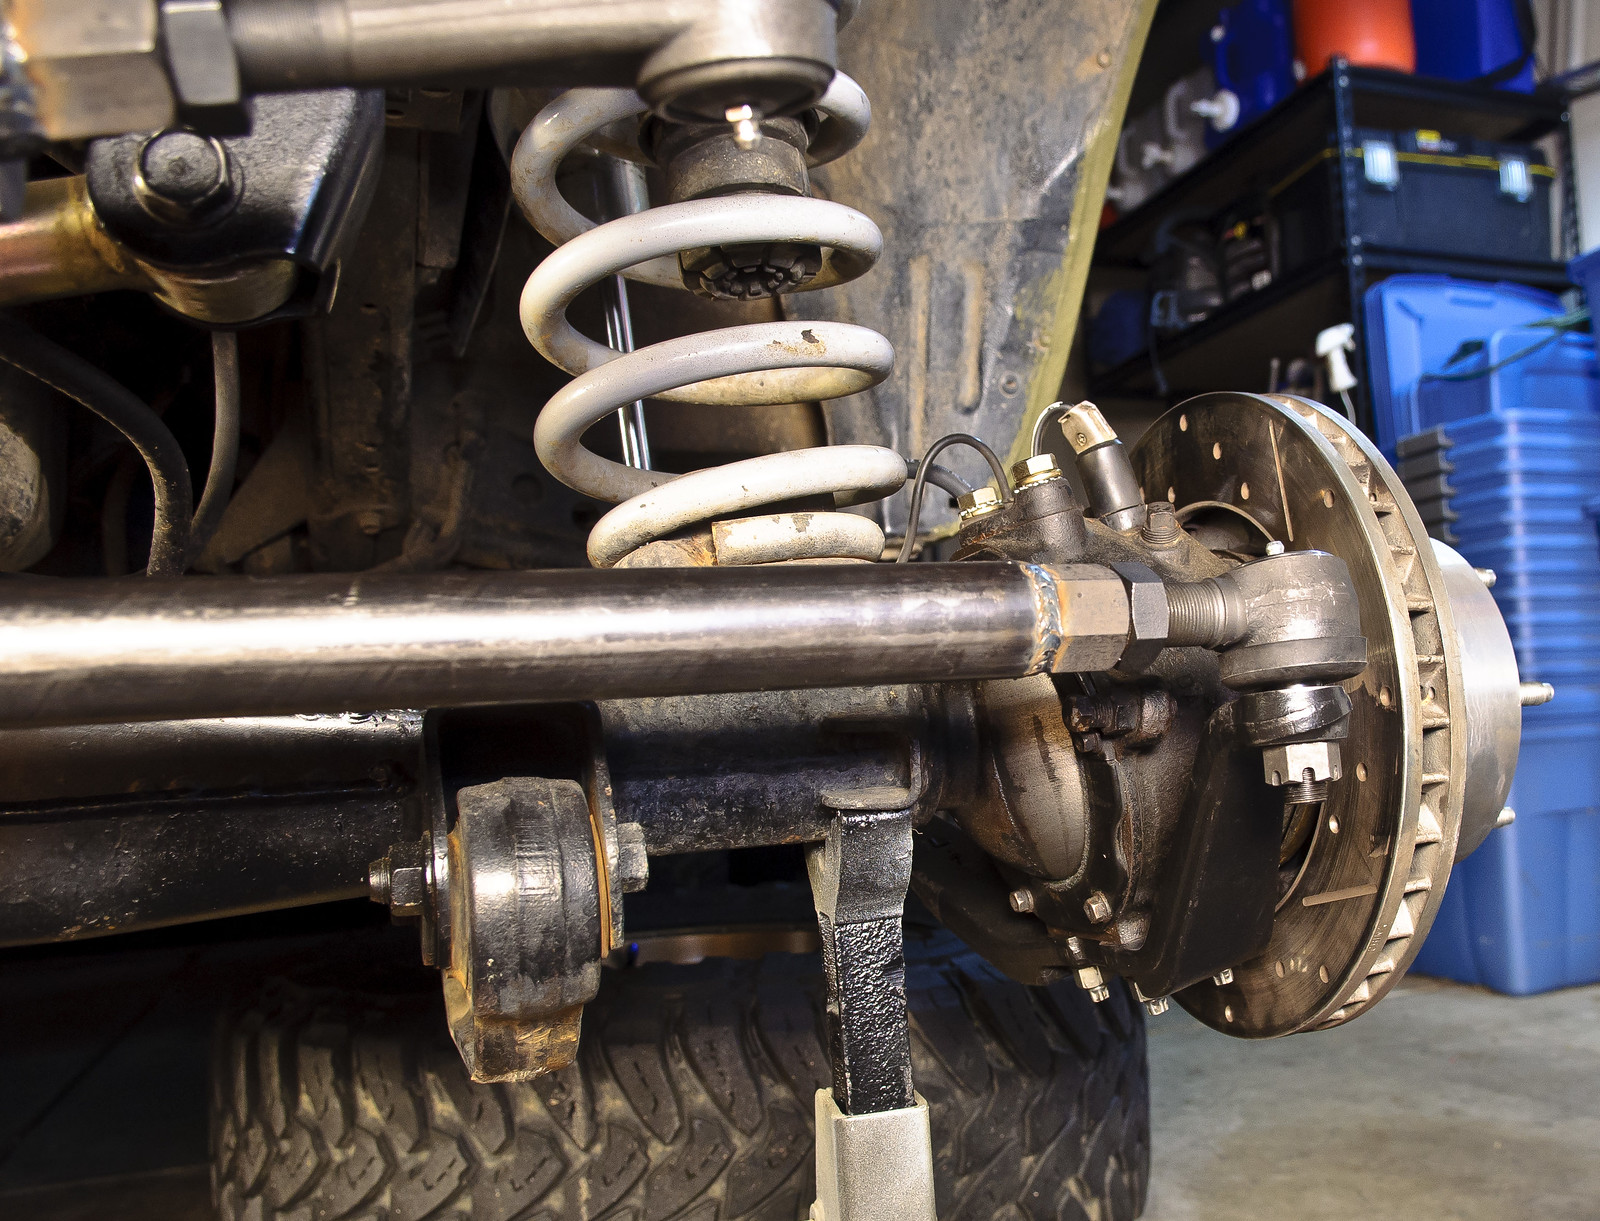
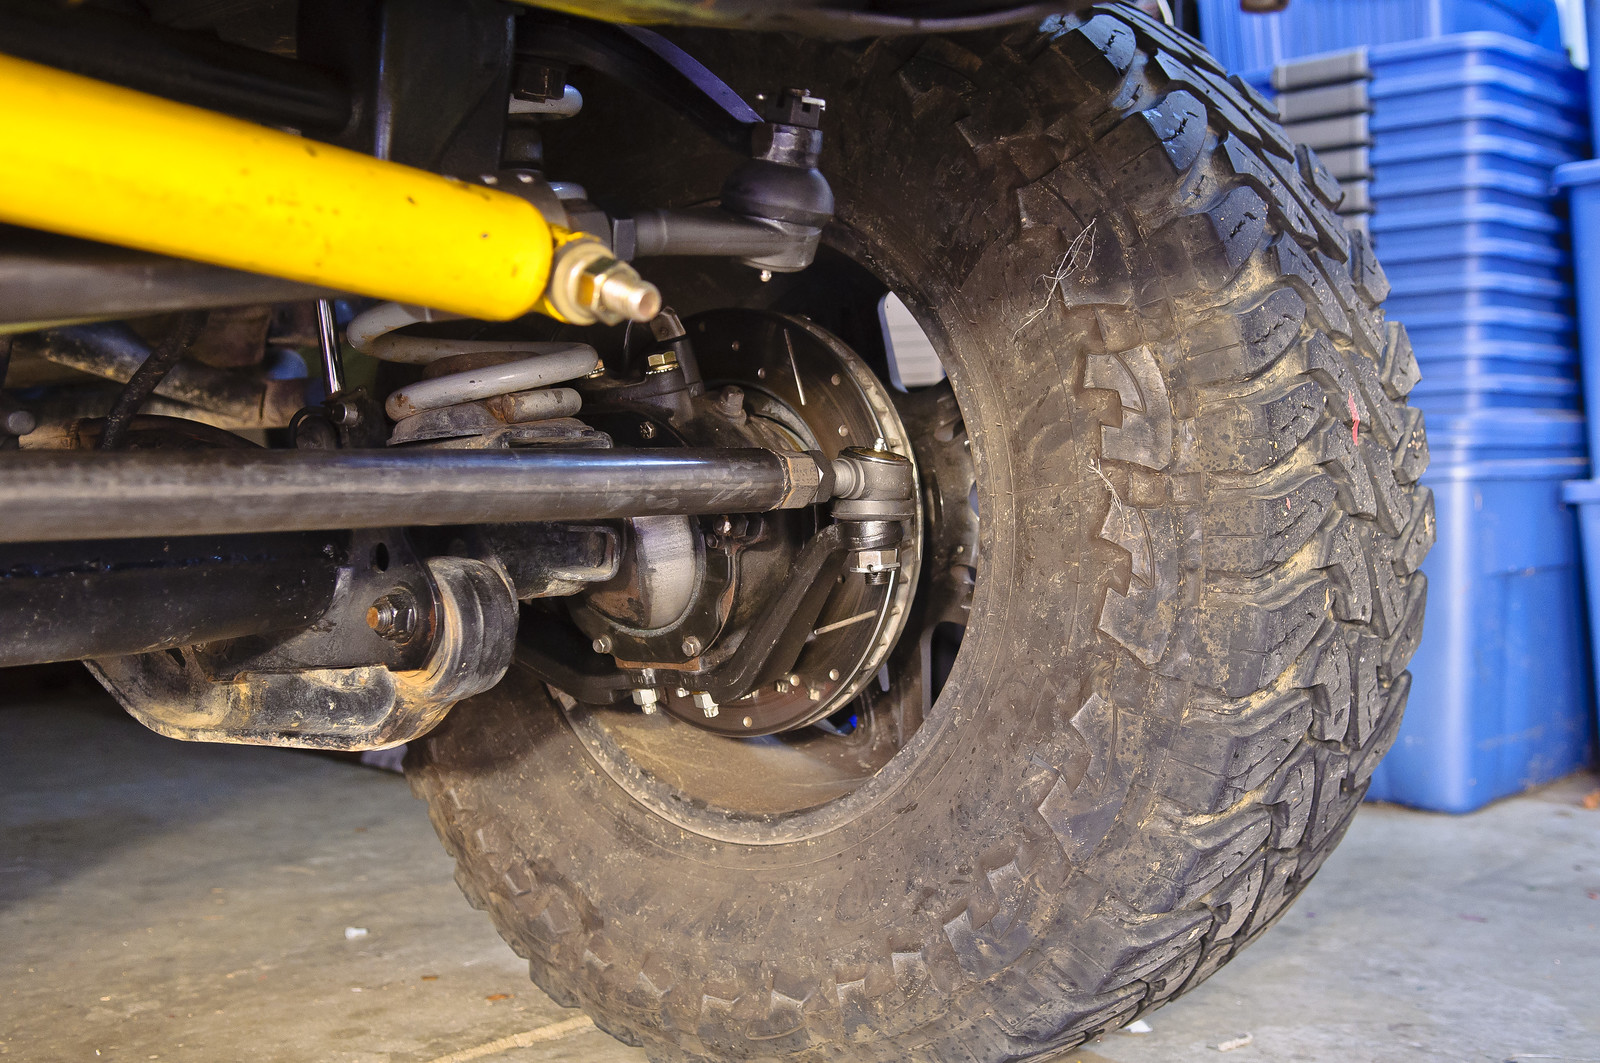
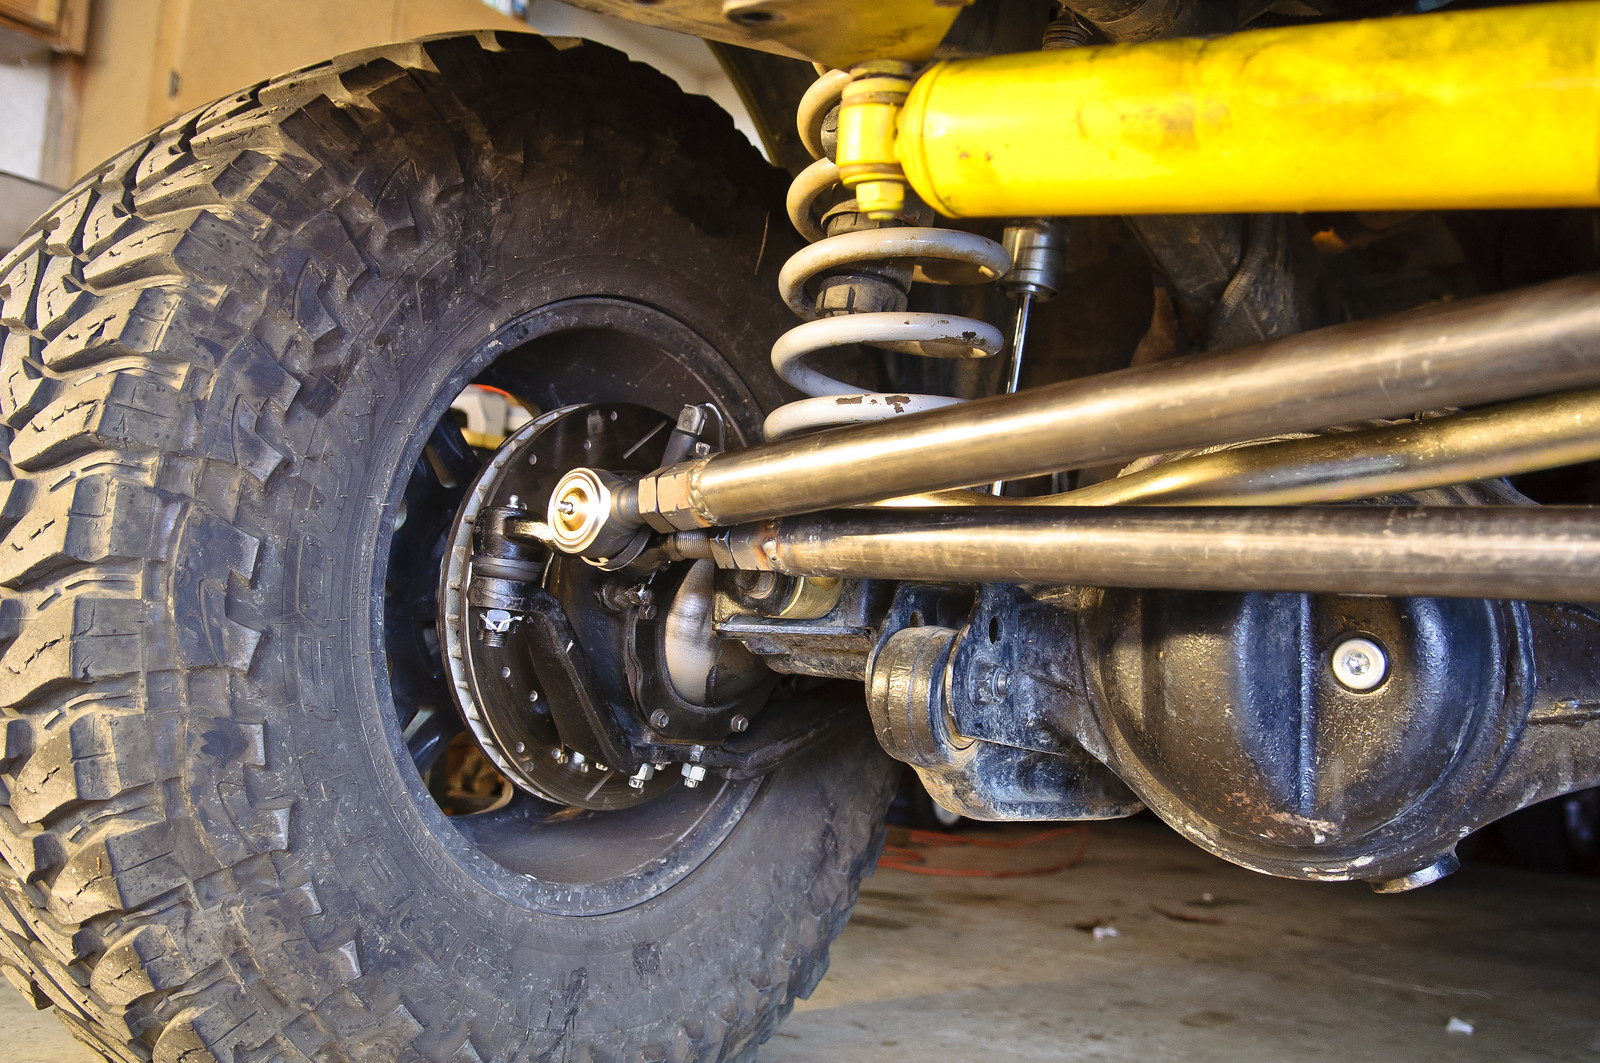
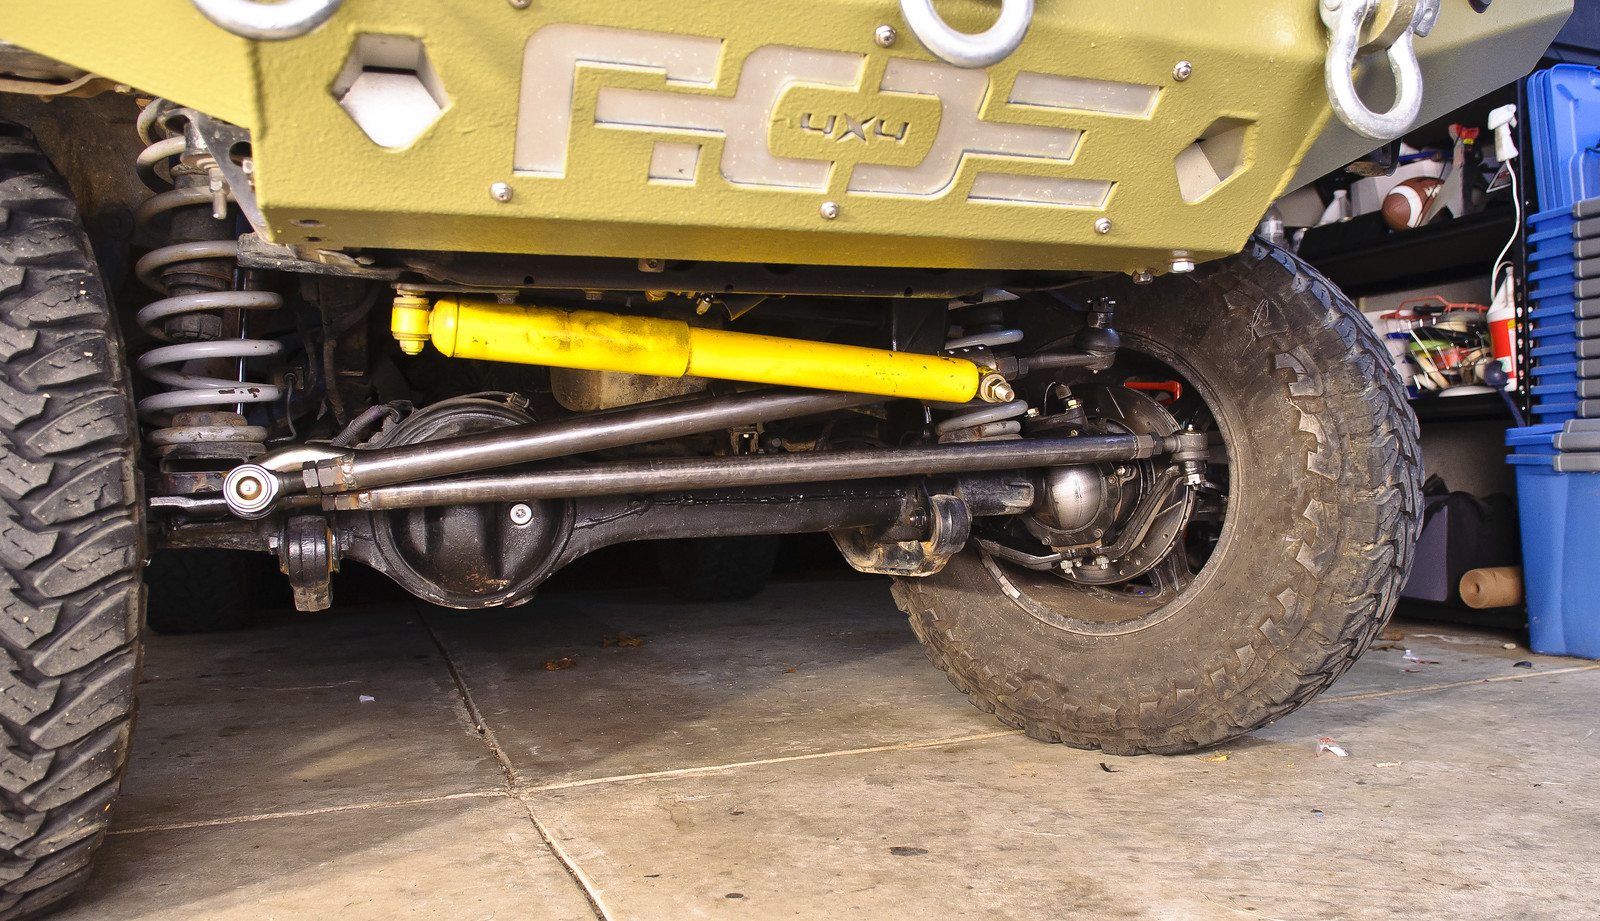
And here it is installed! No clearance issues, even with the panhard in the stock location

11700918026_dc64aa21ce_h.jpg


11700917376_e2530d37b4_h.jpg


11700535834_93a741734e_h.jpg


11700407663_78220c47e9_h.jpg


11700912636_efae47315e_h.jpg


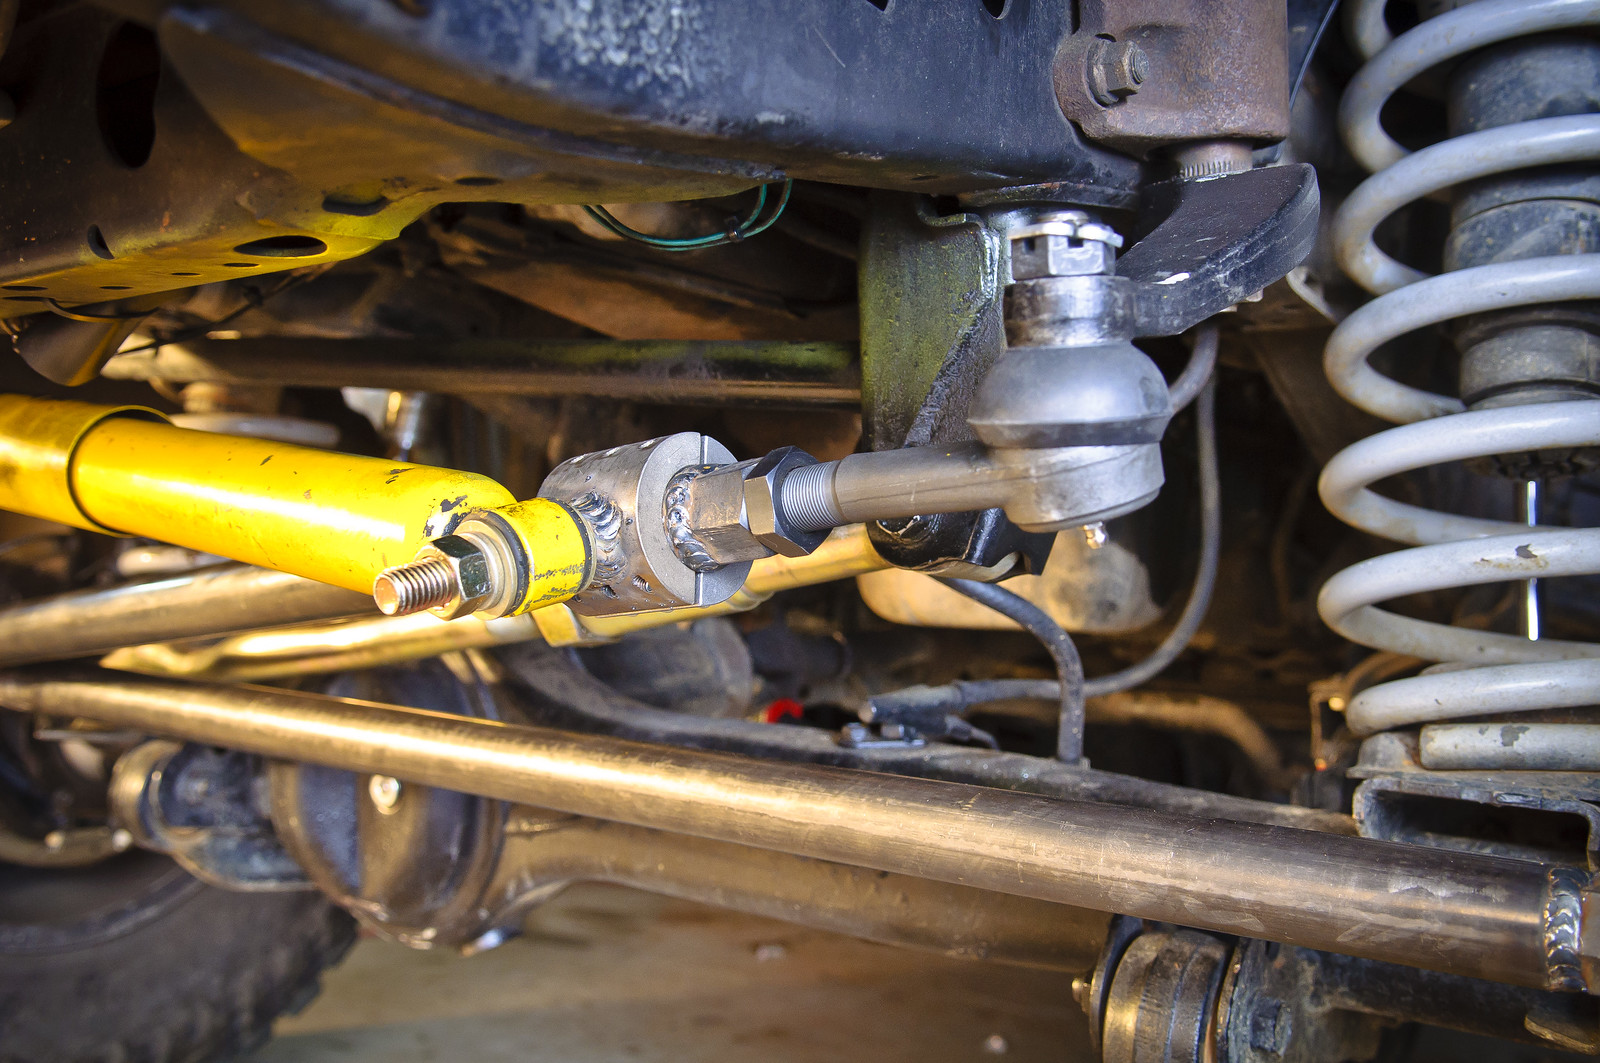
For the stabilizer, we simply welded a bolt onto the OD tube clamp
11700157055_b17a3305bd_h.jpg


11700908036_b1947940b9_h.jpg


11700151975_acada1cb4b_h.jpg


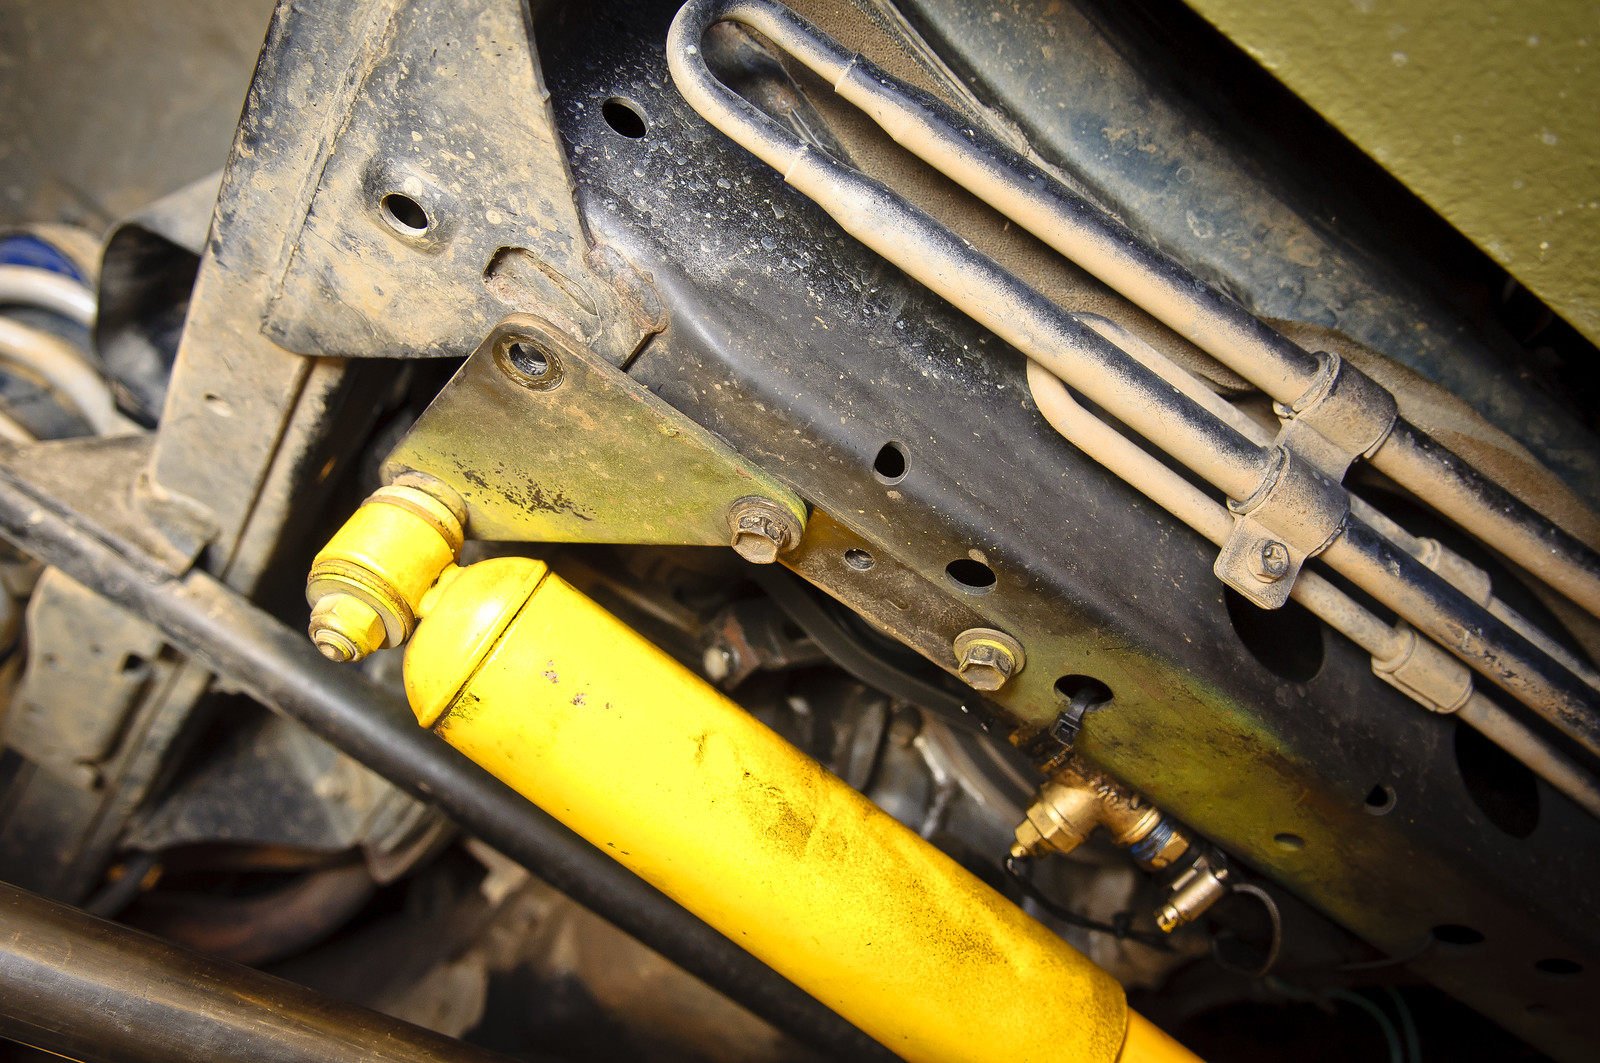
And here's the only hiccup I had with the whole project. Because the mount for the stabilizer moved over a few inches, the shock is too long and won't allow you to turn the wheel all the way to the passenger side. So I just moved the mount over and I'm only using one bolt for now. I'll either need to get a shorter shock or redo this mount somehow in the new position. We'll see if it can hold using just one bolt...
11700402463_05303b2b6a_h.jpg
 
Good we better see you at the meet now
 
This is on my list thanks for the write up!

Sent from my iPhone using IH8MUD
 
Can't wait to do this on my rig! It actually reminds me of all the crazy custom fab stuff during my zuki days.

hijack: Is it better to run without the brake shields? Looks MUCH cleaner IMO and seems that cooling/drainage would be improved too...
 
Can't wait to do this on my rig! It actually reminds me of all the crazy custom fab stuff during my zuki days.

hijack: Is it better to run without the brake shields? Looks MUCH cleaner IMO and seems that cooling/drainage would be improved too...
Some people think you'll damage the rotors without the dust shield. Meh! Mine were all beat up so I took them off. I also took them off because I wanted easier access to the knuckle stud bolts underneath so I could re-tighten them after every trip. With the shields in place this was a challenge. But I didn't really "remove" them completely. I wasn't sure if the shield served as a spacer to align everything together so I just trimmed off the shield and left the plate in place.

Thanks folks! Hope this motivates some to upgrade their steering. I know I'm not the first one to run this same setup...
 
Nice work. :cheers:

Not that it matters for your set-up since you've committed to the OD tube clamp, but perhaps a more elegant solution that may allow you to retain the steering stabilizer in it's stock length and mount is using the GM TRE part no. ES2233L generously provided by The Dude in this thread:
https://forum.ih8mud.com/hardcore-corner/61575-4x4labs-1-ton-tres-hd-connecting-rod-fzj-80-a.html
Ah yes, I do remember coming across your thread but i guess I didn't read close enough. And that's good to know! I did see that TRE on ruffstuff http://www.ruffstuffspecialties.com/catalog/TREYLINK.html but I didn't know it was a draglink TRE. I figured it was just a regular Y-link TRE that he sells in the kit I bought. DOH!

Oh well. But I do plan on going hydro assist in the future when I get bigger tires. When I do, I'll just remove the stabilizer and use the OD tube clamp on the lower tie rod to mount the ram :)
 
yes, that will work out fine for switching to hydro assist.

I did see that at least Dan states that the pitman arm TRE is a "high angle" one and I can see that it is built a bit differently than the standard ones for the connecting rod.

In your case, I think I'd just make a backing plate of 0.25" flat stock with 3 holes that goes between your stabilizer mount and the cross-member of the frame. That will allow you to tack weld the head of a bolt facing down on the furthest hole to the PS and attach your stabilizer mount with a nut below and use the two bolts on the remaining holes. Just an idea....
 
Some people think you'll damage the rotors without the dust shield. Meh! Mine were all beat up so I took them off.

I've typically heard them called 'splash shields', as I believe one of the intended functions is to help protect the rotor from large splashes of water which can easily warp a warm rotor. This has given me sufficient paranoia to leave mine in place.
 
Nice work, I do have one question. Does running the RHD arm on the drivers side and moving the tie rod up front have a negative affect on the Ackerman Angle. It seems like I read somewhere that there was a downside to this set-up on a daily driver. I don't like the tie rod being behind the axle and would like to do this to my 4runner. :cheers:
 
Nice work, I do have one question. Does running the RHD arm on the drivers side and moving the tie rod up front have a negative affect on the Ackerman Angle. It seems like I read somewhere that there was a downside to this set-up on a daily driver. I don't like the tie rod being behind the axle and would like to do this to my 4runner. :cheers:

That's only if you reverse the stock RH steering arm, when you use the RHD arm it is fine
 
Dayum dude that rig gets better and better! Can't wait to see it in person!
 
Nice job. Good to see there was no interference with the panhard connection at the axle side. It's good the drag link does not have too much angle , so steering probably feels like stock.

Did you ream the steering and pitman arms for the GM taper, or did you drill out and use the taper inserts?
 
Dayum dude that rig gets better and better! Can't wait to see it in person!

Well it would have been this Sunday but unfortunately Matt had to cancel!

Nice job. Good to see there was no interference with the panhard connection at the axle side. It's good the drag link does not have too much angle , so steering probably feels like stock.

Did you ream the steering and pitman arms for the GM taper, or did you drill out and use the taper inserts?

Well there's two different tapers here. The regular GM TREs have the .749" taper. The bigger GM draglink TRE for the pitman arm has a .795" taper.

For the steering arm TREs (.749" taper) I simply used the RuffStuff inserts. This requires drilling the arms out to 7/8" then dropping in the inserts.

For the pitman arm, I sent this one to be reamed out by 4x4Labs. RuffStuff sells the tapered insert for this TRE even though they don't list it on their website. They recommended having the pitmarn arm reamed out because this big insert would have required a 1" hole, which is a good chunk of metal out of the stock pitman arm.

And I should note that the tie rod just TOUCHES the panhard at full turn barely. Doesn't interfere with the turn radius but they will contact each other. This could also be due using an Ironman adjustable panhard which is thicker than the stock tube.
 
Well it would have been this Sunday but unfortunately Matt had to cancel!


yeah that sucks..
i think i might end up copying your set up. ive been thinking of a beefier set up but wasnt sure where to start.
cant wait to hear how it works on the trail.
 
yeah that sucks..
i think i might end up copying your set up. ive been thinking of a beefier set up but wasnt sure where to start.
cant wait to hear how it works on the trail.

If you think you might upgrade your steering, I recommend getting that RHD steering arm from Cruiser Parts now rather than later. Who knows how much inventory they have. A few years ago these arms were unobtanium! It's only $139, so just buy it and save it for a rainy day. That is unless you plan on going with Hellfire knuckles :cool:
 
And here's the only hiccup I had with the whole project. Because the mount for the stabilizer moved over a few inches, the shock is too long and won't allow you to turn the wheel all the way to the passenger side. So I just moved the mount over and I'm only using one bolt for now. I'll either need to get a shorter shock or redo this mount somehow in the new position. We'll see if it can hold using just one bolt...

11700402463_05303b2b6a_h.jpg

For those interested, I finally resolved this problem with the stabilizer. I spent some time researching Bilsten 5100-series stabilizers and found one off the big Chevy 2500HD trucks that was just the right length.

In order to make it work I had to cut out both bushings and install some new ones so it would fit the big bolt I had welded on the tube clamp and also the factory mounting stud up on the frame.

The shock I used is the Bilstein 33-196619. It has an extended length of 22.46" and is 14.55" collapsed.

Feels a bit better than the old OME I had on there too :)

12040305195_79aea91813_h.jpg
 
Back
Top Bottom