New '66 thread (1 Viewer)

This site may earn a commission from merchant affiliate
links, including eBay, Amazon, Skimlinks, and others.

Joined
May 25, 2012
Threads
34
Messages
727
Location
Heber City, UT
I've lurked here on 'Mud for some time now. I figured it's about time I introduced myself, and in the process, my 'cruiser.

My first experience with an FJ40 was back in the '90's in high school when my father sold his '85 solid axle hi-lux for a cherry '76 FJ40. Affectionately named the tin can turtle, this began a family passion for all things 'cruiser (and all things turtle). As soon as I was able to drive, my landcruiser radar was buzzing and we found the distinct white top peaking over an private wrecking yard in Salt Lake City. We jumped the fence and found a relatively intact '78 that had been "totaled" by the insurance after a front right impact. Taking the license number down, my aunt at the DMV helped us track down the owner and $2500 later, it was dropped off of a trailer at my parents house for a six month restoration/build including a high output SBC and bright red paint.

I only have a few regrets from that cruiser, first being that I ever sold it. Also, add-a-leafs make for a terrible ride. Armor-all on the tires and chrome rims are...well...out of place. Lastly, what's with that black bezel that's on upside down? College came and sadly, both cruisers were sold. Fast-forward 16 years of higher learning and I picked up a '66 (or is it a '65?) for $1500 that had been rotting in a neighbors driveway for a decade or so.

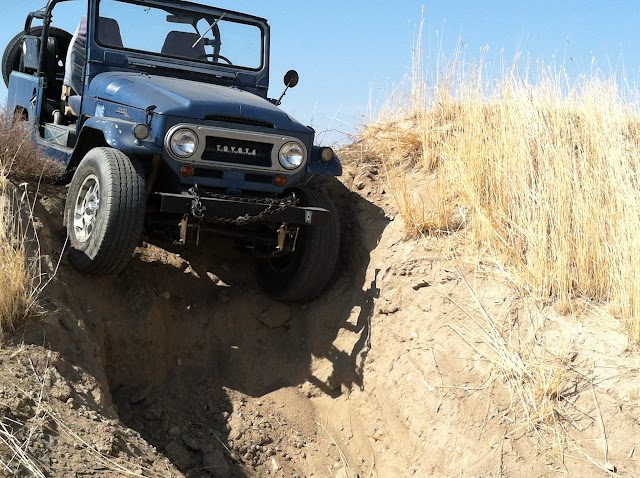
So I begin another version of an FJ40 build and I'm happy to share my blood and sweat with pics as I go.

IMG_0638.jpg

image-1194218421.jpg
 
Last edited:
After flat towing it a mile to my father's house, I filled the mismatched tires with air...and they held it. Then I filled the clutch and brake reservoirs with fluid...and they held it. Then I filled the battery with water and hooked up the charger...and it held the charge. A little less than 30 minutes' work plus some time on the charger and this thing was rolling and stopping under its own power so we loaded her up and took her the 300 miles to my home in Boise.
 
After examining the fuel filter (how cool is it to have a glass filter housing?), the next work included rebuilding the 1bbl carb, changing plugs & wires, adding pertronix ignition and coil and a donated set of LT285/75R16 Michelin LTX M/S's on fancy alloy wheels and only 100,000 miles of wear. I also flipped the bezel after cleaning it up and painting it Hammerite silver and added the SOR bikini top.


Oh, and I cut down the ridiculous C-channel bumper only after it gouged my roommates shins five or six times.
 
The saggy stock suspension just barely allows the 285s to clear with moderate flexing so a shackle lift had to suffice until I can throw on some OMEs.

IMG_1495.jpg


It's amazing how much the ride improved by just adding shackles that were welded to the springs with 45 years of neglect. And the new flex was kinda impressive too.
IMG_1523.jpg
IMG_1579.jpg
 
Soon, I had my first stuck.


Thankfully, I high centered on this little hill, not knowing the other side had been dugout. Unfortunately, I pulled the skid plate to re-paint it. After getting out, I couldn't see any damage and the T-case plug didn't show any leaks.


However, the un-stuck-ing was a bit complicated when the ECU on my buddy's '69 Bronco with an injected 302 decided to pack it in after getting tension on the strap. Thank goodness his starter motor was torquey enough to pull me to a place with dirt under my tires.

 
Other odds and ends throughout the fall have included cleaning up and painting the bumperettes, a temporary Hi-Lift mount, clean-up and extension of the spare bracket to mount a full-sized spare and LEDs in the brake/turn signals, apron lights and dash lights.


I also wired in relays for the headlights which seemingly doubled their output and I added 7" hella FFs to the high beam circuit.
Not pictured yet are the buckets from a 2005 scion tC, 3 point belts from the back of a late-model Pathfinder and a heater fan from a 1991 Mercury Capri.

 
The next steps include reconditioning the fuel tank which seems to have a few pinhole leaks that busted through my JB weld patch. I also need to quickly address a leaky right rear wheel cylinder, re-work my driver's seat bracket in order to use the toolbox underneath (the PO welded it shut, presumably after one of the latches broke). The rear end will get an ARB after the OME springs and shocks go on and then I'll get that cancer around the rearend treated.
 
Don't throw away what you remove off your older cruisers, as those parts are getting harder to find.

Unfortunately, don't think you'll make much money selling them either...we tend to save older discarded parts for spares.

Edit: we try and save from the scr*p heap what others deemed useless...
 
My wife said no FJ! said:
Don't throw away what you remove off your older cruisers, as those parts are getting harder to find.

Unfortunately, don't think you'll make much money selling them either...we tend to save older discarded parts for spares.

Edit: we try and save from the scr*p heap what others deemed useless...

Yes sir. I learned that really quick after I tried to get some parts from my local toyota dealership and he reminded me of the warehouses swamped by the tsunami and that most replacement parts are probably somewhere on the bottom of the pacific.

From what I can tell, the roll bar, jump seats, bucket seats and glove box door aren't original but almost everything else seems vintage.
 
Curious does it have a brass tag by the VIN? That is a 65 not a 66. 65 was the last year with the vent in the windshield and the only year with that style vent on the cowl.
 
Yes sir. I learned that really quick after I tried to get some parts from my local toyota dealership and he reminded me of the warehouses swamped by the tsunami and that most replacement parts are probably somewhere on the bottom of the pacific.

From what I can tell, the roll bar, jump seats, bucket seats and glove box door aren't original but almost everything else seems vintage.

Hate to tell you this, but just about everything on these older 40s, is different than anything after '71. Read that other '66 thread again, and same applies......older, weaker ball and claw axles, for which parts are getting harder and harder to find. It has drum brakes all around on a single circuit master and 9mm fittings which are very rare, with a 3 speed tranny, and if still stock, the older/weaker F135...which unfortunately most guys will just remove and dump for a newer 2F or dare I say...350. If what you want is a modified 40, I bet you can find a 40 with the mods you'd want, for a whole lot less than what it will cost you to swap all this stuff out on yours. Your best bet for a rest mod would be a '76 and newer 40.

This is just my opinion, as this is your rig, for you to completely enjoy a you want, but if it were me, I'd just as well get some old steelies, bring this one back to stock, and look for a newer candidate to mod. That is not to say you can't go crazy and mod this 40...it's really just a question of $$$. There is always the question of taking apart an older stock rig, but hey, that's a whole other argument.

Whatever you decide to do, just be safe, and have fun :beer:
 
IMG_0636.jpg


Yeah, I'm not looking to do anything crazy or wheel too hard. I'll probably stop with springs. I like the three speed and vacuum shift t-case. The motor turns just fine. The brake design seems sketchy but they've kept the rig stopping for 45+ years so far. I'm not going to cut any panels or especially the dash. I'd love to get some steelies. These alloys were free and will go back to my father when I can afford new tires. If I could find some affordable original seats c/ brackets, I'd put those in too. When money is a bit better around here, I'll get it back to a bit more original and find a newer 40 to seriously mod.
 
Oh, another fun adventure I had this summer was, while driving down the freeway to Meridian, the crusty old windshield gasket gave way and the glass popped out. Luckily the rear view mirror held it enough to keep it from hitting me in the face. You can see the crustified and gappy gasket here:

IMG_0769.jpg


Taking it out gave me a chance to knock down all the surface rust on the sill before I put in new rubber.
 
Welcome


Nice 40
 

Users who are viewing this thread

Back
Top Bottom