![]() |
Support our Advertising Vendors!! |
|
|||||||
|
|
![]() |
|
|
LinkBack (3) | Thread Tools | Display Modes |
|
|
#1 |
|
IH8MUD Addict
Join Date: May 2005
Location: Boulder Creek, CA
Posts: 598
|
FJ to BJ mutation?
hello,
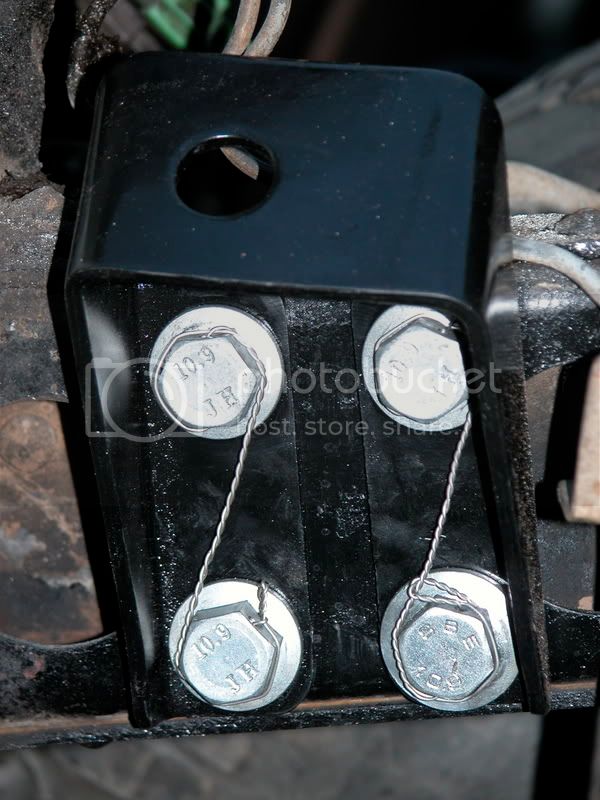
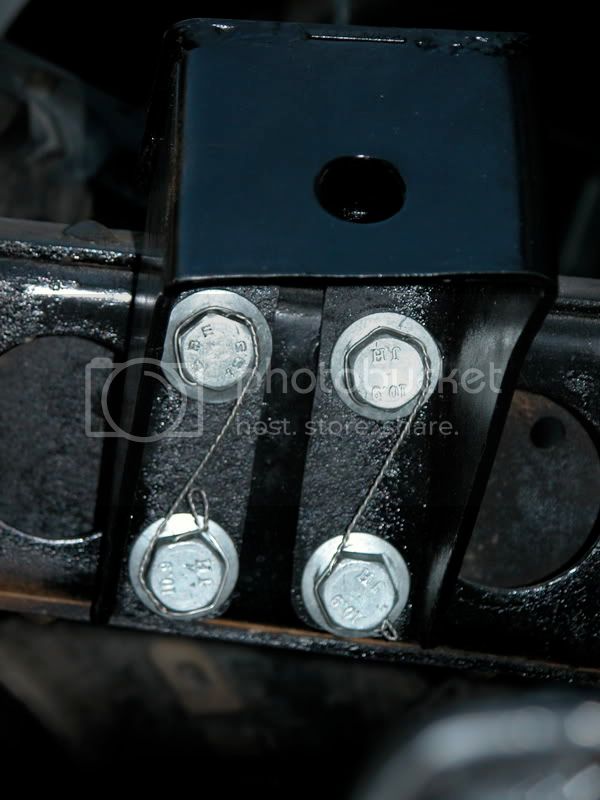
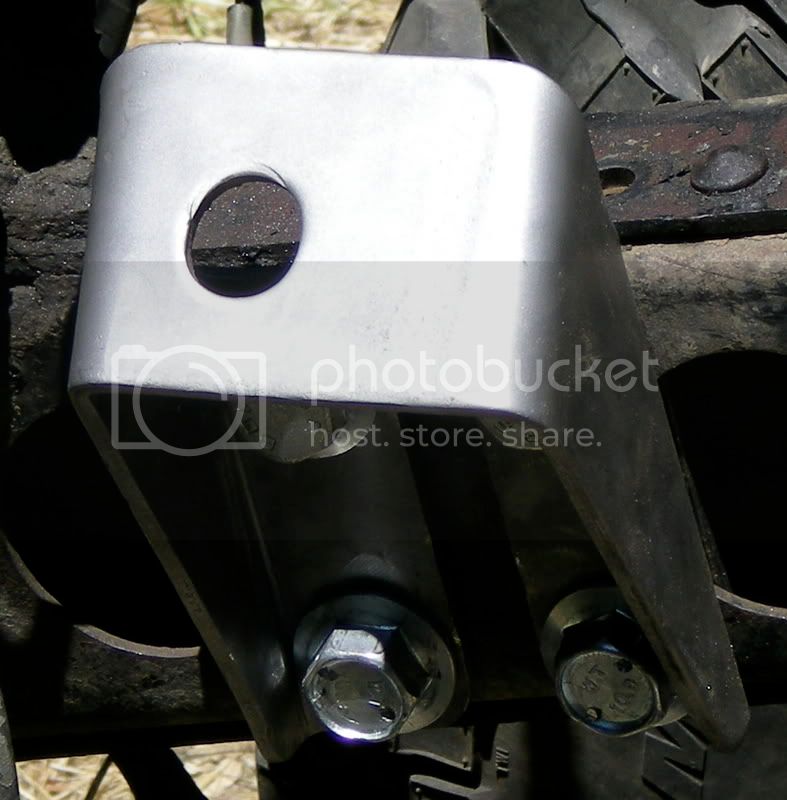
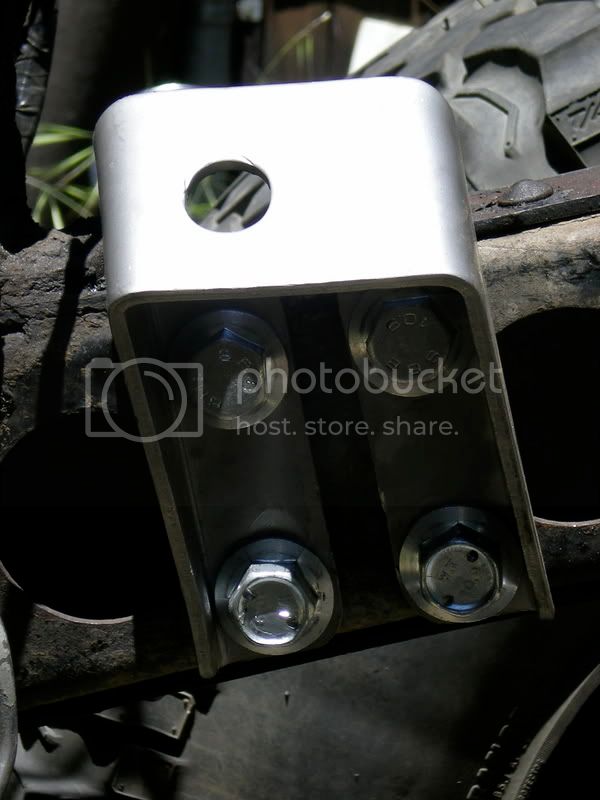
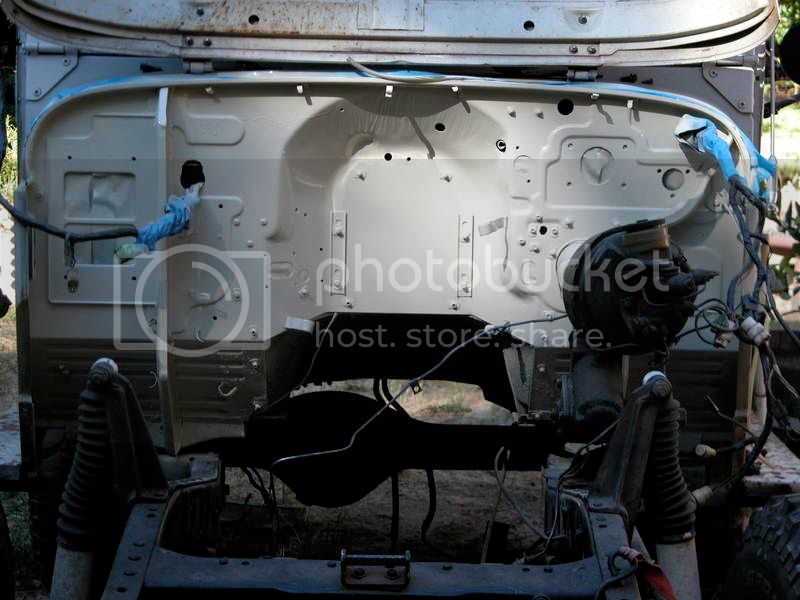
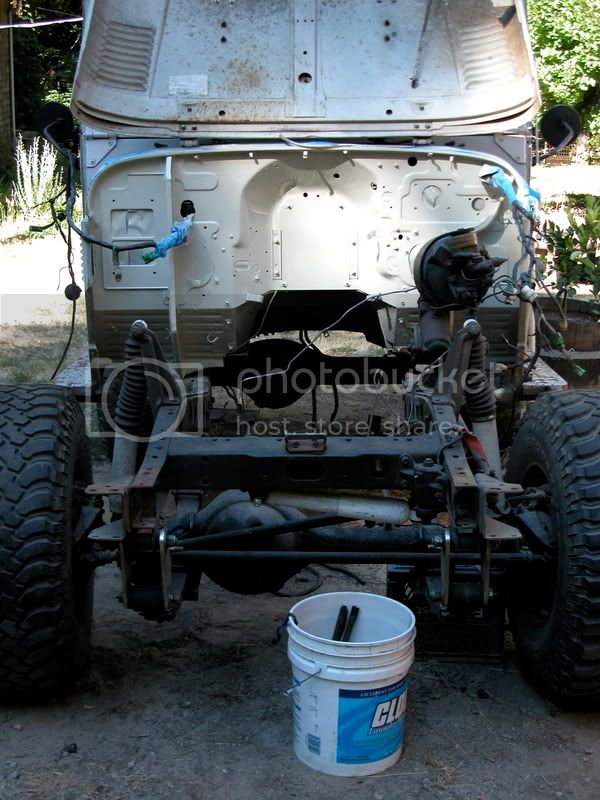
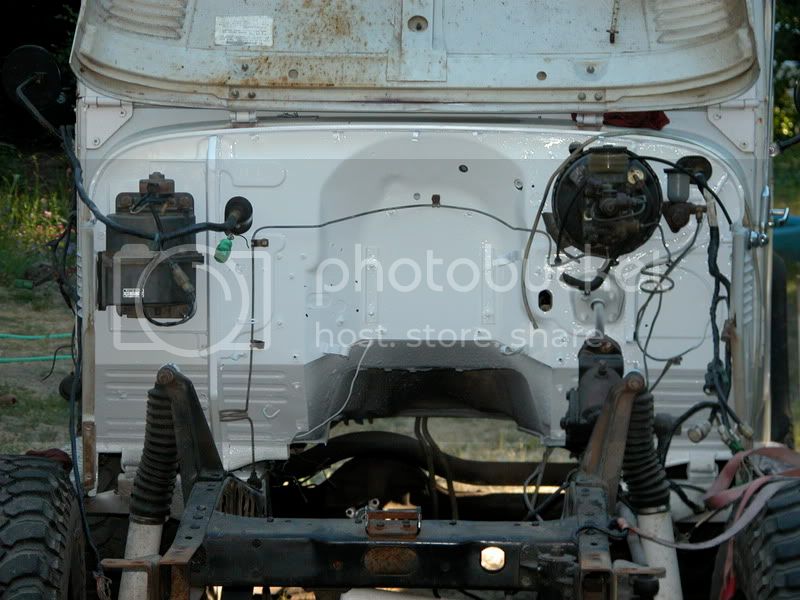
I have started the actual swapping of the 3B into my FJ40. Up to this point most of what I have been doing was removal of engines and motor mounts. Got that stuff done and here are some flicks of the BJ motor mounts relocated onto the FJ.The plates have some really cool flange nuts welded to them, this allows more gripping surface and negates the need for a wrench on the inside of the frame. The bolts will be secured with safety wire aircraft style to prevent loosening of the bolts. Trans mounting will be finished tomorrow! I got a transfer mounted parking brake kit and that will go into the split case also tomorrow. Getting excited, grunt work is starting to be finished, fabrication and install just starting up! ![]() ![]() eric ![]() P.S. I was gonna weld the mounts to the frame, but I decided that upsizing the bolts and creating the clamping plates was more similar to the original riveted mounting process. I don't know how I would have done this with out the donor BJ41 less than 30' away for measurements and such. Motor mount bolts are 16mm, and trans mounts are 14mm, about 10% larger than the original rivets. Last edited by Otterav; 02-18-08 at 12:10 PM. |
|
|
|
|
|
#2 |
|
Mod in Hibernation
|
Cool!
Amazing how this thread slipped down the list with out responses ![]() I like the mounts. Any reason you decided against welding them on the frame? The idea should work. You would just have to keep an eye on them so that they do not pound too hard on the holes in the frame. Causing elongation or cracking. in fact using a small bead may also be good to prevent any movement. Lets see some more shots. __________________ -84 BJ60, Finally on the FN road! -91 FJ80, wife's ride Iron Butt award winner of the Cruise Moab 08 ! |
|
|
|
|
|
#3 |
|
IH8MUD Lifer
Join Date: Feb 2004
Posts: 1,859
|
Ya, I'm thinking the same thing - might as well tacl it into place and be done with it. 1 inch of good weld holds 60K pounds - or something like that.
__________________ Louis Check out my youtube videos at: www.youtube.com/lshobie Join the True North Toyota Land Cruiser Club in Ottawa http://landcruisers.ca/ |
|
|
|
|
|
#4 |
|
Mod in Hibernation
|
vibration will start to get things moving. Then when a little gap is present it will really start to work. The 1 inch bead will make sure it cannot move. The majority of the load will still be on the bolts, which is fine. Its the potential for movement you want to stem.
__________________ -84 BJ60, Finally on the FN road! -91 FJ80, wife's ride Iron Butt award winner of the Cruise Moab 08 ! |
|
|
|
|
|
#5 |
|
IH8MUD Addict
|
Glad to see this...
My Dad recently purchased a 3B to put into his FJ-40... Probably won't do the swap for quite some time yet, but I'm sure it will be helpful to see someone else do it first. ![]() Dan __________________ 1976 HJ-45 (needs restoration) http://forum.ih8mud.com/fj45-owners-...self-into.html 1991 "Faux-Lux"Pickup 4x4 2LT-E/R-150f http://forum.ih8mud.com/79-95-toyota...onversion.html 1979 FJ-40 to BJ conversion http://forum.ih8mud.com/diesel-tech-...ml#post3811936 "Dandelions. You see flowers in these weeds." --Five Iron Frenzy |
|
|
|
|
|
#6 |
|
IH8MUD Addict
|
I'm watching this thread as I am planning to do the same thing with my fj40.
I just have to build my garage first. :( __________________ 87 HJ60,86 HJ60 auto,73 FJ40, 82 BJ60, 89 FJ62 and counting... |
|
|
|
|
|
#7 | |
|
IH8MUD Addict
Join Date: May 2005
Location: Boulder Creek, CA
Posts: 598
|
Quote:
My shop is a fab shop, no parking inside at all. I am doing the swap/mutation on dirt and 10% grade in the yard. This requires a little rigging, but still doable. I like to think that this set of conditions keep the conditions in spirit of the original landcruisers, rough, dirty, and kinda crude. Go for it, its great fun! eric
|
|
|
|
|
|
|
#8 | |
|
IH8MUD Addict
Join Date: May 2005
Location: Boulder Creek, CA
Posts: 598
|
Quote:
The original rivets are about 7/16", the new bols are 16mm or about 5/8". The original rivets only used the head and upset head for bearing surface on 3 of the 4 mounts. The 4th mount uses a backing plate for reinforcment/strength. I thought about tacking them in place, but for the time being the clamping area of the flange bolt heads, and 1/4" clamping plates provide 20-30 times the clamping surface area than the original rivets. Welding creates a heat affected zone(haz) which could cause cracking, since the rest of the frame is riveted, I will try this method first, then esclate to welding if there is any evidence of movement or shifting. Being a aircraft mechanic, I am a believer in the original manufacturing engineers wisdom for the manufacturing process(non-welded). Rivets allow the base metal to flex to a limited amount, welding fixes the mount to the base metal and is immobile and rigid concetrating the stresses into a very localized area. There are very few welded attachments to the original frame, so think of this as an experiment, this will also allow the wannabe swappers who do not possess welding equipment to possibly participate also. I will be splitting the split case today for the xfer mounted parking brake kit. The kit will allow me to have 4 wheek discs and a parking brake all in a similar config to the original truck. I will be putting a full floater in the rear shortly, this will allow the rear to have discs without the semi-floater caliper issue. Pics of the xfer guts to follow if anyone is interested. Pics of the engine install will follow as soon as it goes in. Continue the debate! eric
|
|
|
|
|
|
|
#9 | |
|
IH8MUD Addict
|
Quote:
__________________ 87 HJ60,86 HJ60 auto,73 FJ40, 82 BJ60, 89 FJ62 and counting... |
|
|
|
|
|
|
#10 |
|
IH8MUD Addict
Join Date: May 2005
Location: Boulder Creek, CA
Posts: 598
|
hello,
I just spent today removing the wiring harness from the BJ and transferring it to the FJ. I retaped some areas that were loose and needed reinforcment. Spent about 4 hrs figgering the pinout on the speedo heads, everything is the same plug location with the exception of a wire at the #8 position. On the FJ that wire is blue w/white stripe, on the BJ that pin is not used. The wiring diagrams for the FJ do not even have a blue w/white stripe wire. Well long story short, that wire is some sort of speed sensor for the emissions stuff. I will be wiring the 12v BJ60 start relay and glow plug relay tomorrow. I will also get some polyurethane paint for the firewall and prep tomorrow. Ola eric ![]() P.S. I already repinned the EDIC plug for the motor and relay. Its kinda cool Toyota uses plugs in areas with empty pins sockets 12v uses one pin socket, 24v uses a different unused pin socket.Yhis allows them to produce one harness and just use different pin sockets for the power sections! Last edited by Otterav; 06-27-07 at 09:48 PM. Reason: added some stuff |
|
|
|
|
|
#11 |
|
IH8MUD Lifer
Join Date: Jun 2004
Location: North Carolina
Posts: 1,146
|
Hmm...wish I thought of that before I did mine. I put bolts back through the original holes, then huge "fender" style washers on the back, then lock nuts. It was a real beotch to get those buggers tight INSIDE the frame. I may redo mine in time, or just run a bead on it as others have said. I'll keep an eye on mine too. Be sure to post up what you do to the exhaust....mine was a booger to run and get it high up enough.
__________________ 78FJ40 w/13BT diesel (BIESEL),66FJ45(MARMUT), 13BT install thread www.importpurist.com "Much like a cat or hot buttered toast, the correct side will always try to land down. If the bezel is on upside down, then the force of it trying to right itself may cause you to roll your cruiser unexpectedly." |
|
|
|
|
|
#12 |
|
IH8MUD Addict
Join Date: May 2005
Location: Boulder Creek, CA
Posts: 598
|
Hey,
Back into the fray, I stripped the firewall to bare metal, primed with PPG primer, then DCC for the color. I have had 2 different quarts of paint mixed. First was Cygnus White, then another color Toyota white, I think I will try Artic White as a last resort. Here are some linkys for the progress shots: ![]() ![]() ![]() eric Last edited by Otterav; 02-18-08 at 12:11 PM. |
|
|
|
|
|
#13 | |
|
IH8MUD Addict
Join Date: May 2005
Location: Boulder Creek, CA
Posts: 598
|
Quote:
After talking to some friends, one who is an engineer, all agreed that the purpose of the riveted joint allows limited flexing without stress concentrations that welding would promote. I figger 200-300 FT LBS of torque applied to the bolts will prevent loosening. I will be running 3" exhaust piping from the turbo(next project). Today will be the split case opening to install the parking brake kit from $pecter. Once that is done the motor combo install will commence! Ola eric
|
|
|
|
|
|
|
#14 |
|
IH8MUD Lifer
Join Date: Jun 2004
Location: North Carolina
Posts: 1,146
|
Honestly, I think you would be fine with 2.5" exhaust. There isn't much room for the exhaust to run, and the 2.5 is pretty big as it is. I ran 2.5 with my turbo setup and have been very pleased with how it turned out.
__________________ 78FJ40 w/13BT diesel (BIESEL),66FJ45(MARMUT), 13BT install thread www.importpurist.com "Much like a cat or hot buttered toast, the correct side will always try to land down. If the bezel is on upside down, then the force of it trying to right itself may cause you to roll your cruiser unexpectedly." |
|
|
|
|
|
#15 |
|
IH8MUD Regular
Join Date: Feb 2006
Location: Ballarat, Victoria, Australia
Posts: 385
|
Just loctite the bolts mate. Loctite stud sealant (the strongest variety available) on them and then do them up stupidly tight and you'll be fine.
|
|
|
|
|
|
#16 |
|
IH8MUD Addict
Join Date: May 2005
Location: Boulder Creek, CA
Posts: 598
|
Hello,
Todays projects, paint the firewall, got 'er done. Reinstalled the heater blower, brake master/booster, clutch master. Had to mutate the throttle pedal, chopped up the FJ, welded parts of the BJ to the FJ bits. The throttle cable fit into the FJ firewall, bolts right up. Made the gas pedal fit(see above). Nothing is simple! flicks: ![]() ![]() Ola eric ![]() P.S. Crushers came up with some PTO gears, thanks dude, you saved the day! Waiting for some $pecter parts to arrive for the xfer case. Last edited by Otterav; 02-18-08 at 12:12 PM. |
|
|
|
|
|
#17 |
|
IH8MUD Addict
Join Date: May 2005
Location: Boulder Creek, CA
Posts: 598
|
Hey,
Drilled the heads of the motor mount bolts. Installed the motor mounts, torqued the bolts "stupid tight", used a 4' breaker bar and pulled on it till it was bending. I weigh 250 lbs and was wailing on the bolts, I figger the torque is about 450-600 Lb Ft. I then saftied the bolts with .032 safwty wire. If this setup loosens I will crap myself. Here some pics of the motor mount install: ![]() ![]() Trans mounts tomorrow, along withe the left Battery mount from the BJ, I stripped and painted it, make some mounting plates for the bolts also. Still waiting for some parts from Specter to finish the xfer case PTO gear stuff. Starting to roll towards the install, gonna do the fuel lines tomorrow also. Gonna use the BJ stockers. OLA eric
Last edited by Otterav; 02-18-08 at 12:13 PM. |
|
|
|
|
|
#18 |
|
IH8MUD Addict
Join Date: May 2005
Location: Boulder Creek, CA
Posts: 598
|
Hello,
I installed the trans mounts, "wanked them, stupid tight" and saftied the bolts. Installed the fuel line and sedimenter. Got the vacuum line mounted and bolted in. Got the battery mount for the left side from the BJ, it was bead blasted and painted, I needed to make some nut plates to mount it to the frame, I will post pics tomorrow, too dark for the camera to auto focus! Amazing how much stuff needs to be transferred from the BJ to the FJ, I will say it again, it was a little more expensive to buy the whole BJ over an engine only, but after buying a few parts here and from Specter, the process would get very expensive, very quickly. If one bought an engine and was gonna mount it up without another car to measure it would be tough, if not impossible. All the manuals show frame details, but motor and trans mounting details are absent. If one doesn't buy a whole car, a half cut is the way to go! OLA eric
Last edited by Otterav; 07-09-07 at 09:58 AM. |
|
|
|
|
|
#19 |
|
IH8MUD Regular
Join Date: Feb 2006
Location: Ballarat, Victoria, Australia
Posts: 385
|
glad to see my term stuck hahaha.
looking good, looking good. Hope it's all worth it in the end
|
|
|
|
|
|
#20 |
|
IH8MUD Addict
Join Date: May 2005
Location: Boulder Creek, CA
Posts: 598
|
Well,
I got the split case, split and the PTO gear in, as well as the preloading the new output bearing. I will finish making the nutplates to mount the battery support tomorrow. I think the engine will go in tomorrow also. eric |
|
|
|
|
|
#21 |
|
IH8MUD Addict
Join Date: May 2005
Location: Boulder Creek, CA
Posts: 598
|
Hey,
Yesterday the engine was installed! It went in like buttah, the hardest part was dragging the engine lift across the ground with a 4000lb come-along to the cruiser. I actually had to chain the come along to the shop to change the angle for the pull! The process of measuring and remeasuring the engine mount positions paid off. I placed the radiator shell and fan shroud for location and position check, all is well there. Gonna be hooking up systems and reinstalling stuff today. Here are some linkys for the install flicks: ![]() ![]() ![]() ![]() eric
Last edited by Otterav; 02-18-08 at 12:15 PM. |
|
|
|
|
|
#22 |
|
IH8MUD Addict
Join Date: May 2005
Location: Boulder Creek, CA
Posts: 598
|
WhooooHooooo,
Got the fuel lines finished, radiator installed, filled up and leak checked. All good! Took 5 gals of diesel from my 2 1/2 ton truck, and filled the tank 1/4 of the way, pumped the primer, and started it up, took a bit of cranking, before it started and set to idling nicely. Gonna figger out the alternator wiring tomorrow and start bolting all the junk back together! Ola eric
|
|
|
|
|
|
#23 |
|
IH8MUD Addict
Join Date: May 2005
Location: Boulder Creek, CA
Posts: 598
|
Hey,
Back from the Big annual camping trip. It was great, woulda been better if the Cruizer was there! Been dinking around with the alternator wiring. I have a internal regulator alt wiring is giving me some pause for thought. I need a wiring diagram for the alt P/N# 27040-57011, if you have a pic of the wiring diagram and wanna email me a copy send to: otterav@earthlink.net , I think that the alternator came from a early 80s BJ6X? Thanks eric |
|
|
|
|
|
#24 |
|
IH8MUD Lifer
Join Date: Jun 2004
Location: North Carolina
Posts: 1,146
|
What color are the wires on the Alt? Do you have a three wire connector that has a red, blue, and white wire in it?
__________________ 78FJ40 w/13BT diesel (BIESEL),66FJ45(MARMUT), 13BT install thread www.importpurist.com "Much like a cat or hot buttered toast, the correct side will always try to land down. If the bezel is on upside down, then the force of it trying to right itself may cause you to roll your cruiser unexpectedly." |
|
|
|
|
|
#25 |
|
IH8MUD Addict
Join Date: May 2005
Location: Boulder Creek, CA
Posts: 598
|
|
|
|
|
|
|
#26 |
|
IH8MUD Addict
Join Date: May 2005
Location: Boulder Creek, CA
Posts: 598
|
Hey,
Got the drive lines in, it seems like the original FJ driveshaft was short after the 5 1/2" lift. The BJ rear driveshaft was a bit longer, now the driveshaft has about the same extension of the slip joint as when it was on the unlifted BJ. So for once I got lucky without having to fab everything. I reinstalled the trans tunnel, seats, gauges, and a bunch of misc parts in the cabin. I will be fabbing a semi-temp exhaust system('till the turbo install). Ola eric |
|
|
|
|
|
#27 | |
|
IH8MUD Lifer
Join Date: Jun 2004
Location: North Carolina
Posts: 1,146
|
Quote:
The other end of that wire then becomes a 12v power on (small white w/blue stripe I think) with key that is run to the power lead for the alt. I ran another wire from my charcoal canister wire that was used as the "sense", then hooked up the large white wire w/blue stripe as normal to the B terminal on the alt. There is usually a third wire on the plug of the alt that is used for a charge light, but I didn't hook that up. IIRC, I also had a white w/black stripe that was a ground that ran to the ground terminal of the alt. You should be able to use a meter to figure out which of the original alt wires are ground, and which one becomes a 12v power on. I don't know what model of alt you have, so the wires or positions may be different from mine. __________________ 78FJ40 w/13BT diesel (BIESEL),66FJ45(MARMUT), 13BT install thread www.importpurist.com "Much like a cat or hot buttered toast, the correct side will always try to land down. If the bezel is on upside down, then the force of it trying to right itself may cause you to roll your cruiser unexpectedly." |
|
|
|
|
|
|
#28 |
|
IH8MUD Addict
Join Date: May 2005
Location: Boulder Creek, CA
Posts: 598
|
Hey,
Rut, thanks for the input! Your info got me thinking, when I hooked 12V to the white/yellow I got 17.2V, when I hooked up 12V to the white I got nothing. The key was to hook up 12V to the yellow/white(excite), and hook 12V to the white(sense), when I did this I got about 14.2V which was within spec for the 3B manual! WhoooHooo, lectricity! I ordered some exhaust tubing and 90's along with a muffler and flex joint, gonna stick 'em together with the MIG for a temp exhaust system today. OLA eric
|
|
|
|
|
|
#29 |