



ok... knocked out the radiator replacement this weekend... took me about 4 hours...
I was running for about 135k with the original rad so I decided it was time to freshen up a bit... bought a 93-94 brass radiator via Dan and was ready to go...
First I flushed my system with the older radiator still installed... used the prestone kit but did not install it permanently... just tied it into my water intake pipe and flushed really good according to the prestone instructions...
When everything was clean and clear I started the removal....Basically I followed the instructions I found here on Mud but I wanted to add some pics that may help others... Also the best way to pull the fan clutch and shroud out was to unbolt the fan, then unbolt the shroud, the pull both up and out in the original position.... easy work.... a strap wrench was used to hold the pulley while I unbolted the fan clutch
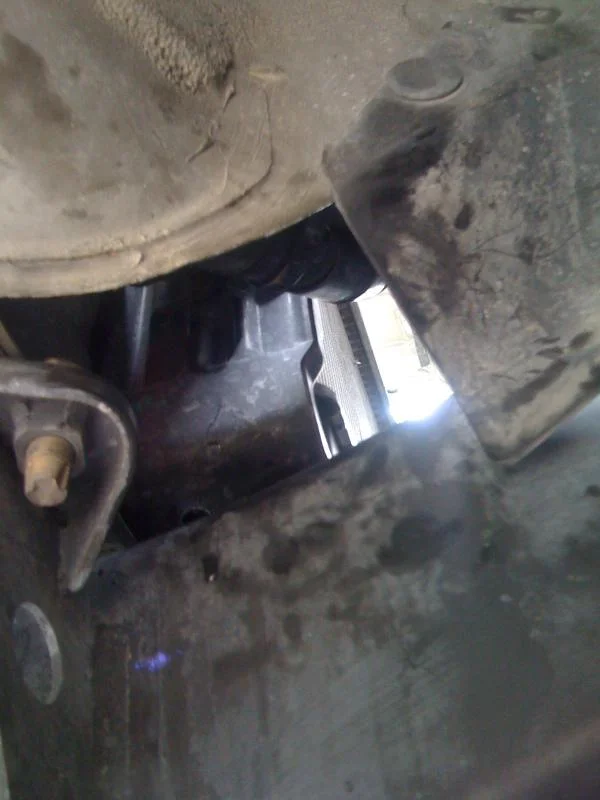
The toughest part was the 4 bottom radiator bolts which need to be removed from the bottom with a gear wrench (there are 2 on each side)... I have included a pic of the position of these bolts.
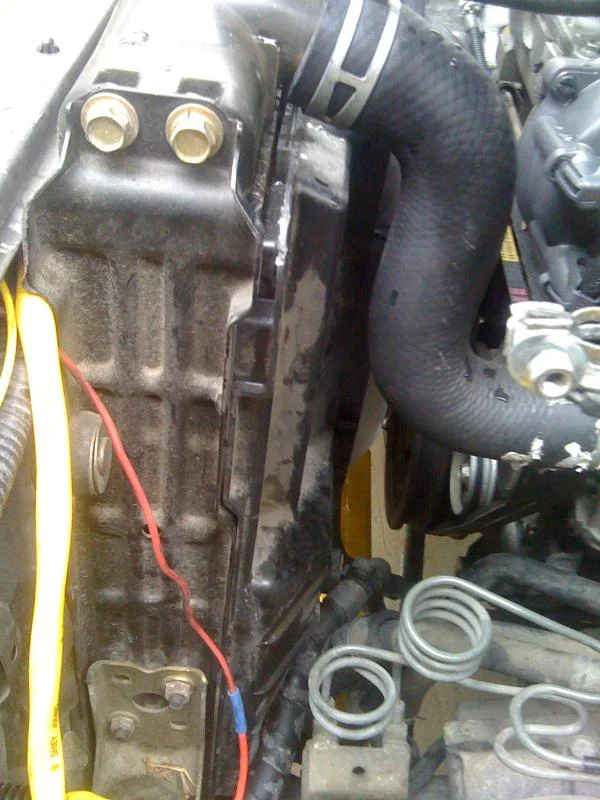
Also the hidden middle bolt was a breeze, but I removed my battery box, grille and headlights which made everything much much easier. You can see the back side of the hidden bolt in the 1st pic.. the smooth one with the red wire right behind it...
I basically removed all the hoses connected to the rad, then the 2 side nuts on the side of the L mounting brackets, then the long bottom bolt at the bottom of the bracket, then I removed the 2 bottom radiator bolts that were accessed from the bottom.... After that I just lifted the rad straight out. The new one slipped right in and I bolted it into the bottom L brackets which were left attached to the frame of the truck and then reinstalled the bottom rad nuts..
After all was buttoned up, I did 4 fill and drains with distilled water and after the 4th drain, I filled it up with 50/50 toyota red and distilled..
Doesnt get any better IMO...
1st pic-- remove those 2 nuts on the L bracket and that one on the bottom of the bracket
2nd pic- there are 2 more hidden nuts under the bottom of radiator.. remove them
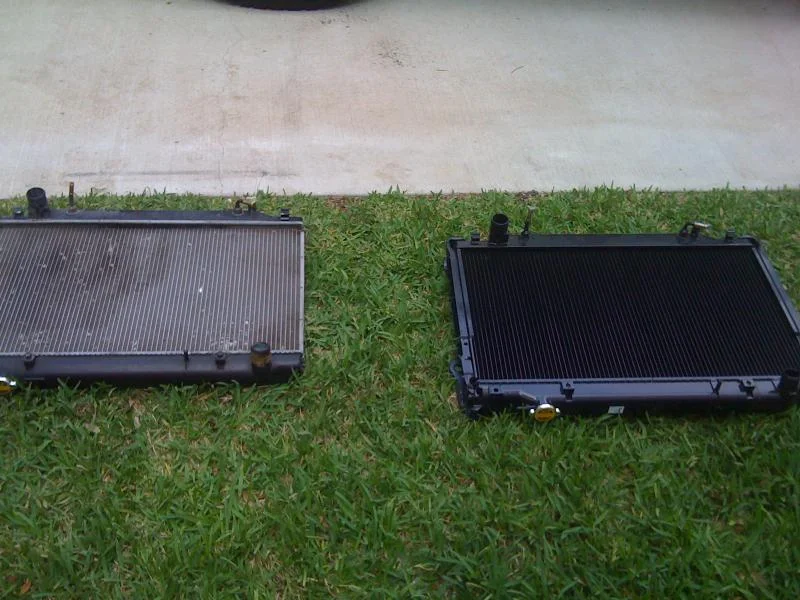
3rd pic- Original 97 rad vs new 93 brass
I was running for about 135k with the original rad so I decided it was time to freshen up a bit... bought a 93-94 brass radiator via Dan and was ready to go...
First I flushed my system with the older radiator still installed... used the prestone kit but did not install it permanently... just tied it into my water intake pipe and flushed really good according to the prestone instructions...
When everything was clean and clear I started the removal....Basically I followed the instructions I found here on Mud but I wanted to add some pics that may help others... Also the best way to pull the fan clutch and shroud out was to unbolt the fan, then unbolt the shroud, the pull both up and out in the original position.... easy work.... a strap wrench was used to hold the pulley while I unbolted the fan clutch
The toughest part was the 4 bottom radiator bolts which need to be removed from the bottom with a gear wrench (there are 2 on each side)... I have included a pic of the position of these bolts.
Also the hidden middle bolt was a breeze, but I removed my battery box, grille and headlights which made everything much much easier. You can see the back side of the hidden bolt in the 1st pic.. the smooth one with the red wire right behind it...
I basically removed all the hoses connected to the rad, then the 2 side nuts on the side of the L mounting brackets, then the long bottom bolt at the bottom of the bracket, then I removed the 2 bottom radiator bolts that were accessed from the bottom.... After that I just lifted the rad straight out. The new one slipped right in and I bolted it into the bottom L brackets which were left attached to the frame of the truck and then reinstalled the bottom rad nuts..
After all was buttoned up, I did 4 fill and drains with distilled water and after the 4th drain, I filled it up with 50/50 toyota red and distilled..
Doesnt get any better IMO...
1st pic-- remove those 2 nuts on the L bracket and that one on the bottom of the bracket
2nd pic- there are 2 more hidden nuts under the bottom of radiator.. remove them
3rd pic- Original 97 rad vs new 93 brass
Last edited:


 Hmm good info. The toyo shop I like happens to be one of the better BMW shops as well. I used to take my M3 to it.

