



I just finished installing the PHH http://www.1fzfephh.com/, on my LX450, after reading several threads here and suggesting replacement after 100k. Since we have 173K and upon inspection the ORIGINAL OEM PHH, I knew we were on borrowed time.

It appeared that most accomplished this PHH replacement in a few hours. I anticipated it would take me the same amount of time, I was wrong and now call the PHH a FHH !
There were suggestions to remove the valve cover to access the lower (2nd) bolt on the tube connecting the PHH to the engine block.
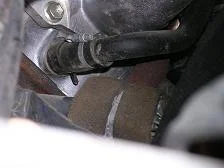
Or to reach up from the bottom (or wheel well) to access the 2nd bolt for loosening - however my arems are too short or don't have the 3rd or 4th joint apparently necessary to get a wrench up there!
In the smallish town I live in I didn't have access (couldn't immediately buy) to the ratcheting-box-end-flex wrenches that were recommended to help with this repair, so I took another approach.
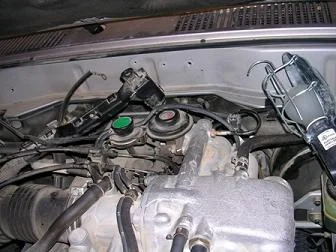
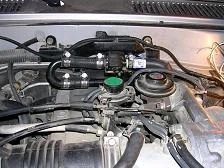
From the engine bay, I removed the tubing and heater valve assembly attached to the firewall and this let me get to the 2nd bolt with my 12mm Gearwrench.

Attached to this heater valve assembly were more OEM heater hose with the "sardine can" clamps (removed with a dremel tool). This was a good time to replace these hoses too.
I ended up removing the 2nd bolt (not recommended) since I couldn't get the new silicone PHH on the enging block nipple and the PHH tube to line up. To retain the 2nd bolt and not have to thread it in the rear of the block I slotted the bracket on the tube.
From there everything went together fine.

Another suggestion for lubing the hoses, since I did several of them in this repair, is to ues KY lube - water soluble and won't hurt the tubes or cooling system either.
It appeared that most accomplished this PHH replacement in a few hours. I anticipated it would take me the same amount of time, I was wrong and now call the PHH a FHH
!There were suggestions to remove the valve cover to access the lower (2nd) bolt on the tube connecting the PHH to the engine block.
Or to reach up from the bottom (or wheel well) to access the 2nd bolt for loosening - however my arems are too short or don't have the 3rd or 4th joint apparently necessary to get a wrench up there!
In the smallish town I live in I didn't have access (couldn't immediately buy) to the ratcheting-box-end-flex wrenches that were recommended to help with this repair, so I took another approach.
From the engine bay, I removed the tubing and heater valve assembly attached to the firewall and this let me get to the 2nd bolt with my 12mm Gearwrench.
Attached to this heater valve assembly were more OEM heater hose with the "sardine can" clamps (removed with a dremel tool). This was a good time to replace these hoses too.
I ended up removing the 2nd bolt (not recommended) since I couldn't get the new silicone PHH on the enging block nipple and the PHH tube to line up. To retain the 2nd bolt and not have to thread it in the rear of the block I slotted the bracket on the tube.
From there everything went together fine.
Another suggestion for lubing the hoses, since I did several of them in this repair, is to ues KY lube - water soluble and won't hurt the tubes or cooling system either.


 I struggled for I'm not sure how long without taking the transmission dip stick out of the way until


