
- Joined
- Sep 17, 2003
- Threads
- 69
- Messages
- 4,618
- Location
- Sunnyvale, CA
- Website
- www.george4wd.taskled.com
I've had SOR covers on the driver/passenger side for a bunch of years. The second set has started to shred (driver's side) due to my wife having to slide out to get to the ground.
So, figured I'd give a different brand a try. These from seatcoversunlimited. They took a couple of months to come, custom cut and I selected their charcoal coloured material (good match to the grey leather) and also went with canvas-cordura fabric. About $180 delivered. Didn't go for the headrest covers since the SOR ones are good enough.
Picture of passenger side complete, driver's side is still the old SOR and you can see the wear on the far side bolster.
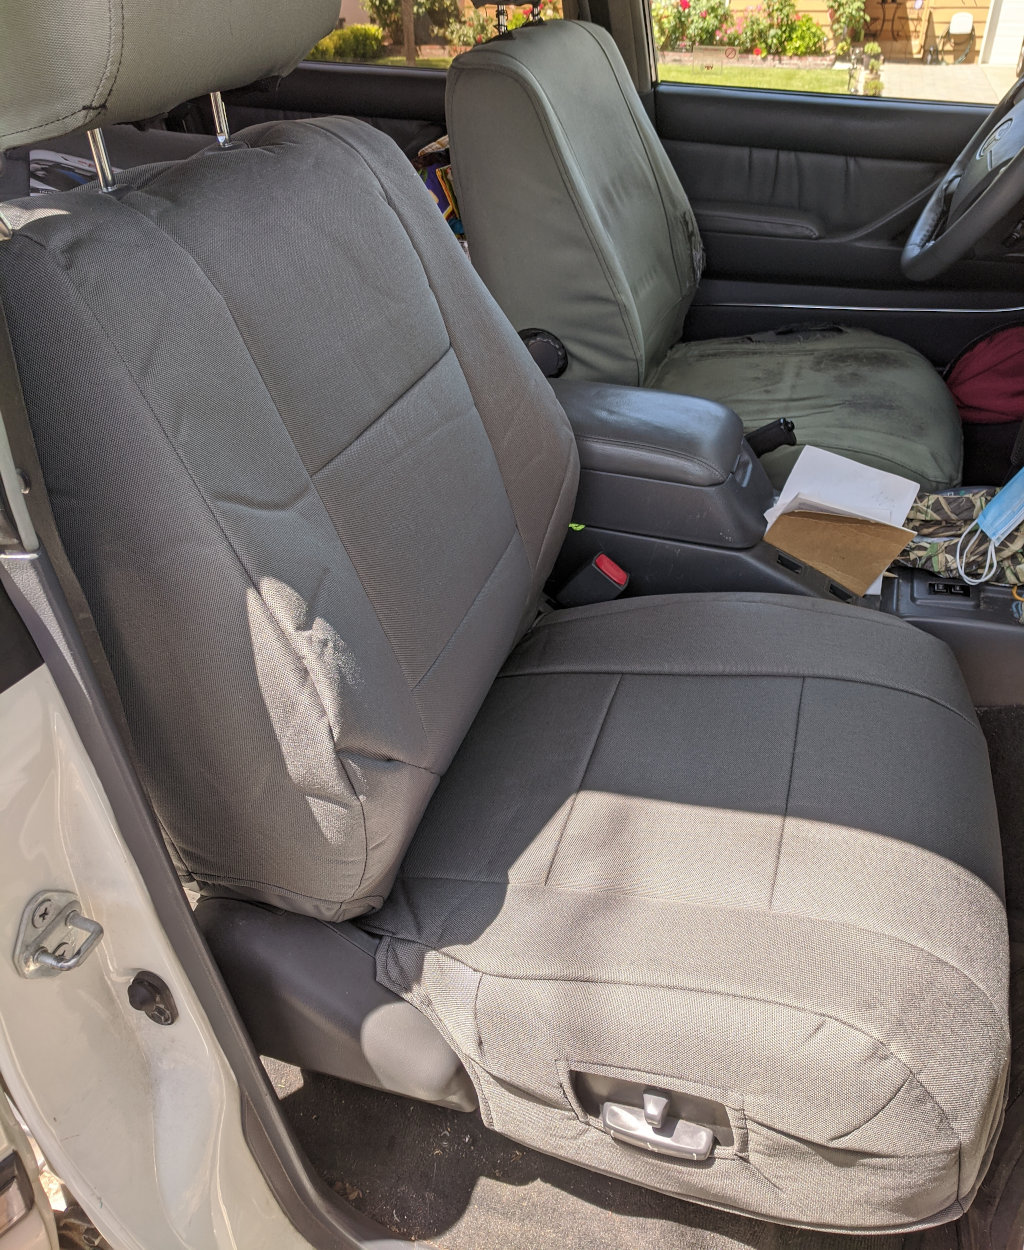
Quite a good and tight fit. The fabric has a foam like liner that adds some extra padding/stiffness to the material. The fabric is quite thick and hopefully should last many years.
To install the covers is a little trickier than the SOR where the headrest posts go. On the SOR they just had big hemmed holes. On the new ones there are no holes and they expect you to cut a hole to tuck under the plastic trim/latch of the headrest. Now, there's probably a thread somewhere on mud but... Anyhow, the big question was, how do you get those plastic bits off. I did a bit of google searching and found a picture of a 4runner part and it looked very similar to the 80's. So, I could see the 2 tabs that need to be released, BUT, they are inside the seat. Hmm....
Ok, bit of looking at the seat back and it appears (never noticed before) that the back is a separate piece. Bit of prying and I released the top 2 clips. Then noticed the bottom was still retained, 2 screws to release, and it's off. Of course now I know better and realize you only need to remove the bottom 2 screws, slide down and it unclips, easy.

With the back cover removed, you can see what it looks like from the back. The 2 spring clips at the top that latch into the back of the seat assembly and the two tabs that the 2 screws retain.

The screws are phillips (or JIS most likely) and are relatively short. Pic of what they look like:

And now a picture of the back seat guts with the back cover removed:

So, getting there now") The next step was to get to the tabs of the 2 plastic doodads to be able to pull them up and out of the seat. Here's a picture (phone shoved up to see into the top gap of the seat:
The next step was to get to the tabs of the 2 plastic doodads to be able to pull them up and out of the seat. Here's a picture (phone shoved up to see into the top gap of the seat:

You can see the 2 halves of the clip that need to be pressed towards the middle to allow the doodad to be pull up from the top. Fairly tight area to get your fingers/hand in to release. I used a flat head screwdriver from the top to try an extract the doodad and then pressed one clip side and then the other. Out the doodad came.
Pictures of the two doodads, one has the lock/release mechansim to allows the headrest to be adjusted up/down:


You can see the ledge at the bottom of the doodad that will capture it into the seat headrest tubes and the tabs on each side that need to be pressed towards the center to release the ledges.
Picture of the two holes in the top of the seat - they are metal tubes that the plastic doodads slide and clip into:

Ok, so now it's easy to just slip covers on and tie/velcro straps etc. Then the plastic doodads can be pressed down firmly to re-latch and give a nice clean finish with the seat covers in place.
Here's a picture of the inside back of the driver's seat so you can see the extra mechanisms for lumbar etc:

Better picture of the two tabs that the back seat cover screws into:

And you can see that the screwdriver would need to be angled up to properly align with the screw heads.
Picture of the installed passenger side seat cover from the back. Has a reasonably sized pocket for stuff:

cheers,
george.
So, figured I'd give a different brand a try. These from seatcoversunlimited. They took a couple of months to come, custom cut and I selected their charcoal coloured material (good match to the grey leather) and also went with canvas-cordura fabric. About $180 delivered. Didn't go for the headrest covers since the SOR ones are good enough.
Picture of passenger side complete, driver's side is still the old SOR and you can see the wear on the far side bolster.
Quite a good and tight fit. The fabric has a foam like liner that adds some extra padding/stiffness to the material. The fabric is quite thick and hopefully should last many years.
To install the covers is a little trickier than the SOR where the headrest posts go. On the SOR they just had big hemmed holes. On the new ones there are no holes and they expect you to cut a hole to tuck under the plastic trim/latch of the headrest. Now, there's probably a thread somewhere on mud but... Anyhow, the big question was, how do you get those plastic bits off. I did a bit of google searching and found a picture of a 4runner part and it looked very similar to the 80's. So, I could see the 2 tabs that need to be released, BUT, they are inside the seat. Hmm....
Ok, bit of looking at the seat back and it appears (never noticed before) that the back is a separate piece. Bit of prying and I released the top 2 clips. Then noticed the bottom was still retained, 2 screws to release, and it's off. Of course now I know better and realize you only need to remove the bottom 2 screws, slide down and it unclips, easy.
With the back cover removed, you can see what it looks like from the back. The 2 spring clips at the top that latch into the back of the seat assembly and the two tabs that the 2 screws retain.
The screws are phillips (or JIS most likely) and are relatively short. Pic of what they look like:
And now a picture of the back seat guts with the back cover removed:
So, getting there now
The next step was to get to the tabs of the 2 plastic doodads to be able to pull them up and out of the seat. Here's a picture (phone shoved up to see into the top gap of the seat:
You can see the 2 halves of the clip that need to be pressed towards the middle to allow the doodad to be pull up from the top. Fairly tight area to get your fingers/hand in to release. I used a flat head screwdriver from the top to try an extract the doodad and then pressed one clip side and then the other. Out the doodad came.
Pictures of the two doodads, one has the lock/release mechansim to allows the headrest to be adjusted up/down:
You can see the ledge at the bottom of the doodad that will capture it into the seat headrest tubes and the tabs on each side that need to be pressed towards the center to release the ledges.
Picture of the two holes in the top of the seat - they are metal tubes that the plastic doodads slide and clip into:
Ok, so now it's easy to just slip covers on and tie/velcro straps etc. Then the plastic doodads can be pressed down firmly to re-latch and give a nice clean finish with the seat covers in place.
Here's a picture of the inside back of the driver's seat so you can see the extra mechanisms for lumbar etc:
Better picture of the two tabs that the back seat cover screws into:
And you can see that the screwdriver would need to be angled up to properly align with the screw heads.
Picture of the installed passenger side seat cover from the back. Has a reasonably sized pocket for stuff:
cheers,
george.
