
Hi all,
I've posted a few steering wheel photos, but I thought I would collect them all here--start to finish, especially now that I've actually finished!
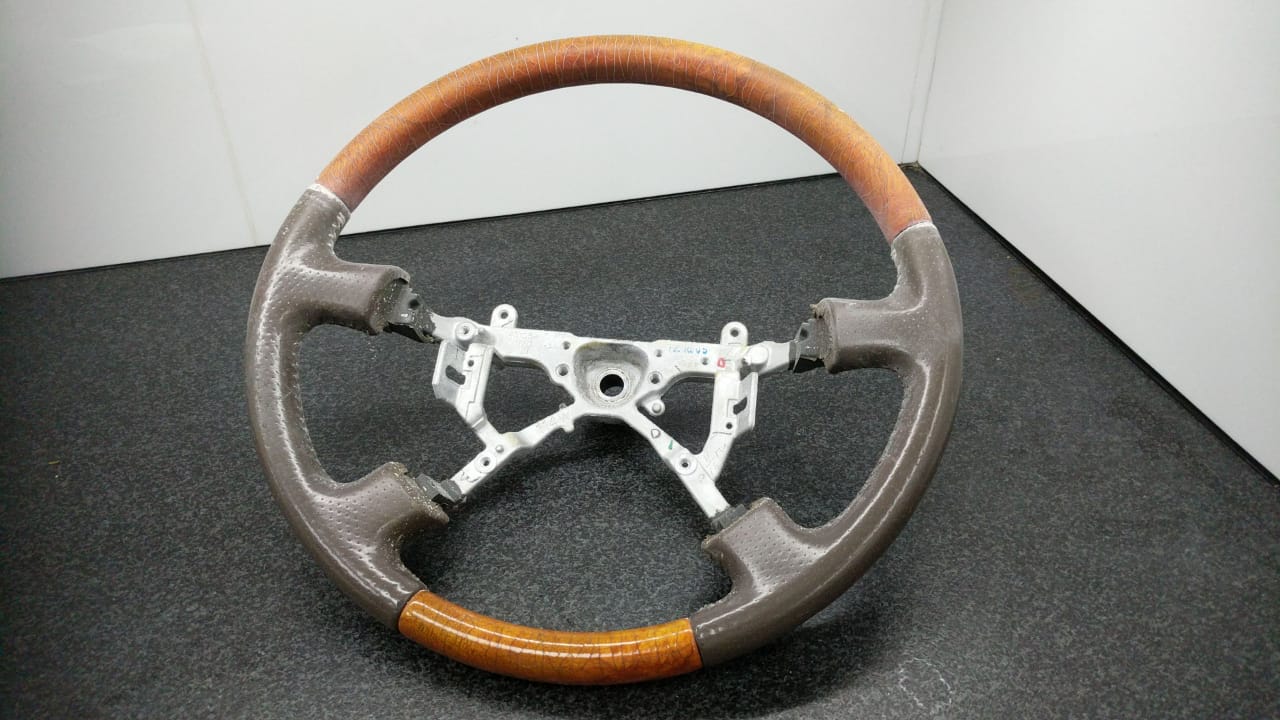
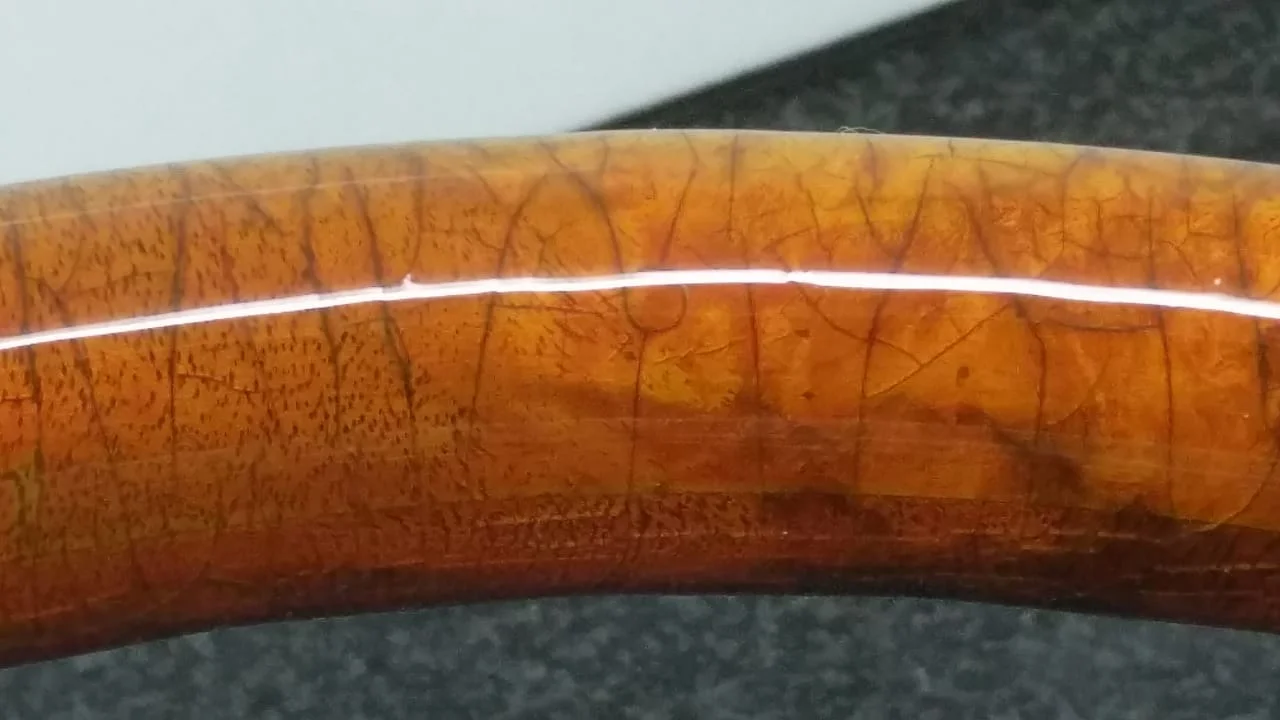
The start of the story is my purchase of a 2001 LX470 with 38K miles on it. Really in great shape--even had the original dealer carpet protection on the drivers front and rear passenger area for some reason. One thing that did bother me was that the finish on the wooden part of the steering wheel was badly cracked:
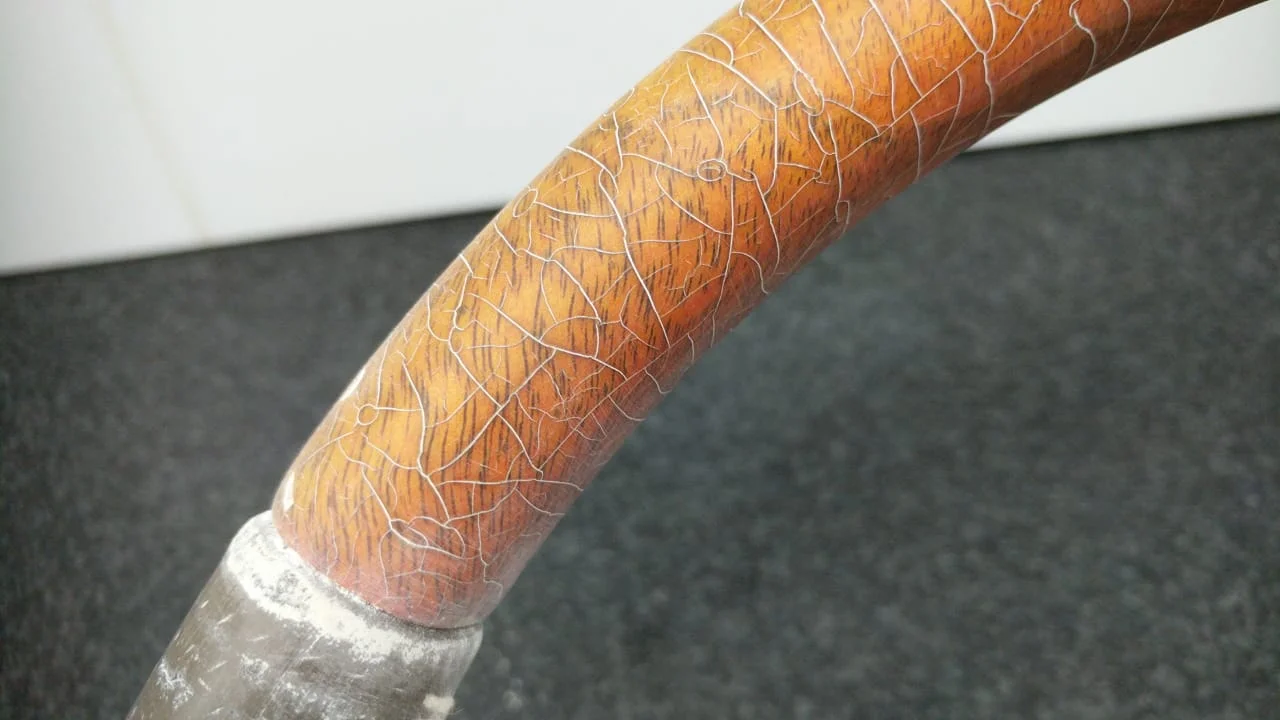
It felt just rough enough to be annoying. So I decided to remove the wheel and refinish the wood (and it is wood on the LX470, unlike my LC which has some nice looking plastic), and also replace the leather with local camel leather, which I like quite a bit. Very flexible and durable and thick. Here's the wheel at the start just after I started sanding down the finish on the wood:
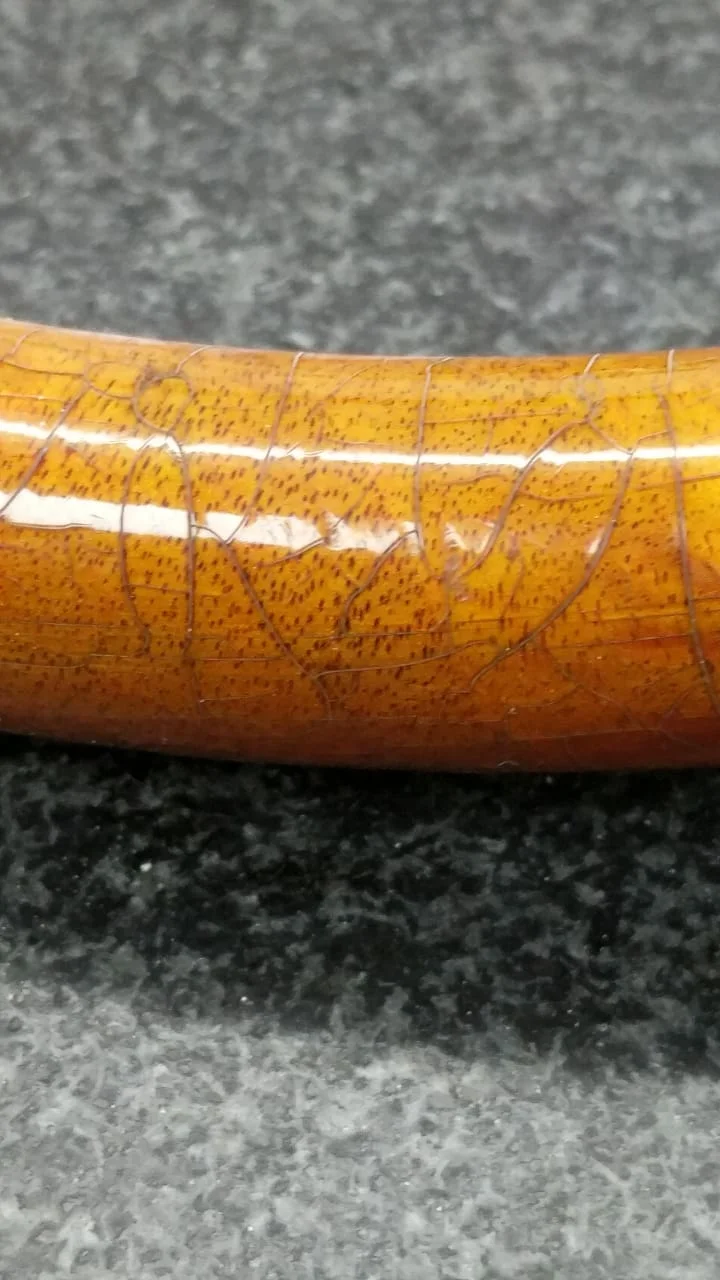
Here's a close up that really shows the problem:
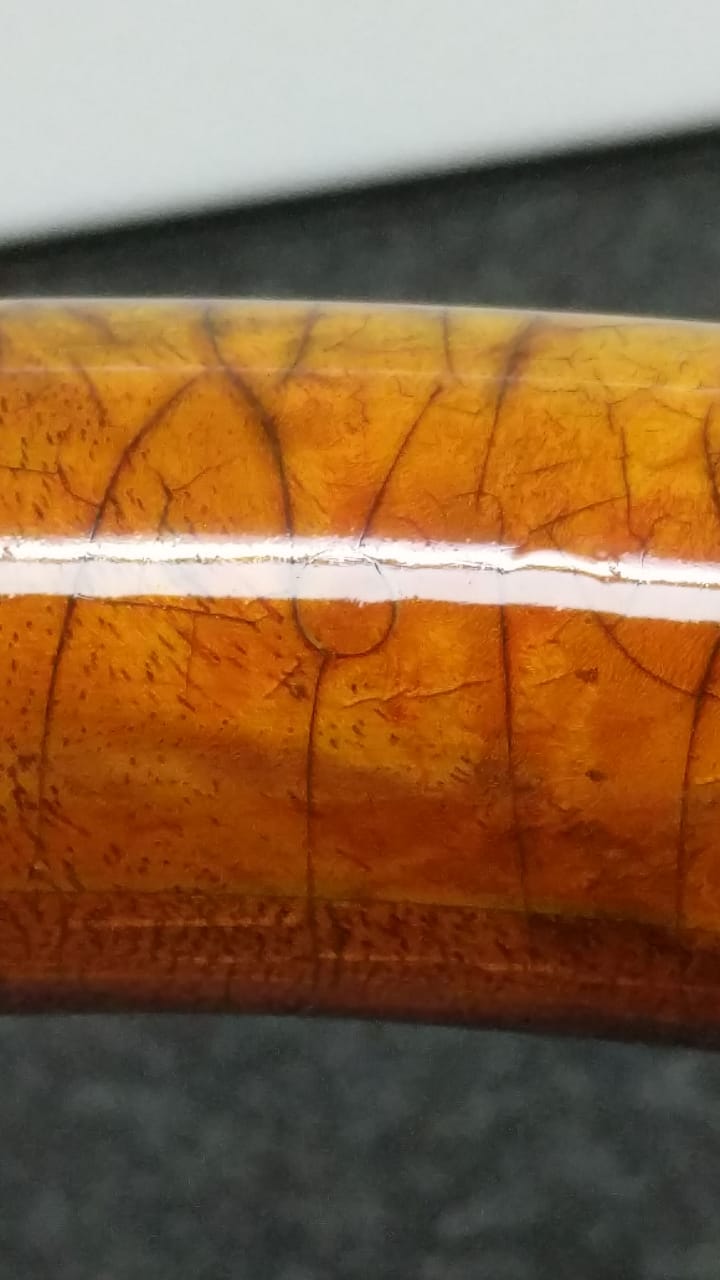
Here is a photo after quite a bit of sanding and one coat of good quality spar varnish:

I won't take you through all the photos, but if you are interested they all are here. I sanded and varnished and sanded and varnished at least 6 times and even after that I was not quite satisfied with this:
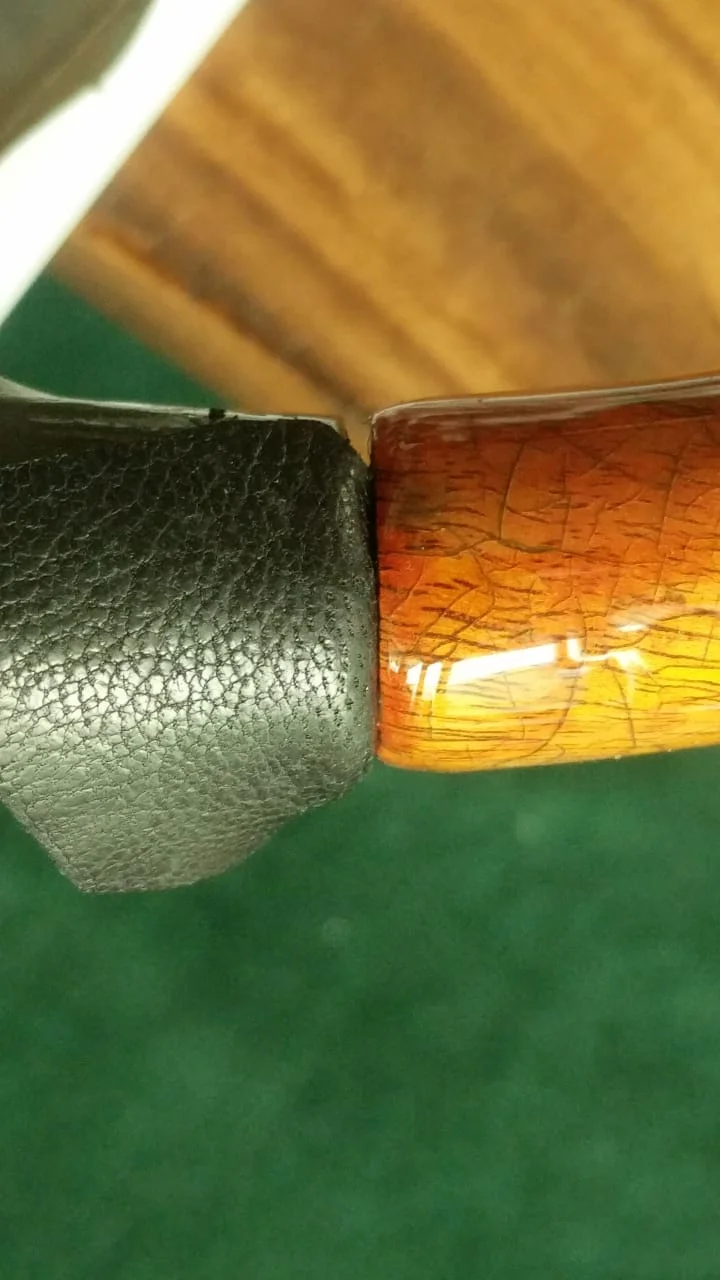
(There are a lot of intermediate photos in the album linked above.) On my next trip to the US i stopped in at home depot and bought one of those 25 dollar epoxy tabletop kits. When I got back to Dubai I sanded again and mixed up the epoxy coating and applied it with a foam brush. The stuff is tricky. Very thin and it takes something like 45 minutes to set up so coating a cylindrical shape was difficult. I ended up having to flip it over and over more or less constantly to try to get an even coat. The other problem was bubbles. The directions suggested using a propane torch to burst the bubbles and this worked well. Spot heating with the torch also assisted in getting rid of runs--they would flow a bit if you pass your torch over it. Basically a good part of an afternoon to get the thing the way I liked it. Here's the result:
The finish is not quite perfect but really pretty nice. And I certainly did not want to spent another afternoon putting another coat of epoxy on. I figure 6 coats of spar varnish followed by a thick epoxy coat ought to be enough!
So then it was on to the leather. Now having done one LC and one LX I can tell you that the LX wheel has real leather and the LC has some kind of stiff vinyl on the faux wood steering wheel. It turns out that the leather wheel is much easier to work with. The leather comes off easier and at the end the leather is more flexible and you can stretch it out to make a pattern for the replacement leather. This was impossible with the LX vinyl covering--when I did that one, I had to make up my own pattern and it was a real pain.
I initially tried to use the old leather directly as a pattern:
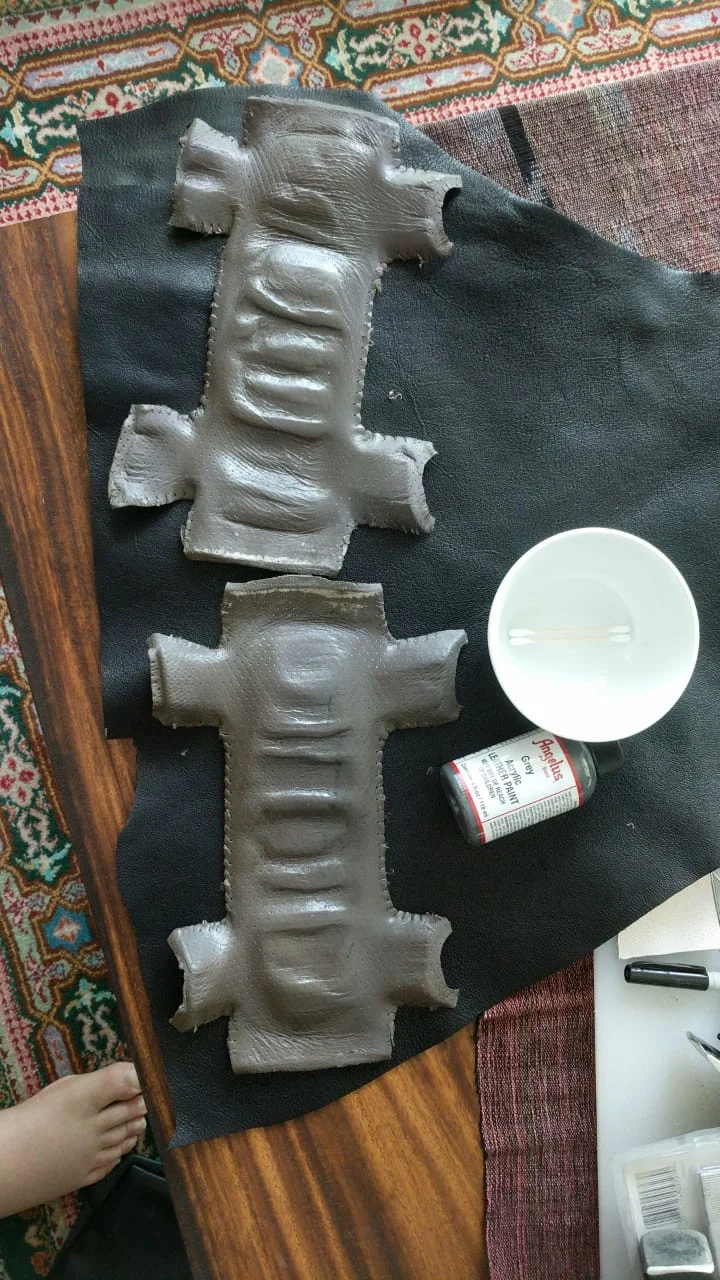
But this did not work too well. They were not quite flat enough.
So what I did was staple the old skins down on cheap Ikea cutting boards, stretching as I went. Then I clamped the two cutting boards together flat and left them for a few days:
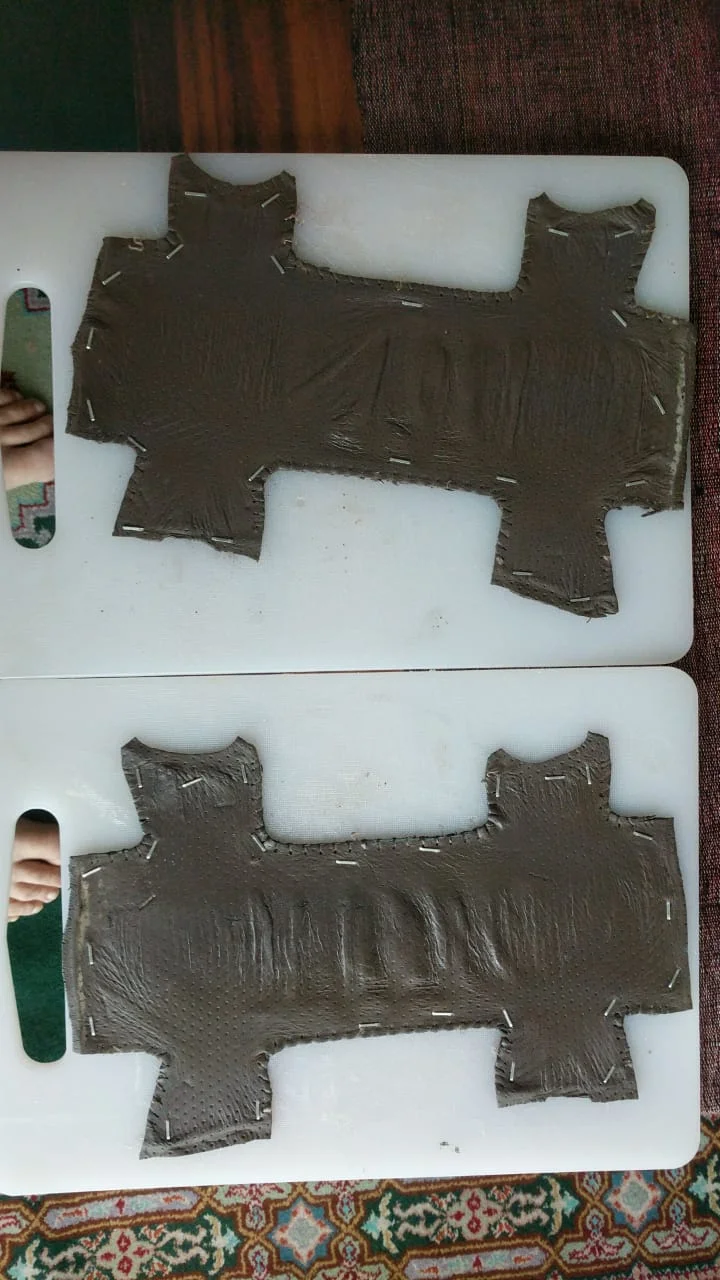
You can see here that the old leathers are much, much flatter after this, and quite suitable for using as a pattern to cut replacements (out of camel leather in this case). I'd like to add that it is a great idea to buy surgical scalpels on amazon--a hundred #11 blades and a stainless steel handle are just a little over 10 bucks on Amazon, and scary sharp. Xacto blades have gotten kind of expensive. Scalpel blades are not as durable and can break, but are much, much sharper, and at the price you can replace blades a lot more often. Never going back to Xacto. Here's a photo of me cutting out the new leather:

One of the biggest challenges when I did the LC wheel was figuring out the holes for the stitching. You have to be careful to have the right number in the right place. I found that I could use the LX leather holes as a guide for where I would punch the holes. Much easier.
Because the camel leather I was using was thicker, I had to cut away some of the rubber material of the wheel so the leather would fit in the gap between the wood and the rubber:
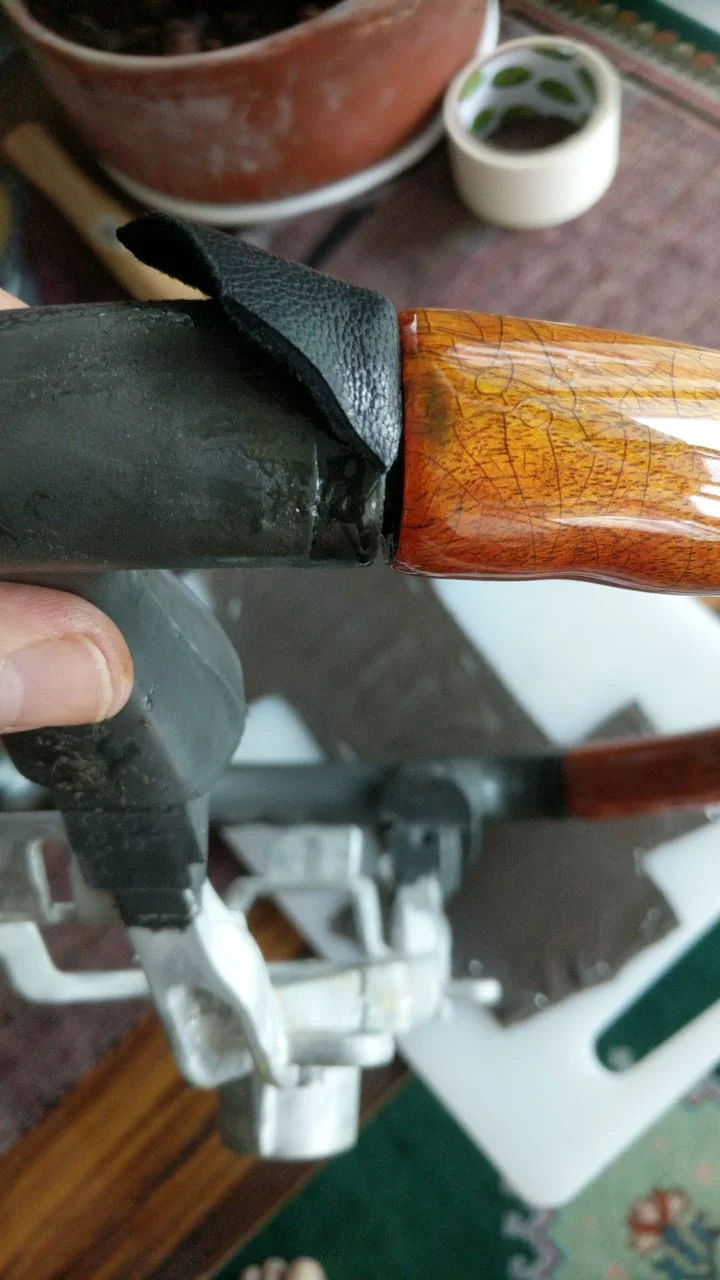
Then it was time to start gluing and stiching. I use flexible PVA glue for gluing down leather. You can clean up with water which is very nice. I used 'baseball' stitching as taught by a number of videos on youtube. Here's the start of stitching:
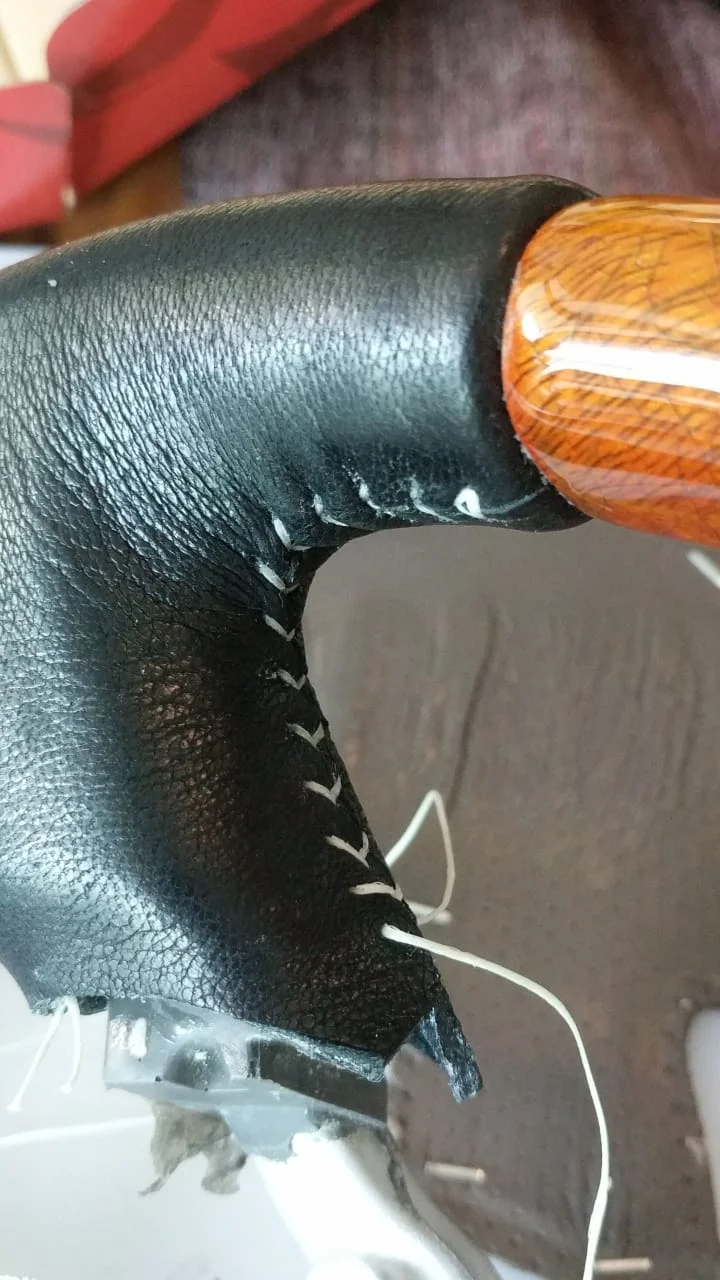
It is important to start at the juncture of the wood and rubber so that you have a neat joint where your hands will touch the wheel all the time. So you first do one end, then the other, and then sew the middle section. I used quite a bit of PVA glue and it works pretty good as both a lubricant and a gap filler. This thick leather is pretty stretchable, but it helped a lot that the PVA glue allowed it to move around while I was sewing. I also found that I could squeeze the leather to get the glue underneath to go where I wanted it.
And here is one side done:
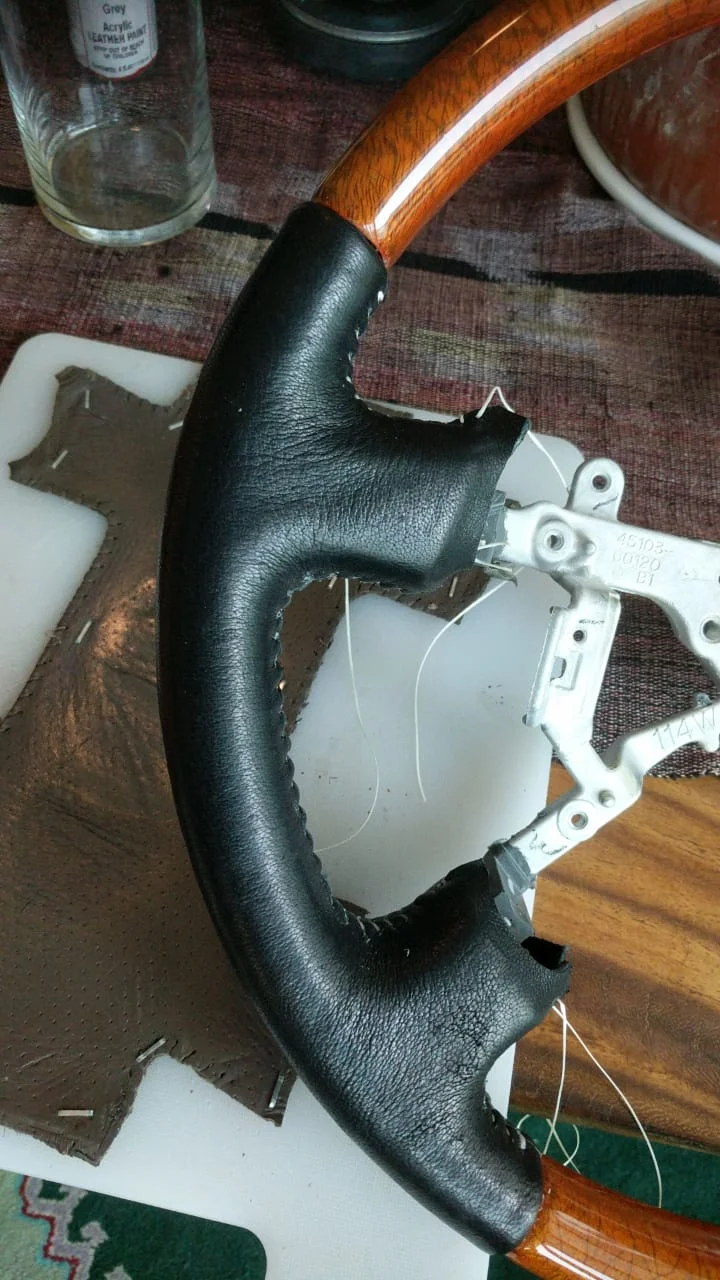
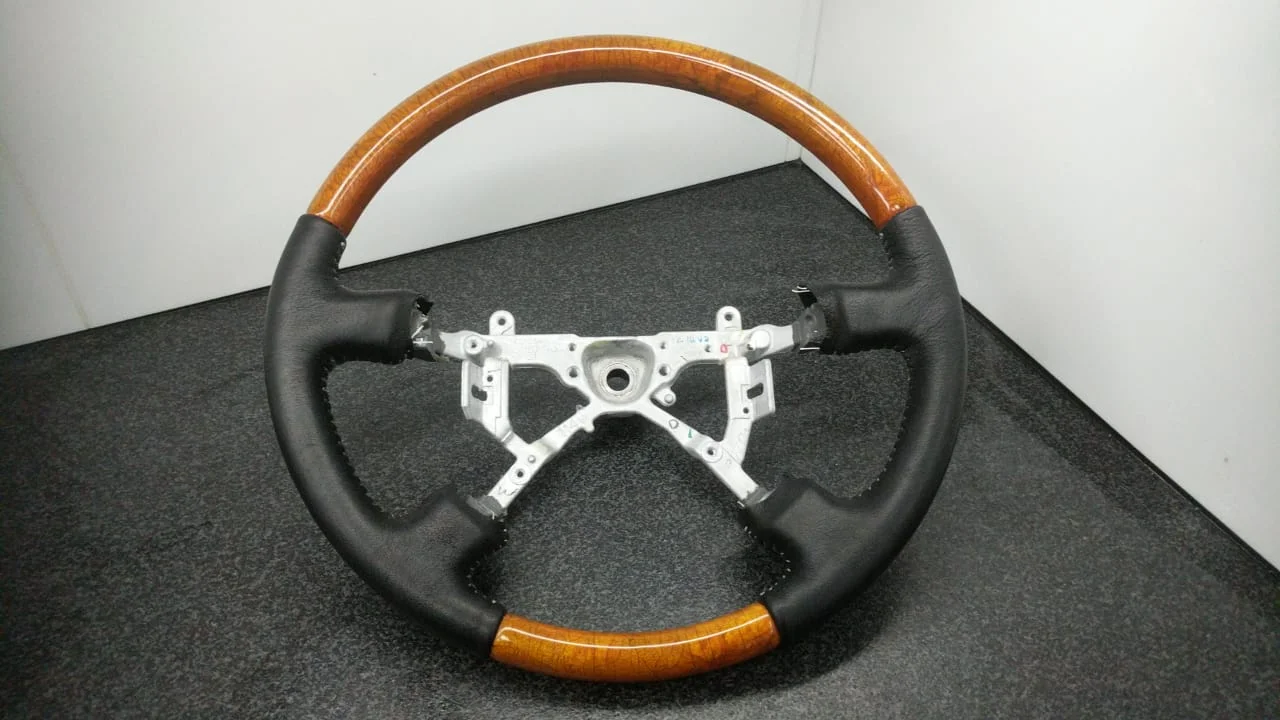
And a week or so later, here is the wheel refinished and with both sides of leather done:
And just today, I put it on my truck:
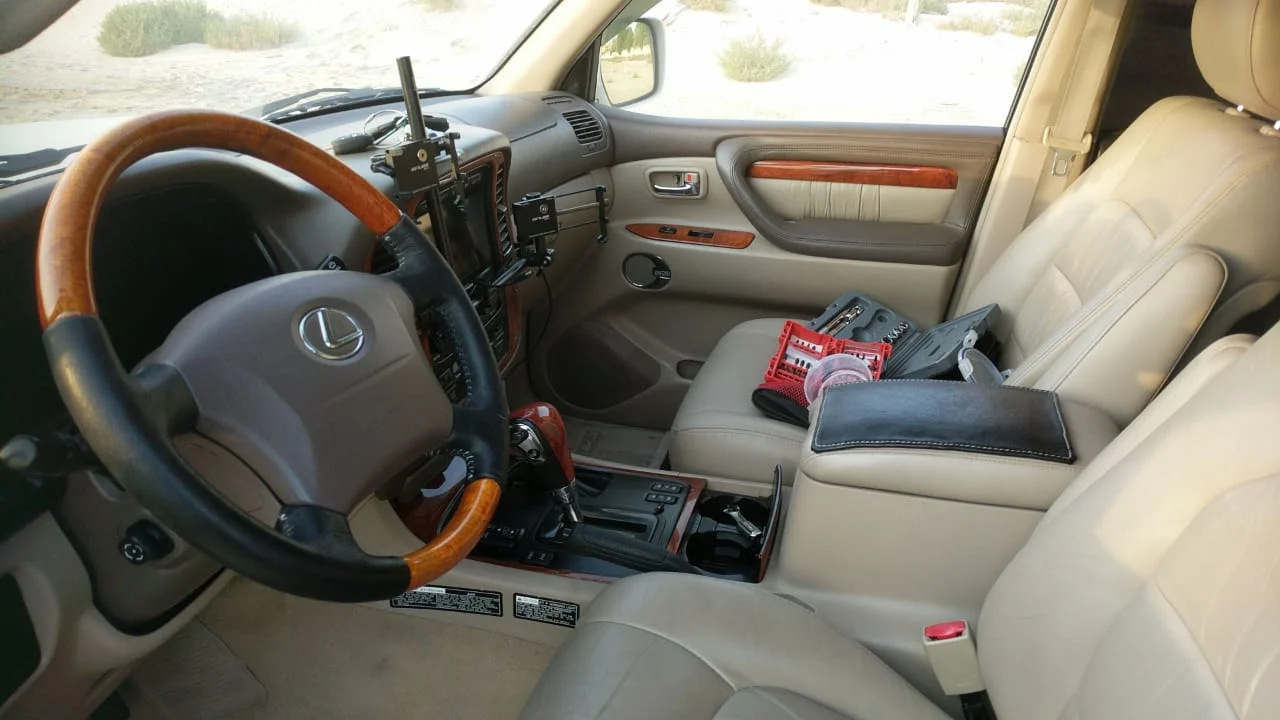
I used black leather because I could not match the old putty color and also so it would match the leather on the shifter and transfer lever leather. I think it looks quite nice. When I put it on, it was a bit tighter fit than before because of the thicker leather and I was worried about the horn working, but it worked fine. I'm getting a little rubbing sound when I turn the wheel to the left, but I think I can work that out.
You may notice the black pad on the center console. The tan leather there was crazing a little bit so I decide to put a black leather pad there too. I'm not really happy with the result and I might re-do it in future. The real problem is that I misjudged the size and ended up having to boil it to shrink the leather down to the right size and it changed the finish of the leather for the worse. here are a couple of photos:
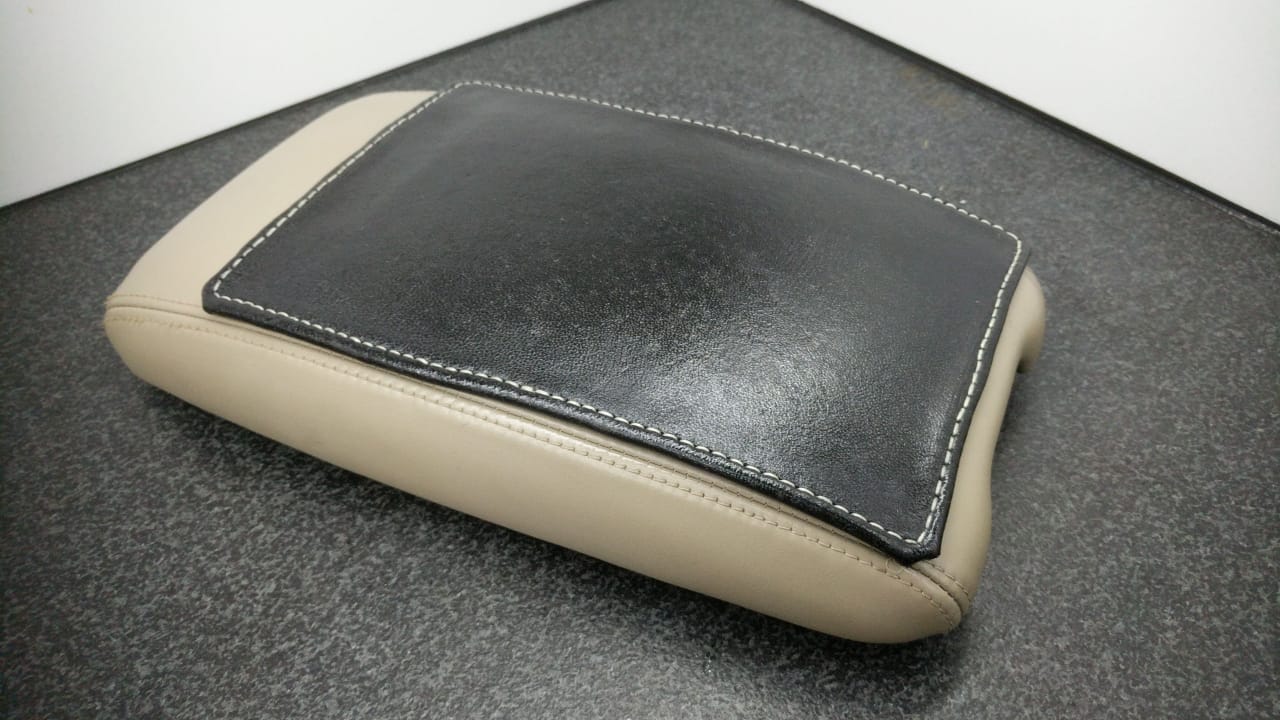

The pad was simply glued down with PVA glue and held until set with masking tape. The edges are a bit wavy because of the boiling step. I think I will just leave it most likely. There are other things that the truck needs.
I really enjoyed doing this little project. Took longer than I initially thought, but it was very rewarding in terms of the result. I really dislike worn steering wheels. It's also worth mentioning that this took me a few weeks, doing the work a little at a time. I used a donor LC wheel while I was working on the LX wheel. Well worth buying a cheap wheel on ebay so you are not rushed.
Thanks for reading!
I've posted a few steering wheel photos, but I thought I would collect them all here--start to finish, especially now that I've actually finished!
The start of the story is my purchase of a 2001 LX470 with 38K miles on it. Really in great shape--even had the original dealer carpet protection on the drivers front and rear passenger area for some reason. One thing that did bother me was that the finish on the wooden part of the steering wheel was badly cracked:
It felt just rough enough to be annoying. So I decided to remove the wheel and refinish the wood (and it is wood on the LX470, unlike my LC which has some nice looking plastic), and also replace the leather with local camel leather, which I like quite a bit. Very flexible and durable and thick. Here's the wheel at the start just after I started sanding down the finish on the wood:
Here's a close up that really shows the problem:
Here is a photo after quite a bit of sanding and one coat of good quality spar varnish:
I won't take you through all the photos, but if you are interested they all are here. I sanded and varnished and sanded and varnished at least 6 times and even after that I was not quite satisfied with this:
(There are a lot of intermediate photos in the album linked above.) On my next trip to the US i stopped in at home depot and bought one of those 25 dollar epoxy tabletop kits. When I got back to Dubai I sanded again and mixed up the epoxy coating and applied it with a foam brush. The stuff is tricky. Very thin and it takes something like 45 minutes to set up so coating a cylindrical shape was difficult. I ended up having to flip it over and over more or less constantly to try to get an even coat. The other problem was bubbles. The directions suggested using a propane torch to burst the bubbles and this worked well. Spot heating with the torch also assisted in getting rid of runs--they would flow a bit if you pass your torch over it. Basically a good part of an afternoon to get the thing the way I liked it. Here's the result:
The finish is not quite perfect but really pretty nice. And I certainly did not want to spent another afternoon putting another coat of epoxy on. I figure 6 coats of spar varnish followed by a thick epoxy coat ought to be enough!
So then it was on to the leather. Now having done one LC and one LX I can tell you that the LX wheel has real leather and the LC has some kind of stiff vinyl on the faux wood steering wheel. It turns out that the leather wheel is much easier to work with. The leather comes off easier and at the end the leather is more flexible and you can stretch it out to make a pattern for the replacement leather. This was impossible with the LX vinyl covering--when I did that one, I had to make up my own pattern and it was a real pain.
I initially tried to use the old leather directly as a pattern:
But this did not work too well. They were not quite flat enough.
So what I did was staple the old skins down on cheap Ikea cutting boards, stretching as I went. Then I clamped the two cutting boards together flat and left them for a few days:
You can see here that the old leathers are much, much flatter after this, and quite suitable for using as a pattern to cut replacements (out of camel leather in this case). I'd like to add that it is a great idea to buy surgical scalpels on amazon--a hundred #11 blades and a stainless steel handle are just a little over 10 bucks on Amazon, and scary sharp. Xacto blades have gotten kind of expensive. Scalpel blades are not as durable and can break, but are much, much sharper, and at the price you can replace blades a lot more often. Never going back to Xacto. Here's a photo of me cutting out the new leather:
One of the biggest challenges when I did the LC wheel was figuring out the holes for the stitching. You have to be careful to have the right number in the right place. I found that I could use the LX leather holes as a guide for where I would punch the holes. Much easier.
Because the camel leather I was using was thicker, I had to cut away some of the rubber material of the wheel so the leather would fit in the gap between the wood and the rubber:
Then it was time to start gluing and stiching. I use flexible PVA glue for gluing down leather. You can clean up with water which is very nice. I used 'baseball' stitching as taught by a number of videos on youtube. Here's the start of stitching:
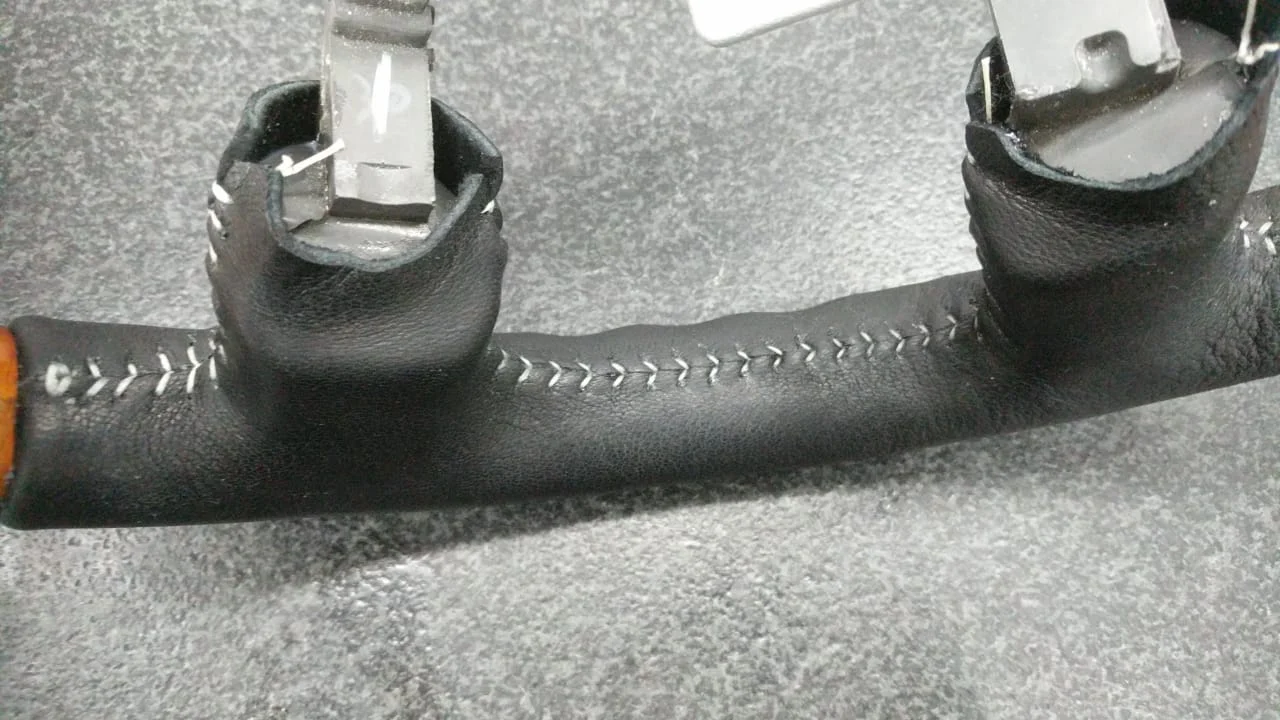
It is important to start at the juncture of the wood and rubber so that you have a neat joint where your hands will touch the wheel all the time. So you first do one end, then the other, and then sew the middle section. I used quite a bit of PVA glue and it works pretty good as both a lubricant and a gap filler. This thick leather is pretty stretchable, but it helped a lot that the PVA glue allowed it to move around while I was sewing. I also found that I could squeeze the leather to get the glue underneath to go where I wanted it.
And here is one side done:
And a week or so later, here is the wheel refinished and with both sides of leather done:
And just today, I put it on my truck:
I used black leather because I could not match the old putty color and also so it would match the leather on the shifter and transfer lever leather. I think it looks quite nice. When I put it on, it was a bit tighter fit than before because of the thicker leather and I was worried about the horn working, but it worked fine. I'm getting a little rubbing sound when I turn the wheel to the left, but I think I can work that out.
You may notice the black pad on the center console. The tan leather there was crazing a little bit so I decide to put a black leather pad there too. I'm not really happy with the result and I might re-do it in future. The real problem is that I misjudged the size and ended up having to boil it to shrink the leather down to the right size and it changed the finish of the leather for the worse. here are a couple of photos:
The pad was simply glued down with PVA glue and held until set with masking tape. The edges are a bit wavy because of the boiling step. I think I will just leave it most likely. There are other things that the truck needs.
I really enjoyed doing this little project. Took longer than I initially thought, but it was very rewarding in terms of the result. I really dislike worn steering wheels. It's also worth mentioning that this took me a few weeks, doing the work a little at a time. I used a donor LC wheel while I was working on the LX wheel. Well worth buying a cheap wheel on ebay so you are not rushed.
Thanks for reading!
Last edited: