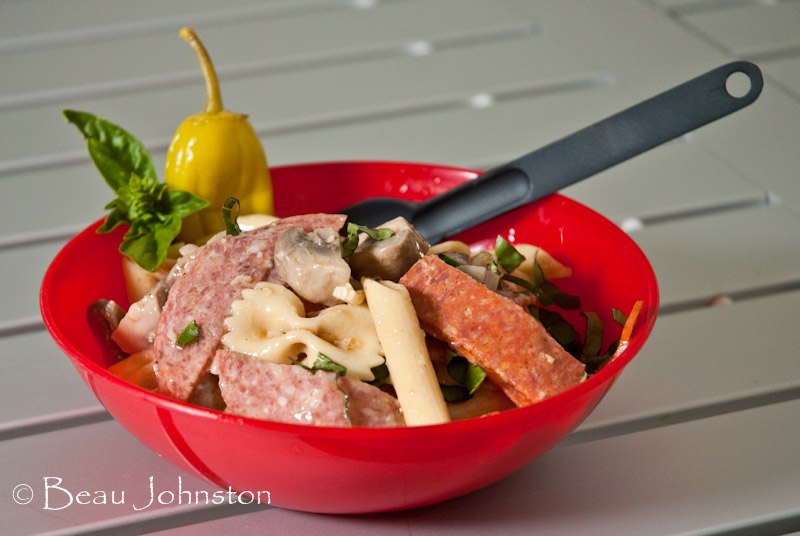
Antipasto Pasta Salad
Antipasto Pasta Salad

Looking for a great meal you can prepare ahead of time and serve the first night on the trail? This Antipasto Pasta Salad is sure to be a hit with everybody in your group.
Ingredients:
8 ounces sliced pepperoni
8 ounces salami
10 tablespoons red wine vinegar
6 tablespoons olive oil
3 tablespoons mayonnaise
1-12 ounce jar pepperoncini with 2 tablespoons juice reserved, drained, stemmed, and chopped coarse
4 garlic cloves, minced
¼ teaspoon red pepper flakes
Salt and pepper
1 pound penne or campanelle pasta
1 pound white mushrooms, quartered
1 cup shredded provolone cheese
12 ounces roasted red peppers, drained, patted dry, and chopped coarse
1 cup chopped fresh basil
Serves 6-8
Cooking Instructions:
In order to remove the excess fat from the pepperoni and salami, place one paper towel on a microwave-safe plate. Arrange pepperoni in a single layer on towel, cover with another layer of paper towel , and layer with salami. Cover with one more paper towel then microwave on highest power for one minute. Allow to cool slightly then cut pepperoni and salami into ¼ inch strips. Set meat aside.
Whisk 5 tablespoons vinegar, oil, mayonnaise, pepperoncini juice, garlic, red pepper flakes, ½ teaspoon salt, ½ teaspoon pepper in a medium bowl.
In a large pot bring 5 quarts of water to a boil. Season with 1 tablespoons of salt and add pasta. Cook until al dente. Drain pasta, return to pot, and toss with ½ cup of dressing and remaining vinegar. Spread dressed pasta across rimmed baking sheets and refrigerate until chilled, about 45 minutes.
Meanwhile, bring remaining dressing to a simmer in a large skillet over medium high heat. Add mushrooms and cook until they release their juices and are lightly browned, about 8 minutes. Transfer to a large bowl and cool.
Add meat, provolone, roasted red peppers, chopped pepperoncini, basil, and cooled pasta to mushrooms and toss well. Season with salt and pepper.
For additional recipes and gear reviews be sure to check out our blog at
www.LivingOverland.com