



- Thread starter
- #41
leave these internets and go play with your bumper.
YouTube - Sir Mix A Lot Baby Got Back Best Quality

check face book, you can't escape my 80s "back"
Follow along with the video below to see how to install our site as a web app on your home screen.
Note: This feature may not be available in some browsers.
This site may earn a commission from merchant affiliate
links, including eBay, Amazon, Skimlinks, and others.
leave these internets and go play with your bumper.
YouTube - Sir Mix A Lot Baby Got Back Best Quality

It's everywhere!check face book, you can't escape my 80s "back"

check face book,
noob.
telling us to check FB is like telling a fat kid to chew.
which reminds me... Don't forget to vote!

Isn't it...DIY...Do It Yourself...????

after awhile of Doing It Yourself you feel like you Did Yourself In..

T handle p welded to spindle housing.
open and pin in locked position. I like the way this came out vs the gas strut design.
Were you able to have the spring loaded pin ride on something angled to have it amotmaticaly lock into place like the one on Slees bumper? I'm contemplating the same idea.
Hey, i got another question. When you guys welded your spindles on, did you do most of the welding to the lower part of the shaft? I'm worried about putting too much heat to the upper spindle when welding it to the spindle hole in the bumper. I haven't test fitted the spindle yet to see how much welding area there is below.
I welded mine on the bottom (inside the bumper) and where the spindle meets the top of bumper.
shouldn't have an issue with warping since the spindle is 1.75 inches thick. At least i didn't. i tacked the spindle on 4 sides of the top and 2 sides inside first.
then welded an inch or 2 inside due to fitment of welding torch.

T handle p welded to spindle housing.
open and pin in locked position. I like the way this came out vs the gas strut design.
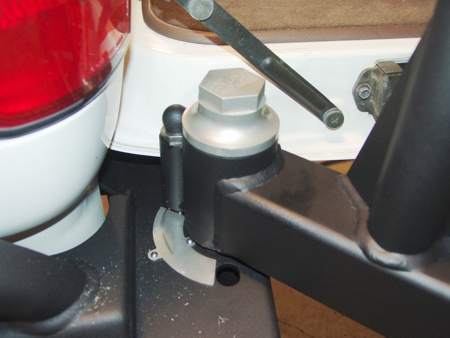
The pull pin is only engaged when the swing out.. Is well .. Swung out.


