1973 FJ40 Build-up thread

This site may earn a commission from merchant affiliate
links, including eBay, Amazon, Skimlinks, and others.

Joined
Feb 18, 2004
Threads
53
Messages
373
Location
Seattle, WA
1973 FJ40 Build-up thread- SOA, TH350, Disc Brake, et

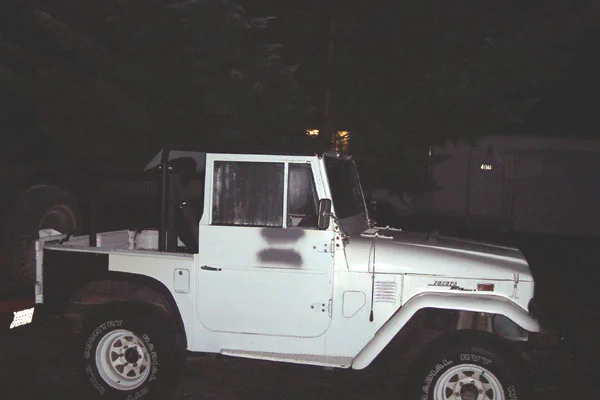
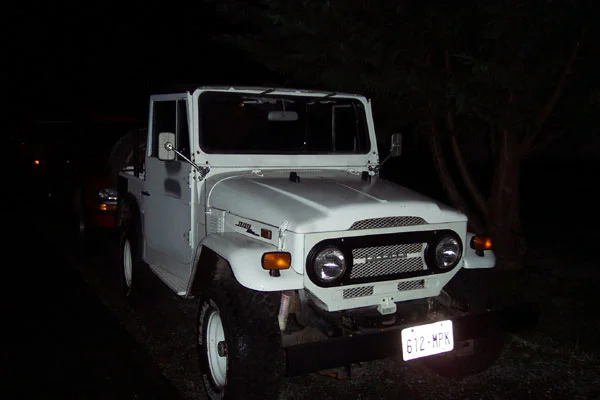
Well, after about two years on and off working on this hunk of metal, I think I've made enough progress to post a build-up thread. I purchased my first landcruiser, a 1973 FJ40 from another local toyota guy for a decent price. It was spray-painted white, and was a little rough.

Goals:

New paint
Bed-liner interior
Newer 350 v8
TH350 install
Disc brakes front and rear
SOA, with stock fj40 springs in front, fj55 in back
Cut and turn, no shackel reversal
Other seals, maintenance stuff along the way
Justpurchased1.webp
Justpurchased2.webp
 
Last edited:
The first order of business was to begin working on the interior/exterior, which had a fair amount of surface rust. In some spots, it was more than just surface oxidation...
interior1.webp
interior2.webp
interior3.webp
 
Picked up my first welder, which is probably the most useful tool I own. Used it to weld in some new sheetmetal in the nasty spots.
welder1.webp
interior4.webp
interior5.webp
 
Using a 15 dollar undercoating spray gun from Harbor Freight, I used duplicolor bedliner to spray the inside of the vehicle. This will make it a whole lot easier to keep clean when wheeling. There was a TON of prep work to do this. Paint stripper to get down to bare metal, grinding off any rust, primer, then Xylene to prep surface (using respirator) for the bed liner. Came out sweet, and like the texture I got from the spray gun a whole lot better than what I've seen people get from rolled on bed liner.


Next was to paint the exterior- another step which requires mucho prep work to be done properly. Used a Harbor Freight HVLP spray gun and PPG single stage Dune Beige paint to get my FJ40 back to its original color. First paint job I ever did, and it showed in parts. It was November, I had a cramped garage to work in, and it was too cold. Great thing about single stage paint is that the imperfections can be worked out pretty easily with fine wet sanding and buffing. I'll likely repaint some spots down the road, but for a trail vehicle, its fine. Added a new Bestop soft top, and a Cool Cruiser's Hell For Stout front bumper to add to the new look of the vehicle.


To make things a bit more comfier when driving the rig, a pair of Corbeau bucket seats were added, with 5-point harnesses to be included at a later date.


About a year in now, in a new house with a two-car garage. Time to get serious! When purchased, the fj40 had a 327 V8 from a 1969 chevy nova II, and the stock 3 speed and transfercase. I picked up a newer 350 from an '84 van, a TH350 automatic transmission, and an adapter from Advanced Adapters to mate the TH350 to the toyota transfer case.

Old driveline coming out:


TH350 transmission out of a Monte Carlo:


Present from Advanced Adapters:
 
New drivetrain was assembled after picking up a new torque converter with 1400 rpm stall, and installing a B&M Stage 2 shift kit:


Trying to get positioning in the rig:

 
Last edited:
Stock crossmember was going to be in the way with the longer drivetrain:


Brace cut off, with AA tranny brace installed:


Repositioned brace, with some added frame support (used part of the old front bumper). Eventually, I may make a skid plate that will bolt to this:

 
Was getting tc gear oil leaking from tc drum brake. Pulled apart, cleaned up and installed a speedy sleeve to get things fit a bit better. New seals on front and rear TC outputs were installed at the same time.


Also installed a transfer case saver bracket as a bit of insurance down the road:

 
Now to get cooling of the engine and transmission squared away. Picked up the largest transmission cooler I could find:


This was mounted to a brand new 4-row radiator from Cool Cruisers:


Used a very expensive overflow bottle (Gatorade):

 
which gun did you use for the undercoating in the body tub? I was looking for the "shutz" type of spray gun that everyone speaks about but could not find on harbor freights website. Can you use just any type of spray gun or is there a specialty one for herculiner, bed liners, etc. I do have a spray gun that came with a compressor kit I got from home depot, looks like a standard gun for overall use, like painting around the home, etc.

Noah
 
I hope to get it finished by the end of summer, mostly will depend on time and money (doesn't it always!).

I don't think it really matters what kind of gun you use. I did thin it down a little with solvent before I sprayed it. I just checked Harbor Freight, and it doesn't look like they're selling the gun I used anymore (bummer!).
 
Shifter for the auto tranny, with lighted display and reverse lockout. In second pic, you can see transfercase shifter relocated further back. A little close to the passenger seat, but it'll do.


Now to work on the brakes. No need for the clutch stuff anymore, so yank that out, rivet a piece of sheet metal to cover the whole. I picked up a brake booster and master cylinder from a 94 4runner.


Now its time to do some suspension work!

Pull the 'ol axles off the vehicle:


Picked up a set of fj55 springs to use for the back of the vehicle. This will help move the rear axle back a few inches, and help with the short rear driveshaft resulting from the installation of the TH350. See springs compared to stock fj40 springs.


FJ55 springs set up with new bushings from SOR, new spring pin, and new stock length shackels from Southwest4x4:

 
Back
Top Bottom