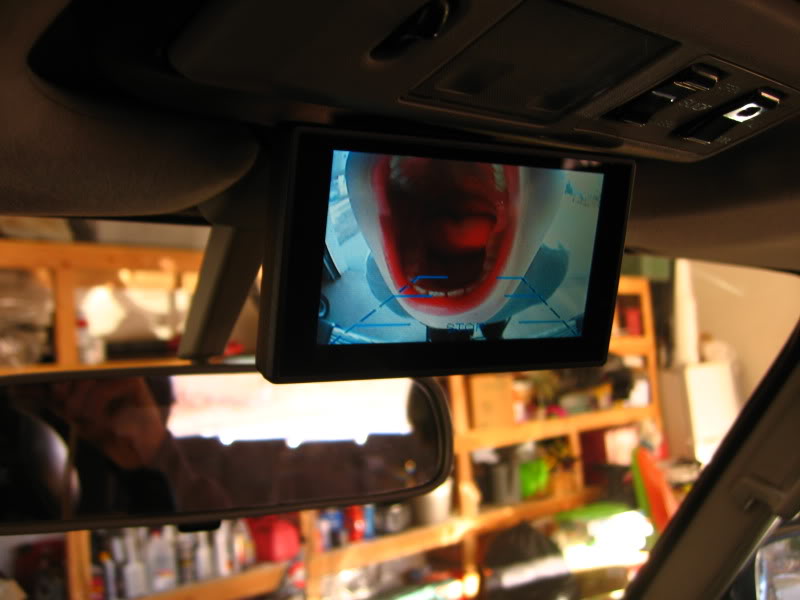



Here's a quick how-to for a back-up camera for $34-$39, depending on which monitor you use.
I bought an E363 rear camera from Amazon. Current cost is less than $15 shipped for the camera. Add to that a monitor. I initially bought a 3.5 inch monitor for $19. However it arrived DOA, so on a whim I had them send me a 4.3 inch model for $24. The overall size of the two monitors are roughly equal - one just has a larger border frame. They are made by the same company and also sold under the Taotronic brand. I do not think the 4.3 incher is necessarily any better quality than the 3.5 incher. I think the first monitor had been damaged in shipping.
http://i8.photobucket.com/albums/a17/docmallory/IMG_8415.jpg
I started by installing the camera. I used a handy tool I got off eBay to pop all the clips on the tailgate carpet without breaking any.
http://i8.photobucket.com/albums/a17/docmallory/IMG_8428.jpg
Then I removed the little panel to access the back of the license light holder. The light holder is held in by 3 nuts. Remove the nuts and the holder comes right off.
http://i8.photobucket.com/albums/a17/docmallory/IMG_8430.jpg
There is a rubber grommet where the license light wires pass into the tailgate. I pushed the grommet through, inserted the wiring for the camera, and then made a slit in the grommet so I could reinstall it around the camera wires.
http://i8.photobucket.com/albums/a17/docmallory/IMG_8431.jpg
The plan was to install the camera on the bottom of the license light holder, in-between the two lights. I used a dremel to make a small notch for the wiring to enter the holder from the camera.
http://i8.photobucket.com/albums/a17/docmallory/IMG_8432.jpg
Then I drilled two holes in the plastic holder to mount the camera. Note that I painted the camera with Plasti-Dip for two reasons - one was to make it less noticeable, and the other was to hopefully help prevent water from entering the camera.
http://i8.photobucket.com/albums/a17/docmallory/IMG_8435.jpg
I used some small nuts and bolts from my odds and ends collection to mount it, rather than the two small screws that were included in the kit.
http://i8.photobucket.com/albums/a17/docmallory/IMG_8436.jpg
The next step was connecting the long video cable and the power cable to the connectors inside the tailgate. To do this, I started at the rubber wire loom that runs between the tailgate and the body. I pulled the loom away from the body, and pushed the video cable and then the power cable up through the rubber loom. I did not get a photo of this, but it was surprisingly *the hardest part of this project*. The rubber tube is just BARELY big enough to squeeze the video connector through. If I had to do it again, I would trim the connector of the video cable to make it smaller in diameter. It took 15 minutes of pushing on the connector to squeeze it through the tube. Then I pushed the video and power connectors up into the tailgate, connected them to the camera cables and then wrapped them in some foam to prevent rattles.
At the other end of the cables, I pushed them into the truck body where the license light wires enter through the wiring loom. The wires then pass THROUGH a 4 inch deep section of the body and then exit under the truck by the spare tire. I had to tape the wires to a stiff wire to thread them into the hole on the other side. The photo below shows the wires exiting by the spare, where there is a rubber grommet that can be slit to accommodate the wires.
http://i8.photobucket.com/albums/a17/docmallory/IMG_8440.jpg
The power wires are not long enough, so I had to solder on some additional wire and used some heat-shrink on it. I ran the power wires through a plastic corrugated wiring loom (purchased separately) up to a rubber grommet under the jack (where the sunroof drain exits under the truck.) I then used the stiff wire to push the power wires into the jack compartment. From there I ran them to a ground point and to the wiring of the reverse bulb on the driver’s side tail lamp housing. You have to remove the housing to access the wiring, but it’s super easy.
The video cable was run along the frame up to a grommet that is just under the driver’s kick panel (where the pin 7 mod is done and where all the alarm wiring connects to the truck.) Take the screw out of the footrest, remove the footrest, and then pull up the clips on the driver’s threshold cover. The photo below shows the video cable entering the footwell. The black wire at the tip of my finger is the video cable.
http://i8.photobucket.com/albums/a17/docmallory/IMG_8460.jpg
This completes the camera portion of the installation. It’s right in the center of my license plate, but did not photograph well. Notice I removed my license frame. I had installed the camera so far back that I could not adjust it downward enough without hitting the frame.
http://i8.photobucket.com/albums/a17/docmallory/IMG_8469.jpg
I bought an E363 rear camera from Amazon. Current cost is less than $15 shipped for the camera. Add to that a monitor. I initially bought a 3.5 inch monitor for $19. However it arrived DOA, so on a whim I had them send me a 4.3 inch model for $24. The overall size of the two monitors are roughly equal - one just has a larger border frame. They are made by the same company and also sold under the Taotronic brand. I do not think the 4.3 incher is necessarily any better quality than the 3.5 incher. I think the first monitor had been damaged in shipping.
http://i8.photobucket.com/albums/a17/docmallory/IMG_8415.jpg

I started by installing the camera. I used a handy tool I got off eBay to pop all the clips on the tailgate carpet without breaking any.
http://i8.photobucket.com/albums/a17/docmallory/IMG_8428.jpg

Then I removed the little panel to access the back of the license light holder. The light holder is held in by 3 nuts. Remove the nuts and the holder comes right off.
http://i8.photobucket.com/albums/a17/docmallory/IMG_8430.jpg

There is a rubber grommet where the license light wires pass into the tailgate. I pushed the grommet through, inserted the wiring for the camera, and then made a slit in the grommet so I could reinstall it around the camera wires.
http://i8.photobucket.com/albums/a17/docmallory/IMG_8431.jpg

The plan was to install the camera on the bottom of the license light holder, in-between the two lights. I used a dremel to make a small notch for the wiring to enter the holder from the camera.
http://i8.photobucket.com/albums/a17/docmallory/IMG_8432.jpg

Then I drilled two holes in the plastic holder to mount the camera. Note that I painted the camera with Plasti-Dip for two reasons - one was to make it less noticeable, and the other was to hopefully help prevent water from entering the camera.
http://i8.photobucket.com/albums/a17/docmallory/IMG_8435.jpg

I used some small nuts and bolts from my odds and ends collection to mount it, rather than the two small screws that were included in the kit.
http://i8.photobucket.com/albums/a17/docmallory/IMG_8436.jpg

The next step was connecting the long video cable and the power cable to the connectors inside the tailgate. To do this, I started at the rubber wire loom that runs between the tailgate and the body. I pulled the loom away from the body, and pushed the video cable and then the power cable up through the rubber loom. I did not get a photo of this, but it was surprisingly *the hardest part of this project*. The rubber tube is just BARELY big enough to squeeze the video connector through. If I had to do it again, I would trim the connector of the video cable to make it smaller in diameter. It took 15 minutes of pushing on the connector to squeeze it through the tube. Then I pushed the video and power connectors up into the tailgate, connected them to the camera cables and then wrapped them in some foam to prevent rattles.
At the other end of the cables, I pushed them into the truck body where the license light wires enter through the wiring loom. The wires then pass THROUGH a 4 inch deep section of the body and then exit under the truck by the spare tire. I had to tape the wires to a stiff wire to thread them into the hole on the other side. The photo below shows the wires exiting by the spare, where there is a rubber grommet that can be slit to accommodate the wires.
http://i8.photobucket.com/albums/a17/docmallory/IMG_8440.jpg

The power wires are not long enough, so I had to solder on some additional wire and used some heat-shrink on it. I ran the power wires through a plastic corrugated wiring loom (purchased separately) up to a rubber grommet under the jack (where the sunroof drain exits under the truck.) I then used the stiff wire to push the power wires into the jack compartment. From there I ran them to a ground point and to the wiring of the reverse bulb on the driver’s side tail lamp housing. You have to remove the housing to access the wiring, but it’s super easy.
The video cable was run along the frame up to a grommet that is just under the driver’s kick panel (where the pin 7 mod is done and where all the alarm wiring connects to the truck.) Take the screw out of the footrest, remove the footrest, and then pull up the clips on the driver’s threshold cover. The photo below shows the video cable entering the footwell. The black wire at the tip of my finger is the video cable.
http://i8.photobucket.com/albums/a17/docmallory/IMG_8460.jpg

This completes the camera portion of the installation. It’s right in the center of my license plate, but did not photograph well. Notice I removed my license frame. I had installed the camera so far back that I could not adjust it downward enough without hitting the frame.
http://i8.photobucket.com/albums/a17/docmallory/IMG_8469.jpg

Last edited: