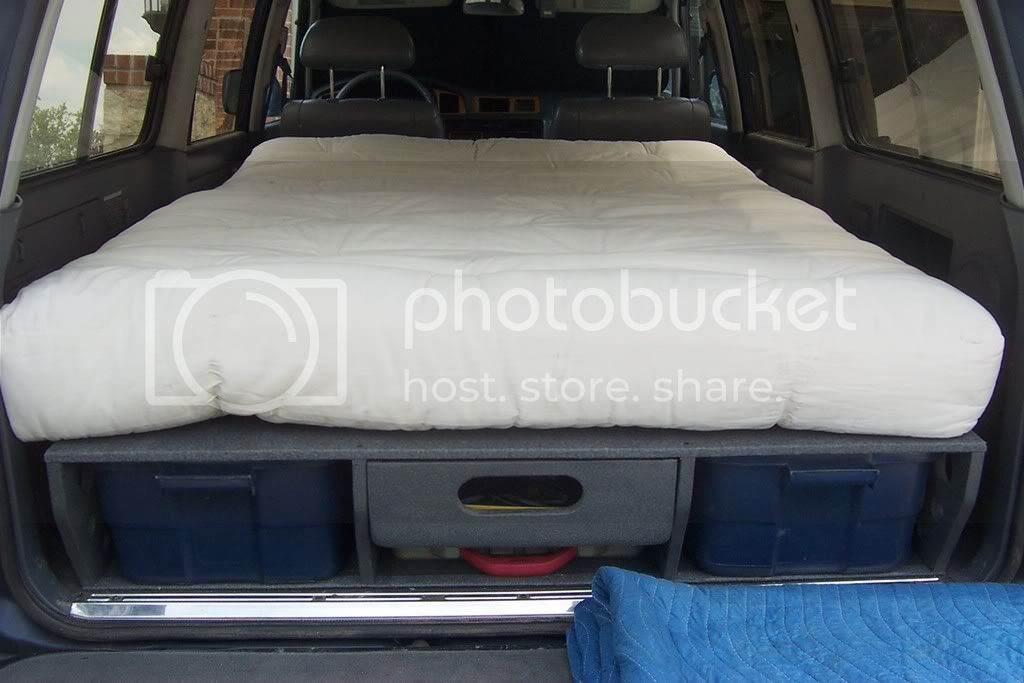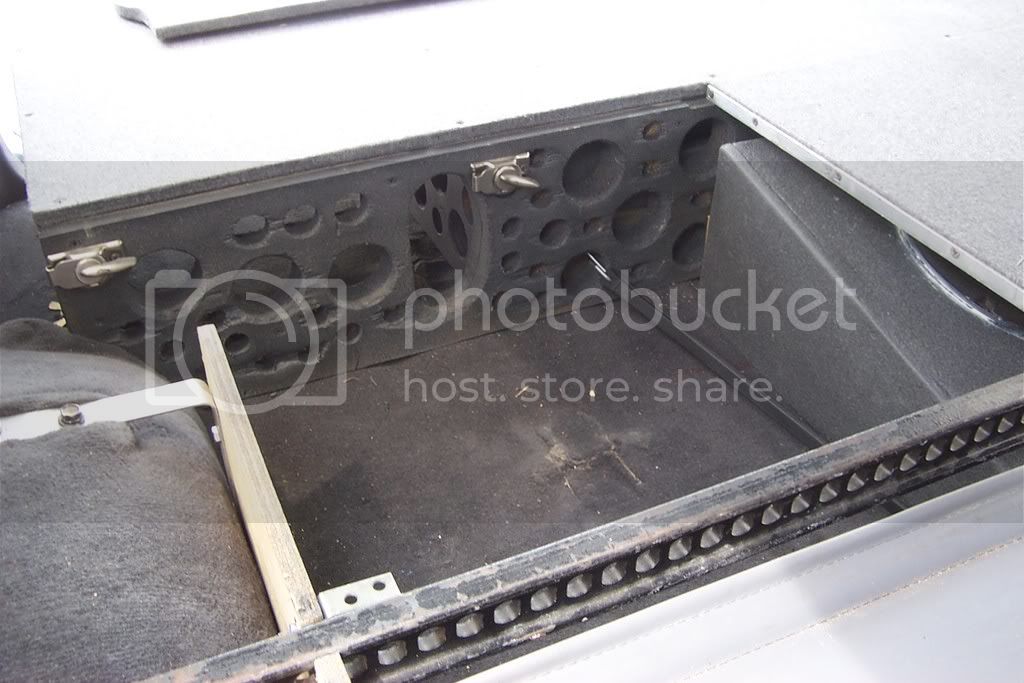



Been working on this for a while. My first generation was 2" taller, had a rougher fit & finish, and had less storage space while being about 3 times heavier. This one is improved in every way with a nice low deck and a weight of 42 lbs.

The large jack box is held up by supports so the tool box can be removed alone.

Each deck panel has aluminum angled stock that is screwed in through 7/16 square steel tube which is snap fastened to the hi-lift bar and latched in place to the main deck structure. Each panel weighs 6 lbs.

The main structure weighs 29lbs completed with fabric and fastening hardware. All plywood used was 7/16 with poplar wood boards for support on the main deck.

The front deck supports hold the hi-lift bar and hold/support the front decking while weighing a 1/2 lb each. The DS main deck bracket is also visible.

Other side. These supports are now painted to match the main deck structure.

One of the deck latches is visible here as well as the wing nut that holds the PS of the main deck to that bracket.

12" sub takes up some space but it is easily removed as is the entire storage unit. Each deck panel gets two deck latches.

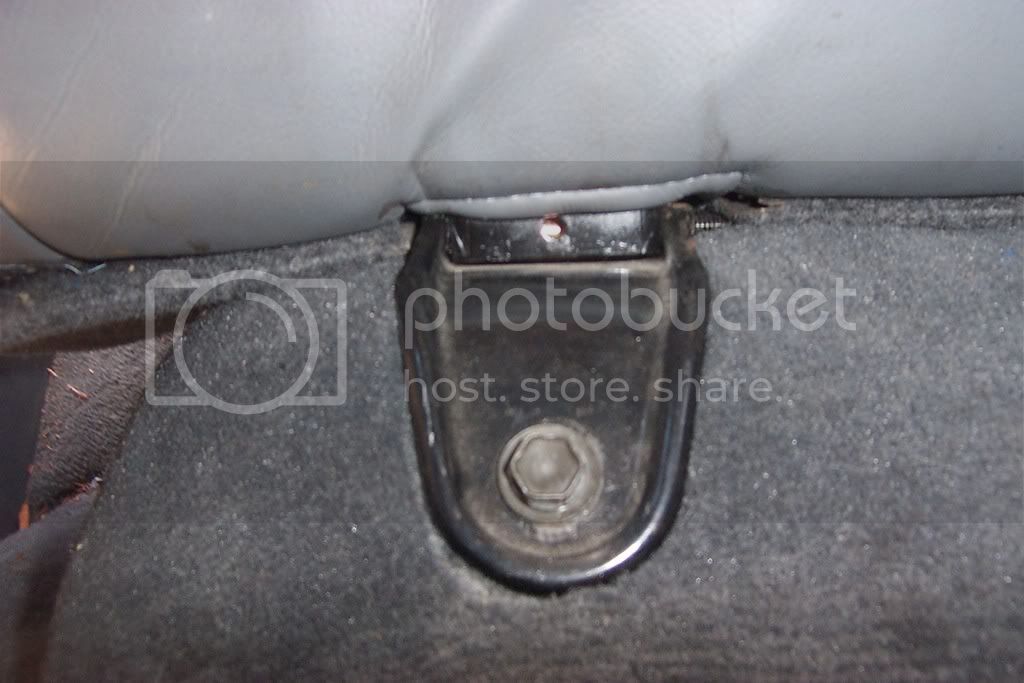
2nd row seat hinges were removed. Seats come out easily if ever needed.
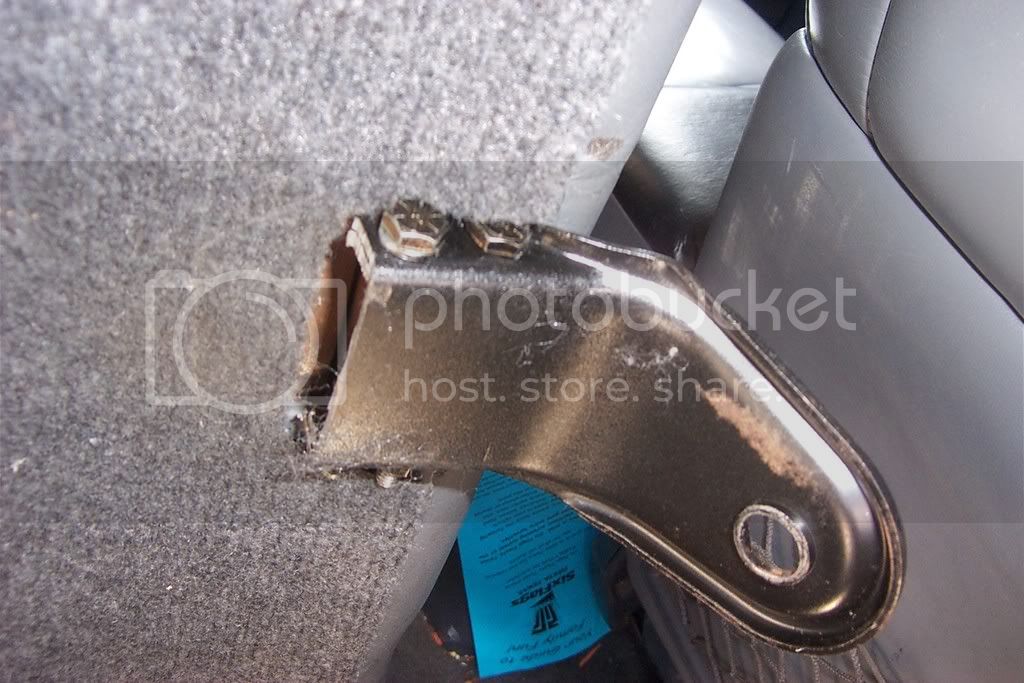
The re-profiled 2nd row legs are joined together with 2 grade 8 bolts each.
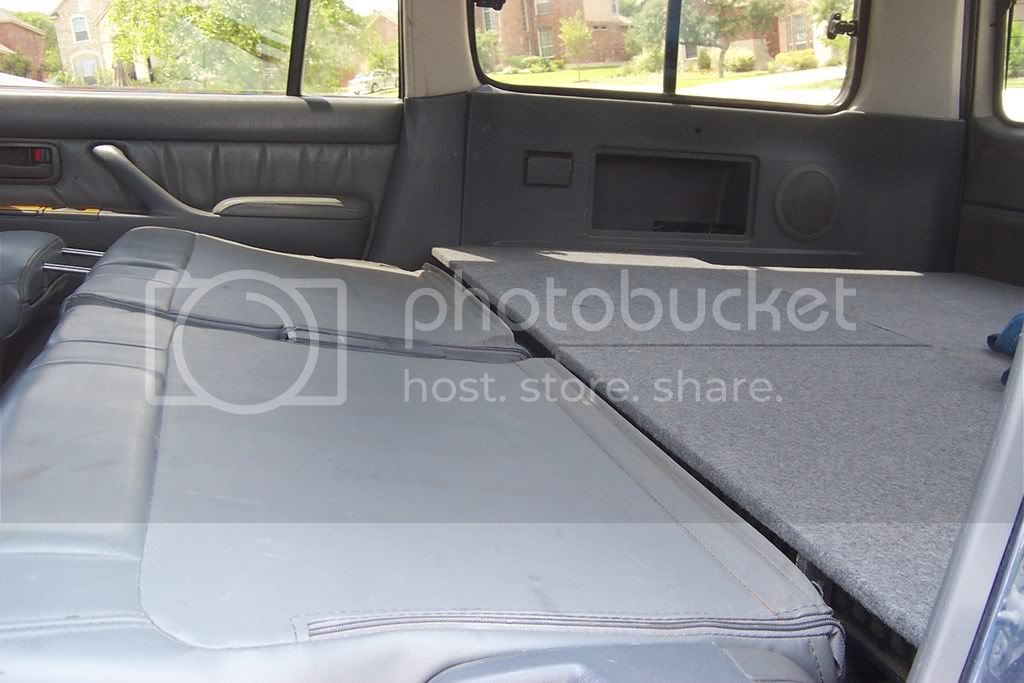
The final sleep/hauling platform is low, flat, and very sturdy. The tops of the 2nd row seats can be pulled down another inch with bungee cords around the head rest supports, but it isn't necessary with the 5" beauty rest futon mattress. The difference over the folded seats is not felt.
Possible changes may be the addition of one bracket to hold the sub down (it is currently held in place by a bungee and a short 2x4). I hate the idea of drilling holes in my floor.
Another change may be to fasten the main structure through the fabric covered metal brace at the rear. I am hesitant to do this because I like being able to remove the entire unit by removing two wing nuts and I hate the idea of drilling holes in my floor. There is very little flex remaining (only when pulling up on the very rear-none when the tailgate is shut) and I don't think there will ever be a problem.
The large jack box is held up by supports so the tool box can be removed alone.
Each deck panel has aluminum angled stock that is screwed in through 7/16 square steel tube which is snap fastened to the hi-lift bar and latched in place to the main deck structure. Each panel weighs 6 lbs.
The main structure weighs 29lbs completed with fabric and fastening hardware. All plywood used was 7/16 with poplar wood boards for support on the main deck.
The front deck supports hold the hi-lift bar and hold/support the front decking while weighing a 1/2 lb each. The DS main deck bracket is also visible.
Other side. These supports are now painted to match the main deck structure.
One of the deck latches is visible here as well as the wing nut that holds the PS of the main deck to that bracket.
12" sub takes up some space but it is easily removed as is the entire storage unit. Each deck panel gets two deck latches.
2nd row seat hinges were removed. Seats come out easily if ever needed.
The re-profiled 2nd row legs are joined together with 2 grade 8 bolts each.
The final sleep/hauling platform is low, flat, and very sturdy. The tops of the 2nd row seats can be pulled down another inch with bungee cords around the head rest supports, but it isn't necessary with the 5" beauty rest futon mattress. The difference over the folded seats is not felt.
Possible changes may be the addition of one bracket to hold the sub down (it is currently held in place by a bungee and a short 2x4). I hate the idea of drilling holes in my floor.
Another change may be to fasten the main structure through the fabric covered metal brace at the rear. I am hesitant to do this because I like being able to remove the entire unit by removing two wing nuts and I hate the idea of drilling holes in my floor. There is very little flex remaining (only when pulling up on the very rear-none when the tailgate is shut) and I don't think there will ever be a problem.
Last edited: