
Link to Part 1
Phase 3: Prep the bracket
-Using the supplied Photoman bolt and cup, put the bolt head and cup towards the front and the nut and washer to the rear. A pair of 17mm wrenches will drive the bushing. You'll feel the bushing move and then the nut and washer will bottom against the bracket. Loosen and remove bolt, cup, washer, and nut

Phase 4: Prep the alternator.
Your new-to-you Sequoia alternator will most likely be fitted with a serpentine belt pulley. You'll have to remove this and your old pulley (if swapping). Procedure is the same for both.
-Put on the big leather gloves and put the 22mm socket on the nut in the middle of the pulley. Use the impact wrench (I have a corded 1/2" electric but air will also work) and hold the pulley firmly while buzzing off the nut.
-Use the gear puller if needed to get the pulley off. Mine did not want to just come off and judicious taps with a dead blow did not remove mine. It came off easly with a 3 jaw gear puller. Remember to grease/oil the Acme threads on the puller
-Clean degrease the pulley shaft with brake parts cleaner and rags.
-Put BLUE loctite on the threads of the shaft
-Slide either the Photoman pulley or your takeoff pulley on the shaft. Hand thread on the nut until it starts to spin.
-I elected to wrap my pulley in the leather gauntlet and hold it in the vise to drive on the nut with a few jabs of the impact. I used my torque wrench and proceeded to use my best Dr. Emmet Brown voice while torquing to 88 lb/ft and making Dad jokes to my son. Me: "When this baby hits 88, you're gonna see some serious sh-t." Son: "Dad, it just went click" Me: "That the serious sh--" Son: Eyeroll.
-Put your old alternator aside as a core or a spare


Phase 5: Install the alternator
-Remove the 12mm head bolt directly above the existing hole in the front engine cover where you had the old bracket
-Slide your new alternator into position and use the old bolt. Hand tighten it at this point. You'll have an unused ear on your alternator and your field connector will still be pointing to 7 O'clock)
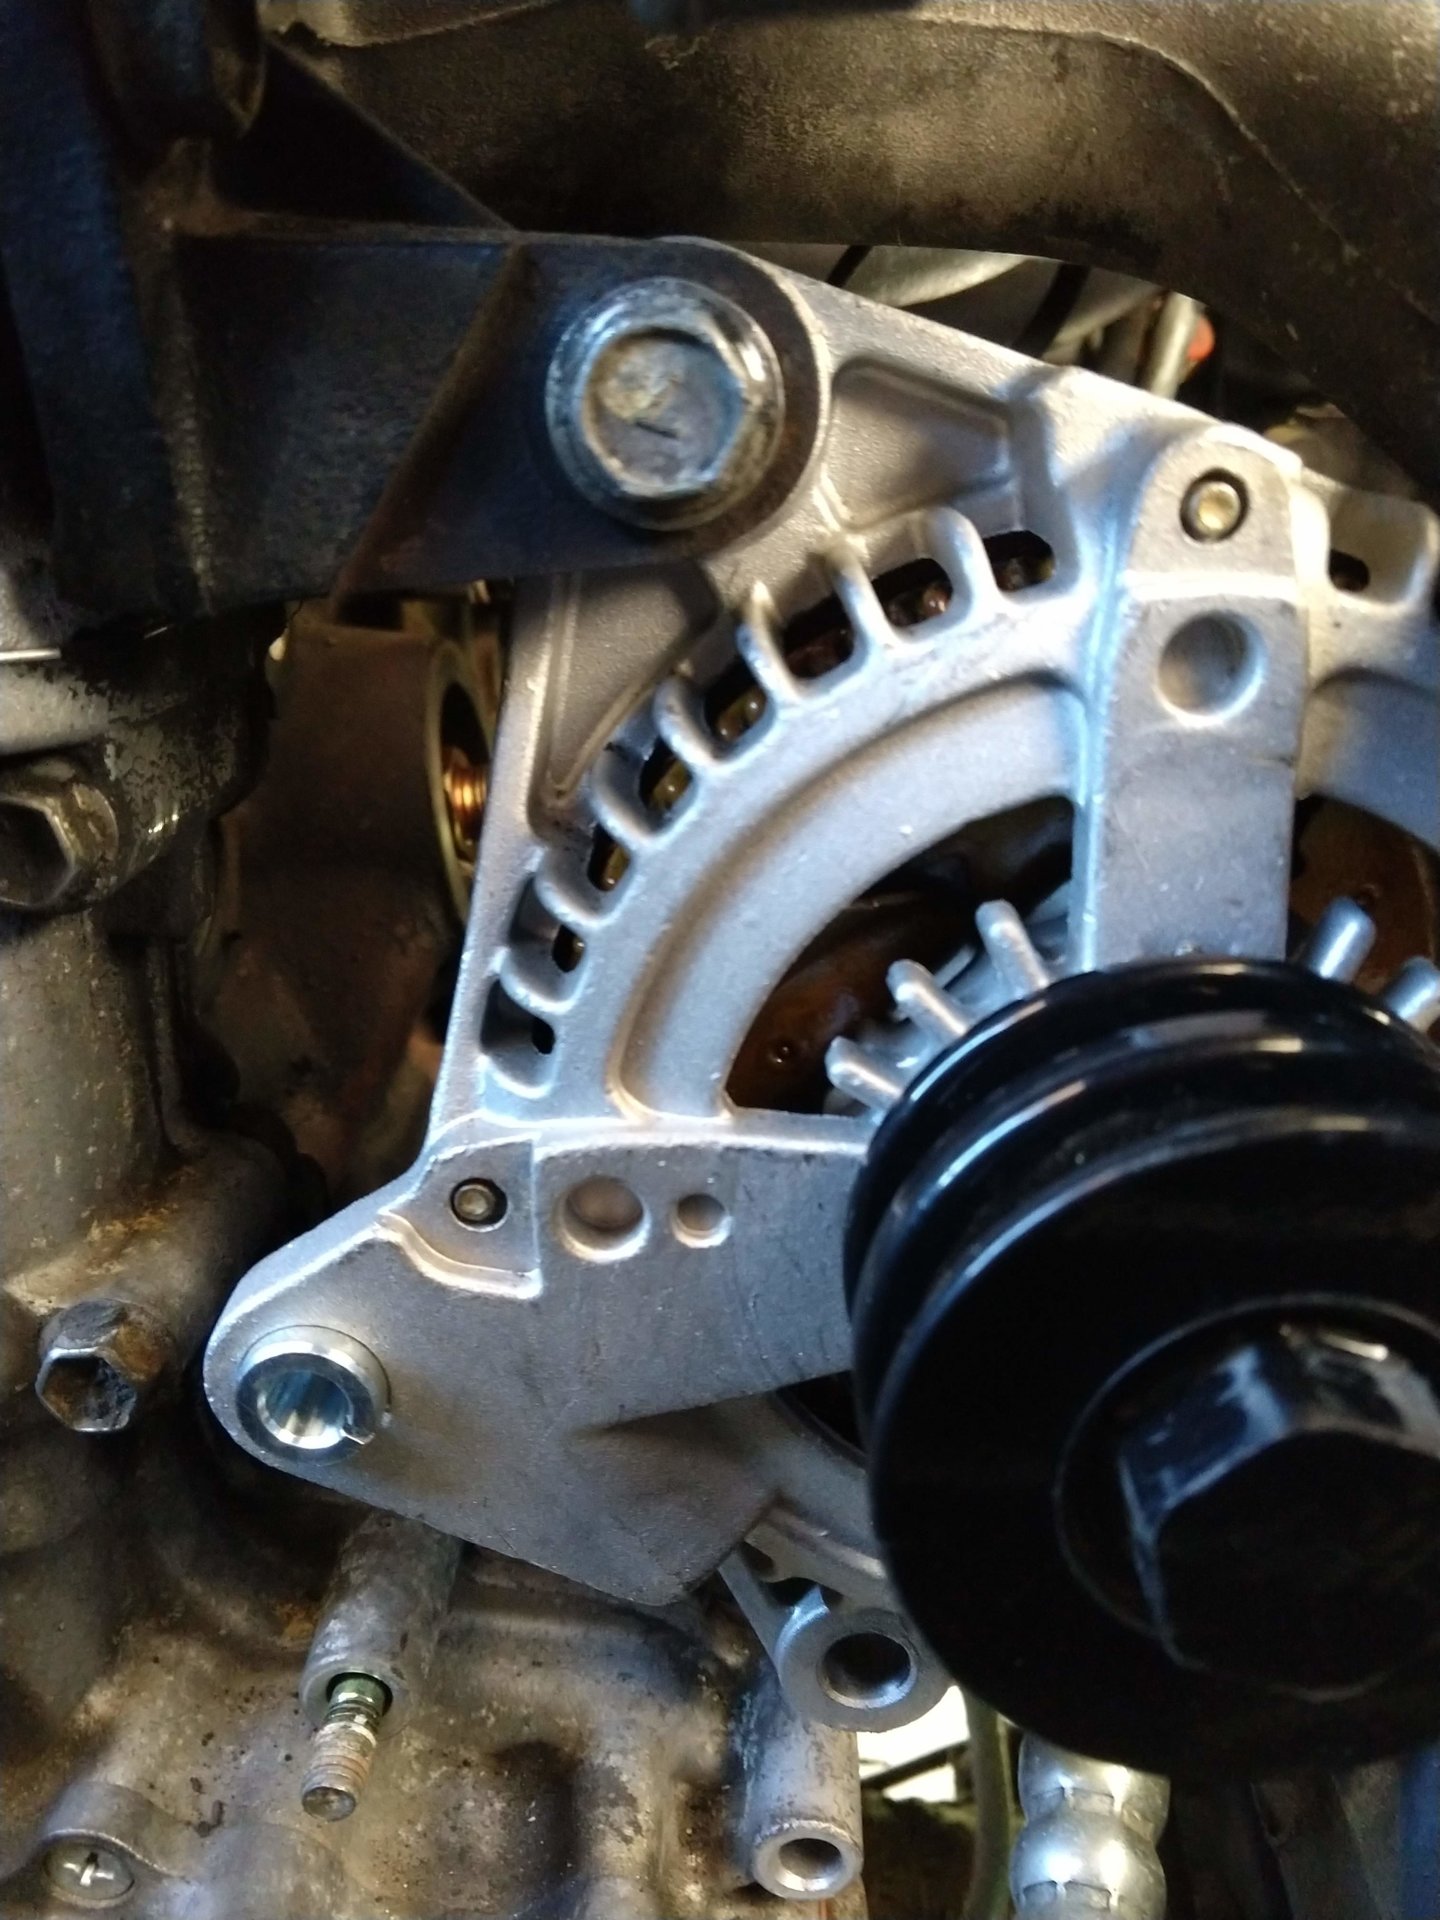
Note: that bolt directly to the left of the unused ear at 9'oclock is removed. The bracket uses this bolt. See the oil filter mount to the rear? That's where you get installation room.
Phase 6: install the bracket.
-Remove the tension screw from the new bracket and slide the new bracket into place. Hand thread on the nut over the stud. Proceed to wiggle the 7/16" bolt through the adjuster and through the third mount point. Remember, you'll have an unused eye/ear between the top pivot bolt and the bottom mount bolt. Put the flanged nut on the back. Ensure the flange on the back of the adjuster is riding on top of the adjuster track.
-Install the other two bolts with 12mm heads through the bracket and into the engine cover and alternator. Torque the 12mm head fastener to 26 lb/ft
-Loop the belts over the pulley grooves. I used the Photoman reduced diameter pulley, so they looped right over
This page was difficult to photograph but the Photoman instructions are clear and the installation is intuitive.


Link to Part 3 and Final
Phase 3: Prep the bracket
-Using the supplied Photoman bolt and cup, put the bolt head and cup towards the front and the nut and washer to the rear. A pair of 17mm wrenches will drive the bushing. You'll feel the bushing move and then the nut and washer will bottom against the bracket. Loosen and remove bolt, cup, washer, and nut
Phase 4: Prep the alternator.
Your new-to-you Sequoia alternator will most likely be fitted with a serpentine belt pulley. You'll have to remove this and your old pulley (if swapping). Procedure is the same for both.
-Put on the big leather gloves and put the 22mm socket on the nut in the middle of the pulley. Use the impact wrench (I have a corded 1/2" electric but air will also work) and hold the pulley firmly while buzzing off the nut.
-Use the gear puller if needed to get the pulley off. Mine did not want to just come off and judicious taps with a dead blow did not remove mine. It came off easly with a 3 jaw gear puller. Remember to grease/oil the Acme threads on the puller
-Clean degrease the pulley shaft with brake parts cleaner and rags.
-Put BLUE loctite on the threads of the shaft
-Slide either the Photoman pulley or your takeoff pulley on the shaft. Hand thread on the nut until it starts to spin.
-I elected to wrap my pulley in the leather gauntlet and hold it in the vise to drive on the nut with a few jabs of the impact. I used my torque wrench and proceeded to use my best Dr. Emmet Brown voice while torquing to 88 lb/ft and making Dad jokes to my son. Me: "When this baby hits 88, you're gonna see some serious sh-t." Son: "Dad, it just went click" Me: "That the serious sh--" Son: Eyeroll.
-Put your old alternator aside as a core or a spare
Phase 5: Install the alternator
-Remove the 12mm head bolt directly above the existing hole in the front engine cover where you had the old bracket
-Slide your new alternator into position and use the old bolt. Hand tighten it at this point. You'll have an unused ear on your alternator and your field connector will still be pointing to 7 O'clock)
Note: that bolt directly to the left of the unused ear at 9'oclock is removed. The bracket uses this bolt. See the oil filter mount to the rear? That's where you get installation room.
Phase 6: install the bracket.
-Remove the tension screw from the new bracket and slide the new bracket into place. Hand thread on the nut over the stud. Proceed to wiggle the 7/16" bolt through the adjuster and through the third mount point. Remember, you'll have an unused eye/ear between the top pivot bolt and the bottom mount bolt. Put the flanged nut on the back. Ensure the flange on the back of the adjuster is riding on top of the adjuster track.
-Install the other two bolts with 12mm heads through the bracket and into the engine cover and alternator. Torque the 12mm head fastener to 26 lb/ft
-Loop the belts over the pulley grooves. I used the Photoman reduced diameter pulley, so they looped right over
This page was difficult to photograph but the Photoman instructions are clear and the installation is intuitive.
Link to Part 3 and Final
Last edited: