/ Problem: 4WD light stays on.
1. Check the front driveshaft under your car. If you press the 4WD button to the off position in your car and you can't turn your front driveshaft then your solenoid is probably burnt out.
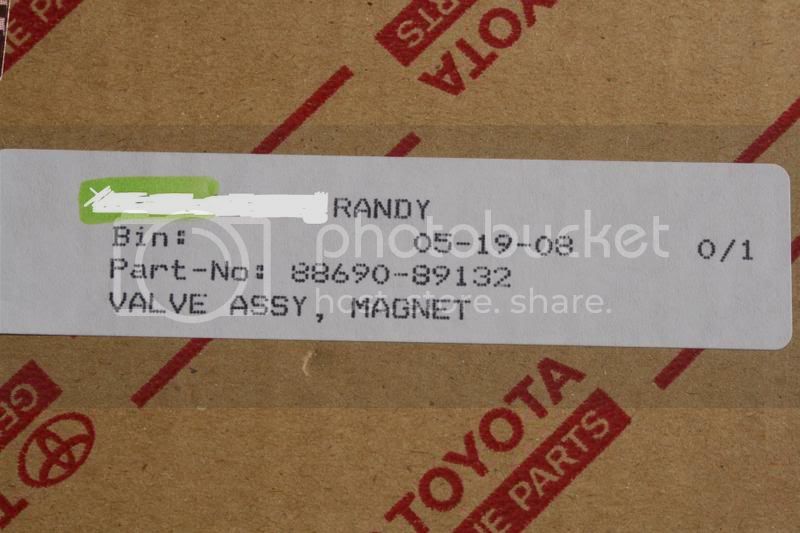
4WD VSV Replacement: Toyota P/N 88690-89132
Part Name: Valve Assy, Magnet
Price from CruiserDan: 17.77
No Discount Price from Toyota: 23.70
This part is off a 1988 Toyota Pickup. It's off the 22R Engine.

Tools Needed:
1. 12 mm wrench or socket. (unbolt VSV bracket from firewall)
2. Screw driver (remove bad VSV from bracket)
3. Angle grinder or file or hack saw (modify metal notch on VSV to fit original bracket.)
4. File, pocket knife, or razor blade (remove connector lip to fit original clip)
For reference: VSV = Vacuum Solenoid Valve
Steps to repair electronic 4WD in an FJ62 (mine is a 1988)
1. Remove Bad VSV (red one) This picture shows the passenger side firewall. You need a 12 mm wrench to remove the bracket. Unclip the wires and hoses. Make sure to label everything or keep it half hanging and connected like I did.


2. Unscrew the new bracket from the new VSV. We don’t need it. Also, take off the 2 hoses that come with the new VSV as well (not shown in pics)

3. Now we need to modify the new VSV before it will fit. Compare the two VSV’s and it’s obvious that we need to trim the metal tab on the VSV and remove the lip off the new electric connector. I had already trimmed mine prior to this picture so use your imagination.

This second picture shows the two metal tabs. They are different sizes. The new one is too big and needs to be trimmed down.

Wear safety glasses and use proper tools and techniques. Don’t stab yourself with a pocket knife while trying to remove the electrical connector lip. Point is, be safe.
4. Now that you’re new VSV is modified; check to see if the electrical connectors fit. Also check and see if the metal tab on the VSV fits into the firewall bracket you unbolted. Connect up the proper hoses. The vertical hose coming straight out the old VSV is the Vacuum line one. The new VSV Vacuum line is the one on the outside. I hadn't trimmed the metal tab yet, so again, use your imagination. Sorry for the lack of proper pictures.

5. Attach everything and don’t worry about sucking on the tube or switching hoses anymore! I have only just installed this. ***DISCLAIMER: Worst case scenario this VSV may burn out early. Who knows, maybe it’s not supposed to be used for this. I hold no responsibility for you trying this. I tried it and it works but I cannot guarantee for how long. My guess is that everything will be ok but I’m just letting you know, do this at YOUR OWN RISK.***
Keywords: four wheel drive solenoid, VSV, vacuum solenoid valve.
1. Check the front driveshaft under your car. If you press the 4WD button to the off position in your car and you can't turn your front driveshaft then your solenoid is probably burnt out.
4WD VSV Replacement: Toyota P/N 88690-89132
Part Name: Valve Assy, Magnet
Price from CruiserDan: 17.77
No Discount Price from Toyota: 23.70
This part is off a 1988 Toyota Pickup. It's off the 22R Engine.

Tools Needed:
1. 12 mm wrench or socket. (unbolt VSV bracket from firewall)
2. Screw driver (remove bad VSV from bracket)
3. Angle grinder or file or hack saw (modify metal notch on VSV to fit original bracket.)
4. File, pocket knife, or razor blade (remove connector lip to fit original clip)
For reference: VSV = Vacuum Solenoid Valve
Steps to repair electronic 4WD in an FJ62 (mine is a 1988)
1. Remove Bad VSV (red one) This picture shows the passenger side firewall. You need a 12 mm wrench to remove the bracket. Unclip the wires and hoses. Make sure to label everything or keep it half hanging and connected like I did.


2. Unscrew the new bracket from the new VSV. We don’t need it. Also, take off the 2 hoses that come with the new VSV as well (not shown in pics)

3. Now we need to modify the new VSV before it will fit. Compare the two VSV’s and it’s obvious that we need to trim the metal tab on the VSV and remove the lip off the new electric connector. I had already trimmed mine prior to this picture so use your imagination.

This second picture shows the two metal tabs. They are different sizes. The new one is too big and needs to be trimmed down.

Wear safety glasses and use proper tools and techniques. Don’t stab yourself with a pocket knife while trying to remove the electrical connector lip. Point is, be safe.
4. Now that you’re new VSV is modified; check to see if the electrical connectors fit. Also check and see if the metal tab on the VSV fits into the firewall bracket you unbolted. Connect up the proper hoses. The vertical hose coming straight out the old VSV is the Vacuum line one. The new VSV Vacuum line is the one on the outside. I hadn't trimmed the metal tab yet, so again, use your imagination. Sorry for the lack of proper pictures.

5. Attach everything and don’t worry about sucking on the tube or switching hoses anymore! I have only just installed this. ***DISCLAIMER: Worst case scenario this VSV may burn out early. Who knows, maybe it’s not supposed to be used for this. I hold no responsibility for you trying this. I tried it and it works but I cannot guarantee for how long. My guess is that everything will be ok but I’m just letting you know, do this at YOUR OWN RISK.***
Keywords: four wheel drive solenoid, VSV, vacuum solenoid valve.

