
Disclaimer: the approach described here is a terrible idea and you'll probably burn your Land Cruiser to the ground.
I (mostly) successfully welded up the roof rack holes on my '94 today. I used C25 gas and .030 MIG welding wire.
Initially, I wanted to pull the headliner down. However, the pre-1995 the headliner is a traditional style: fabric held up by bows. I managed to unhook the rear portion and found that I could 'flip' the bows upside down, but this would still involve some difficult contortions to get to the front row of holes, plus the annoyance of pulling the jute sound deadening out of the way and cleaning the weld area of remaining, fire-prone jute tendrils.
Since my headliner is already in rough condition, I decided to go ahead and live on the edge and weld the roof with the headliner in place. To prevent fires, I sprayed distilled water into the holes to wet down the jute. I started on the rear, passenger side holes, since that part of the headliner fabric was down, and I could keep a close eye on it. I kept a garden hose pressurized and in place nearby in case of a fire.
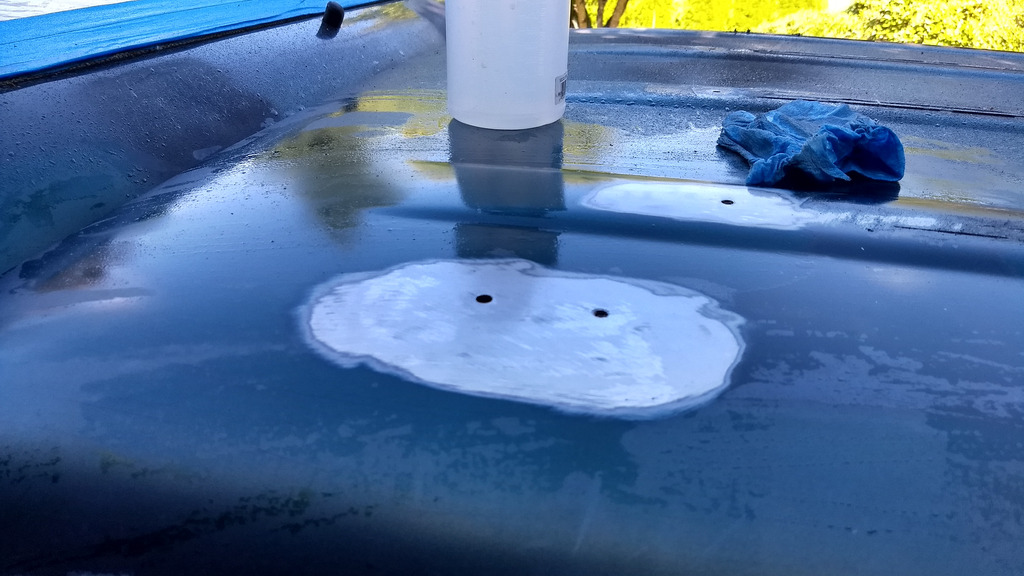
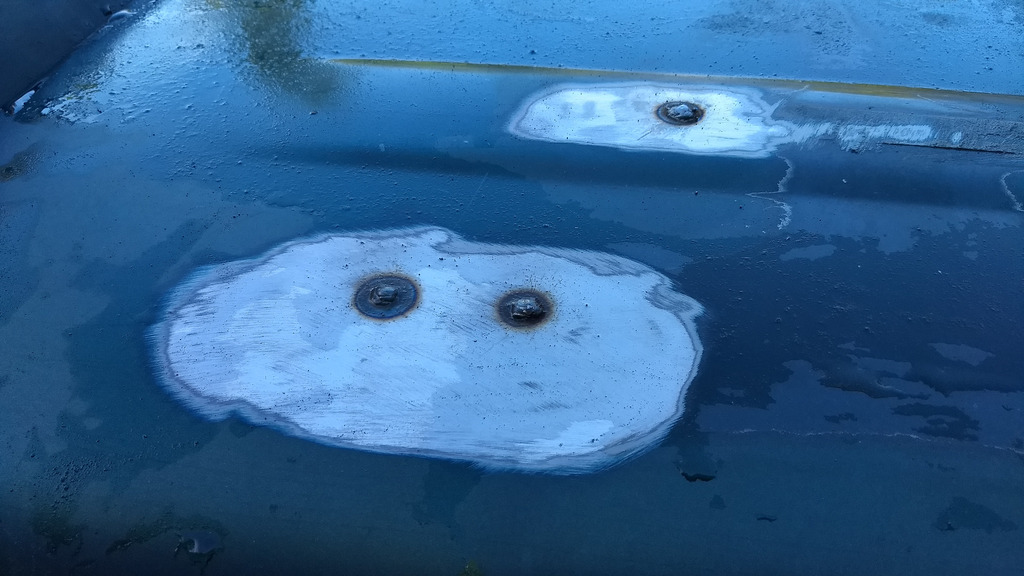
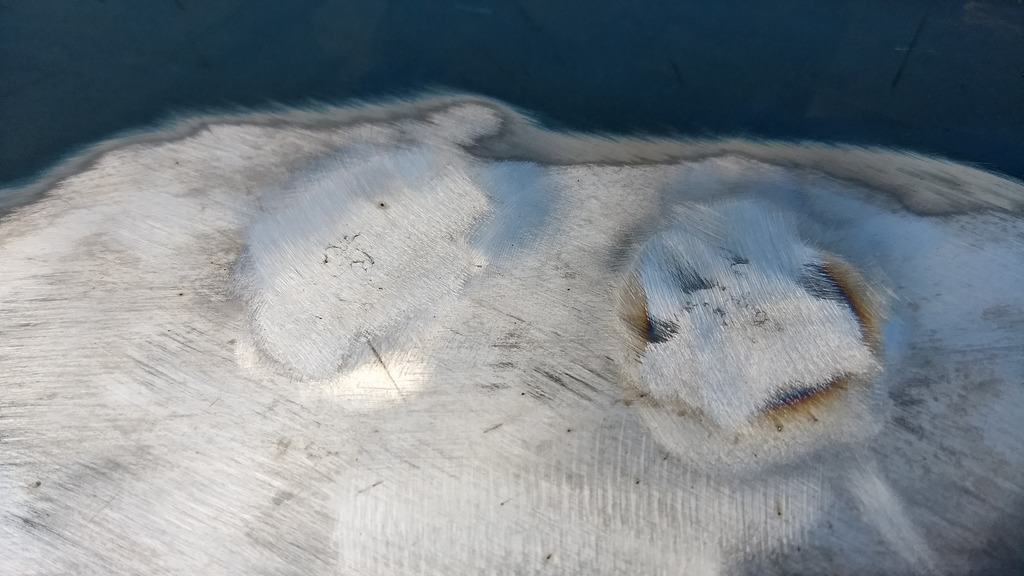
I started out extremely cautious. I sprayed distilled water in from every angle around the clock, trying to saturate any jute that would be hit by spatter. I tried to direct some C25 gas into the hole for a few seconds before each pass. I made one pass at a time, left to right or right to left, then allowed the metal to cool and shooting some more water into it. Once the hole was (mostly) filled, I could make a longer, circular pass to blend everything and eliminate any pinholes. It generally worked best to hit the weld with a brass brush before each pass. I ground the welds down with a 60 grit flap disk.
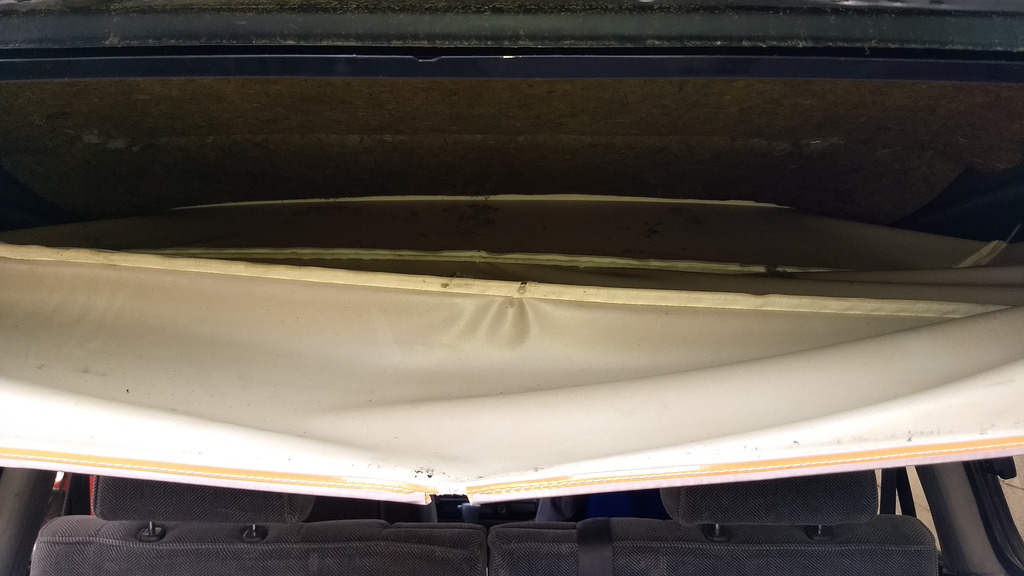
I worked my way counter-clockwise from the rear, passenger side. I got a bit more confident with each hole until I was doing a complete fill without stopping to spray more water. Everything went surprisingly well until the very last pair of holes on the driver's side, rear. I didn't think about the fact that I'd pulled the jute away from the roof. So, there was no water-soaked jute up against the area I'd be welding. This meant that spatter shot freely down onto the headliner fabric, burning some small holes in it. So, if you attempt this method, be sure to leave the jute sound deadening in place while you work.
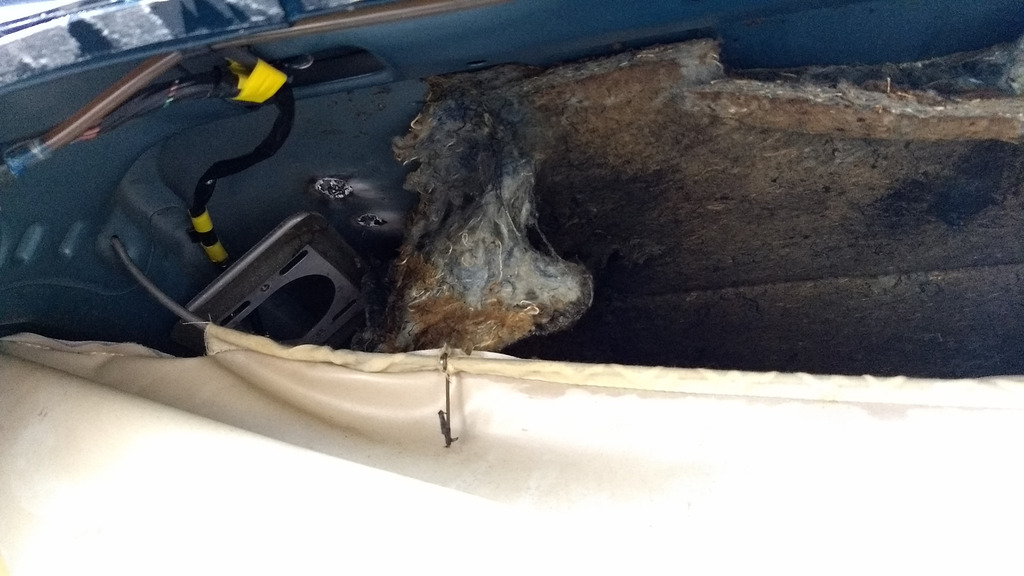
(incidentally, the dark spots on the right hand portion of the jute in that photo aren't burn marks. They're where the jute has soaked through.)
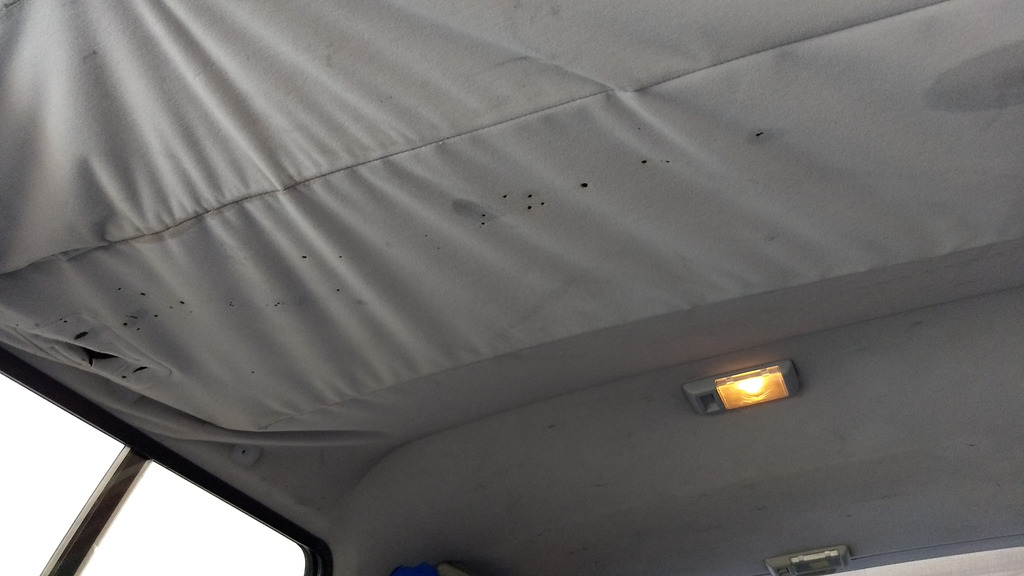
It's not a big deal since, like I said, the headliner was already pretty trashed by the previous owners. All the damage was to the second panel from the back. All the marks in the photo forward of that point are just wear and tear from the previous owners.
I (mostly) successfully welded up the roof rack holes on my '94 today. I used C25 gas and .030 MIG welding wire.
Initially, I wanted to pull the headliner down. However, the pre-1995 the headliner is a traditional style: fabric held up by bows. I managed to unhook the rear portion and found that I could 'flip' the bows upside down, but this would still involve some difficult contortions to get to the front row of holes, plus the annoyance of pulling the jute sound deadening out of the way and cleaning the weld area of remaining, fire-prone jute tendrils.

Since my headliner is already in rough condition, I decided to go ahead and live on the edge and weld the roof with the headliner in place. To prevent fires, I sprayed distilled water into the holes to wet down the jute. I started on the rear, passenger side holes, since that part of the headliner fabric was down, and I could keep a close eye on it. I kept a garden hose pressurized and in place nearby in case of a fire.

I started out extremely cautious. I sprayed distilled water in from every angle around the clock, trying to saturate any jute that would be hit by spatter. I tried to direct some C25 gas into the hole for a few seconds before each pass. I made one pass at a time, left to right or right to left, then allowed the metal to cool and shooting some more water into it. Once the hole was (mostly) filled, I could make a longer, circular pass to blend everything and eliminate any pinholes. It generally worked best to hit the weld with a brass brush before each pass. I ground the welds down with a 60 grit flap disk.


I worked my way counter-clockwise from the rear, passenger side. I got a bit more confident with each hole until I was doing a complete fill without stopping to spray more water. Everything went surprisingly well until the very last pair of holes on the driver's side, rear. I didn't think about the fact that I'd pulled the jute away from the roof. So, there was no water-soaked jute up against the area I'd be welding. This meant that spatter shot freely down onto the headliner fabric, burning some small holes in it. So, if you attempt this method, be sure to leave the jute sound deadening in place while you work.

(incidentally, the dark spots on the right hand portion of the jute in that photo aren't burn marks. They're where the jute has soaked through.)

It's not a big deal since, like I said, the headliner was already pretty trashed by the previous owners. All the damage was to the second panel from the back. All the marks in the photo forward of that point are just wear and tear from the previous owners.