- Joined
- Aug 15, 2005
- Threads
- 776
- Messages
- 5,125
Have installed a lot of short puck style lifts in the past when I would help my buddy out at his 4x4 shop so I know a few tricks and ways to make the install easier. The instruction say to allow for to five hours...more like 12 hours. It might take 4 hours with two experienced mechanics who do this type of install every day AND have access to a complete automotive machine and equipment shop. I'm well equips in my garage but I'm no shop and I'm not two people and the instructions for this kid are severely lacking in points to make the installation easier.
I was going to have a buddy that works at a Toyota dealership install the spacers with their coil compressor, but decided to get some of those claw manual compressors that can be rented at part stores. First thing the instructions need to address, the stock coils need to be compressed before removing mostly in the front, but also needed for reinstalling both in the front and rear. I removed the sway bar and loosened up everything to allow for more room and more movement in the suspension, but I wasn't willing to over extend the suspension and risk damaging , tearing, or separating the axles or boots. So to lesson damaging something removing the front stock springs, they need to be compressed. The instructions say they will just some out. I have no idea how the instructions do not mention this or how about the fact that the springs need to remain compressed (exactly 3 inches more so they are the same length they were when removed) to reinstall them after the pucks are added. No way would the springs fit back in place with the the longer length.
Secondly, little things like using a bottle jack between the rear axle and frame to push the axle down helps with removing the rear springs. No mention of that. The instructions say to disconnect the shocks and allow the axle to drop equally and remove the spring. Sorry not going to happen unless one side is compressed and the other is at the bottom of the travel from the bottle jack and even then, those dangerous spring compressors are needed to reinstall the springs after the lift bushing is installed of they were able to be removed without compression in the first
I realize this isn't like doing suspension work on my FJ40 and there is more thought put into coil suspensions but for a 3" lift, it was a giant pain in my butt and half of the time was spent cranking on the coil compressors with a wrench because my manifold on my compressor's manifold cracked so I couldn't use my impact gun. I would have been pissed if I somehow got the front coils out without compressing them and paid a dealership to install the lift pucks and find out when I got home that they were not going to fit unless they remained compressed. The directions stated to take them to a qualified repair shop to have the springs done and should have been more clear about what to do after they were compressed. I realize the instructions were probably written this way for legal reasons, but mention of how to reinstall them would have helped. I really don't know how some people install these things when they have no prior knowledge on how to do them or only have basic tools. It must be a nightmare for them.
Oh did I mention that the kit did not include extensions for both the diff skid plates. There were spacers to lower the dif and spacers for the rear diff skid plate but not for the front. I need to make my own for the skid to fit properly.
My over all experience:
Installation instructions: 3/10 (for gross underestimation of time and lack of helping hints)
Parts: 8/10 (would be higher if the front skid was taken into account)
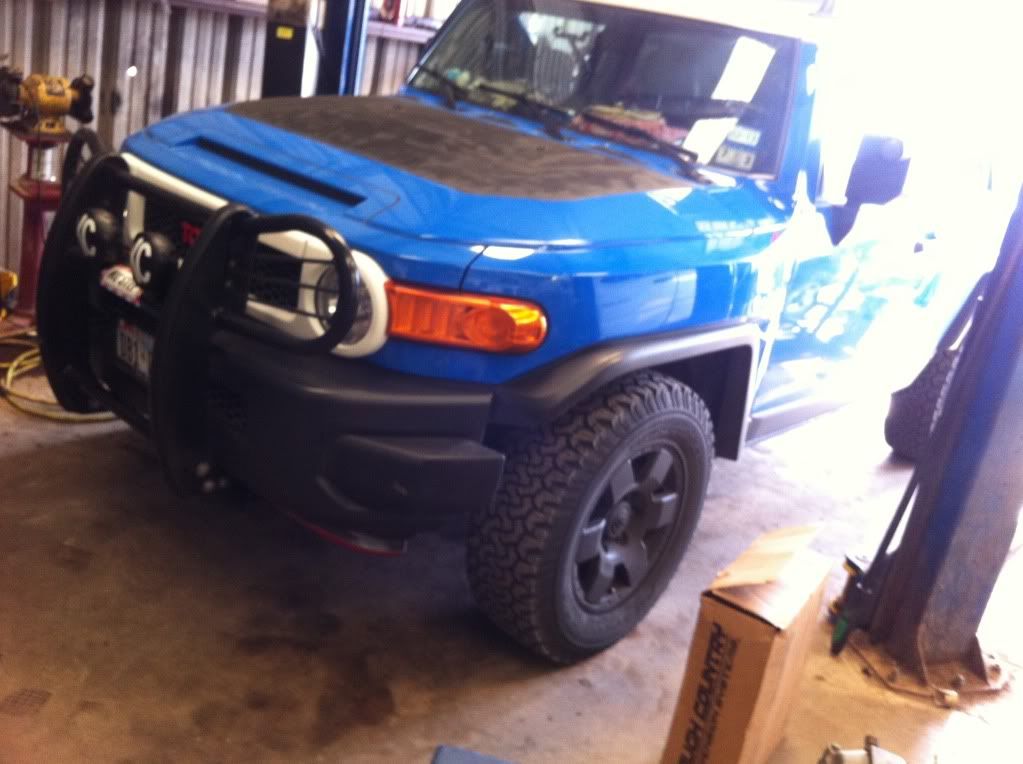
Conclusion: 9/10 for small lift. I gained 3" of ground clearance and improved my approach angles for my expo and DD
My brand new 33s look small. Looks like 34s and a smaller offset wheel or spacers will be needed in the future.
Sent from my iPad using IH8MUD
I was going to have a buddy that works at a Toyota dealership install the spacers with their coil compressor, but decided to get some of those claw manual compressors that can be rented at part stores. First thing the instructions need to address, the stock coils need to be compressed before removing mostly in the front, but also needed for reinstalling both in the front and rear. I removed the sway bar and loosened up everything to allow for more room and more movement in the suspension, but I wasn't willing to over extend the suspension and risk damaging , tearing, or separating the axles or boots. So to lesson damaging something removing the front stock springs, they need to be compressed. The instructions say they will just some out. I have no idea how the instructions do not mention this or how about the fact that the springs need to remain compressed (exactly 3 inches more so they are the same length they were when removed) to reinstall them after the pucks are added. No way would the springs fit back in place with the the longer length.
Secondly, little things like using a bottle jack between the rear axle and frame to push the axle down helps with removing the rear springs. No mention of that. The instructions say to disconnect the shocks and allow the axle to drop equally and remove the spring. Sorry not going to happen unless one side is compressed and the other is at the bottom of the travel from the bottle jack and even then, those dangerous spring compressors are needed to reinstall the springs after the lift bushing is installed of they were able to be removed without compression in the first
I realize this isn't like doing suspension work on my FJ40 and there is more thought put into coil suspensions but for a 3" lift, it was a giant pain in my butt and half of the time was spent cranking on the coil compressors with a wrench because my manifold on my compressor's manifold cracked so I couldn't use my impact gun. I would have been pissed if I somehow got the front coils out without compressing them and paid a dealership to install the lift pucks and find out when I got home that they were not going to fit unless they remained compressed. The directions stated to take them to a qualified repair shop to have the springs done and should have been more clear about what to do after they were compressed. I realize the instructions were probably written this way for legal reasons, but mention of how to reinstall them would have helped. I really don't know how some people install these things when they have no prior knowledge on how to do them or only have basic tools. It must be a nightmare for them.
Oh did I mention that the kit did not include extensions for both the diff skid plates. There were spacers to lower the dif and spacers for the rear diff skid plate but not for the front. I need to make my own for the skid to fit properly.
My over all experience:
Installation instructions: 3/10 (for gross underestimation of time and lack of helping hints)
Parts: 8/10 (would be higher if the front skid was taken into account)
Conclusion: 9/10 for small lift. I gained 3" of ground clearance and improved my approach angles for my expo and DD
My brand new 33s look small. Looks like 34s and a smaller offset wheel or spacers will be needed in the future.
Sent from my iPad using IH8MUD