
I made this thread over on fjcruiserforums for members. I thought I would pass it on to members over here also. I hope it helps.
Historic Background For Doing This MOD
Toyota has moved the front differential and transfer case breathers up high in the engine bay already for you, but neglected to move the rear differential breather or E-Locker breather. Those of you that cross water a lot may want to check your rear differential fluid from time to time if you haven’t relocated the rear differential or e-locker breather. I decided to relocate the rear breather up high too, I would normally run all breathers inside the vehicle, but since the front is already in the engine bay. I decided to run the rear differential & Locker there too.
"IF YOU DON'T TRAVEL IN HIGH WATER, YOU DO NOT HAVE TO DO THIS MOD"
http://video.google.com/videoplay?docid=8973547597847260935&q=toyota+truck&hl=en
This is a Good Video explaining why you need to relocate your breathers.
To do my way of the Filter location in the engine bay you will need the following items:
Need to Purchase
1. 15’ of ¼” Fuel line. (Shop around, I paid .85 cents a foot, I have seen it for 1.85 a foot)
2. You will need to order a Toyota Camry Fuel Line Union Part # 90404-51026 ($3.50)
3. You will need to buy (3) small ¼ inch Hose clamps
4. You will need some plastic Zip Tie’s for securing the hose from the rear to the engine bay.
5. You will need a small piece of 16ga steel (This can be purchased from Lowe’s or Home Depot)
6. Rustolem Flat Black paint (If you don’t have any, Check with Dragon I’m sure he has plenty lying around. He's the undisputed “Rattle Can King”. J/K
7. You will need to buy a small 1/4" x 1/4" x 1/8" “T” for tying in the E-Locker hose to the Rear Differential Hose. This can be purchased at any Automotive store for under a dollar.
Tools Needed
1. You will need a standard screw driver (for Hose clamps)
2. You will need a Dremel Tool with Cut-off wheels or a Hand held Grinder with cut-off wheel.
3. Knife to cut the fuel hose to length
4. Your going to need some sand paper and metal file to smooth out the edges of the bracket.
The Following are some pictures of the items as listed above.

This is a 1/4" x 1/4" x 1/8” “T” You can pick these up at any Automotive store for under $1.00

Here is a picture of the Toyota Camry “Union” part number # 90404-51026
I found a nice small air breather from AutoZone, $9.95 It’s made by “Spectre” Part number 3992, they come in different colors, Silver, Blue, Red, Yellow,etc. The following are pictures of the small colored Filters, they are very similar to a K&N filter. I used a little oil on mine to keep it water proof too.
I went ahead and did the leg work for everyone for the small colored breathers.
Here is the following part numbers for the colored filters
Specter Part number # 3992 Red Breather

Specter Part number # 3994 Yellow Breather

Specter Part number # 3995 Silver Breather

Specter Part number # 3996 Blue Breather

Specter Part number # 3998 White Breather
Here is the web site : [URL="http://spectreperformance.com/#CATALOG.3992"]Spectre Performance - Official Site[/URL]
You can also find them in your local automotive store too.

I decided to stay with the TRD theme, (Red). I also purchased 20 feet of ¼ fuel line for running the hose to the engine bay. I shopped around a bit for it, Pep Boys wanted $1.85 a foot, I found it at O’Reillys for .85 cents a foot.
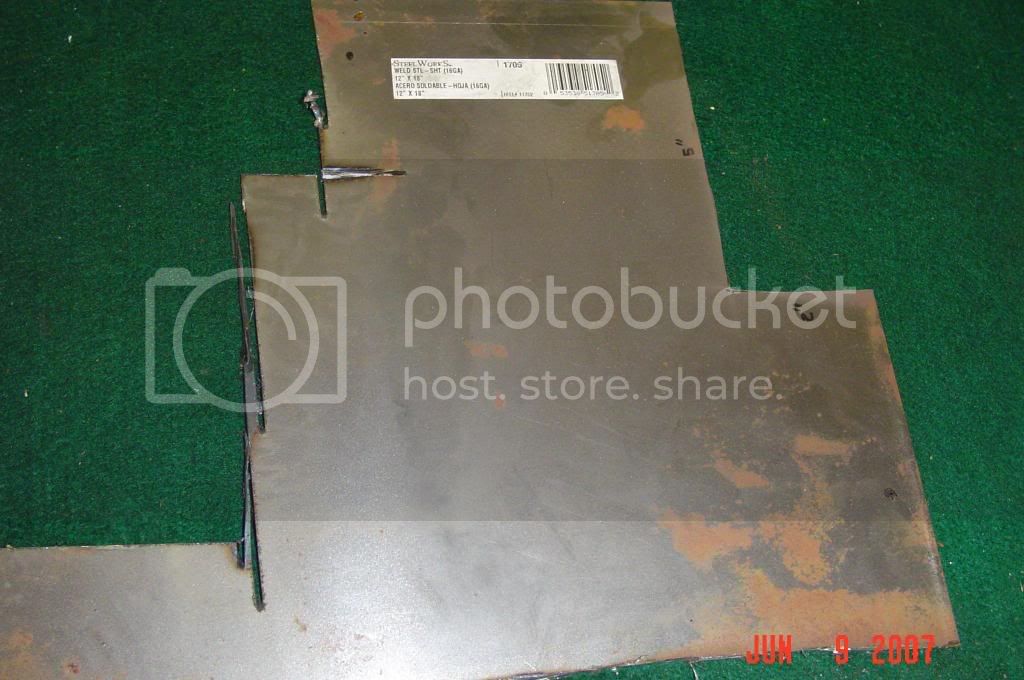
I had some 16ga steel left some from my CB mount MOD and Fuse box MOD, so I used this material for making my breather bracket. You can purchase this at Lowe’s or Home Depot for under $10.00 I decided along the drivers side close to the firewall for the breather location.

I measured a 2” wide, 5” long would be just right for the bracket. I also decided to make one end round. I used my dremmel tool with cut-off wheel to cut the shape out; you can use a handheld grinder, etc. I then drilled out a ¾ inch hole for the filter. I then bent the bracket 2.5 inches back from the top of the bracket. My wife had the camera so, I couldn’t take any pics of the bracket at this stage.

I then sprayed the bracket with gray primer, then a coat of flat black.

I bought a self tapping metal screw with lock washer for attachment to the firewall.

I attached the breather to the bracket, then the hose to the breather, then ran the hose along the bottom under the vehicle.


I attached the hose with tie wraps along the frame.

In this pic you can see I left a good portion of the hose and then cut it off, tie wrapping it to the cross bar. Please don not cut the hose off to short, you want to leave enough room for your rear axel to be able to articulate without pulling out the hose from the Union.

The new Union installed.

This is a pic of the existing E-Locker location, This is what we are going to remove and install the “T” to. You need to cut about 3-4 inches from the locker hose breather end off. See the "CUT Line in the above pic. Then push the "T" into the small locker hose. I then used (2) small ties wraps for securing it, hose clamps are to small.

The newly installed "T" run from the Rear Differential Hose & E-Locker then into the Main hose which runs all the way to the engine bay.

Finished Rear Differential & E-Locker Breather location in the engine bay.
The new relocated rear differential & locker breather completely installed and ready for some SCUBA Driving . I hope this will help others that do any kind of water crossings.
Breather Cost $9.95
Fuel Line Cost $15.00
Hardware Cost $ 1.50
“T” Cost $.50
Leftover Metal $ Free
Union Cost $3.75
Knowing that water can’t get in and damage your rear differential; Priceless
So, for under $30.00 I have the piece of mind of no contamination to the Rear Differential & E-Locker and it looks good too
Good luck to all you SCUBA Drivers out there.
SCUBA Drivers Unite!
I made this LOGO for all of you SCUBA Drivers when you complete this MOD, show yourself!

Historic Background For Doing This MOD
Toyota has moved the front differential and transfer case breathers up high in the engine bay already for you, but neglected to move the rear differential breather or E-Locker breather. Those of you that cross water a lot may want to check your rear differential fluid from time to time if you haven’t relocated the rear differential or e-locker breather. I decided to relocate the rear breather up high too, I would normally run all breathers inside the vehicle, but since the front is already in the engine bay. I decided to run the rear differential & Locker there too.
"IF YOU DON'T TRAVEL IN HIGH WATER, YOU DO NOT HAVE TO DO THIS MOD"
http://video.google.com/videoplay?docid=8973547597847260935&q=toyota+truck&hl=en
This is a Good Video explaining why you need to relocate your breathers.
To do my way of the Filter location in the engine bay you will need the following items:
Need to Purchase
1. 15’ of ¼” Fuel line. (Shop around, I paid .85 cents a foot, I have seen it for 1.85 a foot)
2. You will need to order a Toyota Camry Fuel Line Union Part # 90404-51026 ($3.50)
3. You will need to buy (3) small ¼ inch Hose clamps
4. You will need some plastic Zip Tie’s for securing the hose from the rear to the engine bay.
5. You will need a small piece of 16ga steel (This can be purchased from Lowe’s or Home Depot)
6. Rustolem Flat Black paint (If you don’t have any, Check with Dragon I’m sure he has plenty lying around. He's the undisputed “Rattle Can King”. J/K
7. You will need to buy a small 1/4" x 1/4" x 1/8" “T” for tying in the E-Locker hose to the Rear Differential Hose. This can be purchased at any Automotive store for under a dollar.
Tools Needed
1. You will need a standard screw driver (for Hose clamps)
2. You will need a Dremel Tool with Cut-off wheels or a Hand held Grinder with cut-off wheel.
3. Knife to cut the fuel hose to length
4. Your going to need some sand paper and metal file to smooth out the edges of the bracket.
The Following are some pictures of the items as listed above.
This is a 1/4" x 1/4" x 1/8” “T” You can pick these up at any Automotive store for under $1.00
Here is a picture of the Toyota Camry “Union” part number # 90404-51026
I found a nice small air breather from AutoZone, $9.95 It’s made by “Spectre” Part number 3992, they come in different colors, Silver, Blue, Red, Yellow,etc. The following are pictures of the small colored Filters, they are very similar to a K&N filter. I used a little oil on mine to keep it water proof too.
I went ahead and did the leg work for everyone for the small colored breathers.
Here is the following part numbers for the colored filters
Specter Part number # 3992 Red Breather
Specter Part number # 3994 Yellow Breather
Specter Part number # 3995 Silver Breather
Specter Part number # 3996 Blue Breather
Specter Part number # 3998 White Breather
Here is the web site : [URL="http://spectreperformance.com/#CATALOG.3992"]Spectre Performance - Official Site[/URL]
You can also find them in your local automotive store too.
I decided to stay with the TRD theme, (Red). I also purchased 20 feet of ¼ fuel line for running the hose to the engine bay. I shopped around a bit for it, Pep Boys wanted $1.85 a foot, I found it at O’Reillys for .85 cents a foot.
I had some 16ga steel left some from my CB mount MOD and Fuse box MOD, so I used this material for making my breather bracket. You can purchase this at Lowe’s or Home Depot for under $10.00 I decided along the drivers side close to the firewall for the breather location.
I measured a 2” wide, 5” long would be just right for the bracket. I also decided to make one end round. I used my dremmel tool with cut-off wheel to cut the shape out; you can use a handheld grinder, etc. I then drilled out a ¾ inch hole for the filter. I then bent the bracket 2.5 inches back from the top of the bracket. My wife had the camera so, I couldn’t take any pics of the bracket at this stage.
I then sprayed the bracket with gray primer, then a coat of flat black.
I bought a self tapping metal screw with lock washer for attachment to the firewall.
I attached the breather to the bracket, then the hose to the breather, then ran the hose along the bottom under the vehicle.
I attached the hose with tie wraps along the frame.
In this pic you can see I left a good portion of the hose and then cut it off, tie wrapping it to the cross bar. Please don not cut the hose off to short, you want to leave enough room for your rear axel to be able to articulate without pulling out the hose from the Union.
The new Union installed.
This is a pic of the existing E-Locker location, This is what we are going to remove and install the “T” to. You need to cut about 3-4 inches from the locker hose breather end off. See the "CUT Line in the above pic. Then push the "T" into the small locker hose. I then used (2) small ties wraps for securing it, hose clamps are to small.
The newly installed "T" run from the Rear Differential Hose & E-Locker then into the Main hose which runs all the way to the engine bay.
Finished Rear Differential & E-Locker Breather location in the engine bay.
The new relocated rear differential & locker breather completely installed and ready for some SCUBA Driving . I hope this will help others that do any kind of water crossings.
Breather Cost $9.95
Fuel Line Cost $15.00
Hardware Cost $ 1.50
“T” Cost $.50
Leftover Metal $ Free
Union Cost $3.75
Knowing that water can’t get in and damage your rear differential; Priceless
So, for under $30.00 I have the piece of mind of no contamination to the Rear Differential & E-Locker and it looks good too
Good luck to all you SCUBA Drivers out there.
SCUBA Drivers Unite!
I made this LOGO for all of you SCUBA Drivers when you complete this MOD, show yourself!
Last edited:


