Removing the heater under passenger seat and the radiator lines that run to it...can I cap? (1 Viewer)

This site may earn a commission from merchant affiliate
links, including eBay, Amazon, Skimlinks, and others.

Joined
Sep 17, 2021
Threads
34
Messages
178
Location
San Diego, CA
Website
worldseasonings.com
I am putting in a new carpet kit and have been thinking to completely remove the heater under the passenger seat. I don't know if if it works, or how to work it to be honest.

I removed it, drained my radiator fluid and now want to keep it out to use the space under my seat for some audio amps.
Can I cap both those lines? Or, do I need to loop them into one another? If looped - the hose I have gets a crimp in it and I'm worried it won't allow proper flow. Has anyone done this? (I'm sure many have.) If so, any suggestions for a good fix for it?

Also, how do you run that heater? Or, how can I see if it's even working?

Thanks - Travis
 
You don’t want to loop the rear heater line otherwise it’s always circulating coolant more quickly out of the rear of the head and injecting it directly into the water pump.
Under the truck you can join the two coolant pipe ends together that end near the hole in the floor with a short piece of coolant hose that will kink when connecting to both pipes. That will stop the flow.
If the little hose piece doesn’t quite kink close, a band clamp can be gently constricted around the hose to encourage the kink.
I had my rear heater disabled like that for 28 years & 250K miles. No problem.
Thanks! So I WANT to kink it. Stop the flow. What if I just capped both pipes under the truck? Would that do that same thing?
 
Yes caps are more elegant. I didn’t have caps so just stopped it using the ghetto method.
Just be really sure that the caps can’t blow off when under pressure (15 psi) when the cooling system pressurizes
 
Or do away with all the rear heater plumbing completely.

Before:
2DAE06D9-49E1-42DF-B1F1-5B01B65B141D.jpeg


After
2BAE8060-1F5C-4A4C-B9C9-2CCF186B40CC.jpeg
47078B54-6BC5-47E8-97AD-F1504A0476E7.jpeg
 
On my 4runner those pipes rusted out underneath which is a major point of failure, the thing ran out of coolant and overheated. I cut the pipes in the engine bay and crimped them shut and welded them up to seal. I will do the same on the 60 but they aren't as rusted out.
 
Also, how do you run that heater? Or, how can I see if it's even working?

Thanks - Travis
On a 62 there is a center console switch that has a high and low setting. Press it in one direction or the other and put a hand back there to hear/feel if it's working.
 
On my 4runner those pipes rusted out underneath which is a major point of failure, the thing ran out of coolant and overheated. I cut the pipes in the engine bay and crimped them shut and welded them up to seal. I will do the same on the 60 but they aren't as rusted out.
Good call. I capped them under the truck but would prefer to do in the motor bay.
 
Or do away with all the rear heater plumbing completely.

Before:
View attachment 3033111

After
View attachment 3033113View attachment 3033112
Like OSS shows, some FJ60 came without a rear heater, so you can switch to that configuration. Pipe 87249C and hose 87256C are replaced with hose 87246A and Joint 87205 and Hose 87255A are replaced with Joint 87205.

@ToyotaMatt has the correct Joint to do this. You may have to find a comparable hose to 87246A at your auto parts store. Please note that I think the diagram below is misleading (wrong?) where it shows the heater valve connecting to the firewall connections to the main heater core. I think the heater valve connects to the top port and the return piping to the bottom port. Please reference the pictures from OSS.

1655212888821.png
 
I am putting in a new carpet kit and have been thinking to completely remove the heater under the passenger seat. I don't know if if it works, or how to work it to be honest.

I removed it, drained my radiator fluid and now want to keep it out to use the space under my seat for some audio amps.
Can I cap both those lines? Or, do I need to loop them into one another? If looped - the hose I have gets a crimp in it and I'm worried it won't allow proper flow. Has anyone done this? (I'm sure many have.) If so, any suggestions for a good fix for it?

Also, how do you run that heater? Or, how can I see if it's even working?

Thanks - Travis
Yes caps are more elegant. I didn’t have caps so just stopped it using the ghetto method.
Just be really sure that the caps can’t blow off when under pressure (15 psi) when the cooling system pressurizes
Like OSS shows, some FJ60 came without a rear heater, so you can switch to that configuration. Pipe 87249C and hose 87256C are replaced with hose 87246A and Joint 87205 and Hose 87255A are replaced with Joint 87205.

@ToyotaMatt has the correct Joint to do this. You may have to find a comparable hose to 87246A at your auto parts store. Please note that I think the diagram below is misleading (wrong?) where it shows the heater valve connecting to the firewall connections to the main heater core. I think the heater valve connects to the top port and the return piping to the bottom port. Please reference the pictures from OSS.

View attachment 3033842
On my 4runner those pipes rusted out underneath which is a major point of failure, the thing ran out of coolant and overheated. I cut the pipes in the engine bay and crimped them shut and welded them up to seal. I will do the same on the 60 but they aren't as rusted out.


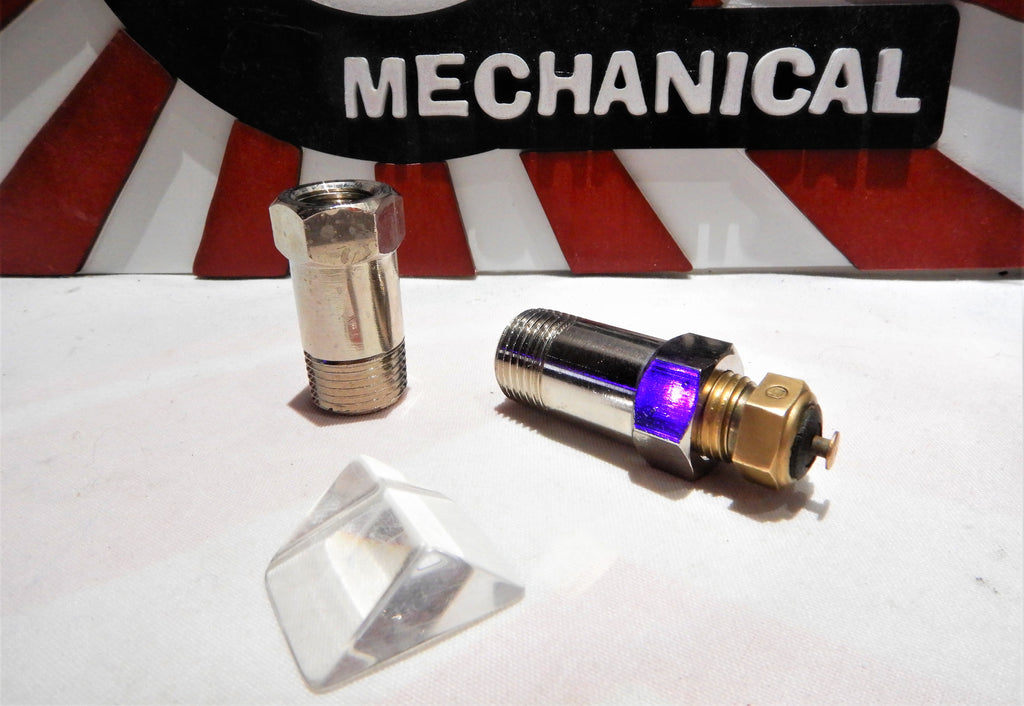
- The below are all OEM Toyota JOINTS Call-OUT #87205 above W/O Rear Heater option .....


- Also Below are : " UNIONs " or Male Threaded NUTs w/ FEMALE Threads also to accept OEM Coolant Temp. Sensers , Sensors , and Switches .......


- First 2 are
UNIONS .........FYI


- NOTE : if anyone wonders why TOYOTA calls them UNIONS , it's because there job or purpose in TEq Life is to UNITE 2 things mechanically together kinda like a civil union where two people band together for a greater purpose ......

- typically metal or plastic fastener threads are Involved only regarding UNIONS but NOT all the time , there are some TOYOTA exceptions to this rule of JDM thumb i have come across in my JIS travels


- a JOINT however , JOINS two or MORE parts together via a 3rd party " THING " or Device such a OEM Double Wire Type hose clamp , It's kinda like a

Land Cruiser TOWING Option ,. the Class III Receiver and Ball or Hitch is the UNION there .....


1655283872130.png


1655283895351.png


SEE Call OUT Letter K below :

1655283929017.png


1655283993932.png


1655284010610.png


1655284051215.png


1655284078356.png


Below are Threaded JOINTS for LAND CRUISER Cylinder Heads for cooling systems and for HEATERS or BOTH in Tandem

JOINED together meshed in mechanical JDM / JIS harmony via a hose clip or clamp of various types .....


1655284547005.png


1655284612308.png


1655284654352.png
 
1655284739996.png


1655284728217.png


1655284772383.png


1655284799061.png


1655284817739.png


Related : Engine BLOCK DRAINS


1655284914670.png


1655284928697.png


1655284980420.png


1655284993385.png


1655285007049.png


Here is how I did it...simple and good decision. In Texas, we just dont need more heat than the dash can put out during the coldest winter days. Did it at the same time I was replacing my carpet. I gained space under my seat and removed more points of failure.


Users who are viewing this thread

Back
Top Bottom