
great. ill do that! it’s nice to have some confirmation that what i have is good. i have a tendency to over think things and as i’m not experienced with this job i just don’t want to miss something that could lead to a major problem. i can do the work easily. it’s just recognizing when something subtle isn’t right but could be a big issue that i worry about.
Navigation
Install the app
How to install the app on iOS
Follow along with the video below to see how to install our site as a web app on your home screen.
Note: This feature may not be available in some browsers.
More options
You are using an out of date browser. It may not display this or other websites correctly.
You should upgrade or use an alternative browser.
You should upgrade or use an alternative browser.
Official 1HD-T 1HD-FT 1HD-FTE and 1HZ BEB thread (2 Viewers)
- Thread starter Greg_B
- Start date
This site may earn a commission from merchant affiliate
links, including eBay, Amazon, Skimlinks, and others.
More options
Who Replied?Anyone identify a thread which details the BEB replacement from start to finish with all pics, videos or details as if I'm a 5 year old? Some threads are missing pics so its hard to follow. I don't want to miss any critical steps and end up with catastrophic damage.
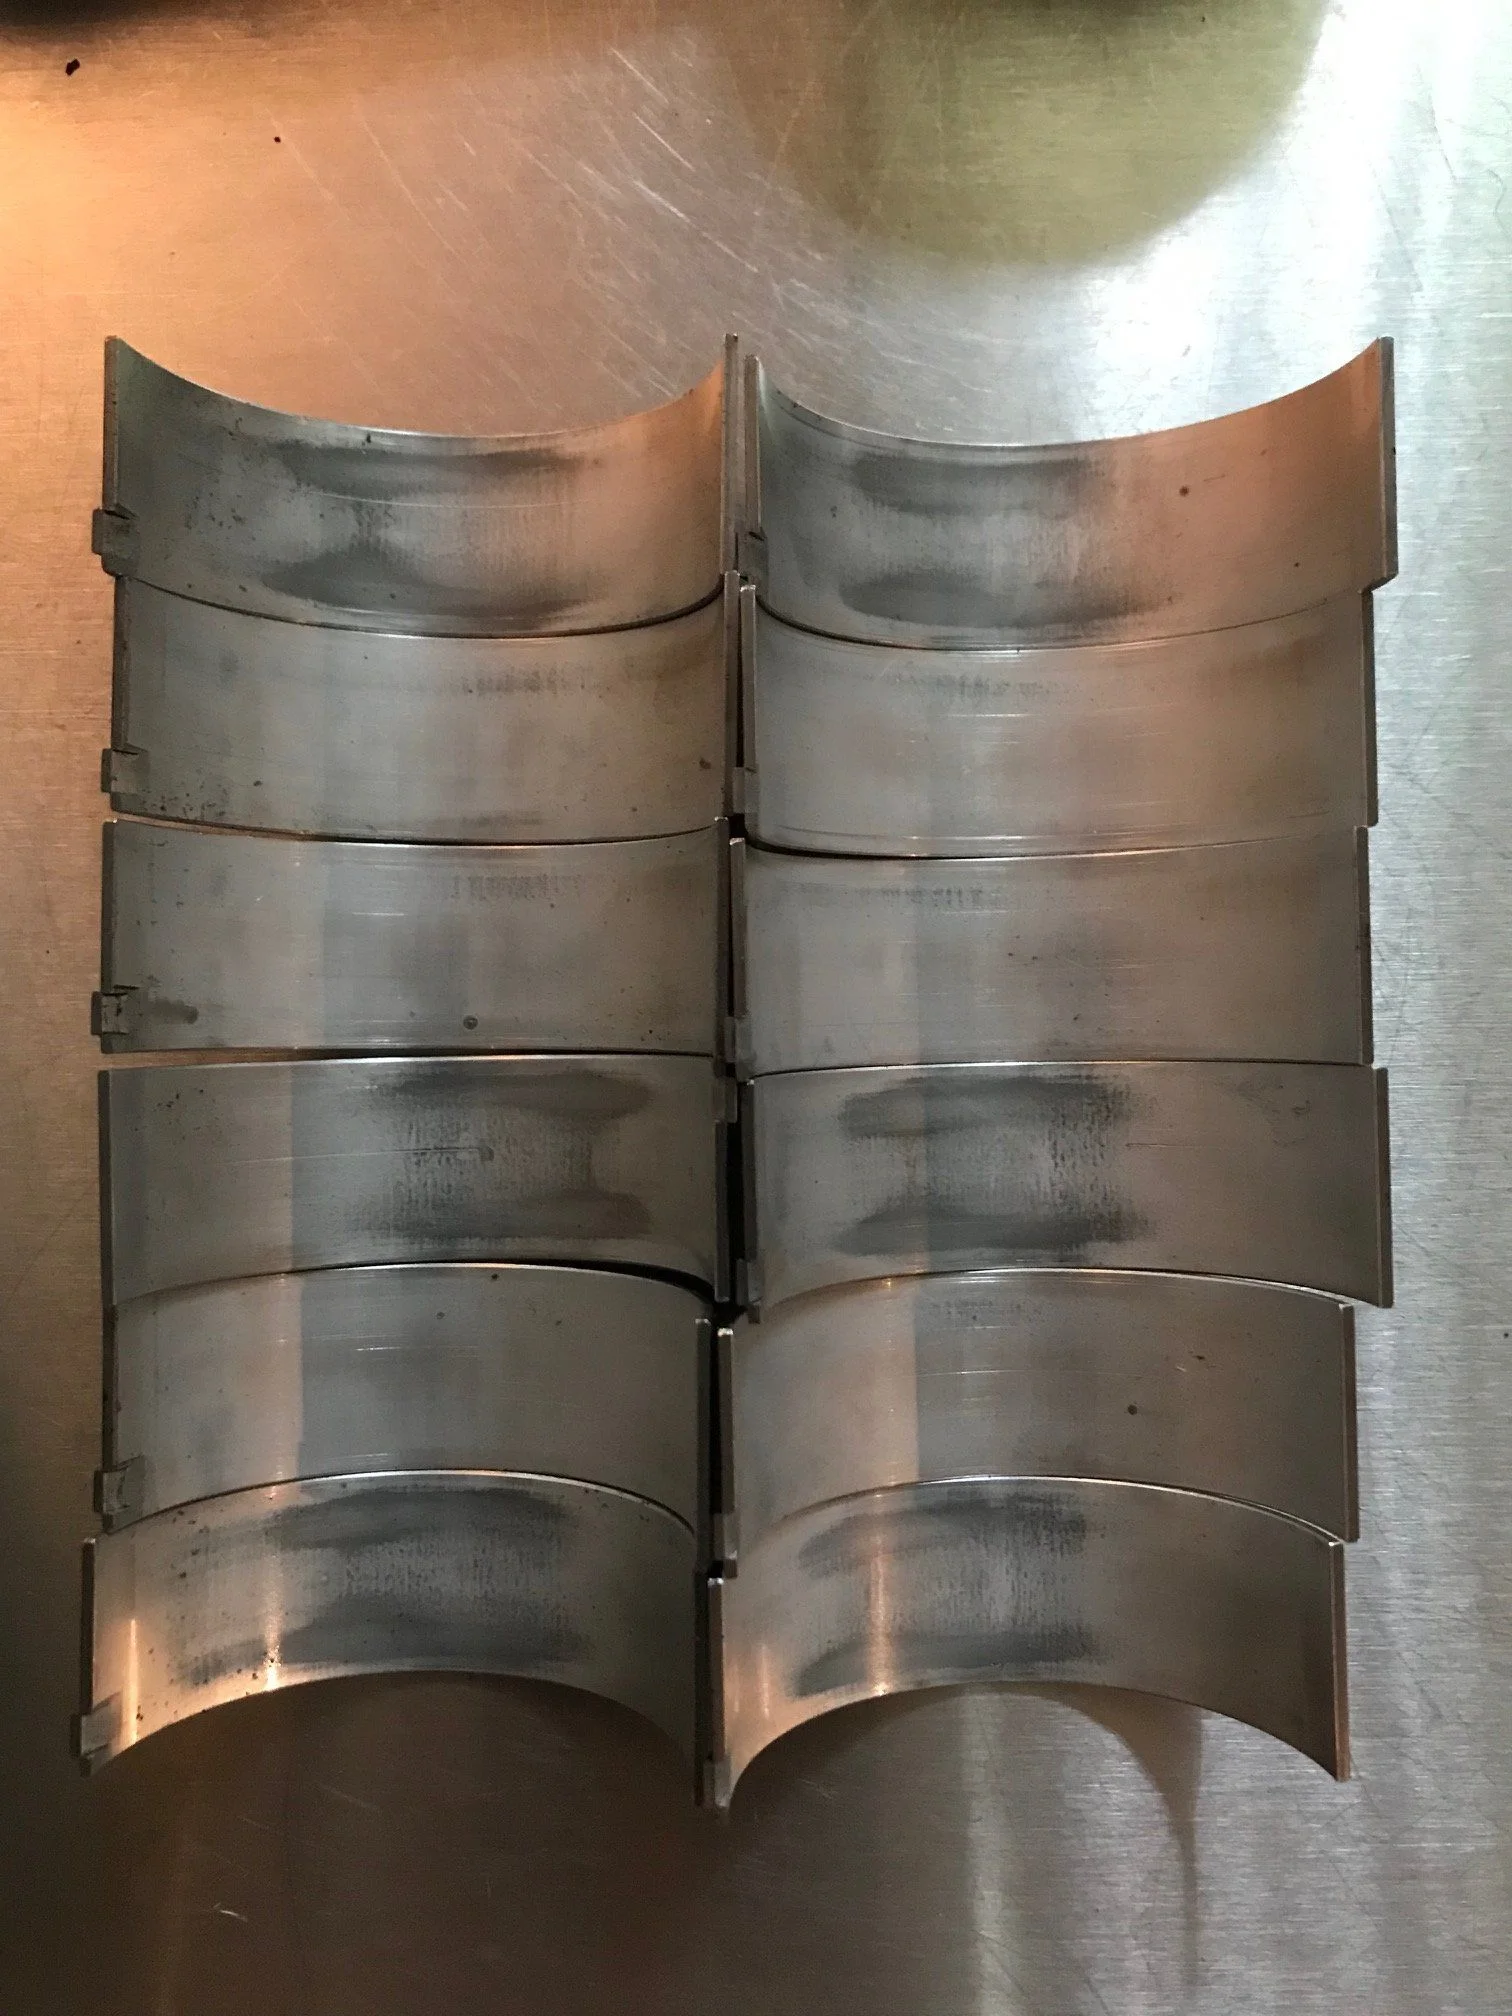
1992 1HD-T original BEB's at 279K kilometers. Too bad but they got mixed up after replacement so unfortunately they are not in order. I will try to post the block # later.
Disclaimer: I am an amateur at best. I have been working on vehicles since I was a kid but this is my first bearing change. I did this on my back in the drive way in southern AZ over a couple days due to the heat.Anyone identify a thread which details the BEB replacement from start to finish with all pics, videos or details as if I'm a 5 year old? Some threads are missing pics so its hard to follow. I don't want to miss any critical steps and end up with catastrophic damage.
Tools needed:
Jack stands: taller the better
Oil mat(optional)
Oil pan seal cutter: worth the money for the time saved. Google “pan seal cutter” I paid $25 on amazon for the JTC brand but you can get it cheaper from eBay.
10mm socket: oil pan bolts and coolant line holder bolt
17mm socket: tranny stabilizing braces bolts
12mm 12point socket: bearing case bolts and protection plate bolts
32mm socket: crank bolt to rotate the crank
Breaker bar
Socket extensions.
Torque wrench.
Bearings: I used TAIHO standard bearings(Taih std R707A 18F08AI) will use ACL on my other cruiser shortly.
Conrod bolts x 12: part number 13265-17010 I got mine on Amayama.com
FIPG: Toyota FIPG or Permatex Ultra Black (Toyota didn’t have any in stock so I went with the ultra black)
Plastigage: green strips (got mine on amazon) .001-.003 inch clearance range.
Gasket scraper and or wire brush
Brake Cleaner or similar cleaner.
Rags and lint free towels.
Assembly Lube(optional): I used Lucas oil assembly lube on the bearings.
Oil based paint pen.
- Chock the cruiser and put the tranny in nuetral.
- Lift the cruiser mid frame and put the jack stands under the steering arms. You want as much room as you can get between the engine and the axle/steering arms etc.
- Drain the oil. I let it drip for over an hour to get as much out as I could. Remove the dip stick, wrap it in a towel and set it aside. Plug the dip stick hole if your worried about dust and dirt getting in.
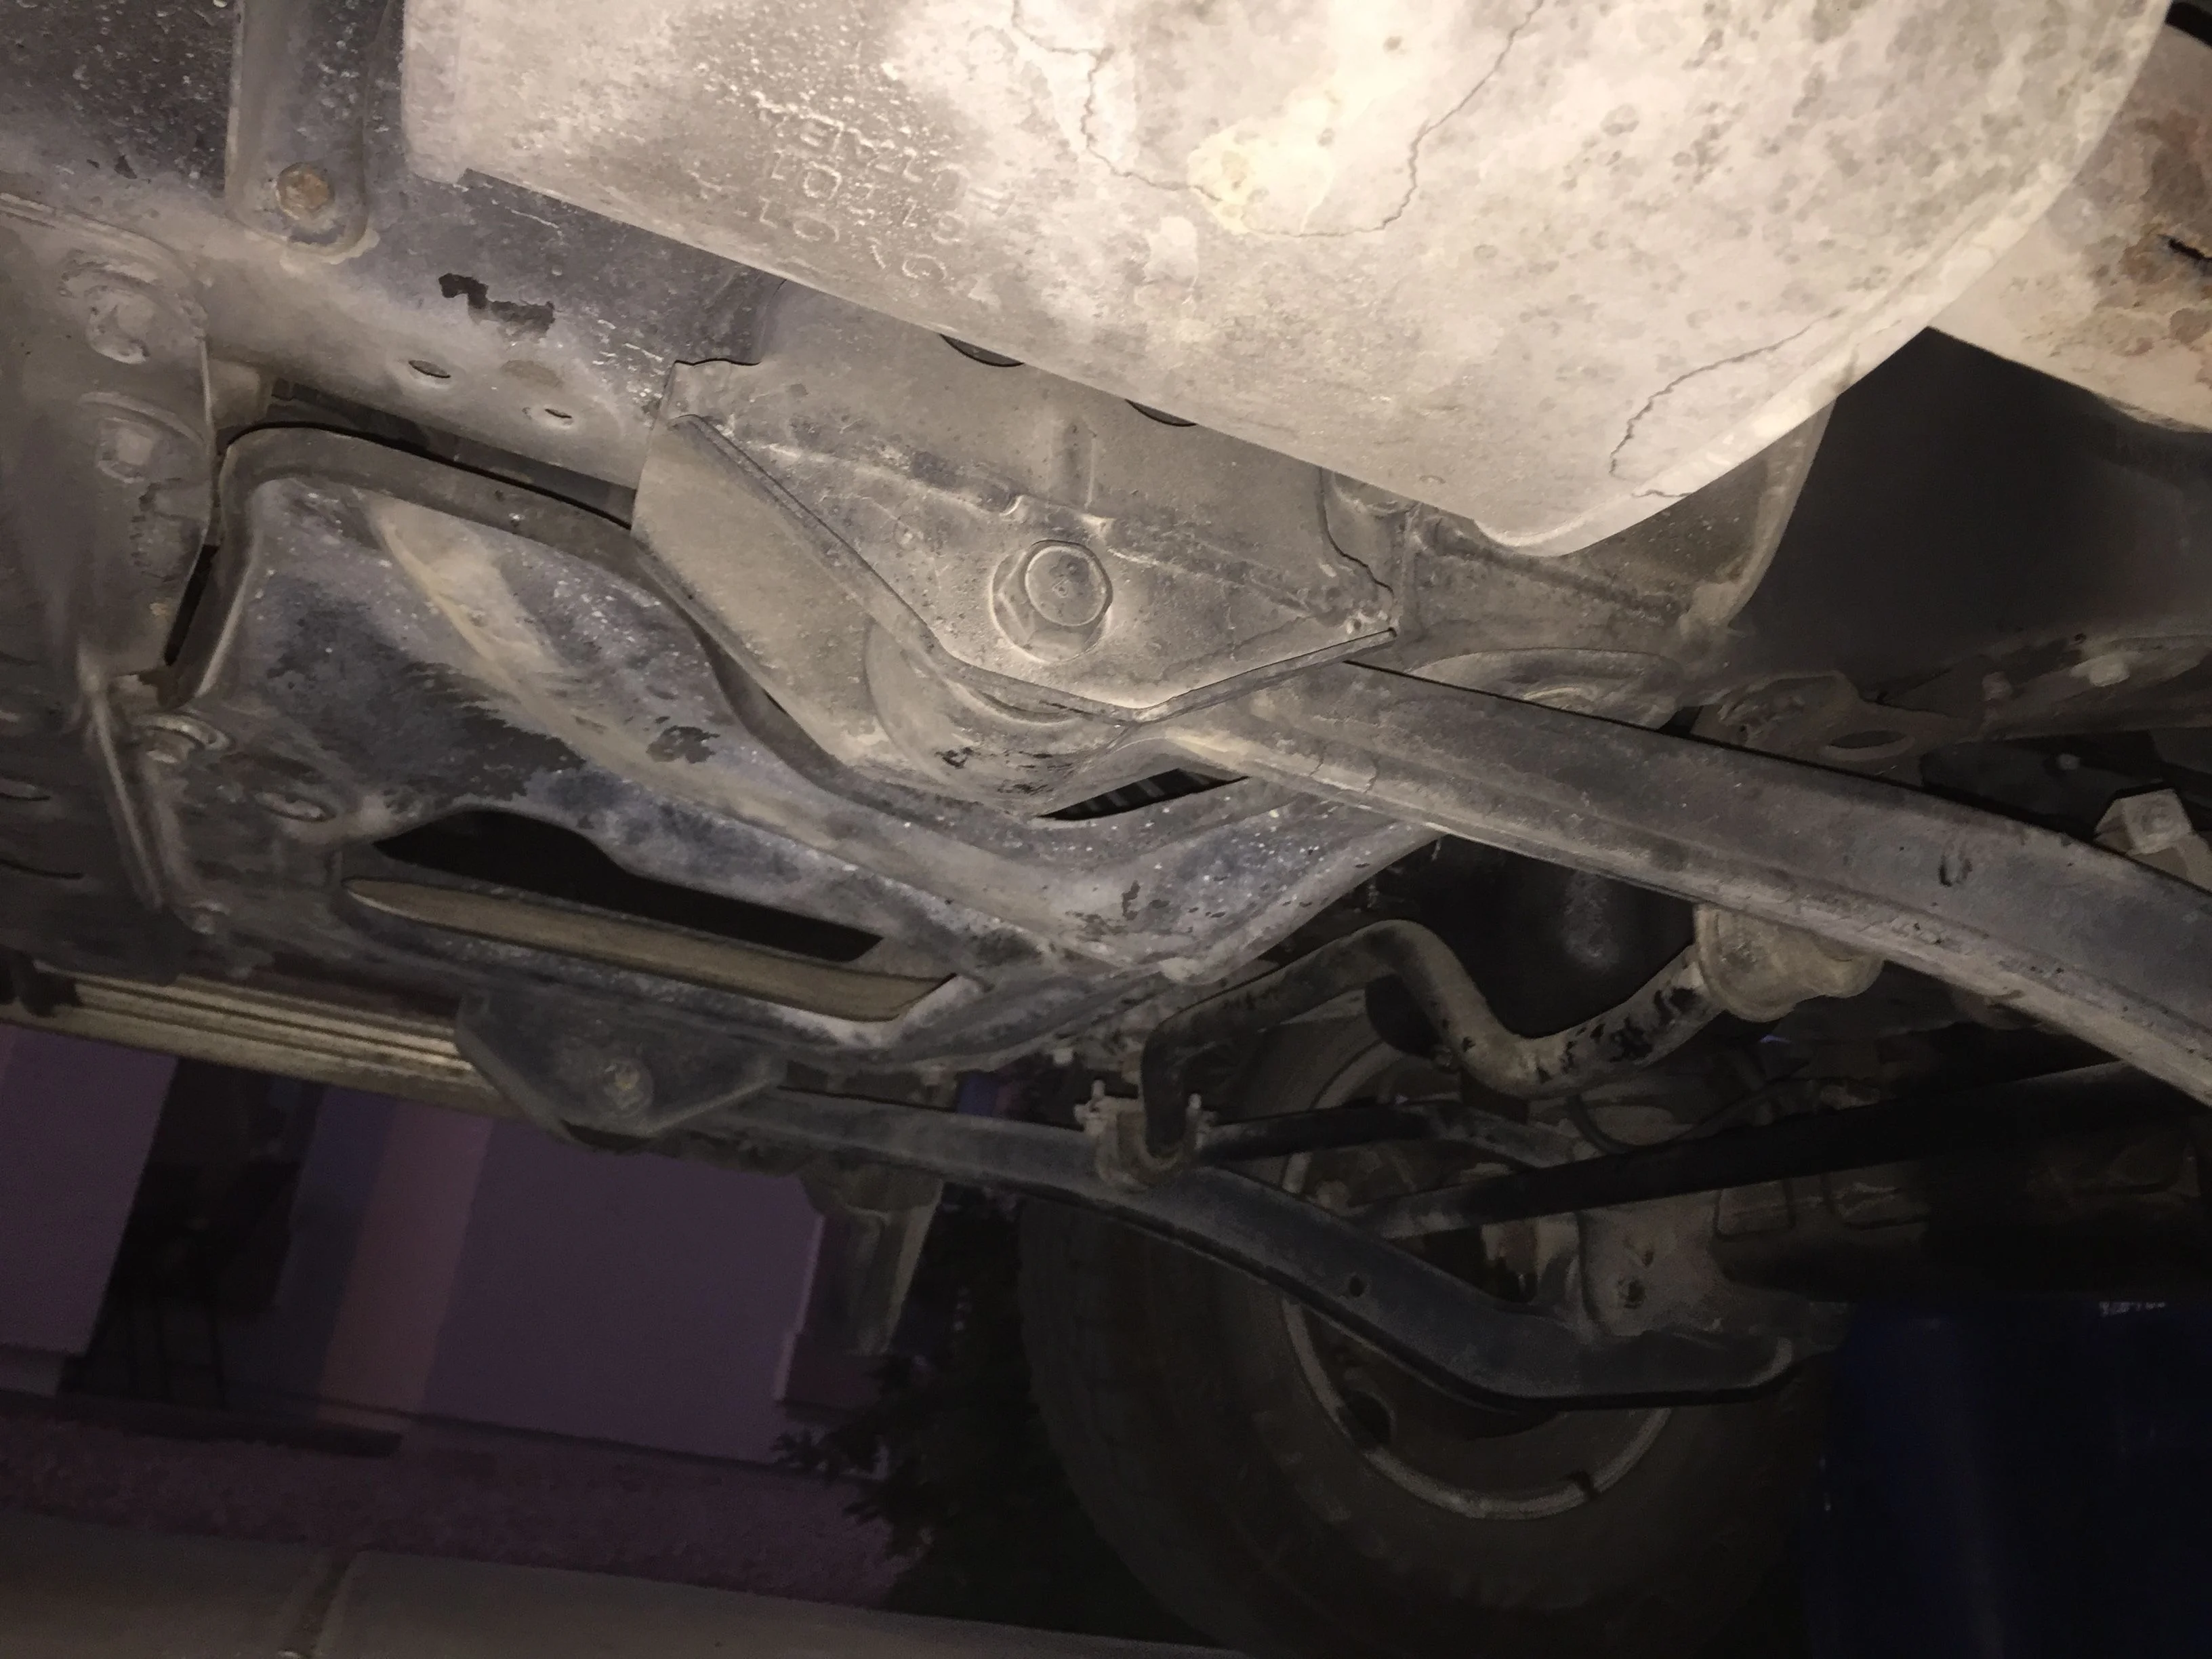
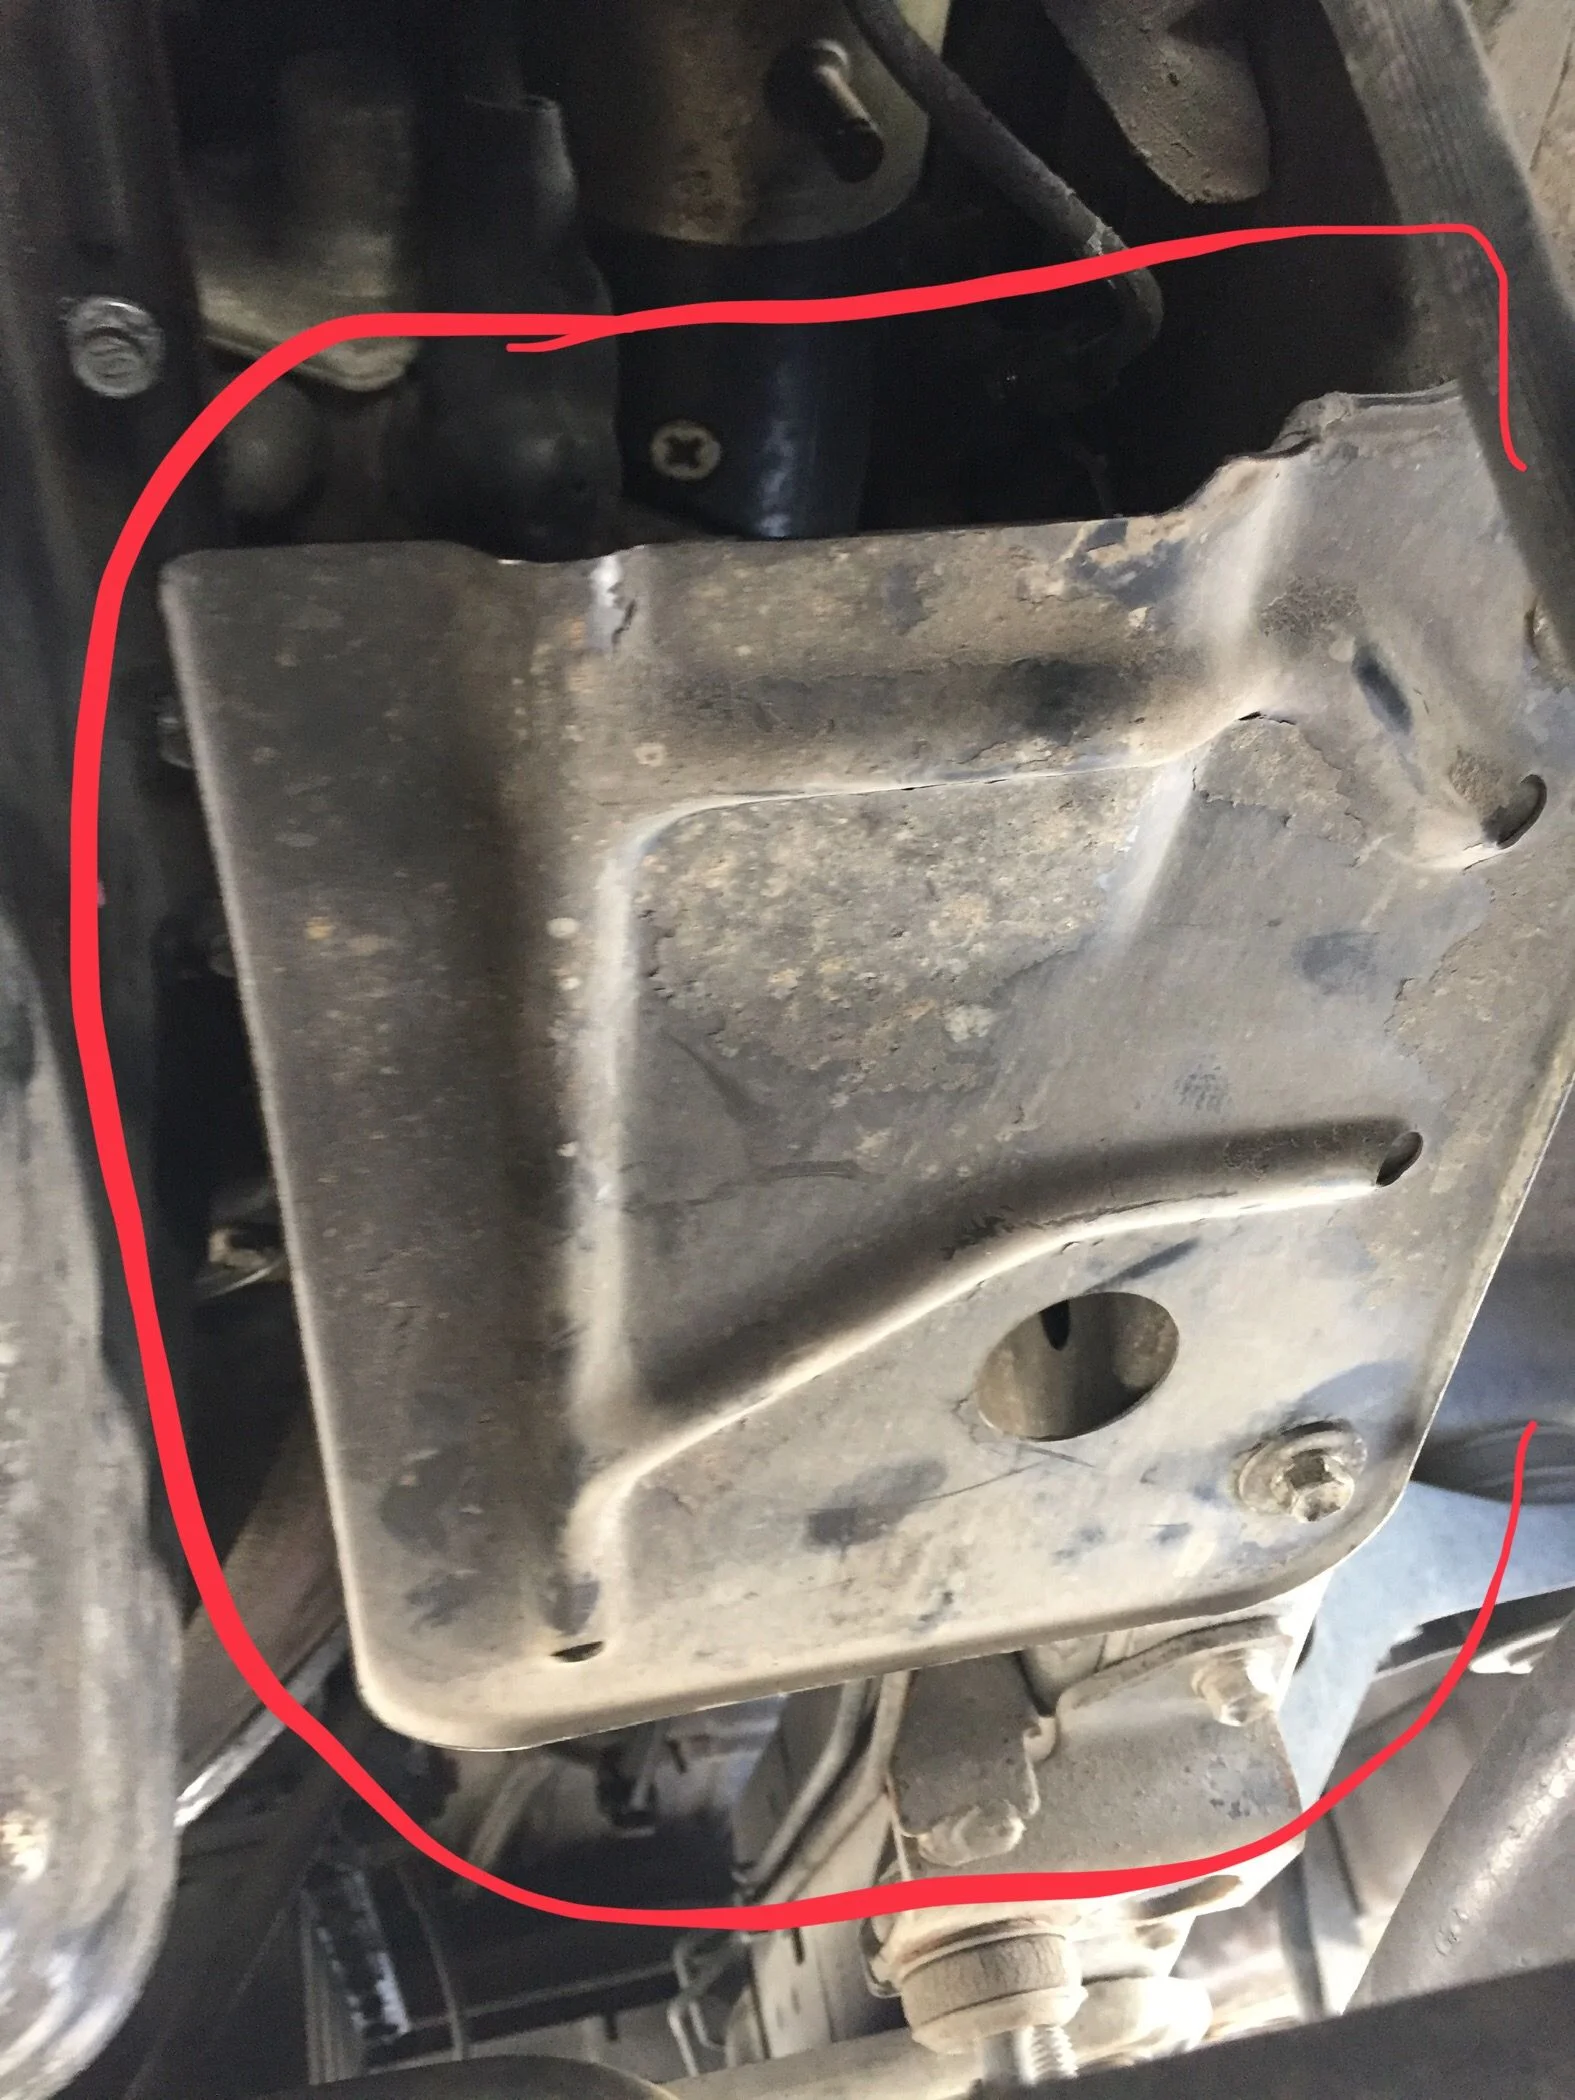
- Remove the front skid plate, brake line skid plate, coolant line holder, and tranny stabilizing braces (The tranny braces will make it exponentially easier to get to the back of the oil pan with the seal cutter)
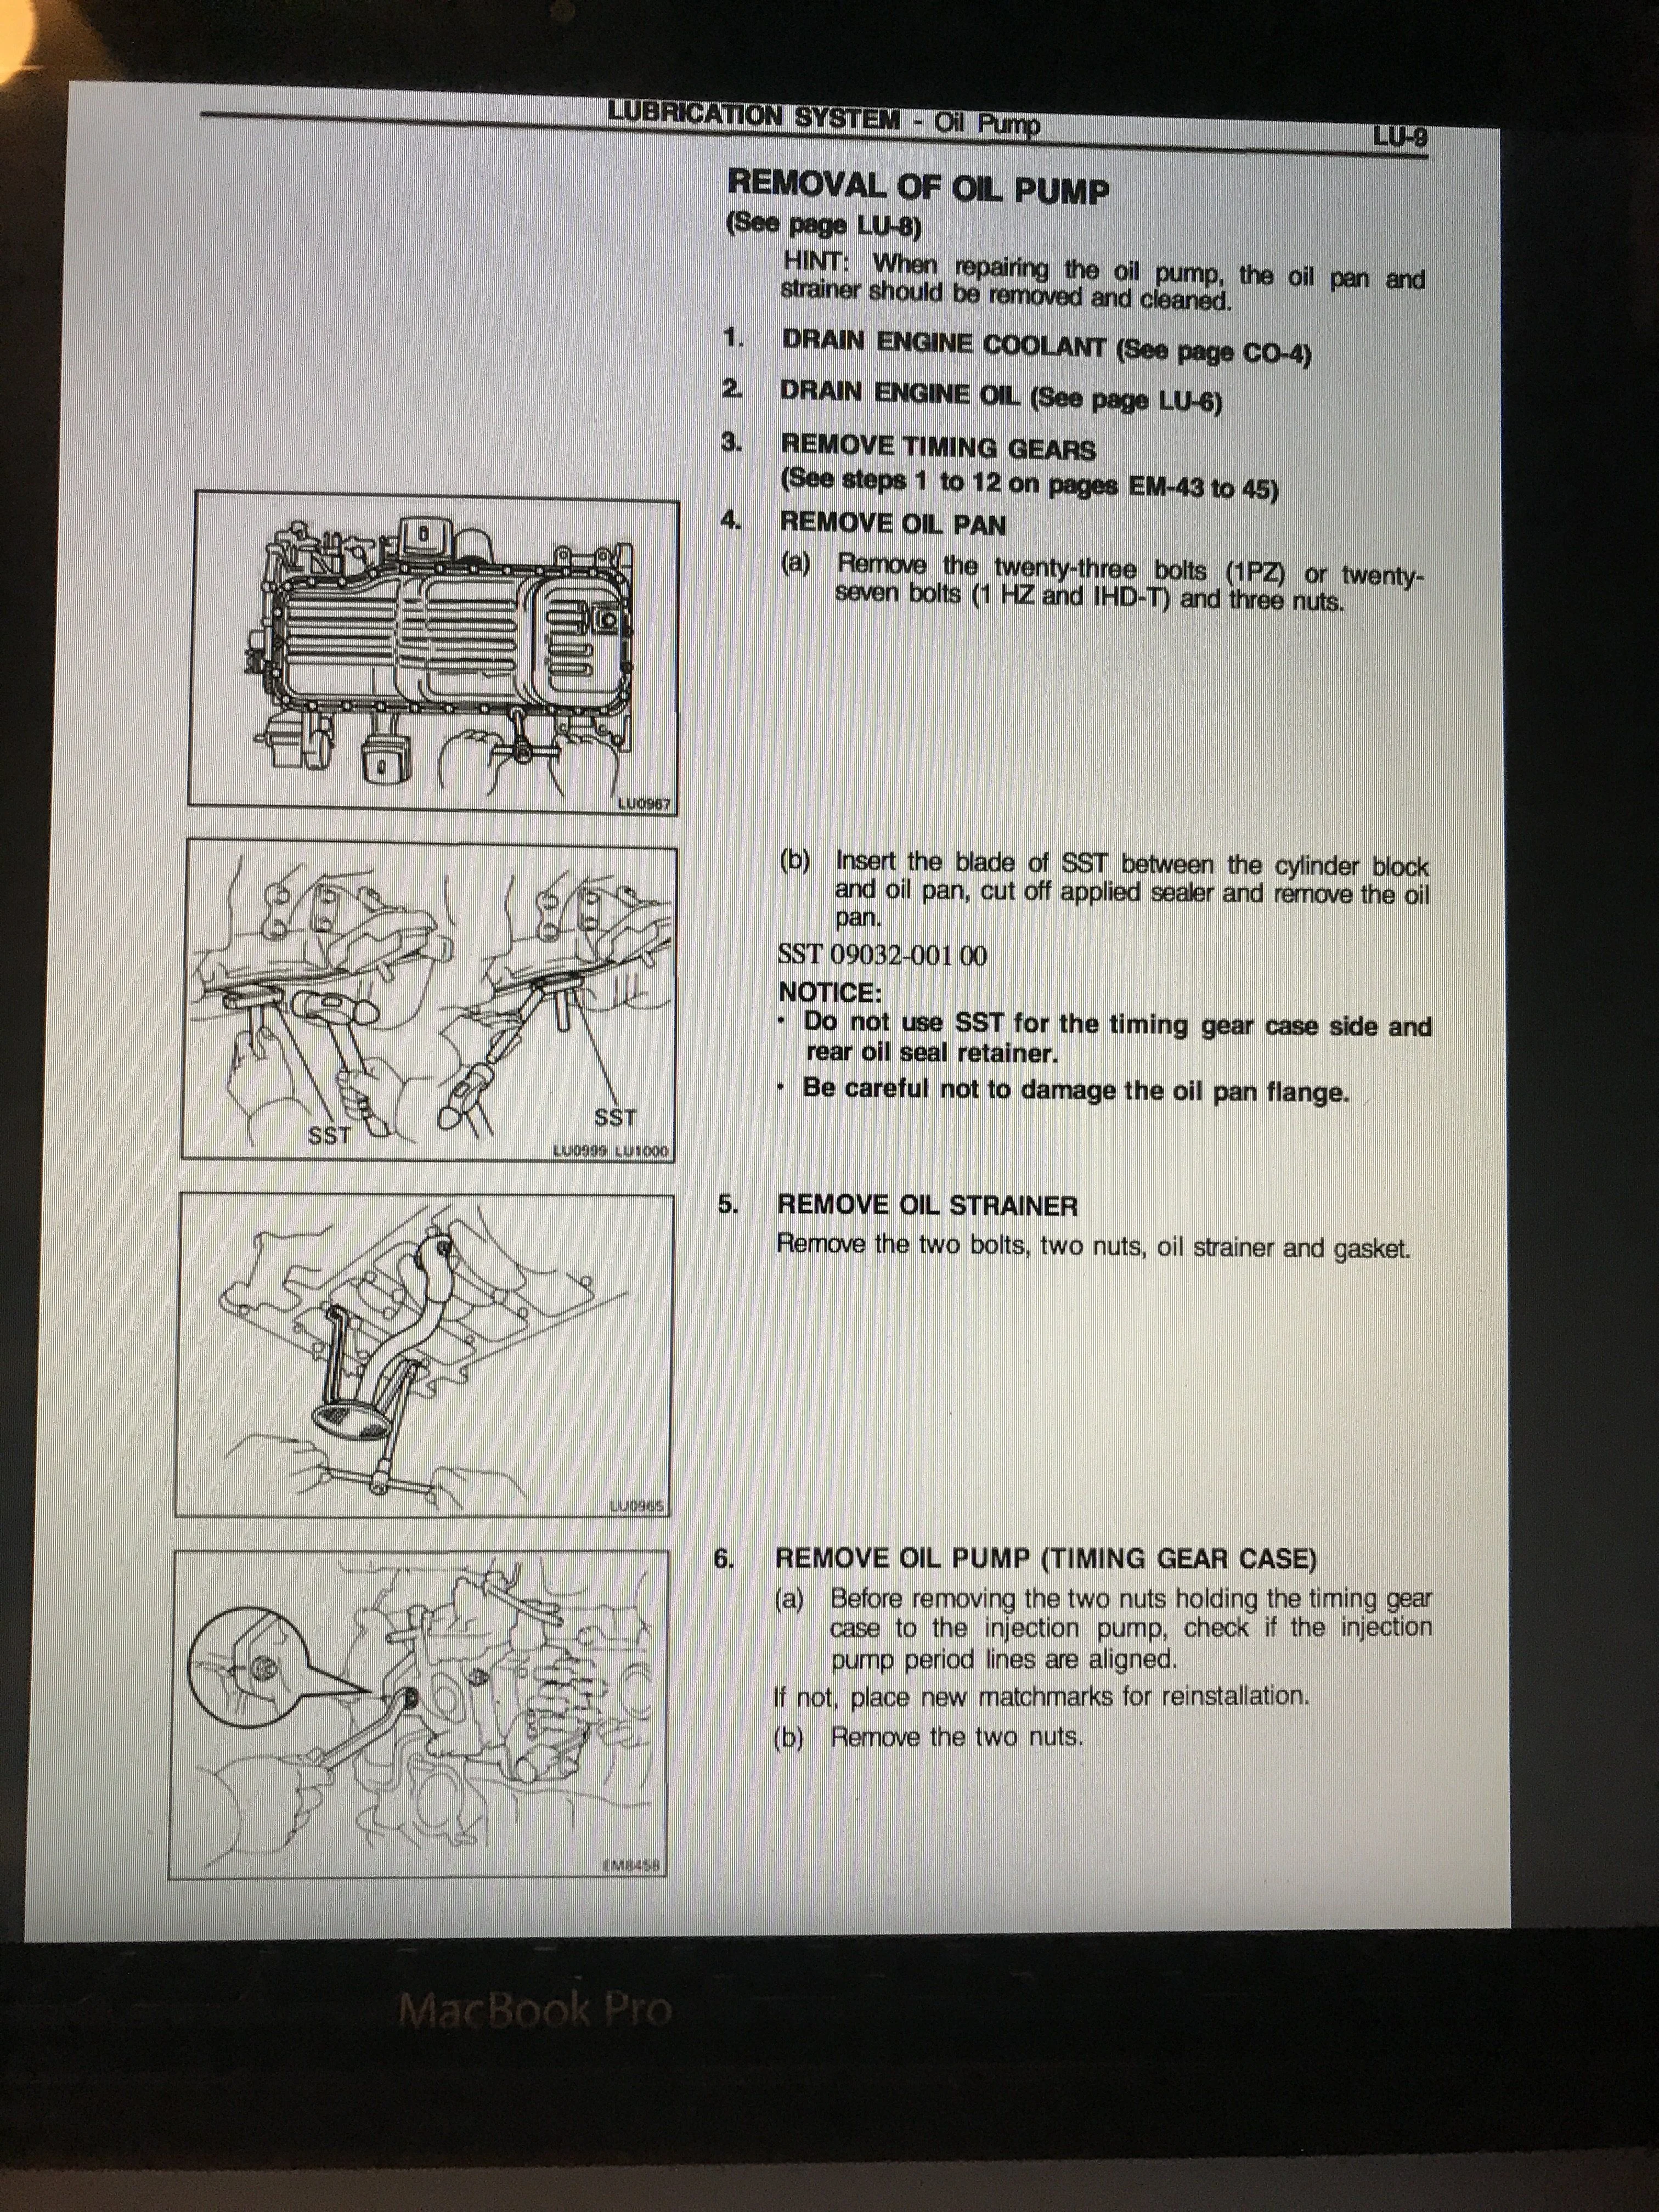
- Remove all the oil pan bolts and 3 nuts (10mm).
- Use the oil pan cutter around all the edges. I started in the middle and used an old broken 1/2” socket wrench as a hammer. Tap it in and once it’s flush hammer away on the end of the cutter moving down the edges. Repeat on the other side. Avoid flexing it up and down to the max extent practicable to avoid bending the oil pan edge.
- Once you have cut enough of the sealant the oil pan should have some decent movement. The back edge of the oil pan sits in an indentation on the tranny case. I had to push forward and down to get past this and get it off the two bolts at the back of the oil pan. If you get one end free first, avoid the urge to pull the pan off before cutting as much of the old gasket as possible. There’s a good chance of bending the pan if you yank on one end too hard.
- When the oil pan is free slide it aft and out. Put it to the side for now.
- Remove the oil strainer. 10mm. 4 nuts and a steel gasket (the FSM says to replace the gasket but mine was in great shape so I re-used it). (The oil strainer doused me with oil when I pulled it out, just a heads up.)
- Bearing replacement:
- I started with the two that were bottom dead center. Remove the conrod bolts(12 mm 12 point socket on a breaker bar) These were extremely tight, to the point that I thought I was going to break them off.
- With the bolts out wiggle the bottom bearing case free and set to the side. (I left the bottom bearing in for the moment.)
- Reach around the conrod and slowly push the top piston up until it is clear of the conrod. Once clear slide out the top bearing if it didn’t already come out on its own.
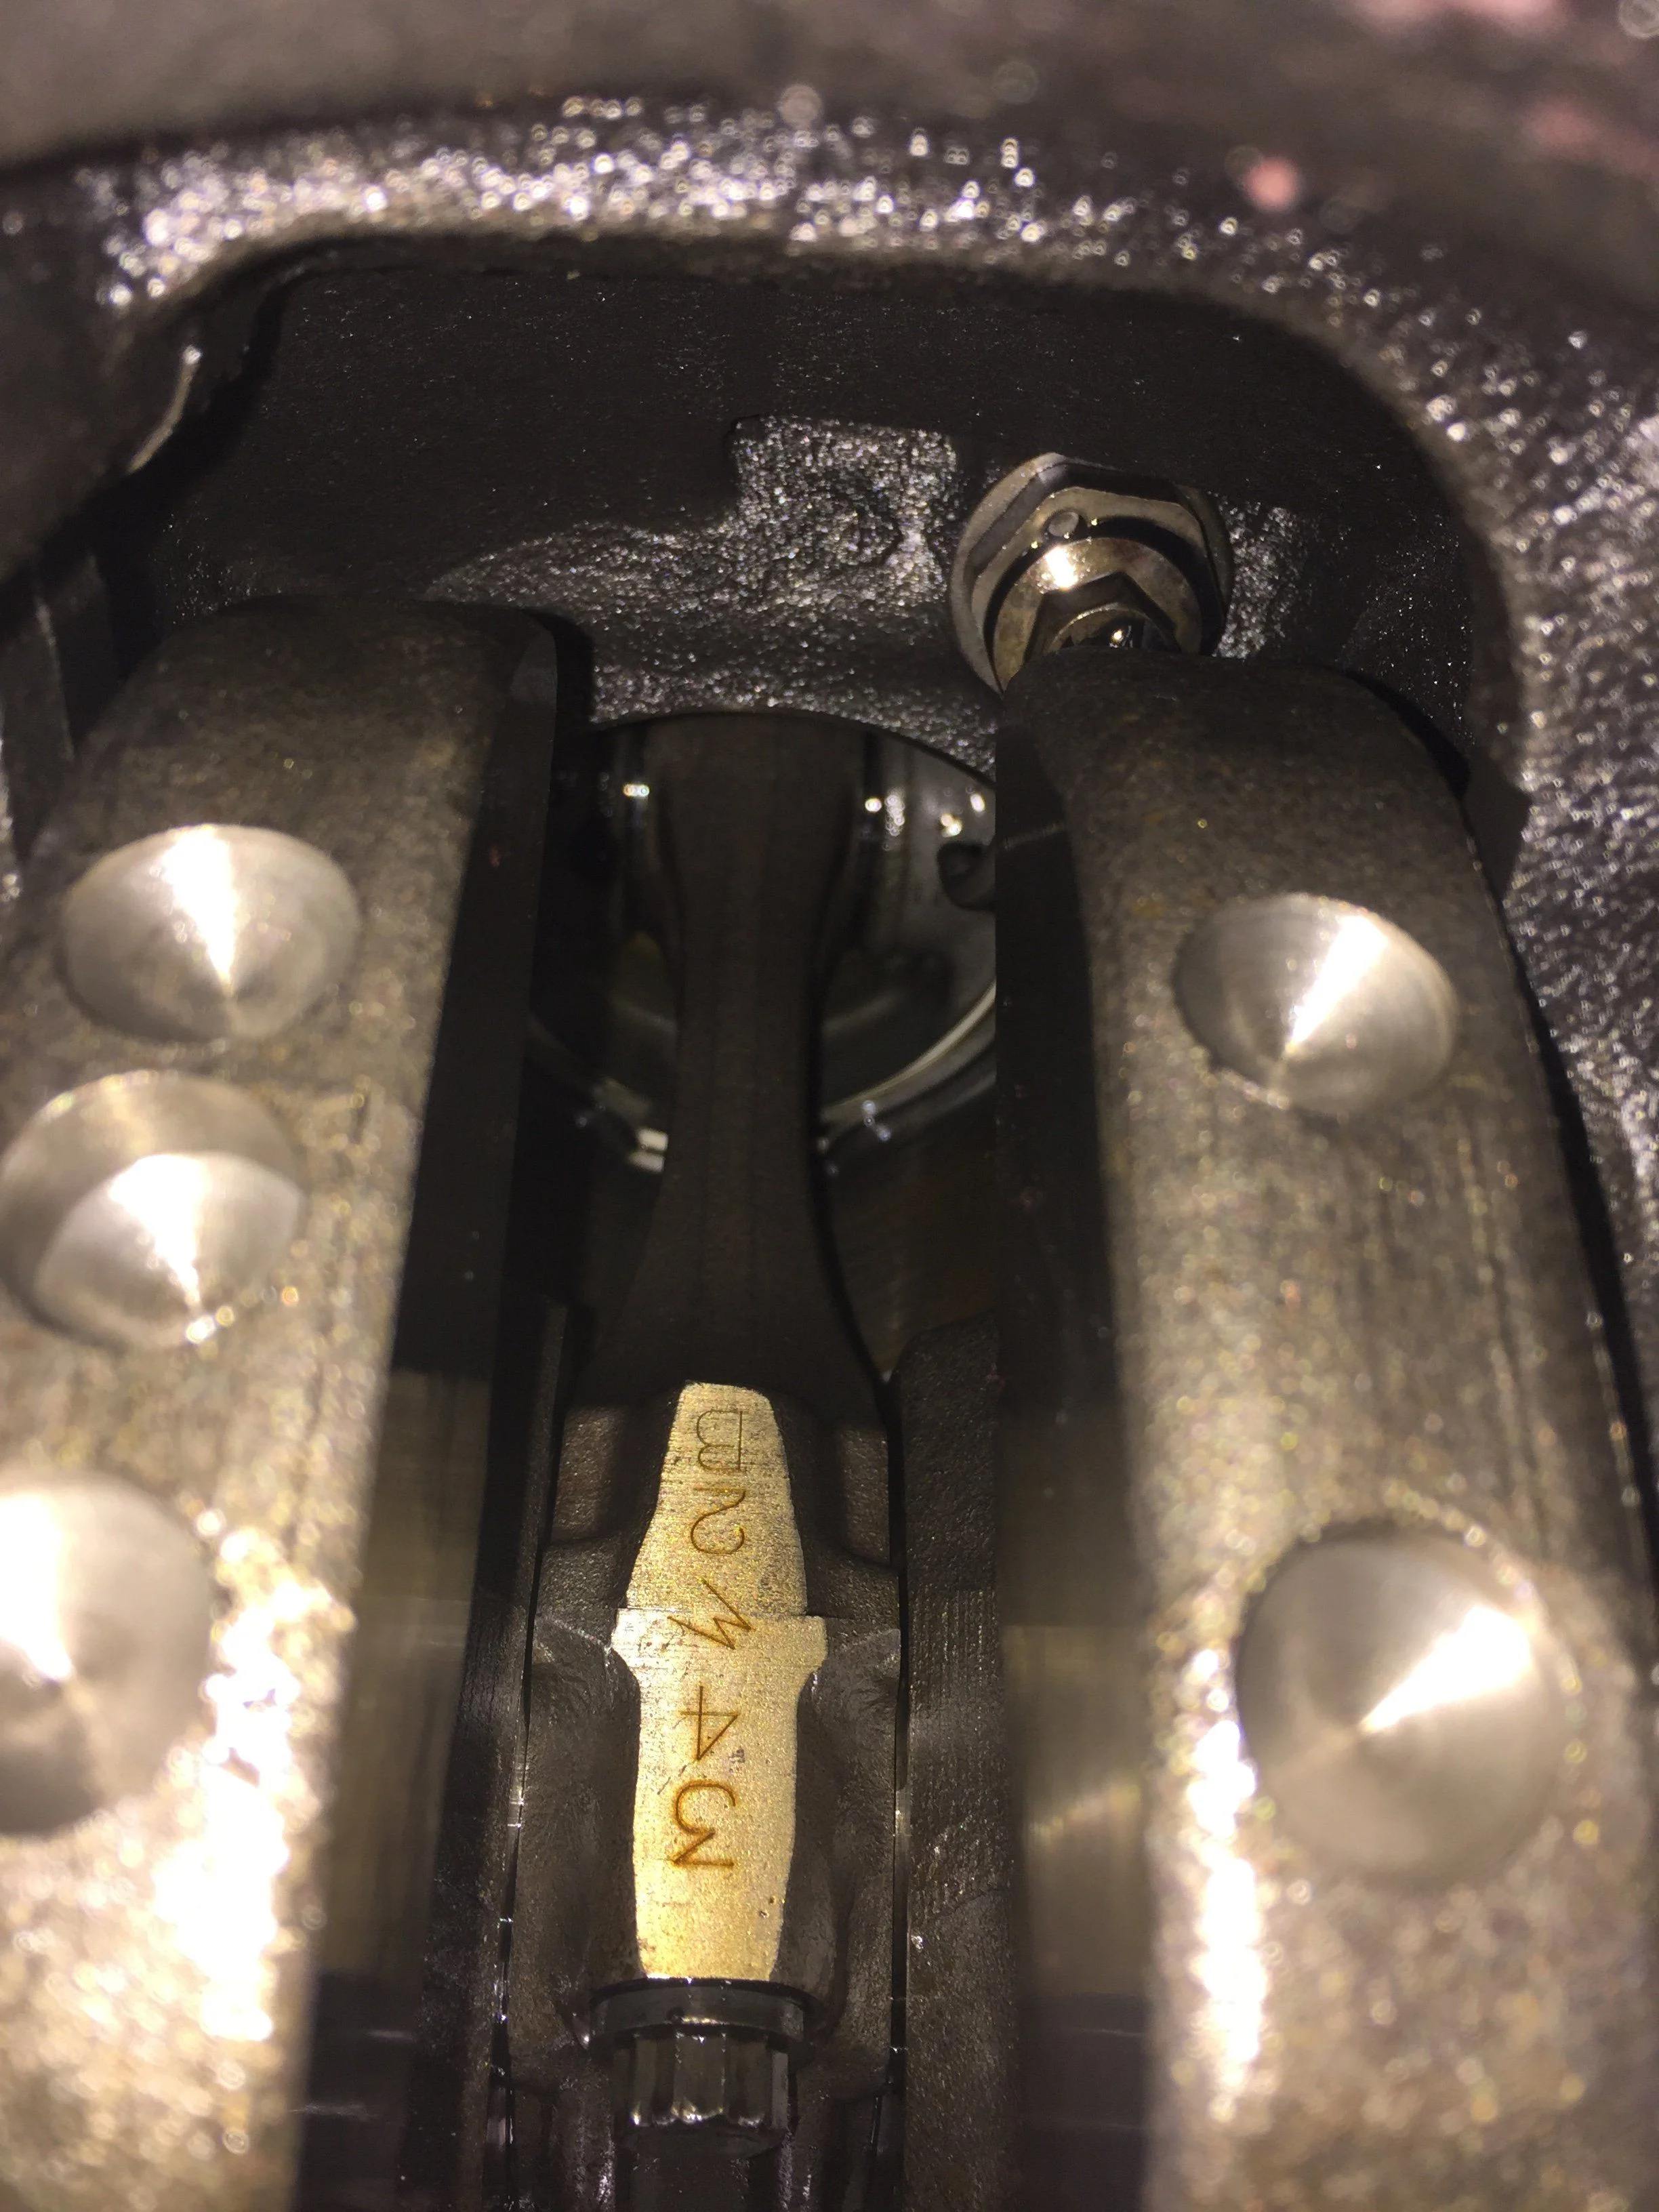
- Repeat the last two steps for the other bearing that’s bottom dead center. MAKE sure you keep from mixing up the bottom bearing case for re-install. (They should be marked on the left side with a unique symbol for each one).
- Clean the bottom and top bearing cases and conrod surface.
- Put some assembly lube on the top bearing, install the bottom bearing on the bottom case.
- Re-install the top bearing. (This was a bit tricky working around the conrod, but doable. Slowly pull the piston/top bearing case down until it seats on the conrod.
- Put a strip of plastigage on the conrod oriented front to back.
- Install the bottom bearing, ensuring you have it in the right place and the etchings match on the left side. (The notches in the cases are on the same side top and bottom)
- Install the 2 conrod bolts and torque to 27 ft-lbs. Then turn additional 90 degrees (I used a paint pen to mark the bolts after torquing to tell how far 90 dig was.)
- Remove the bolts and measure the plastigage to verify if your oil clearance is within specs.

- If your within spec, clean off the plastigage from the bearing and conrod, smear some install lube on and re install the conrod bolts as described 2 steps up.
- Rotate the crankshaft (32 mm socket on front crankshaft bolt) clockwise until the next two bearings are bottom dead center.
- Repeat steps 1-13 for the next 4 bearings.
- Re-install the oil strainer.(10 mm socket)
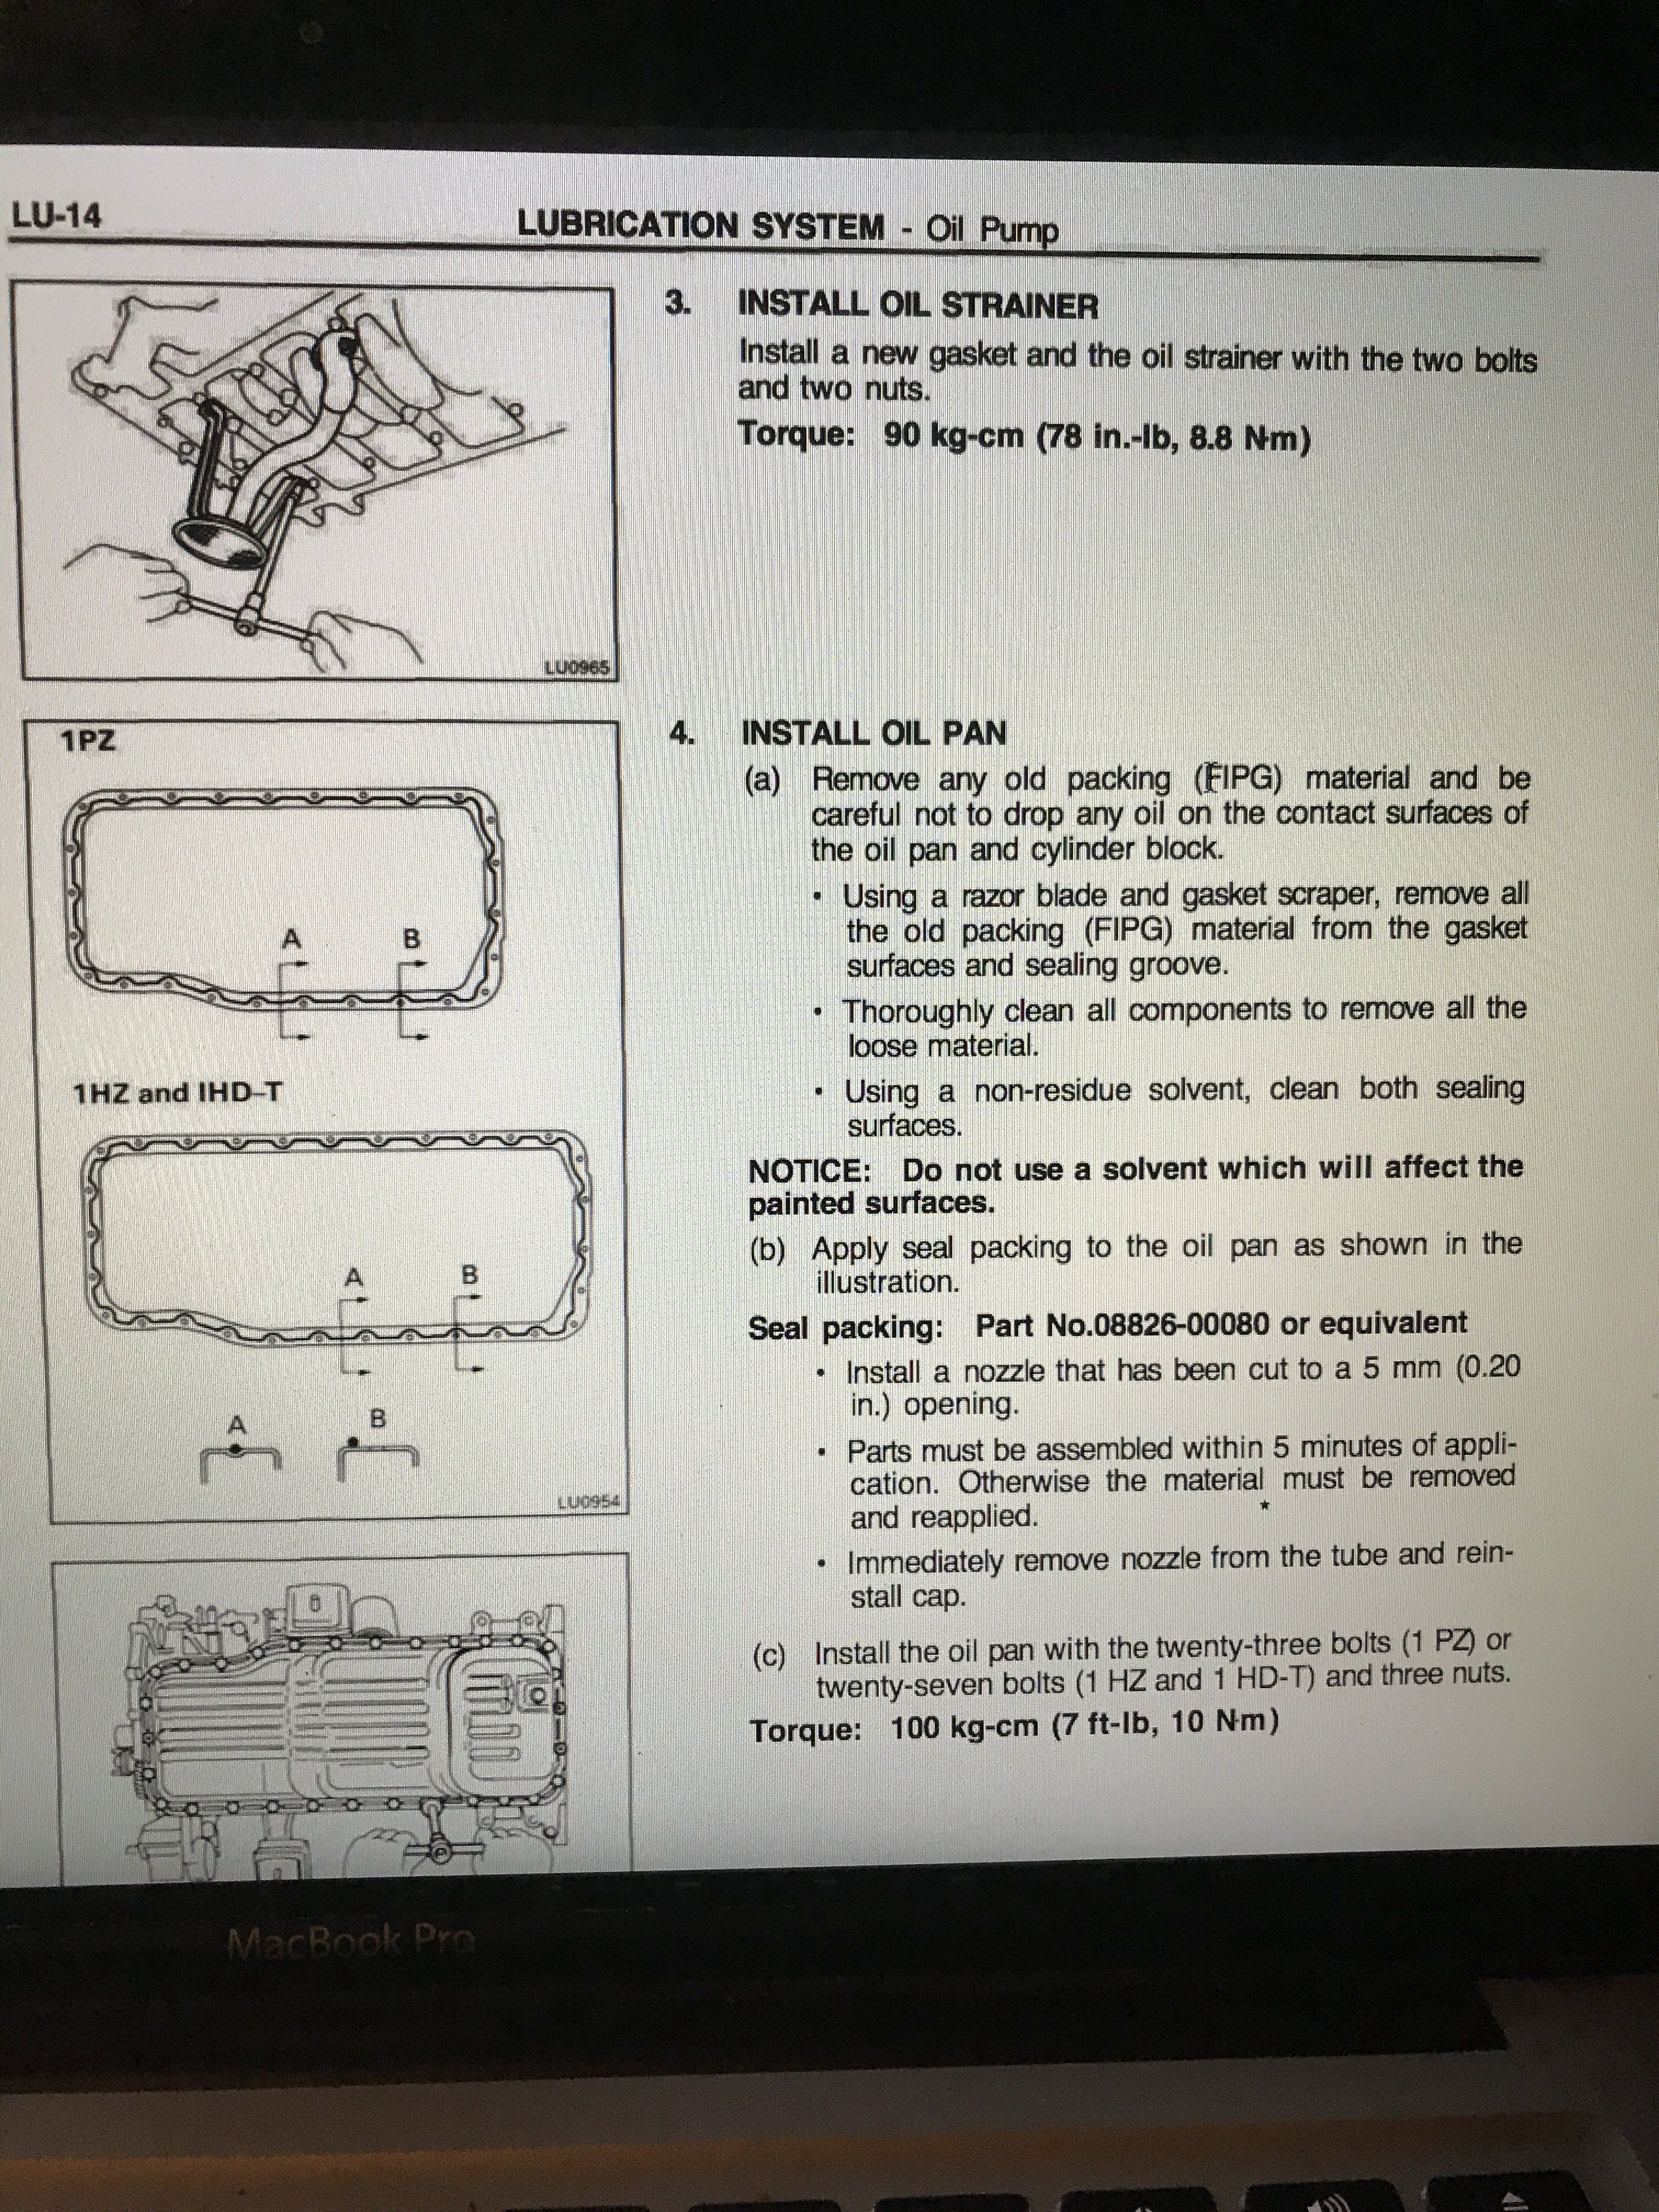
- Now the fun part: clean off all the old FIPG off the oil pan and engine block.
- For the engine block the gasket scraper worked fairly well. I used a small chisel to get around the tight spots. Brake cleaner and a rag also helped.
- The oil pan was a real bitch. I started with the gasket scraper, small chisel, and small flat head. After about an hour in the heat my patience was done and I busted out a wire brush wheel and my cordless drill. This part will drive you nuts but you have to get all the old gasket off. After wire brushing the sh#t out of it I went back over the grooves with the screw driver to get all the nooks and crannies clean.
- Clean out the inside of the pan with rags/shop towels. Make sure you get all the bits of FIPG out.
- Wipe the mating surface on the pan and engine block with a rag and brake cleaner one last time before you re-install the pan. Make sure there is no oil on either surface, especially the block.
- Oil pan re-install: I recruited a friend to help for this part to avoid getting FIPG anywhere I didn’t want it while maneuvering the pan into place.
- Have your 10mm socket on a longer extension and 4 of the oil pan bolts laid out within reach for right after you get the pan up.
- Put a 5mm bead of FIPG on the oil pan edge. Follow the grooves and divots, making sure you have a continues bead along the entire edge. If it looks too thin in a section, add a bit more but no need to go overboard.
- You have about 5 min from putting on the bead of FIPG to get the pan on, at least that’s what Toyota says. Don’t rush it and put a crappy bead down or accidentally smear the bead on the underbody of the cruiser when sliding the pan into place, but don’t take too long as to let the FIPG start to set up.
- Carefully slide the oil pan into position below the engine block. (This is where a second set of hands really helped. My friend was more towards the front of the cruiser and helped guide the oil pan forward keeping it from hitting anything.
- Lift the oil pan up, leading with the back end to get past the tranny indent discussed previously. At this point you can see the two bolts on the rear end through the holes in the oil pan and the one bolt in the front. Next push up and aft until the pan slides over the bolts. If your assistant had the front bolt lined up right, the pan should pop into place.
- Keep steady but gentle pressure on the pan and have the other person put for oil pan bolts (10mm) in at the corners finger tight. Now you can install the 20 ish other bolts and three nuts all finger tight.
- Let the FIPG set up for about an hour (if it’s hot and humid you only need to wait 30-45 min).
- Tighten all the oil pan bolts and torque to 7 ft-lbs.
- Let the FIPG cure for 24 hours. (There’s always a debate about cure time and how long to wait before torquing and adding fuel. My 2 cents: Permatex says wait an hour before torquing past finger tight and 24 hours before adding oil. Toyota says 24 hours for cure time. Both say in cold, dry, or cold and dry it may take even longer. I say be patient, it’s not worth even having to re-scrape off the damn FIPG another time let alone full oil pan removal and re-install.)
- After the cure time, check the oil pan seal. Some of the FIPG should be slightly protruding. It should not be gooey/tacky at all. If it’s cured add the 2 gallons ish of oil. Put the dip stick back in.
- Fire it up and let it idle for a bit. Listen for any new ticks or knocking and check for leaks around the oil pan.
- Re-install the tranny braces, skid plates, and coolant line holder bracket.
- Look for oil leaks over the next few days/weeks.


Hopefully this is helpful. Thanks to all the previous postings on BEBs and to franklin40 for answering all my dumb questions. I am missing a couple photos to clarify some things. I will try and add those tomorrow. I am open to any corrections or suggestions on clarification.
Last edited:
Any indication its time to do this? Will the need to replace show up in an oil analysis? My pan has been off but I have no info its been done.
Did mine in March '19. There is no indicator that I am aware of that it needs to be replaced. The wear you see is very superficial, over 160k kms, so not sure how well it would show up in an oil analysis.
BEB replacement is a very easy task, but time consuming, took me 5 hours, I also plastigauged.
BEB replacement is a very easy task, but time consuming, took me 5 hours, I also plastigauged.
- Thread starter
- #27
No indicator that I am aware of either. If it's an unknown I consider it PM and peace of mind. A "tick" does not work as many 1HD-T's have a random tick as has been mentioned on a number of threads. Would make sense an oil sample would give indication, but you would need to know what bearings are in there I would think. I did my timing belt last winter at around 100K Kms since the engine went in the truck. I have ACL's in mine and have done three oil samples in the last couple years. No elevated readings in copper or lead so I am going to run them out to 150K Kms, take photos and post up here for continued data. I have some Taiho bearings and OEM bolts on the shelf ready to go.
hth's
gb
hth's
gb
I was told it could hear like a "wet thump" whatever the hell that means. I was not experiencing that when I replaced mine. I have Taiho in there now. There are people talking about replacing them every 100K. I can't imagine why. The original bearings were faulty. In any other car or truck this is not a normal PM as far as I know (please correct me). I hope I never have to do this again even though it is not that big a deal. No matter how easy it is, there is still a good deal of pucker factor replacing something in the engine with that kind of tolerance. Sounds like a really good idea to get the old faulty ones out regardless of age or noise though. At the same time, mine were pretty much fine after 300K km.
chapel gate
GOLD Star
I'd go taiho. They are oem fitment with Honda amongst others. Imo ACL are over rated and there have been documented failures.
I've had a set of taiho in my ft for close on 150000 miles.
I've had a set of taiho in my ft for close on 150000 miles.
BeB is not a problem or issue if the short block has been replaced, correct?
I would check them at 100K with a new short block regardless.
I know it’s a bit of a painful job, but i like to “overhaul” the engine every 100,000km. Things like bearings, water pump, timing belt/spring/bearing are all pretty cheap but if they go wrong it’s going to be expensive. They probably don’t need changing, but it isn’t too hard to check them
Something to consider if you plan on keeping your cruiser for a few years is ACL Race series bearings. The guys at Diesels Unlimited claim you can extend you BEB inspection interval to 200,000km by using them.

I installed both mains and BEB.s
They are more money but the extended interval is worth it.
I installed both mains and BEB.s
They are more money but the extended interval is worth it.
I think it was Mark I was talking too. Give him a ring .How have they verified the additional inspection interval?
I know it’s a bit of a painful job, but i like to “overhaul” the engine every 100,000km. Things like bearings, water pump, timing belt/spring/bearing are all pretty cheap but if they go wrong it’s going to be expensive. They probably don’t need changing, but it isn’t too hard to check them
It may be time consuming, but it's quite easy, but it isn't painful at all, with the caveat that one has access to a lift. If no lift, I wouldn't even attempt it. A lot can go wrong laying on one's back.
- Thread starter
- #37
Best as I can figure a 1993 build date 1HD-T, 22100-17620 injection pump number and a block number of 0064832. 120,000kms on these ACL Duraglide bearings. I did not take pictures of the bearings I took out 120,000 ks ago but the bearings that were in there were in good shape iirc. I'll have to check the trucks book to confirm and update when the g-turbo/intercooler added but its been a couple years of running at 20psi. Before the FMIC and turbo it has the stock turbo dialed up a little and fuel pin mods. Always have run a pyro and backed out when the Madman alarmed at 1250F (676C). Have run dyno 15/40 but for a number of years now using 5/40 T6 run out 10,000kms with a factory made in Japan filter. Last two oil samples were a-okay.
Long story short and will be for another eventual thread but had some strange temperature readings/reactions after a couple long grades last year where I ran it harder then usual so the head was pulled this winter to replace the head gasket. Ended up digging deeper so got to the bearings at 120,000kms. The plan has been to do them at 150,000kms and to that end I had taken samples at the last two oil changes and three in total while these bearings were in service.
Top shells and as written.
Last edited:

Similar threads
Users who are viewing this thread
Total: 3 (members: 0, guests: 3)