Builds Let's Baseline my new to me 1993 Land Cruiser (5 Viewers)

This site may earn a commission from merchant affiliate
links, including eBay, Amazon, Skimlinks, and others.

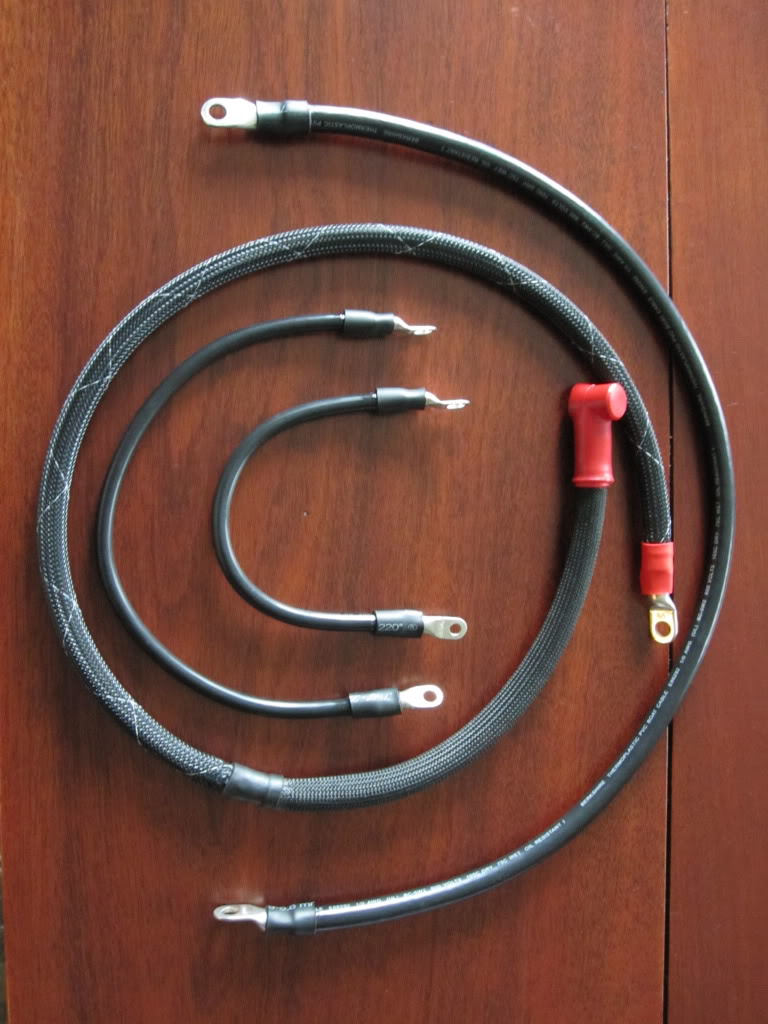
New battery cables arrived in the mail today.

E2A5A7A8-005B-46B4-A566-90BD139B24AD.jpeg
These are from a forum
Member. Here’s the thread with pricing and how to order.

 
I hope your garage is warmer than mine.
I doubt it! I opened the door yesterday and and was surprised that snow was falling. It is insulated, but it has no heat. So it’s usually about 40 degrees inside in the winter. But at least it’s dry! Fun times!
 
OK made a little progress this morning. I got the left knuckle free from the knuckle arm, and despite a stubborn grunion bearing it is not sitting in a bucket with super clean. I had to run to the hardware store for another job of super clean, so I could start another bucket for soaking the knuckles. It was also 38 degrees in my garage so I decided I'd have a cup of coffee and buy some stuff from @NLXTACY. Im hoping to get the passenger side all disassemble tomorrow and get to work separating the Birfields. I made some attempts today, but I was unable to get the short side to separate. I was mostly following the Toyota FSM, but I bought a length of black ABS 1.5" pipe and made a few attempts to whack it out that way. It was all a bit half hearted. I'll get aggressive. Worst case scenario is that I end up "needing" new inner axle shafts and they will have brand spanking new sealing surfaces.

I'll post up some more photos tomorrow, but nothing the forum hasn't seen before. Mounds of blue towels, 5mil nitrile gloves and disgusting tools that need a parts cleaner.
I just rebuilt one of my knuckles, did not do the birf disassembly, but OTRAMM makes it seem to be a rather physical process:


from the 20:20 mark
 
I just rebuilt one of my knuckles, did not do the birf disassembly, but OTRAMM makes it seem to be a rather physical process:


from the 20:20 mark

Thanks for the time marker. I too didn’t disassemble my birfs before. Hoping to get them all separated today.

Or I’ll buy new inner axles and have these as spares? Yard art? Whatever, I have options.
 
Well I was able to get the short side inner axle off. After getting my kids to school I headed over to my local Home Depot, where we now have armed guards--lovely. I purchased a 2.5" to 2" reducer, put it in my vise and slammed the birfield down 2 or three times and it all came loose. Very easy. Way nicer than hitting a brass drift against the inner race and trying not to hammer your hand...very awkward.
IMG_2342.jpeg

The long side was not straight forward. I followed the same procedure and no luck. I was hammering the long side down so hard was bouncing my very heavy work bench loaded with hundreds of pounds of tools away from the wall. The poor vise was straining as well and I suspect I may end up breaking this one (I broke it juringthe joint replacement rodeo earlier this year).
IMG_2345.jpeg

It also made a huge mess highlighting how much it would be very nice to have a large shop to work in. Everything was getting little splatters of grease. Even my poor cruiser. I tried the well documented 1.5" abs pipe method as well, but it was way too bouncy. I didn't feel like I could transfer as much force woitht the abs as I could with the 2" adapter. A couple more photos of the carnage.
IMG_2346.jpeg

IMG_2347.jpeg

Anyway I walked away as I was getting frustrated at this impasse. After inspecting the sealing surfaces of the axles I may just get new inners. There appear to be a few distinct lines where it has ridden for tens of thousands of miles on the seals, but I hate quitting. I'm having another cup of coffee and then maybe I'll give it another go. As always suggestions welcome.
 
And just like that, I have some new inner axles and fresh drive flanges on the way from @cruiseroutfit. Jason was again very helpful on the phone. I can't recommend them highly enough. Excellent customer service. They even understand the 1993-1994 misfits out there...
 
And just like that, I have some new inner axles and fresh drive flanges on the way from @cruiseroutfit. Jason was again very helpful on the phone. I can't recommend them highly enough. Excellent customer service. They even understand the 1993-1994 misfits out there...

:cool:
 
So you have beefy new birfs and updated drive flanges on the way ? Replacing those is a small price to pay for having the better interior and grille.

Jason
It wasn’t really that expensive, not after plunking down my gold on lockers and gears etc. it will be nice to have it all fresh and new together.

I like my grill too. I do wish some smart dudes who make cool cruiser things (@NLXTACY @Outsane) would make useful mounts to live in the many curved button blanks.
 
Screenshot_20221208_075054.jpg

Well my rig is 100% available!:flipoff2:

There is one available for you to test fit.

:grinpimp:
 

Users who are viewing this thread

Back
Top Bottom