Builds Homer's 2003 GX470 Build (1 Viewer)

This site may earn a commission from merchant affiliate
links, including eBay, Amazon, Skimlinks, and others.

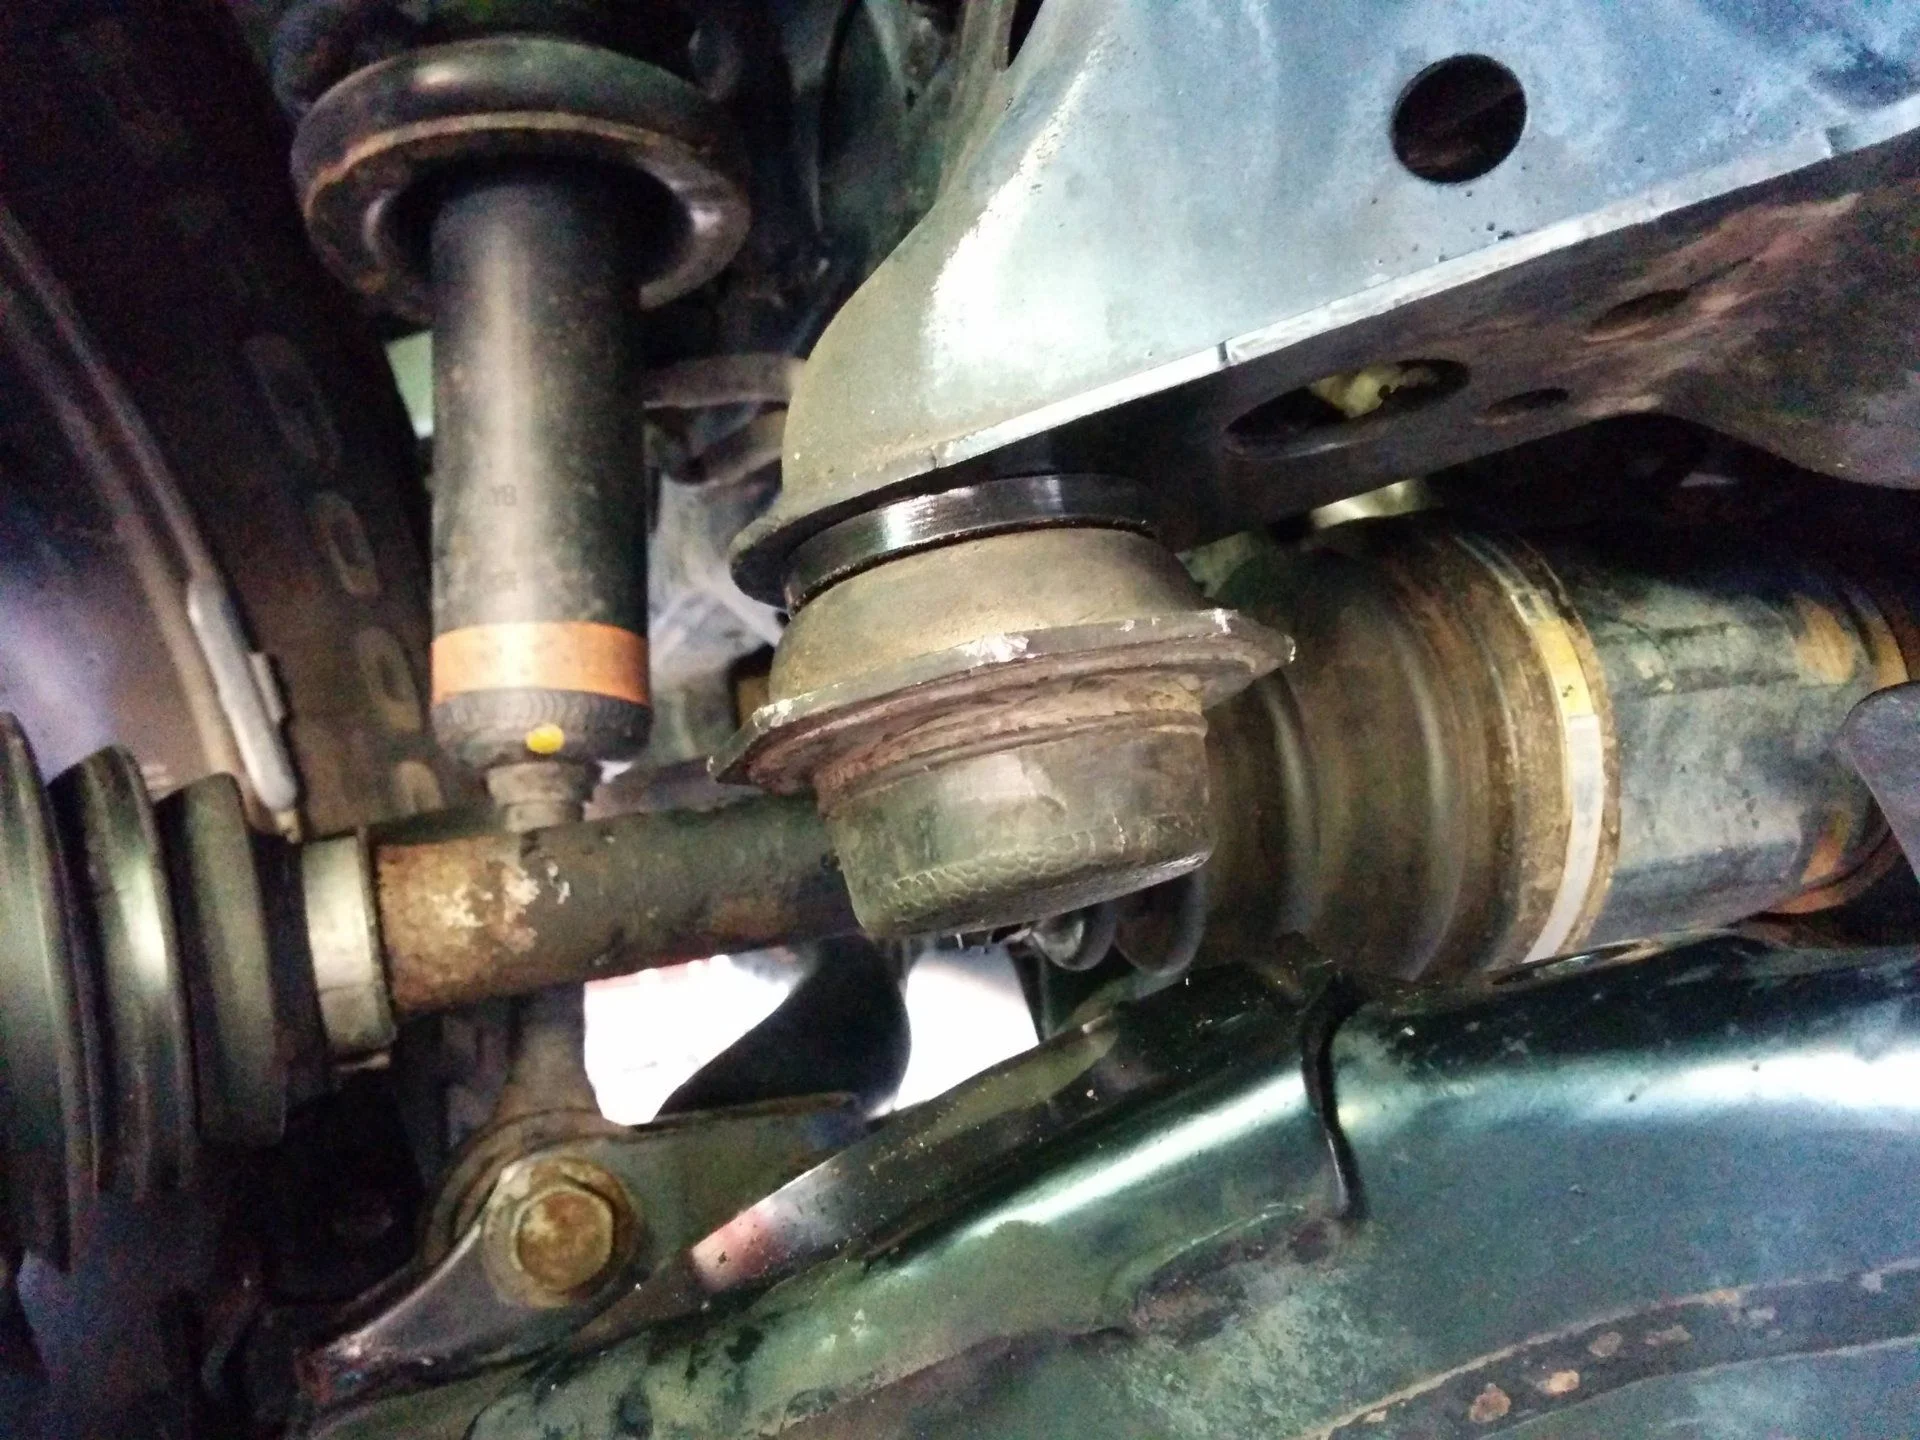
Sidewalk flex...not full articulation, but stock GX470 bumpstops seem to be aligned with axle. Hmmm, I need a taller sidewalk.

SidewalkFlex.jpg

Next two photos are while parked on an even surface. Bumpstop to axle distance and inner spring upper isolator to coil puck distance.
C88C738E-E3D3-43F2-AF4B-AAE51A695CF7.jpeg


37A2AFFF-F498-4491-B80F-314261967FDD.jpeg
 
Last edited:
I went on Berdoo Canyon Road up into Joshua Tree National Park. This trail was easy (say a 2 out of 10 in the difficult scale) last year when I did it in January 2019. This time (2/2020) the rains in December/January created a couple of medium difficult areas (say a 5 out of 10). We scraped the skid plates and rock sliders. And there was one section that was like a 7, but it had a bypass area that was like a 4. Pretty crazy that it changed that much.

I felt that my rear long travel suspension (4Runner rear sway bar end links which are 1" longer, Icon MT LT shocks, Dob LT variable rate coils) did really good compared to airbags. I felt that my articulation was really good in the rear and my tires stayed planted in a really rocky section. I didn't spin wheels like I had in the past. I felt my stock GX bump stop on the drivers side (which I lowered about 3/4" using nuts; didn't lower passenger side; just to try it out) hit the axle at least 3 times.

My original GX470 bump stop survived and it's in one piece. Really happy with the articulation gains. I couldn't measure the articulation gains, but just felt good. My son took his 96FZJ80 (only CDL) and I felt like the GX470 kept up with the 80 when it came to staying planted in the rear.
 
Last edited:
How's the handling on-road? I've been following your other thread about LT options for the GX and am considering the Dobinsons C59-675V springs and GS59-575 shocks. It may not be the ultimate LT setup, bit I'm all for more travel for not alot of money.
 
Handling-on road has been great. Way better than my previous setup with the rear airbags and OME shocks which didn't match the front Bilstein 6112 shocks.

I think your choice of GS59-575 shocks and C59-675V variable rate coils will be great. Don't forget to extend your rear brake lines and your rear end links and you are good to go.
 
You can measure the interior diameter of your coils (I believe they're 3" but dont quote me). Get a hole saw that size and cut discs out of an old polyurethane cutting board. It will perform just like those aluminum ones.

This post just gave me an idea. I can create 1/2" spacers out of polyurethane board for the stock oem GX470 bump stops. This would be a lot easier than customizing the aluminum blocks I bought to create my own spacers. I might have to go to Harbor Freight to look for some poly boards.
 
This post just gave me an idea. I can create 1/2" spacers out of polyurethane board for the stock oem GX470 bump stops. This would be a lot easier than customizing the aluminum blocks I bought to create my own spacers. I might have to go to Harbor Freight to look for some poly boards.
The struts afford 2x lift, vs spacer thickness, the bump stop is at a different point in the geometry. i made bump stop drops from 1/4", steel and that matches the lift afforded from a 0.75" puck. I have material to do 3/8" bump stop spacers, but i think the 1,/4" is actually fine.


Last edited:
Took it shooting and then some off-road action in Berdoo Canyon. Went further in the canyon into Joshua Tree and got to articulate the rear a little.

34ADB453-B19E-4CDC-905F-80E3560C6F60.jpeg


05F02FB7-D20D-40F1-96E4-BFA31A67841A.jpeg


A7097E7D-6B63-4675-95C8-2E17521729DE.jpeg
 
Well...my front door 6x9 Pioneer TS A6926 speakers ($60/pair + $40 install at a car stereo shop) only lasted a little over 3 years. One of the speakers started rattling the sounds pretty good, so I decided to replace them myself. When the 6x9 Pioneers were installed, the shop put in a new 6x9 bracket, so it was very easy to swap out. Just take out the door panels, remove the screws for the old speakers, cut the wires, connect the new wires, and insert the new 6x9 speakers using the previous bracket, holes, and screws.

This time I bought the really cheap Metra Electronics AW669SP front speakers ($16.99 each plus tax). It says it 4 to 8 ohm compatible, so who really knows what that means? But I didn't want to spend a lot and I needed to change them today for a trip tomorrow, so I did a same day pick up at O'Reillys.

I compared them to the Pioneer ones I took out and the Metra are lighter in weight probably due to the small magnet a cheap components. The speakers sound better than the blown one, but that's not saying much. At some point, I'm going to have to figure out what to do with the rest of the speakers. The rear subwoofer sounds shot (even though I tried to do the foam repair a couple years ago).

For comparison, here's a picture of the Pioneer next to the Metra.


66114E14-5F1A-4F30-8952-9E9FF533DDFE.jpeg
C47541B0-38F7-4E3B-8E90-FE5133C2F1CB.jpeg
A04A9BE3-D777-4AA5-B997-E8608EDCC914.jpeg
A896692A-7B03-4943-85C9-773F236FAC9D.jpeg
 
4-8 ohm depends on what they're being hooked up to. most aftermarket car speakers are 4ohm. unless you get into subs, high end, or specialty replacements then you can see 1-8 ohm. I don't know about the ML system, but when I used to sell/install car stereo 20 years ago, the factory amped systems were usually 8ohm (home speakers are often 8ohm too).

in the end, it won't mean much to you unless you have miss-matched speakers, as the 4-ohm speakers will be louder (twice the power coming from your amp).

more information than you're probably interested in
.
 
Good info on impedance. At the end of the day, these are cheap speakers and I just hope they hold up for a year or two
 
Last edited:
Got my Bluetooth ODB2 connector. The codes are not going away. The P0420 and P0430 are confirmed and persistent. They come back within 15-20 miles after being cleared. There's pending and confirmed codes. All the same two codes appearing multiple times.

The downstream O2 sensors were replaced with new Denso ones back in 3/2017. Upstream O2 sensors are original. I have 162K miles now. I just cleaned the MAF and put in a new oem stock air filter.

172ADAF3-4C98-41A9-9953-AD06C94E83A4.png
 
Last edited:
Getting the parts to extend the rear diff breather. Long overdue and finally getting around ti doing it.

2BDE5321-7DE2-47AC-9E3A-1A137687FA78.jpeg


1CCFB328-830D-434D-935A-EBD1BDF3D4C9.jpeg


F738BC3F-21DC-4D61-9A06-92239657CE85.jpeg
 
I just routed mine up to the same place as the front breathers at the top of the trans. I didn't want to drill a hole at the gas cap personally.
 
@captainva I'm gonna look to see where the front diff breather is at. I was wondering if going to the gas cap (or body panel where the stock bottle jack is at) was for me or not. Plus the axle vent cap is one way, so I'm not sure how water can get in, but I'll raise it higher than what's currently at.

@runningdrew Yes, the first (union) item screws right into the rear diff. You can get the part cheaper at RockAuto or other online websites, but I wasn't ordering enough to get free shipping and the shipping killed the price at other places other than Amazon.

The Dorman axle vent item is a little too big for the 1/4" ID hose. I'm going to look for a smaller vent cap that's 1/4" (0.25") or I'll force the Dorman 0.3" axle vent into the 0.25" fuel hose. I'll need some heat and some lubricant (soapy water). LOL.
 
Last edited:
@captainva I'm gonna look to see where the front diff breather is at. I was wondering if going to the gas cap (or body panel where the stock bottle jack is at) was for me or not. Plus the axle vent cap is one way, so I'm not sure how water can get in, but I'll raise it higher than what's currently at.

@runningdrew Yes, the first (union) item screws right into the rear diff. You can get the part cheaper at RockAuto or other online websites, but I wasn't ordering enough to get free shipping and the shipping killed the price at other places other than Amazon.

The Dorman axle vent item is a little too big for the 1/4" ID hose. I'm going to look for a smaller vent cap that's 1/4" (0.25") or I'll force the Dorman 0.3" axle vent into the 0.25" fuel hose. I'll need some heat and some lubricant (soapy water). LOL.
Thanks for the reply, I need to do this, I hate deep water.

SmartSelect_20210116-230909_Facebook.jpg
 
@captainva I'm gonna look to see where the front diff breather is at. I was wondering if going to the gas cap (or body panel where the stock bottle jack is at) was for me or not. Plus the axle vent cap is one way, so I'm not sure how water can get in, but I'll raise it higher than what's currently at.

Its "one way". Really the issue is if you've been wheeling and it gets hot then go through a stream it can pull water into the diff from the vacuum created when cooling quickly. The front diff breather is to the drivers side at the top of the transmission near the firewall. It could be higher but I personally don't want to go through any water that high. For me it was easier to go to the front than deal with the wheel liner clips since I didn't have any replacements for when they inevitably break.
 
I routed my Taco to the gas hole liner. Drill a hole the size of the hose OD and when you get the cap shoved into it, it basically becomes a friction fit once you then shove that into the hole.

Shove some needle nosed pliers into the hose and add a little heat. Push them a little deeper into the hose and let the rubber cool. Should do the trick for you.
 

Users who are viewing this thread

Back
Top Bottom