Hi-lift jack storage solutions (2 Viewers)

This site may earn a commission from merchant affiliate
links, including eBay, Amazon, Skimlinks, and others.

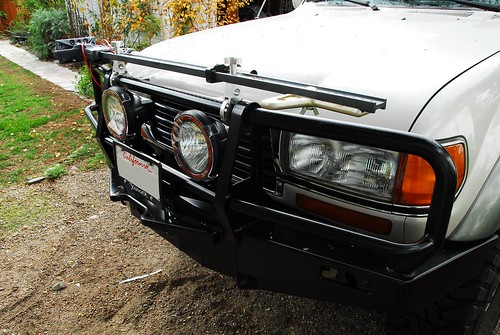
Here is mine! It started on the roof, and moved to the front of the spare tire, and on to the top of the front bumper and finally its resting place for the last three plus years! I have found this to be the most practical place.
Steens 2008 041.jpg
 
Last edited:
My third row brackets are removed, the hi lift rests on top of the wheel wells, bolted down using the seat bracket nuts. 60" that I cut a few inches off so it would fit there.

edit: well, didn't mean to kill the thread but hey, here are the pictures.
nak_hilift1.jpg
nak_hilift2.jpg
 
Last edited:
Here is my solution for a Hi-Lift mount. I went ahead and picked up a brand new Con-Fer rack from Mark at Mark's Off Road in Burbank. Its actually a small two foot by 4 foot one with the mounting hardware for the factory roof rack. Fits perfect and goes on easy.

Now I finally bought a Hi-Lift to replace the one that was stolen. So I wanted to get this Hi-Lift actually installed onto the rack itself because I really had no where else to put it securely.

I was in a quandary. I was leaving for Yellowstone the next morning but I couldnt get the hi-lift mounts for them FOR the Con-Fer rack in time before I left. So I went to my local welder, he was already gone. So I went to the welding shop to pick up some 1/0 cable lugs for another project and asked him where he recommended for short notice projects.

He suggested AIRTIGHT WELDING for those of you local to me.
9820 Owensmouth Ave #5, Chatsworth, CA 91311
818-458-1585

Called him up and he was eager to do it....on a Saturday!!!!

He is NOT what I pictured a welder to look like. This guy seemed like he would be at home at a Jimmy Buffet concert. :p

Went there with my kid and watched this guy work his magic. I had some ideas in my head on what I wanted to see but this guy's solution was 100x better.

All he did was grind down the powder coat to bare metal. Took out some 4"x4" square plates. Then cut some 5/8" steel tube in 1.25" sections (3 total) then welded those onto the top of the square plates. He then proceeded to drill a .50" hole through the tube to go through the plate. Now he welded the plates onto the rack BUT placed them in such a way that when you placed your brand new 2.5" x .5" grade 8 bolt through, it sits up high enough that the rack lip is pressed onto one of the sides of the bolt head. This meant that I didn't need two tools to remove the rack. Just one crescent wrench to get the front nut because the rack itself held the back of the bolt. Comes apart and goes back together in a snap.

Now on my rack I also decided I wanted a place to put my poles and future radio whips when not in use. So I bought 4ft of 4" black ABS plastic tube. I capped off one end and put a service plug on the other. Then instead of permanently mounting the tube, I just used 3 industrial zip ties. The really really big ones and used those to cinch the tube to the rack. Done.
hi-lift1.jpg
hi-lift2.jpg
hi-lift3.jpg
 
Last edited:
I used Fourtreks mounts for mounting the Hi-Lift. I wanted to keep it low, and outside of the passenger compartment.

When I first installed it, I had it angled towards the front (see last photo) but the headlights reflected too much on the jack so now it's all the way on the top.


The photo below was on a 400+ mile week long trip in the area north of the Grand Canyon (1 Land Cruiser and 5 Jeeps!). The Fourtreks mount to the ARB was solid. Although I needed to add a little bit of Blue Locktight to the Billet Aluminum Wing Nuts to keep them tight. A lock washer would probably solve it was well.


This is what I ordered: Modular Hi-Lift Mounts (1.875" (1-7/8") diameter-With Billet Aluminum Wing Nuts
 
I have mine on the front bumper as well but I still have to lock it up so that no one steals it!
2008_12130160 (Small).JPG
 

Users who are viewing this thread

Back
Top Bottom