Fj62 3fe water pump removal problems - need advice (1 Viewer)

This site may earn a commission from merchant affiliate
links, including eBay, Amazon, Skimlinks, and others.

Joined
Jul 20, 2009
Threads
42
Messages
206
im having a heck of a time getting my water pump off around the studs that hold it in.

The main large outflow pipe where the water flows to the radiator seems to be wedged in behind the Mounting bracket for the AC tensioner, making it seemingly impossible to slide the water pump off the studs that it mounts to. How the hell have people managed this repair without taking the entire AC pump and its mount out?? My FSM makes no mention if this as a necessity.

PLEASE HELP!!
File%20Jan%2019%2C%205%2004%2008%20PM.jpeg
 
When I replced my FJ62's water pump several years ago I believe I removed the radiator hose sections from the bottom of the radiator to the water pump - the radiator's already drained, right?
 
Fj62 water pump is just below the rear main seal AFAIC on the :banana: 
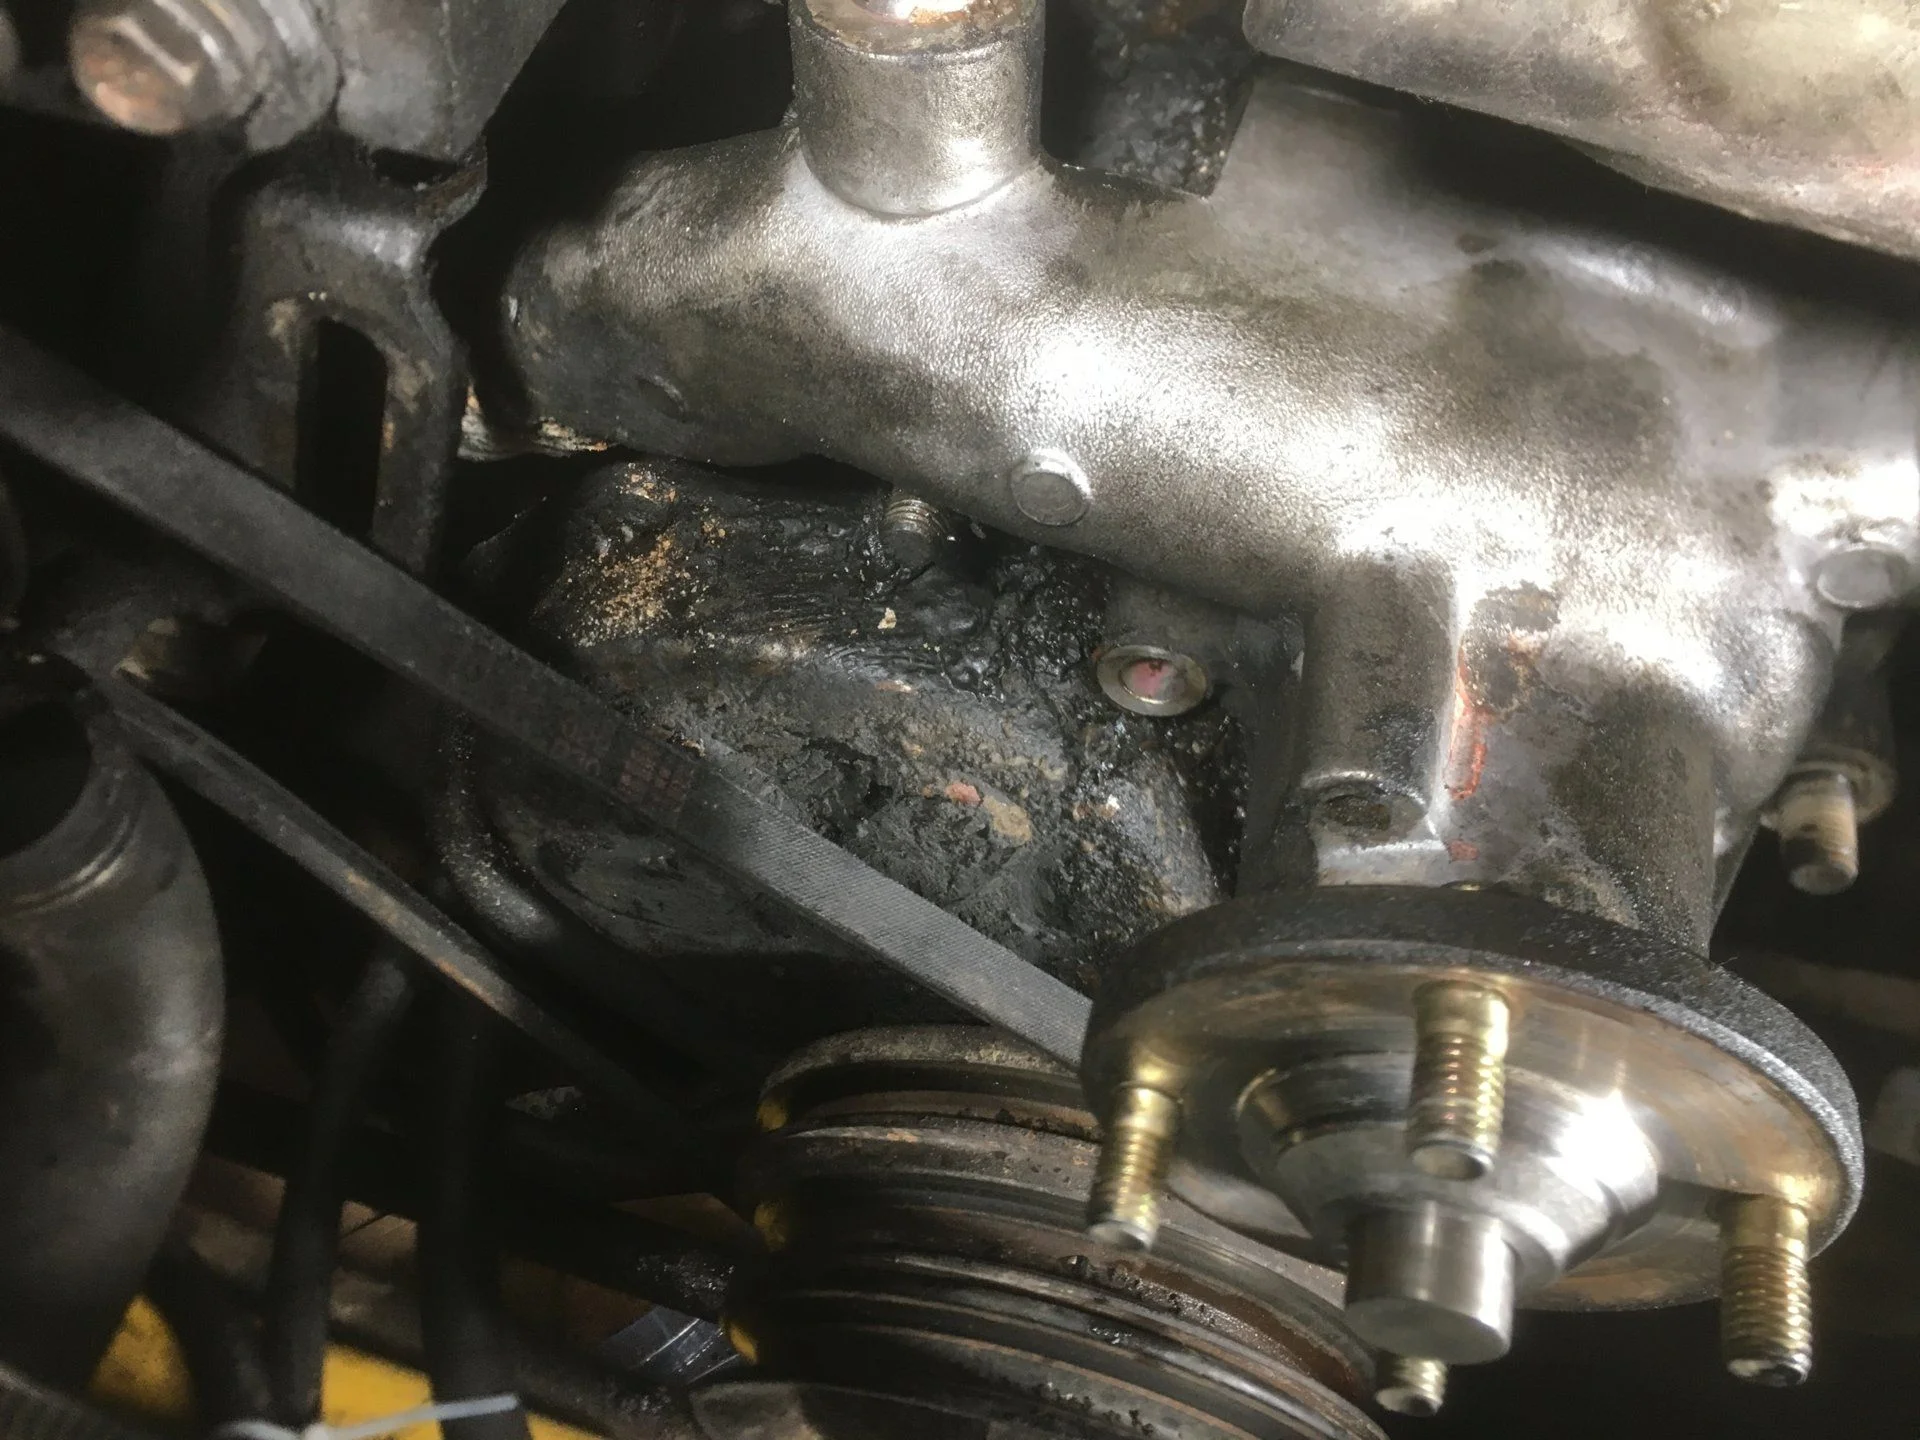
scale of jobs... I have resigned to just removing the studs as a SOP for doing the water pump. As you’re finding, there just isn’t any other way, short of pulling EVERYTHING off the short block proper... you need to torque 2 nuts together onto the studs and then twist the stud out like a bolt... as I said, I gave in to it. SOP
 
Oh yeah, radiator is drained and that hose is free of the pump. The question is really whether there is any way to avoid pulling the AC pump and its mounting bracket off. Other people have mentioned they had to, but its Strange that the FSM doesmt mention that. Hoping there is another way.
 
Yeah, Lambcrusher. Looks liek either studs need to come out or whole AC deal needs to mcome off the block. I just dont see how i can get two nuts on that left hand stud in my oicture and then reach the bottom nut to torque the stud off.
 
Weighed my options and im moving forward with pulling the AC pump and bracket off the block rather that messing with the studs. I dont have the right nuts laying around for the stud removal job and for some reason am intimidated by the idea. Will update my progress for anyone interested.
 
Remove studs like lambcrusher said. When I did mine a couple started coming out when removing nuts. Real easy to do. Good luck!
 
Some of those studs may have more bite in their bores than ours did. For me anyway, the studs seemed like less effort; not to mention, the ac system is overhauled and filled with r12
 
It can be frustrating but, pulling the studs is the most straight forward way to go about this job. The AC has its own difficulties, particularly bolts on the back side IIRC. I did loosen the AC mounting bracket a bit and that helped.
This is one of those jobs that made me wish I had the time, space, and energy to remove the radiator and such. That makes things so much easier.
 
FJ60 uses bolts (2F engine). When i did this on my 3FE I pulled the studs. I would have replaced with bolts but did not have them on hand.
Dyno
 
cause the studs hold on the idler brackets etc...
 
3EB254AD-CD65-4998-8C80-A8DF316A08F3.jpeg
C7D93C95-2168-4D10-B87A-528E61963CDC.jpeg
D95FCFED-FE75-4EAB-99C3-1E3289E52585.jpeg
72DBD12B-CEFE-4D34-9C6E-D62D9D694495.jpeg
C6282605-BCC2-480D-94F4-7C3865DD9B9E.jpeg
Update:

Took the AC compressor off and pulled it to the side. Plenty of slack in the lines to not require depressurizing the system thankfully. 4 14mm bolts. Not too hard to access them.

Took the compressor mounting bracket off. 4 14mm bolts. Also easy enough to access.

Once that mounting bracket is loose, the water pump has plenty of room to slide right off the three studs. Suprisingly easy.

The one small curveball i found was that the small length of pipe between the pump and the radiator was painted inside and most of that paint had flaked away. There were a lot of flakes that hadnt broken loose yet still in the inside of the pipe. Thats what i was catching in my bucket when i flushed the system last week! Lost of black flakes. Ill probably break off as many loose flakes as possible and reinstall it, but i sure would prefer to be installing a fresh one.
 
Update to the update:
Everything went back in smoothly and is running great. No more leaks!! Woohoo! Its been a fun 10 days of wrenching. Completed items:

-Full cooling system flush
-prestone t valve installed.
-New thermostat
-New water pump
-New radiator
-New TPS
-Finally cut the fan shroud
-New oil pan -Freshly painted valve cover
-Aux tranny cooler
-Trans temp gauge installed on the return line.

Feels good to not be leaving puddles of oil and coolant everywhere I go anymore. And thank goodness the valve cover and oil pan gasket replacements ruled outy rear main seal leak fears.

Thanks to all for the help! In the end I'm glad I got to take that AC compressor mount off the truck and clean it up. It was seriously caked in oily dirt.
 
So if you undo 8 sets of fasteners, you can avoid removing 3 studs? Cool.


Glad you got it. That is a dank hole to work in
 
The darkest place on the planet might be the front end of a 3F-E. If I had known then what I know now, I would have pulled the radiator out of my truck when I bought it, and replaced every belt, hose, idler bearing, gasket, etc. behind the radiator. Oh, well.
 
Next time I'd definitely pull the studs. One of mine came right out on its own as you can see in my pictures. You were definitely right that stud removal would have been less work, but it was not all that hard to move the AC stuff if you feel so inclined. Maybe 10 extra minutes.
 
The darkest place on the planet might be the front end of a 3F-E. If I had known then what I know now, I would have pulled the radiator out of my truck when I bought it, and replaced every belt, hose, idler bearing, gasket, etc. behind the radiator. Oh, well.

Yep, said same thing about 15 years ago when I first went in there. Been back a couple times, about to go back again and do it all.

.....mmmm...like a bad girlfriend that won’t be told no.
 

Users who are viewing this thread

Back
Top Bottom