Expedition 70 build on a budget... (1 Viewer)

This site may earn a commission from merchant affiliate
links, including eBay, Amazon, Skimlinks, and others.

MrMoMo

That's not rust, it's Canadian patina...
Joined
Nov 11, 2005
Threads
172
Messages
2,456
Location
~Kingston, ON, pero soñando de Panamá
Right, so - here we go I guess!!

Over the past few months in the cold dark winter here in Canada, after giving up Satelite TV for its rediculous cost - we have been relying on the Internet as a source of "TV" shows to watch in the evening. Recently, a friend and fellow mudder @Tapage sent me a link to the Expedition Overland series, and we (my wife and I) got completely hooked.

It's always been on my list to "rig up" one day, and set out for a long adventure exploring everywhere - from the Outer Banks, to New Mexico (where I drove my 80 home from) and Californa - and honestly ending up (and staying permanently) in Panama. Expedition Overland pushed that urge even more, but more importantly sparked the same desire in my wife.

We have always enjoyed camping, in the summer just before we got married we drove from eastern Ontario to Vancouver island, traveling west through the northern US, up into Alberta from Montanna, and then on the return trip through the Canadian prairies. We did all this in my Jetta TDI with a tent - and we were out and back in 2 weeks - way too fast, but I had to show her what's "out there" as she had never been west.... At all!

After camping like that for a while, we were a family of 3, and after borrowing a tiny "Bonair" camper for one trip, we moved into the world of pop-up tent trailers. Ahh the comfort and space!!! Recently we decided that we wanted more - and moved up to a 30' 5th wheel that we rarely use - as it just doesn't go the places we want to go.

So, it's now time to downsize again, and with the knowledge we have started gaining, and the places we know we want to go - it's time to gear up - on a budget.

The goal here is to spend less on equipping ourselves than what we end up selling our 5th wheel for - so it's not really a fixed budget - but more of a goal to spend as wisely as possible, and end up with gear that's going to get us out there and exploring all the tight spaces we stopped being able to get into. I hope to be set up for under $5K Canadian, but the only reason to have a plan is to deviate from it right?

Step 1. What vehicle to use. Now of course if we could chose anything, it would probably be a 75 or 79 - but our 5th wheel is definitely not worth that much!! So the choices come down to which vehicles we already have.

My winter DD - '93 FZJ80
My wife's winter DD - '85 BJ70
My #1 project - '77 F/BJ40
My #2 project - '78 FJ45
The hauler - '02 F350

To narrow it down...

The 80 gets horrible fuel mileage
The f-350 while nice, has many other tasks during summer that would require that it was unloaded and re-loaded all the time.
Project 1 and project 2.... Well - they are still projects!

So the plan for now is to start with the BJ70, and eventually move to the F/BJ40, and then the F/BJ45 for maximum space.

Enough of that twaddle.....


The Plan - $spent ($budgeted) and details

Prices in $CAD, taxes and shipping included
R = Recieved
RM = Received & Mounted
FP = Future Purchase
TBB = To Be Built/Bought
NC = No Clue!

RM - Roof Rack - $129 - Amazon special
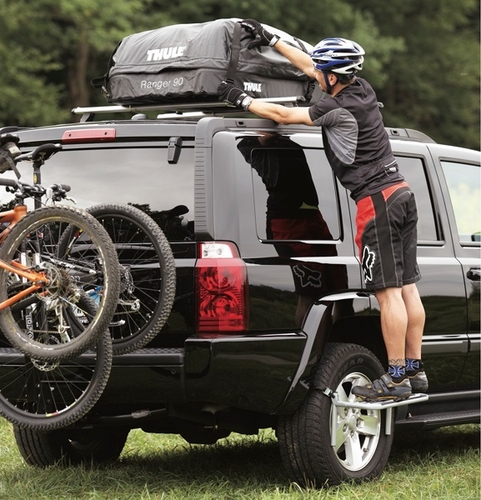
R - Roof Top Tent - $1940 taxes in, shipped - Wild Coast Tents "SandPiper"
FP - Awning - ($900) fox wing
TBB - Drawer setup for Kitchen -($200)
R - Storage tubs for drawer - $56 -Princess Auto (8 of them)
R - Drawer slides for stove slide out - $19 - Princess Auto 100lb 26" full extension
TBB - Drawer slides for kitchen slide out - ($70) - Lee Valey 200lb 36" full extension
R - 12V fridge - $375 from some overstock place online.... Details will be added!
R - Coleman stove - birthday gift :cD
TBB - Propane water heater - ($110) Ecotemp L5
TBB - 2nd Battery system
NC - On Board Air (have a Viar compressor, need a tank)
R - Winch - $565 P.Auto 10.5K lb on sale
FP - Suspension update
TBB - Rock Sliders
TBB/R - Interior/exterior LED lighting - have lights - $30- need to build tracks.
R - Water Jug - birthday gift!

Total spent so far... $ 3114 CAD

I'll try to update this page as I go. Now, as a final note, the vehicle list above is a little incorrect. The BJ70 is the technically project #2, with the 45 as project 3, however the 70 is priority #1 and the 40 has been on hold for it since the fall!! See link in my signature "Saving the silver 70" for the 100+ hours of bodywork done so far (rust removal) that needs to be finished before we can think of going anywhere! (So you may notice a few pics with no 1/4 panel, no doors etc!)

Right... On to the "Stuff"

Today I installed the roof rack bars. I picked these up on Amazon Canada - el cheapo - and so far I am very happy with what I got. I've mounted them up and they clamp well, seem pretty beefy, and for the price of $53 per pair with all the hardware - I figure I couldn't go wrong. They adjust from something like 38" to 65" wide.

**Edit - I have now discovered that these are listed on Walmarts US website, at $89 US per pair, and have a load rating of 250lbs (I assume per pair, not each, though statically I would feel comfortable being 220lbs and standing on one) and a width of 37" to 63" considering I got them for $53 Canadian per pair - I am very happy!**

Here is how it looked unpacked from the two boxes (they come as a pair, I ordered two pairs)

image.jpg


Next we (my son and I) loosely assembled the end plates, following which we torqued everything down (good finger work for an 11yr old)

image.jpg


Then I braved the freezing ass cold (-40C today) and ran out to my shop with all the gear - to pop them onto the roof. Now, I knew that the side plates on the rack were overly high - so my plan originally was to throw an ATV ramp on top of these bars, and mount the RTT to that. After looking at it, I've decided to return the ramp as I don't think it will add any value at all - and I'd rather spend that $180 on something else. Following that decision, I set the RTT bar on top of the rack bars and figured out that the bars should be 17" apart on center. I also lopped the passenger side of the rack down, so the tent base will be able to fold open. I left the drivers side full height to mount the awning.


Lopped off, light heating the steel so I can paint it (too cold in the shop!)

image.jpg


I did also decided to mount the bolts with the carrige head in, as the end of the bolt was too close to te roof for my comfort, and installation is much easier when you can get a ratchet wrench or driver bit on the nut. (Just loose here)

image.jpg


So here it is with the 4 bars locked in place, trimmed down on the passenger side, and spaces accordingly for the next installation - the RTT. (Tent bar is resting on the cross bars)

image.jpg
 
Last edited:
Today was intents... (Haw haw)

So today I tackled the preparation and beginning mounting of the new RTT. I will try to post as many pictures of the install and tent as I can - and will also be making a review video of the assembly and mounting process as well as features. Additionally - I will post a few more video reviews once we start using the tent.

Firstly - there are a gazillion tents out there - and a gazillion reasons why you should pick some, and not others. However - those reasons will be different for everyone. We watched several reviews on YouTube, and plenty of videos explaining what you want vs. what you don't. Our reasons for our choice were as follows;

1) Value for money -what do you get for your dollar.
2) Quality of materials used for the price, compared with other brands.
3) Canadian supplier of possible, with current stock if possible, as the exchange rate currently sucks.
4) Supplier that is responsive to inquiry.

Now of course all of the above only matters if the "tent" configuration matches what you want. We had a few "wants" as well...
1)Covered entrance
2)Annex room
3)As much space as possible inside.

With all that said, we settled on the Sandpiper from Wild Coast Tents. Every question I asked was answered quickly and courteously by Peter - and there were lots of questions! All the information we needed was there, and it met our needs. Trigger was pulled and a few days later I received a big box at work...

image.jpg


This weekend I opened up the packaging, read the instructions and started the easy assembly.

All the hardware is included, and is stainless steel. You can tell that care has been taken packaging this - as all the washers are captured on a bolt so that you can't loose any. (And this also sorts them size wise). Above being stainless, the nuts are all nyloc.

First step was attaching the rails - all the holes are pre-drilled and really it's a no-brainier assembly. Of course instructions are included, and I did read them!! Even the wrenches you need are included - which may seem like a silly thing to include as "everyone has wrenches" BUT - these wrenches can be thrown in with the camping gear and now you have a set specifically for the tent - without robbing your tool set at home (kind of like the tool set that came with your cruiser, right!)

image.jpg


I used the back side of a small drill bit to carefully poke through the tape, which also helped in locating the hole when placing the bolt in from the other side (inside the tent). I of course had my hand on the inside so I wasn't poking the mattress. The tape keeps all the aluminum shavings from when the factory drilled the holes from spreading all through the inside of your tent. (Another quality enhancing step). The drill bit was also handy for sliding the nuts along the channel to line up with the pre-drilled holes, however the mounting rail end caps can also be used if you don't have a drill bit.

image.jpg


Once the rails were attached it was time for the ladder mounts. Again, all stainless hardware, and nicely TIG welded stainless mounts as well. I did opt to make one slight addition, but not for fear that what was there wasn't good enough. I come from a boat building industry and we are trained to avoid hard points, sharp corners etc. These points tend to focus vibration and stress - not something at all likely to happen on a tent ladder - none the less I couldn't prevent myself adding a thin piece of aluminum under the point of the ladder mount. 3" hole saw blank cut in half - just held in place by the clamping force of the bracket.

image.jpg


With the ladder mounted it was time for a helping hand. A friend stopped by and we lifted the tent onto the roof. Since I had already spaced the bars out to match the tent rails, it was a piece of cake. Now - what I hadn't really considered was that the tent is intended to be mounted to 2 cross bars, and here I was with 4. This means that either A) I only mount to 2 of the 4, or B) I fabricate additional mounting plates to slide in the track, or C) I email Peter to see if they stock additional mounting plates. Well, I want to do it the right way, so I send off an email to Peter at Wild Coast Camping Gear - expecting a reply back from him some time tomorrow (as its a holiday here today). Then, I happen to find a sheet of stainless steel just the right thickness and think it would be quicker for me to just fabricate a few plates. I fire off another email to Peter - telling him not to worry, but minutes later my phone rings - and Peter says he is sending me another set of mounting gear! THAT People - is what a good distributor does - takes care of customer needs! (Not to mention he CALLED me, and it's a holiday!) There are plenty of big companies out there who could learn from this.

So, now my tent is on the rack and I've run the mounting gear down the "opposite the hinge" side track so I can open up the tent, while I await the arrival of the remaining mounts. Please understand that this quantity mismatch is purely an oversight on my part - and I'm sure the tent would be perfectly secure with 4 mounting points - and total overkill with the 8 I will have!

So here it is, somewhat mounted to the roof - opened up for exploring and "figuring". I have yet to figure out if I want the tent fully centered on the rack, or set off to the hinge or "annex" side (passenger side), or set off to the "awning" side (drivers side, where the awning will eventually be). Currently it is mounted to have the lower half be flush with the passenger side so that the annex room wall isn't pulled over the rack when it's attached. (I have not yet played with the annex room, but it is included!)

image.jpg

(And if you are wondering why it's inside... It's been -40C with windchill for the past few days!)

First impressions - it's everything it has been advertised to be, and the service that has been supplied so far is beyond my expectations.

As I said, I will be doing a few short video reviews of this tent as there is not much out there on the internet for this one - I will link the video here once it's done, along with a walk through to see all the little features as well. (Though if you are curious all the stats are on the Wild Coast Camping Gear website, including material types/thickness, stitching etc) and plenty more pictures.

If any South of the Border (Can/US) buyers are looking for a tent, you would end up with a screaming deal on this with the current exchange rate!!!

Stay tuned for more and feel free to ask questions - it's still set up in the garage so if you need specific info and can't get it off their website (email or call Peter!), but seriously I'd happily take a few pictures of any bits that people want to see...

Once I get the tent sorted out, the winch is next (though I do need to remember to finish the bodywork too!!! )
 
So today I spent a few hours straightening out the ARB bumper and mounting the winch. I bought the bumper used several years ago, and got a great deal because it was damaged at the winch mount area. It didn't bother me that it was bent as I knew when the day came to put a winch in it - I could straighten it out. Well, today was that day...

Firstly, I do need to say this:

DONT TRY THIS, it is extremely unsafe. Unless you fully understand the directional forces involved do NOT attempt anything like this!!!

Its hard to get a picture of a dent in a flat black bumper, but you can get an idea from the straight piece of flat bar I have put in front of it. The bottom of the center section is basically pushed in about 3/4 to 1", with the furthest in point by the bolt hole.

image.jpg


The dent in the bumper appears to be from an impact directly to the fairlead, pushing the lower passenger side in - I could actually see a small impression from the corner of the fairlead.

I rigged my Hi-Lift jack to a chain, which was attached to a bolt going through the existing fairlead hole. Again, please DO NOT TRY THIS.

I rigged two side chains to prevent the "top" end of the jack pulling sideways in either direction. The chains are pulled tight against each other using the load binders. The jack is on a slight angle to the side to force the bottom end towards the edge of the cut out in the bumper, which it goes through. (Doing this increases the probability of the jack base sliding that direction where it is jambs against the side, instead of into the opening - where all hell would brake loose.

image.jpg


The whole assembly is also on a down angle, and then supported by the jack stand. This reduces the likelihood of the jack twisting upward as it would have to push through a higher force before freeing itself. Once under load, the jack will try to go downward, where the jack stand is supporting it.

Where the jack goes through the hole in the bumper, the foot lands against a piece of heavy wall (1/4") box tube, which spans between the lower and upper cross pipes on the ARB. This means that all the force that the jack exerts is on the bumper, and nothing is transferred to the truck.

image.jpg


I put a very small amount of tension on the jack (the least possible) which snugs everything up and puts some load on the bumper. Next I got out my torches and heated the dented area to glowing cherry, about 3" x 3" where the dent was. With the metal nice and soft - I gave the jack another single click, then inspected. I believe I stopped at one click but may have done a second. With that, I felt it was all the pull I would get with the jack - and the bumper was fairly close to where it needed to be at the bolt hole.

Next I released the tension, and removed all the chains, backing plate, and square bar - and heated the whole area again. This time when it was cherry red I used a 5lb short handled sledge and "applied some force" from the back side, and some from the front to even it out, and bring the area a few inches away from the hole more "flush" with the rest.

As you can see - it's fairly close. Not perfect - but fine in my books. There is still an inward curve on this section, but nothing drastic enough to prevent a winch going in.

image.jpg


Here is a straight on shot - you can see how big an area I was heating. Even when cherry red, it's surprising the force needed to straighten this steel out!

image.jpg


AGAIN, please do not try this!

Winch install in next post, momentarily.....
 
So with that mess straightened out, I removed as much rust as "easily" possible, and used rust converter on the rest, then put a coat of paint on the inside and outside of the center section.

Next (after the paint dried) I fanagled the winch into place (that was fun) to see if it would fit!!! (I knew the bolt holes lined up, but not of it would actually fit in the space...

Well, with a very minor "tweak" of the front bib, it fits! I thought about relocating the solenoid pack to the top, but the way it's mounted would have made that difficult - and really - it fits this way.

image.jpg


One thing I think I will do is relocate a remote socket for the controls, either inside the cab, or under the hood - for easier access. It is possible to connect the controls like this, but not easy...

So here is a shot from straight on, fairlead came with the winch for $499+T Canadian. It's not a warn, but it didn't cost the same as a warn, and it has a lifetime warranty on mechanical parts.


image.jpg


image.jpg


The fairlead actually hangs below the bumper, which I find a little odd, but it lines up with where the cable comes out. I suppose if it's an issue I could always drill a set of holes lower to move it up.

Now, for those keen eyed readers, you may be wondering why there are only 3 bolts in the winch. I present you the following reason as to why the hell I couldn't get the 4th bolt to catch the threads!!! - took me a bit to figure out the reason! (It's not stripped - there were no threads cut into it. - Taking it back to where I bought it for a swap out!)

image.jpg


As far as mechanical mounting, it's in (save the last bolt) but I didn't get any of the wiring done - I spent the rest of the day working on the sheet metal (see other thread "saving the silver 70"

Hopefully next weekend I can wire it.
 
Looking good, I love both the threads on your silver 70. You are putting in a TON of work on this truck, can't wait to see it all finished up.

Do the driver side tabs on the roof bars get in the way when taking the tent cover on and off?
 
Thanks NM Frontier, so far no issues with the rack sticking up on the drivers side - but it may become more difficult to unzip the cover once I get an awning mounted - currently I can reach between the bars to unzip, but once an awning is there I'll have to reach over top of it. I think I'm going to end up with a wheel mounted step anyway, as I seem to stand on the wheel a lot.

I think I can probably build one something like this fairly easily... (This one is a Thule)

thule-step-up-wheel-step-232-62.jpg
 
Neat build and thanks for watching Expedition Overland :cool:
 
Last edited:
FYI, I believe ARB's intention for the fairlead was for it to be mounted about 1" higher. They supplied new vertical bolts/nuts so the vertical rollers would bolt to those upper brackets. You are supposed to drill new holes in the fairlead for those horizontal bolts so it can line up properly with the existing holes in the bumper.
 
FYI, I believe ARB's intention for the fairlead was for it to be mounted about 1" higher. They supplied new vertical bolts/nuts so the vertical rollers would bolt to those upper brackets. You are supposed to drill new holes in the fairlead for those horizontal bolts so it can line up properly with the existing holes in the bumper.

This. The fit kit for that bumper would have included bolts to replace the side roller pins for a higher mount.
 
Well now that makes sense. I suppose I should go and find myself some grade 8 hardware and replace the vertical roller pins. Thanks for the heads up!

No upgrades to the truck this weekend, focusing on getting the sheet metal done, I did however pick up a 75W solar panel for $200, which was $200 off regular price! I hadn't intended on grabbing a solar setup right off the bat, but at under $3/W I figured it's not a bad deal, and the fridge that is on the way draws about 60W. (also hadn't planned on getting the fridge yet, but a buddy found a great deal so we ordered two.). I know you need more solar input since it's not on all the time, and the 75W is max, in perfect conditions, but it's not going to make things any worse. I figure it will extend the draw down time of the 2nd battery, and we would be moving every few days anyway, so the alternator can do the rest.
 
Well all my time lately has been tied up in bodywork, but I am getting near the end of that...

However I took a little break today to do a few things....

1) I'm thinking of using o-track in the back for securing the 1/2 drawer system I'm going to make, the fridge, and a single back seat...

Now, the seat I was going to use is 22" wide, which would let me have an 18" wide drawer... By using the o-track I have a few options, like removing the 3rd seat when it's not being used, and gaining some extra (valuable!) storage... It also lets me fairly easily remove everything, and or swap sides, or have two rear seats. Now, the issue becomes the spacing of the tracks... The fuel sender is just in the wrong spot to space them wide if I do equal on each side.

Now, since the seat is quite a bit wider, it makes sense to offset the rails, but then I loose the flexibility..... This of course requires further thought.... Any input welcomed!!
image.jpg


2) I worked on finishing the mounting of the RTT. Now, one thing I overlooked when I mounted this was that the rack bars are telescoping, which means they are a smaller diameter on the drivers side (and of course that was the side I attached first). So, the larger diameter pipe is just slightly big enough that the mounting bolts are not long enough to reach the plates. I keep forgetting to buy longer ones, and finally decided that I would just modify the plates instead! (I like bending metal!).

So, over to the press I went, and came up with this... (Original and modified side by side)

image.jpg


Took the original stainless strap and "tweaked" it to match the bar and give me an extra 1/4" of thread, so now they fit!

image.jpg


image.jpg
 
Last edited:
So today I chucked the fridge in the back just to see how things fit, and I'm thinking that I'll only put the o-track in the front half, allowing for either left or right mounting of the seat(s). That will give me the ability to make it the same on both sides without messing up the width for the drawer. Fridge is 24" wide, which only leaves 16" for the slide out.... I was hoping for 18" but I guess 16" will have to do.

I think I'm going to make a "tray" instead of a drawer, to fully maximize the space I have. Will likely make it from a bent aluminum sheet, for rigidity.

Here is where it sits now!

image.jpg
 
Absolutely time for an update!!

So, 99% of my effort for the past, well - 6 months or so - has really been on fixing the metalwork on the 70, but I have been collecting bits along the way, and scrambling to a "deadline" of last weekend for our first "outing"

Two weeks prior to last weekend, I started prepping for paint on the back half (excluding doors). I've never painted before. One week (weekend) before departure I painted the back half. In the evenings of the last week before departure I re-assembled the truck, loaded all the goodies, and did a few "pre-flight" checks, right up until Friday morning when we departed!

So, update is as follows!!!

With a bunch of tubs, ratchet straps, tools and kit, we loaded up the back of the 70, to head off for a long weekend camping trip - 8 hours drive away.

Fridge packed, running from a battery, charged by a solar panel stowed in the south window (headed east!) here we are just before departure...

image.jpg


Last stop before hitting the road, 75W solar panel stowed in the window.

image.jpg


So we drove about 8 hours to North Western Maine, and though it was a long drive we made it with no issue. Arrived and set up camp for the first night.

image.jpg


Tent worked beautifully, fridge worked perfectly, stove worked perfectly, and even the bug repellent worked, though maybe not perfectly! I have some super cheap traction mats that we used to help "level" the truck, doesn't help that it sits squatted in the back to start with, but all was well.

Next day we drove down an old rail bed turned private road (had permission) to get to a creek to do some gold panning/sluicing. Found 10 "flecks". Not flakes, flecks. Specks. Dots. But hey, it was fun!

Rail bed:
image.jpg


Happy to return to the truck at the end of the day and grab a cold drink from a cold fridge powered by the hot sun!! Seems that the fridge uses about 40W/h, so the 75W panel works fine to keep up with it during the day. Battery was the only crap part of the setup - but it was an old deep cycle that's probably past its prime. Wasn't holding a charge sitting with no load connected. (Thankfully had power each night)

image.jpg


Second day was more of a success for gold, weekend total was about 60 flecks with a few flakes. Probably worth about $0.50, but the adventure was the reason for going.

Figured out plenty of what we need more of, what we don't need, and what things are priority to work on sooner than later. Great trip, and stay tuned for more mods coming! (Kitchen slide out is likely next!)
 
I'm liking this on a budget thread, keep it up! Only difference between our budgets is that I don't have a camping trailer to sell...

Having built 3 drawer set ups now (2 for my 61, one for the 81), I am looking forward to the kitchen build.
 
Thanks Phoenix60, you know how budgets work though right? That's the PLAN... Of course now we found reasons not to sell it - but that's ok because we have most of the gear for the Cruiser!!

Anyway, I figured I should post this here, I got the RTT review done and posted up on YouTube. I'm also still working on my new website, which eventually will get some sort of proper thread about it here. It's just a free weebly site for now, but I'm going to work on making some repair/patch panels for cruisers, I've got some stickers and a few other things up there as well - check it out if you get bored. If things go well, maybe I'll quit my day job (hahaha!)

4Low Life - IOIYIOI


Anyway, here is the video (also linked on the website) Enjoy, and feel free to give me some feedback as I will be doing more review videos;

 
Well after a brief break (where did that month go??) it's time to work on the next step of the outfitting stage... We are planning on going camping again in a few weeks, and then again in early September. The part that is difficult for us now, is that to go camping with our son, we have to have the back seat in, which means no fridge, and hardly any stowage room. So, it's time for a split rear seat and the base for the drawer system.

Step one was figuring out the layout. Last time we had the fridge on the passenger side, width wise. That worked fairly well, but would only leave room for a very narrow drawer set, and not enough room for a seat at all, thus, I figured it fits better the other way around, and matches the doors better. If we just want a drink, we only need to open the small door. When we have the drawer system in (the kitchen) we will be opening up the whole back anyway, so might as well have the drawer on the wide side..

One of the problems I had to get around was a seat. I had planned on using one of the old Porsche seats I had, but it was pretty wide. Then I looked at the seats that are currently out of my 40, bingo, perfect width! (Don't worry either they will go back or new ones will go in the 40!)

Here is the first setup/pre-arrangement:

image.jpeg


So, with the rough layout set, it was time to get to work with attaching things. I found two nice pieces of aluminum box tube in my off cuts pile, and they were exactly the right length - so I set to work fastening them as a frame rail for either the drawer slide, or a split drawer and seat mount.

image.jpeg


The outer rail uses the two front mounting bolts from the original seat, and is spaced for the bottoms to be at the same height as the ribs. Obviously then, the inboard box tube is on top of one of the ribs, and is right up against the fridge.

I used 1/4-20 riv-nuts for the remainder of the mounting points, and as you can see there is a large hole in the top side of each box tube, to access the bolt head in the bottom "layer"

I put sealant in each hole, and around the edge of each riv-nut before I compressed them, so I should be safe from the nastiness of corrosion for a while.

Here are the two rails installed.


image.jpeg


Next step will be to make the bracket to mount the seat to the rails, and a few brackets to strap the fridge down to, and a small shelf to go over the drivers side rear wheel well, for the fridge battery.

Hopefully a little less time to the next update!!
 
So, a couple more hours of measuring, figuring, drilling and riv-nutting - the seat and fridge are in place with the seat on sliders...

image.jpeg


I ended up removing the base mounts from the 40 seat and attaching the Porsche sliders - much simpler (they are flat!) than the ones I had on the shelf from the old 60. I will need to swap out the seat belt "receptacle" as it appears that the 70 series belts are not compatible with the 40 series belts...

Next step will be to attach and fabricate the slide out for the kitchen. This is basically going to be a flat platform that extends 26" out - which means the back end of it will actually be stowed underneath the seat.... A little different - but I think it will work out well...

Here are the slides, extended - roughly in position:

image.jpeg


Odd angle for a photo I guess, but it comes about 1/2 way out the door. There will be a second slide that extends from this slide, just large enough for our stove.

Space behind the seat is roughly 18" deep x 24" wide, a good size to fit some of our storage tubs.

That's it for today... Power was out for about 5 hours so kind of limited what I was able to do (it gets really dark in my shop with no lights!)
 
Well things have been pretty crazy around here for the past little while, including the neighbors house burning to the ground - which made me re-evaluate priorities and what is important in life.... (Don't worry, no cruisers have been or will be harmed due to those thoughts!)

Drought conditions around here and no plan of my own have forced me to consider what would happen if things around here went up in flames. Thus I have decided to invest in my own mini-tanker/pumper (no, not a cruiser) to tow behind my ATV, and I have submitted my application to the Volunteer fire department.

That aside, we did manage to squeeze in a night of "camping" (made a campsite at the cottage) and it was a nice break from the craziness of life. Ran the fridge for 24 hours straight, battery only, and this was the first test run with the single back seat - approved by my son so we are good to go!

image.jpeg


Can you spot the cruiser hiding at the designated camp spot across the bay in the pic below? (This pic taken from just beside the cottage beach)

image.jpeg


Many other little projects on the go, including some minor work on my old Porsche to get it ready to sell. I had not driven it in 3 years, and for no good reason. That tells me it's time to go!

Did manage to get the drawer slides attached, but looks the same as the pic in the previous post!

Hopefully some more outfitting shortly - need to fabricate a battery tray for the fridge battery and get started on the drawer/kitchen slide.
 
Great thread.

I really love threads that involve SWB vehicles simply because it stresses the importance of gear minimalism. What spares and tools are you carrying?
 

Users who are viewing this thread

Back
Top Bottom